Easy steps to enable sound in Windows VPS
Enabling Sound in Windows requires some steps. This issue can happen because of two issues. By default, most hosting companies, do not enable some services in Windows VPS templates.
In this tutorial, we will check if the sound is enabled or not and if it was not, we will enable sound in two steps.
If the Windows Audio service is enabled in your Windows VPS or if you are not sure about this but still you see that audio service is not enabled, first it is better to check the setting in Remote Desktop Connection (RDP) application.
Enable Sound In RDP (Remote Desktop Connection) Application
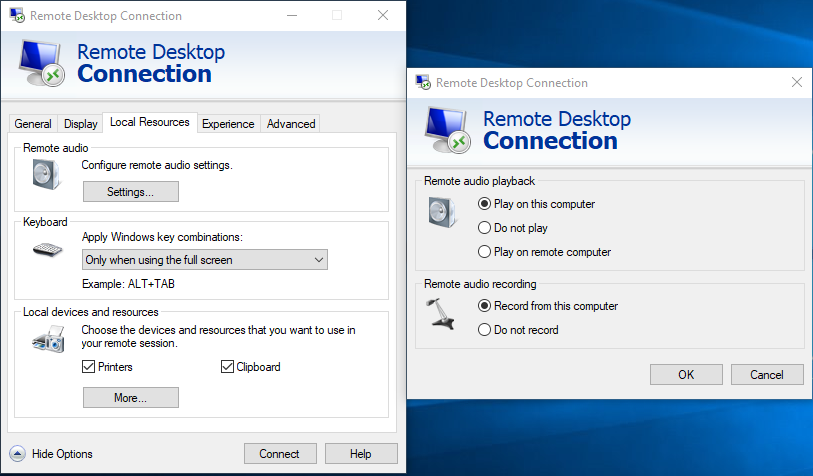
When connecting to Windows VPS through RDP, there is a tab by the name local resources. On the local resources, choose Remote Audio and click on Setting.
On Remote audio playback, choose the option as Play on this computer and if you want to enable Remote audio recording, choose it as Record from this computer.
By doing this step you enable sound in your Windows VPS service. Now you should connect to your Windows VPS or RDP and check this. In the quick access bar, if still, you see that the audio service is not running, it means that the Windows Audio service is not running and you should activate it.
Enable Sound Through Services In Windows VPS
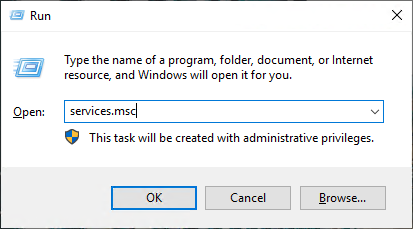
First, open services on the RUN page by pressing Windows Key + R and press enter. Once the RUN page was opened, type services.msc and press enter.
Once the services page was opened, scroll down to find the Windows Audio service. Open it and change the startup type to Automatic.
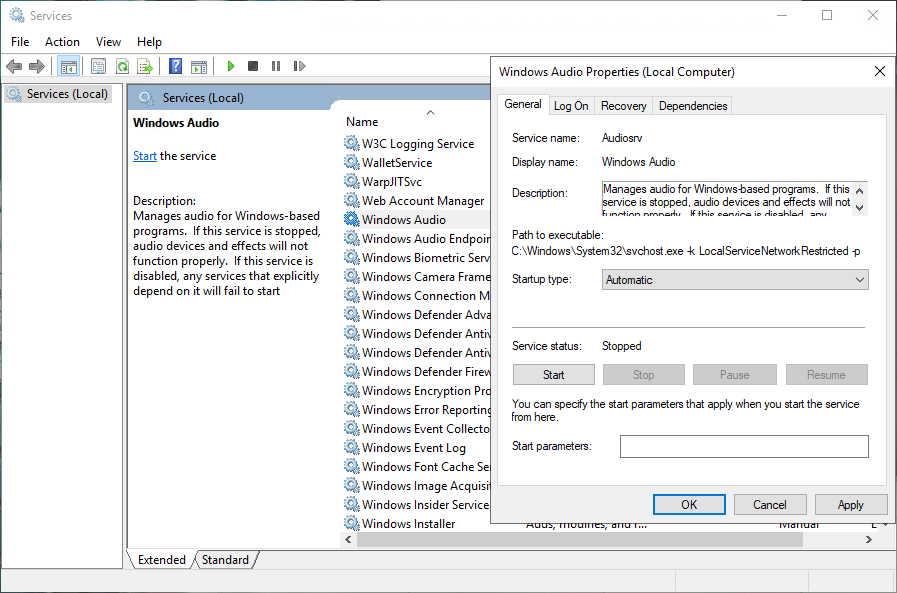
Once it was done, choose start to enable sound in services. Then choose to apply and then OK.
Conclusion
Now successfully you have enabled sound in your Windows. But still, if you see that it is not enabled, restart the server and recheck.
You can buy Windows VPS service and do your magic configurations inside it.
I wish you have successfully enabled sound in your Windows VPS. If still, you face any issues, please do not hesitate to contact us through the comments section.