How To Install IonCube Loader In CentOS 7
This article will check how to install ionCube Loader with PHP in CentOS 7 and RHEL 7 distributions.
ionCube is a commercial software suite containing a PHP encoder, package foundry, bundler, a real-time system for detecting intrusion into the website and error reporting software, and a loader.
PHP Encoder is an application for protecting PHP software used to secure, encrypt, and license the PHP source code. ionCube loader is an extension used to load PHP files in a protected and encrypted way through the PHP encoder.
This tool is often used in commercial software applications to protect their source code and prevent it from being visible.
Prerequisites
Your server must have a web server such as Apache or Nginx installed with PHP. If you do not have a web server or PHP on your system, you can install them using the yum command below.
There are 5 steps to install Install IonCube:
-
- Step1: Install Apache or Nginx web server with PHP
- Step2: Download IonCube Loader
- Step3: Install ionCube Loader for PHP
- Step4: IonCube Loader configuration for PHP
- Step5: Test ionCube Loader

Step1: Install Apache Or Nginx Web Server With PHP
If your system has Apache or Nginx Engine installed with PHP, you can go to step 2. Otherwise, you will have to use the following yum command to install them.
——————– Install Apache with PHP ——————–
# yum install httpd php php-cli php-mysql——————– Install Nginx with PHP ——————–
# yum install nginx php php-fpm php-cli php-mysqlAfter installing Apache or Nginx and PHP engine on your system, start the webserver service and ensure that it is enabled to auto-start when booting the system using the following command.
——————– Start Apache Web Server ——————–
# systemctl start httpd
# systemctl enable httpd
——————– Start Nginx + PHP-FPM Server ——————–
# systemctl start nginx
# systemctl enable nginx
# systemctl start php-fpm
# systemctl enable php-fpm
Step2: Download IonCube Loader
Go to the ionCube website and download the installation files, but before that, you should first check using the following command to see if your system runs under 64-bit or 32-bit architecture.
# uname -a

Linux hosting 3.10.0-957.10.1.el7.x86_64 #1 SMP Mon Mar 18 15:06:45 UTC 2019 x86_64 x86_64 x86_64 GNU/Linux
The output above clearly shows that your operating system is running under 64-bit architecture.
According to your Linux VPS system’s architecture, download the appropriate ionCube loader files using the following wget command in the /tmp/ folder.
——————– For 64-bit System ——————–
# cd /tmp
# wget https://downloads.ioncube.com/loader_downloads/ioncube_loaders_lin_x86-64.tar.gz
——————– For 32-bit System ——————–
# cd /tmp
# wget https://downloads.ioncube.com/loader_downloads/ioncube_loaders_lin_x86.tar.gz
Then, unzip the downloaded files using the tar command, enter the unzipped folder, and run the ls command to list the ionCube loader files for different PHP versions.
# tar -xvf ioncube_loaders_lin_x86*
# cd ioncube/
$ ls -l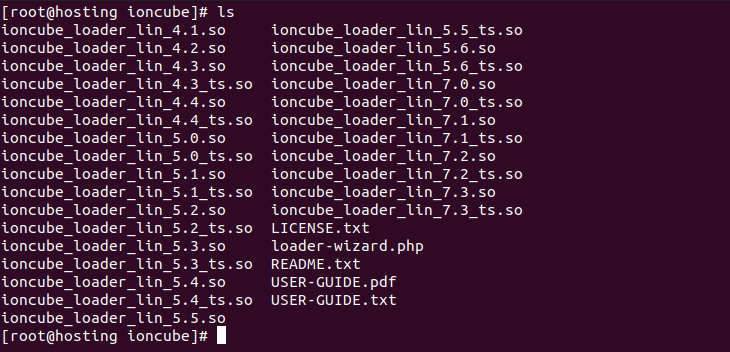
Step3: Install ionCube Loader For PHP
There will be different files from the ionCube Loader for different PHP versions. You need to choose the right ionCube loader for the PHP version installed on your system. Run the following command to know the PHP version installed on the server.
# php -v

PHP 7.2.17 (cli) (built: Apr  3 2019 10:02:16) ( NTS )
Copyright (c) 1997-2018 The PHP Group
Zend Engine v3.2.0, Copyright (c) 1998-2018 Zend Technologies
The result clearly shows that the system uses PHP 7.2.17, which of course, must have a different version on your server.
Then, find the extension folder path for PHP 7.2, where the ionCube loader file will be installed. The following command’s output is clear that the path is / usr / lib64 / PHP / modules.
# php -i | grep extension_dir

extension_dir => /usr/lib64/php/modules => /usr/lib64/php/modules
Then we need to copy the ionCube loader to PHP 7.2 to the extension directory. (/ usr / lib64 / php / modules).
# cp ioncube_loader_lin_7.2.so /usr/lib64/php/modules/Note: Make sure you have correctly replaced the PHP version and the extension path in the above command according to your system settings.
Step4: IonCube Loader Configuration For PHP
Now we need to configure the ionCube loader to work with PHP in the php.ini file.
# vim /etc/php.iniThen we add the following line as the first line to php.ini.
zend_extension = /usr/lib64/php/modules/ioncube_loader_lin_5.4.so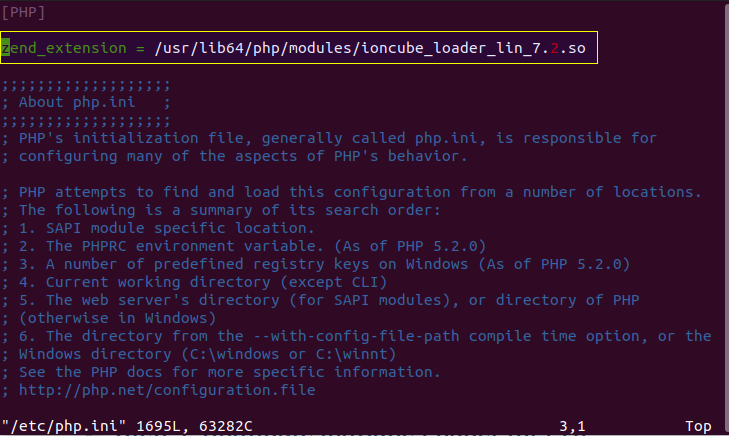
Note: Make sure you have correctly replaced the PHP version and the extension path in the above command according to your system settings.
Then save the file and exit. Now we need to restart the Apache webserver or Nginx engine to make changes to the ionCube Loader.
——————– Start Apache Web Server ——————–
# systemctl restart httpd——————– Start Nginx + PHP-FPM Server ——————–
# systemctl restart nginx
# systemctl restart php-fpm
Step5: Test ionCube Loader
To test whether the ionCube Loader is now installed and properly configured, check your PHP version again. Now you should be able to see and configure the message that PHP with ionCube extension (status must be enabled) as shown below.
# php -v
The above output confirms that PHP is now loaded and enabled with ionCube Loader.
ionCube Loader is a PHP extension for securely loading and encrypting files using a PHP encoder. We hope that everything related to this post will work properly in your implementation.
If still, you don’t have a server, you can buy Linux VPS and start your configurations.