How To Install Plesk On CentOS VPS
Plesk is a commercial web hosting platform with a control panel that gives administrator permissions such as setting up new accounts, reseller accounts, email accounts, and DNS inputs with a web-based interface. Plesk is designed for Linux and Windows-based web hosting providers; Plesk is designed to install and manage web hosting systems and applications on a dedicated server.
In this article, we will learn that how to install Plesk On a VPS server with the following methods:
Windows VPS (Windows Server):
- Install Plesk On Windows Server Using GUI.
- One-Click Plesk Installation | Fast And easy.
Linux VPS (Centos7):
- Install Plesk Using Console
- One-Click Plesk Installation | Fast And Easy

Prerequisites For Plesk Installation
Windows Server
- VPS or Dedicated Server | Windows VPS Server.
- Log in via Remote Desktop Protocol (RDP) as an administrative user.
Linux Server
- Linux VPS server | Linux Virtual Server
Note: By clicking on the given link: https://operavps.com/windows-vps/, you can choose your favorite plan, fast and High-Quality Windows VPS; Also, you will be able, have a look at OperaVPS Linux VPS Server Plan’s
by using the opposite link: https://operavps.com/linux-vps/.
Requirement For Install Plesk On Windows Server
Step1
Log in With RDP
We need to log in windows server by RDP; use the below link to know how to log in to Windows Server with RDP:
Step2
Download Plesk Installer
After logging into the server by RDP, we need to download the Plesk installer to install Plesk on the windows server; Here is the link: https://installer-win.plesk.com/plesk-installer.exe to download the Plesk Installer.
Download the Plesk installer by clicking on the link and then run the installer; it will automatically start at the bowser section. Pay attention to that; your installer will run by the latest version of the Plesk.
Note: If we want to have the Plesk all versions; you need to run the Plesk installer after downloading it by using the command prompt:
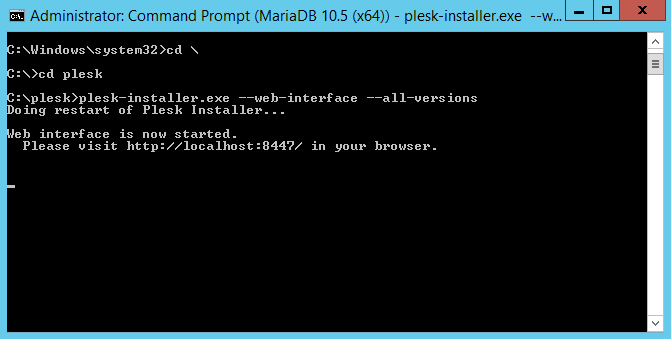
As you can see in the photo; for the first time, we will create a folder inside C:\ drive and paste the Plesk installer in the folder, then; need to:
1. Enter the folder by using the following command:
cd\ cd pleskNote: my folder name is Plesk, and you should use the above command like this; if your folder name is Plesk admin panel; then you should type the command like:
cd\ cd plesk admin paneland after that; need to:
2. Run the following command to start the Plesk installer:
plesk-installer.exe --web-interface --all-versionslike last time that will automatically start at the bowser section. But using this method; You can select the desired version of Plesk.
Install Plesk On Windows Server Using GUI; Step By Step
1) Plesk Installer Login
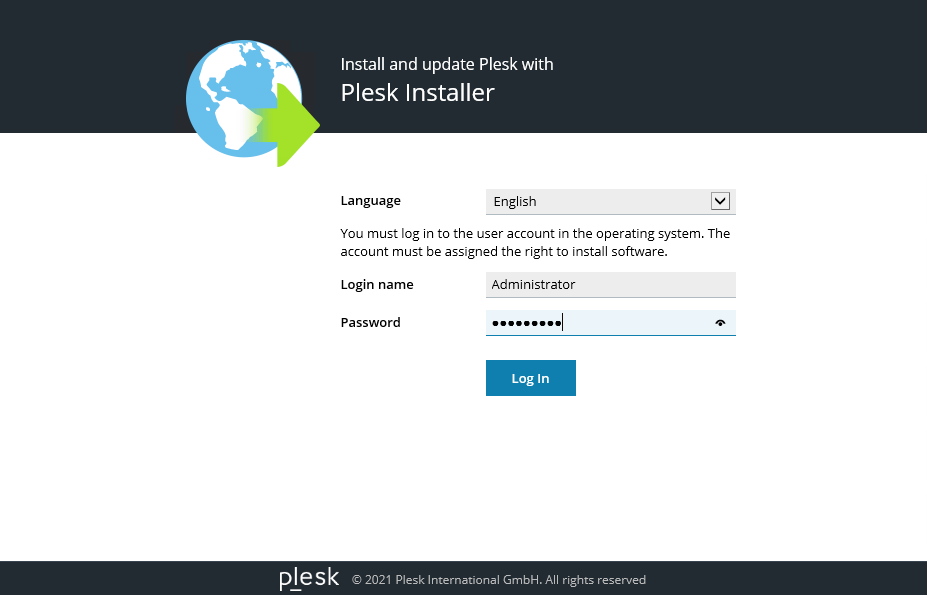
After downloading Plesk and opening it, you will automatically enter the Browser environment in the Windows server environment. You will be faced with the first page of the installation, as you can see in the photo. You need to enter your Username and Password.
2) Plesk Installer
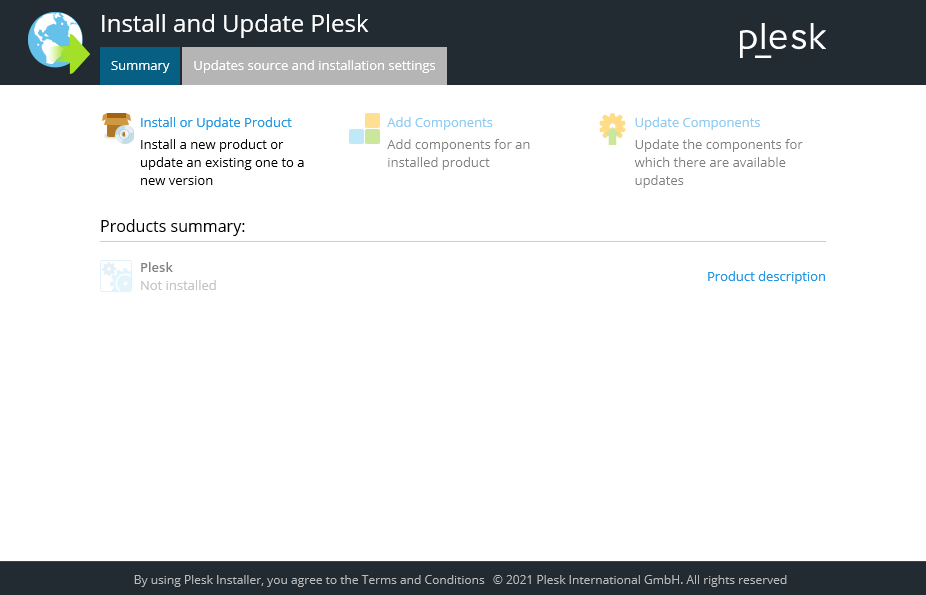
Here we will click on the Install or upgrade product section, like in the photo.
3) Install Or Upgrade Environment
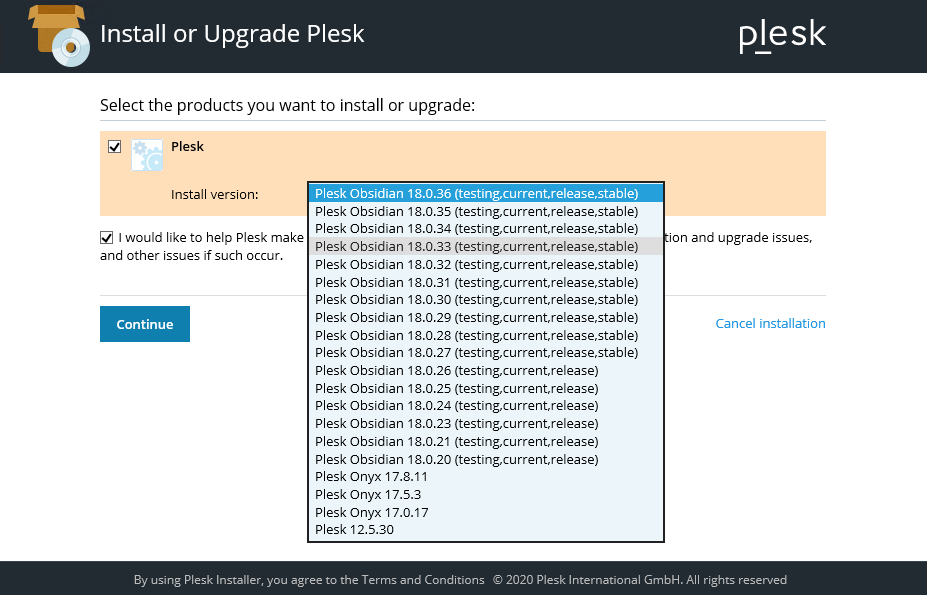
Now select Plesk and the installation version of Plesk, then click on the continue section.
Note: We will choose the newer version of Plesk.
4) Installation Type
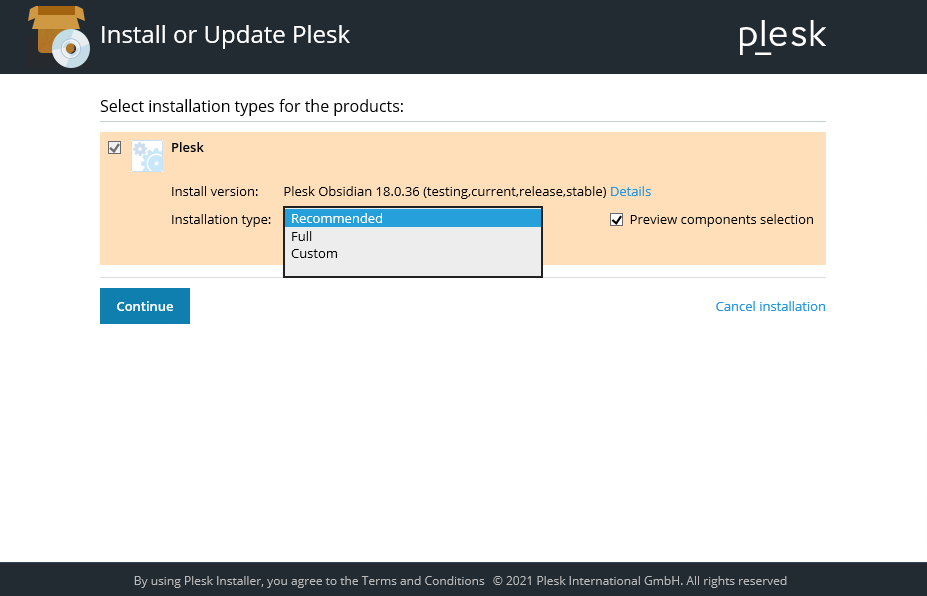
There is three Installation type of the Plesk such as Recommended, Full and Custom Sections; It’s better to select the full version of the installation and then click on the continue button.
5) Select The Packages You Want to Be Installed
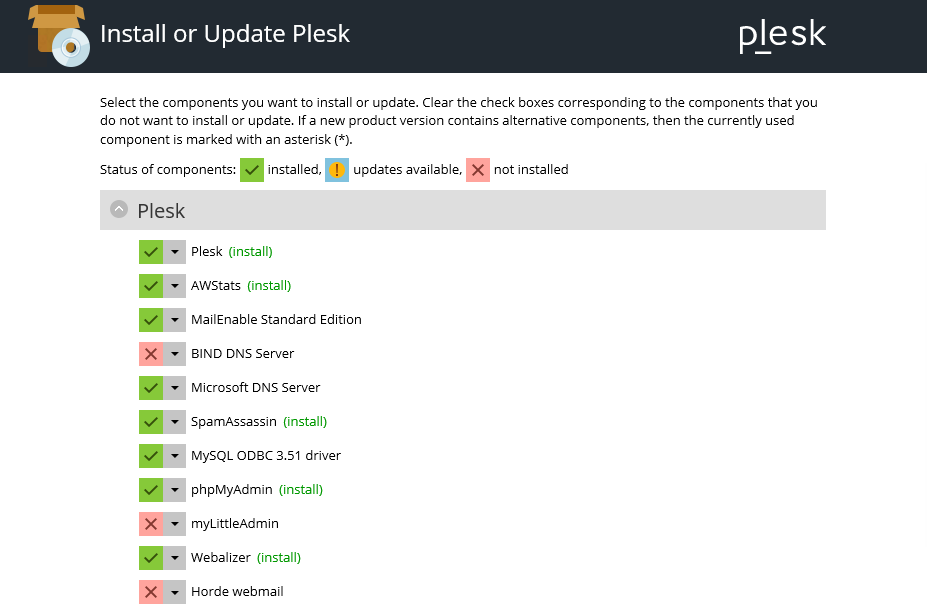
We will select the components that we need to install; After selecting the required items, you can scroll down on the same page, click Continue, and enter the next section.
Note: If you forget to select any of the required items for any reason, you can enter the Plesk control panel environment after installation and install the required components.
6) Select Plesk Admin Password
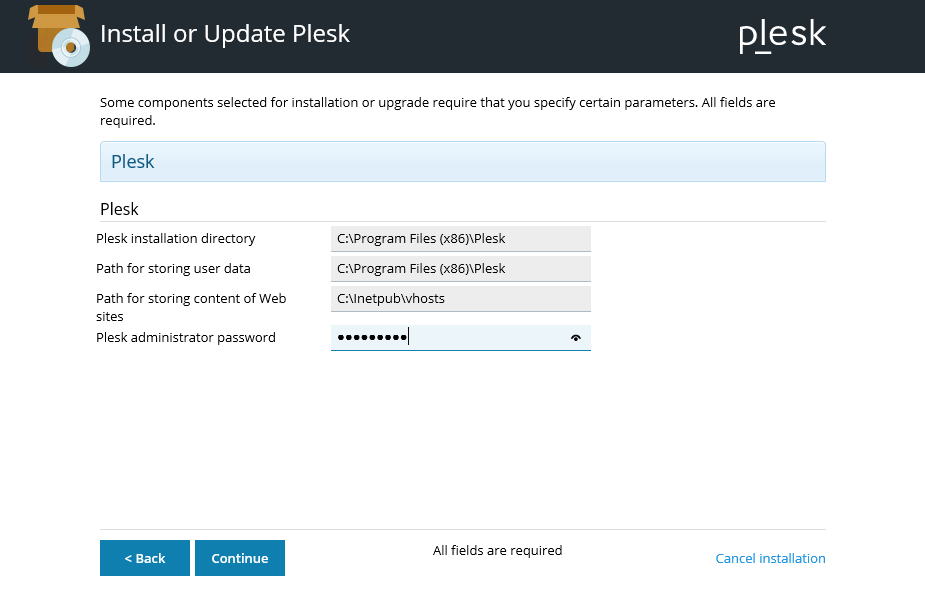
Let’s type our Password on Plesk Administrator Box and Click on the Continue key to resume installation Plesk on Windows server.
7) Installation Started
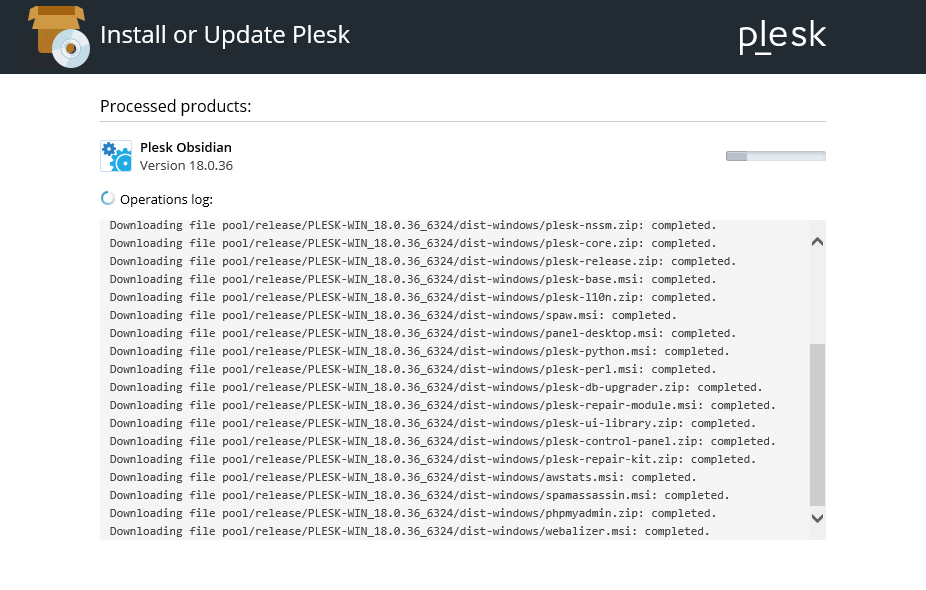
By clicking on the Continue Key, like in the photo: you will see a page showing that the Plesk installation has started and may take some time.
8) Installation Finished
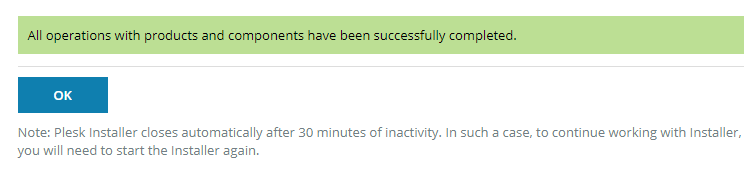
After the installation is complete, you will see a page indicating that the Plesk installation on Windows Server is completed.
Plesk On Linux VPS :
Requirement For Install Plesk On Linux Server
Log In Linux Server Using Putty
You must use putty software to connect and log in to the server. Putty software is client-side software. This means that a server must exist at the network level for the software to connect to it. Our server is the same SSH service currently running on our server, and if the server is down or the SSH service is not running properly, we will not be able to connect to the server via the SSH protocol.
Download Putty: By clicking on the following link: https://www.chiark.greenend.org.uk/~sgtatham/putty/latest.html you can download Putty Software.
Note: You can click on the: How to connect to a Linux VPS using putty; To start the prerequisite installation.
Now We Are Ready To, Install Plesk On Linux VPS Using Console Step By Step
- Download the installation script
- modify the permission of the installed script
- launch the interactive installer console
- select the available product versions
- accept the Plesk question installation process
- select the installation type for Plesk
- confirm the packages installation
- Plesk installation completed section
At this step, using the putty software, we can install Plesk on a Linux VPS:
Note: Use the following link to know; How to connect to a Linux VPS using putty; Then, using the commands below side on putty; We will install Plesk on a Linux VPS.
1. let’s Download the installation script by using the following command, Copy the following command and paste it in putty; then using Enter key, the installation script will download:
wget https://autoinstall.plesk.com/plesk-installer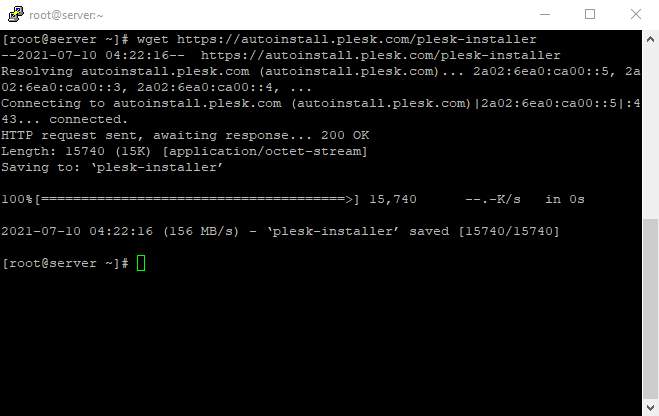
As you can see in the photo; The installation script has been downloaded.
Note: We will use all other commands with putty, like the last time.
2. The second step will be to modify the permission of the installed script; We can modify the permission using the following command:
chmod +x ./plesk-installer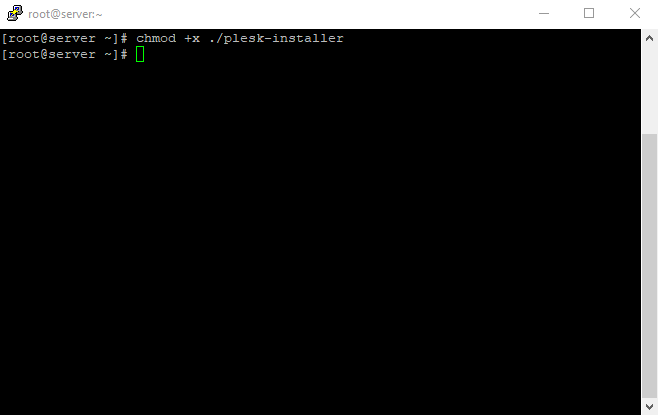
As you can see, the operation will be done automatically after using the command.
3. At the next step, need to use the following command to launch the interactive installer console:
./plesk-installerNote: with the above command, you can install the latest version of the Plesk; But, if you want to select another version of Plesk or have access to all of the available versions, you should use the
following command:
./plesk-installer --all-versions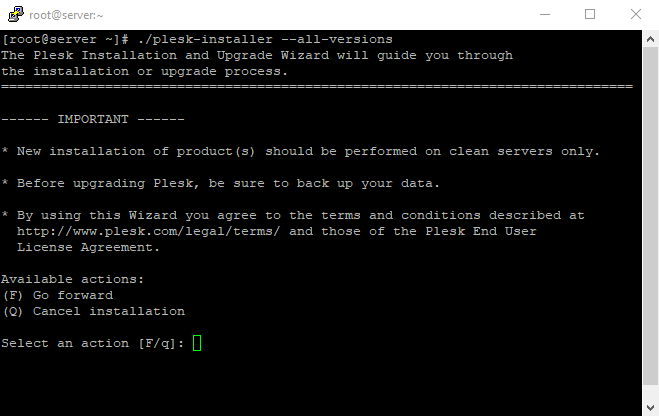
After using the command; You will have Two available actions; as you can see in the photo, enter the F key to resume the installation process.
4. Here, after entering the F key; You will face another section that will show you the Plesk all versions.
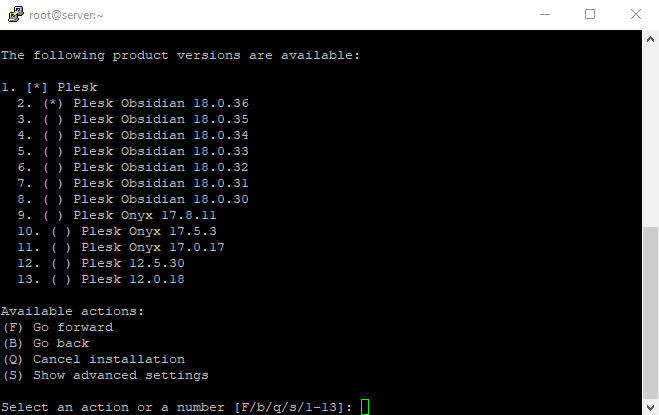
Now, as you can see; you need to select an action or a number to resume the installation process, first; type number 2, and hit the enter button ( that will select the version of your Plesk automatically that you was selected
after that, you will select the Go Forward action, hit the F button, and use the enter key to confirm the action.
5. At this part of the installation, the Plesk installer will ask you a question that will:
"would you like to help Plesk make better products by sending information about issues occurred, including installationand upgrade issues?"
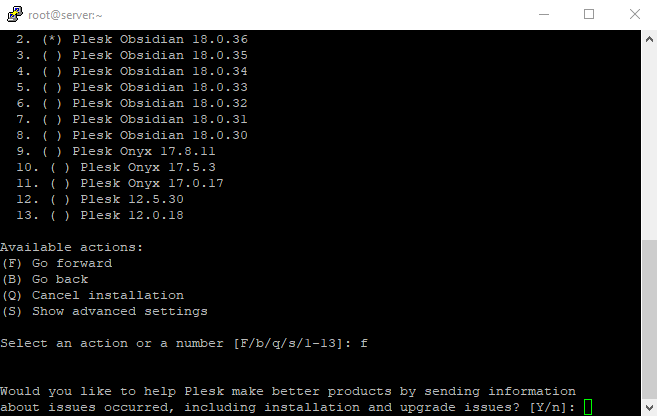
If you want to say ” yes,” then type Y, or if you aren’t interested in it, type N and hit the enter button.
6. This step will be the installation type selection; you can select the installation type as ” Recommended, “Full,” or ” custom ” mode.

Like last time, there need to select an action or a number; for example: if we want the Recommended type of installation, first; should select type number 2 and hit the enter button ( that will select the type of the Plesk installation that you were selected ), after that; you will select Go Forward action; hit the F button, and use the enter key to confirm the action.
7. The package’s preparing step; will be the packages installation confirm section; confirm the packages: select Go Forward action; hit the F button, and use the enter key to confirm the action.
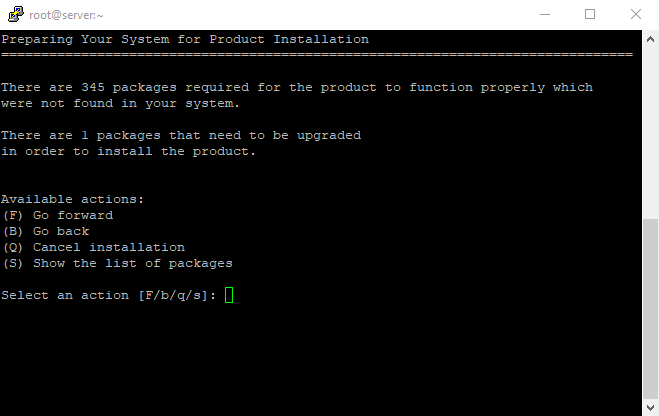
Just like in the photo, you can see the preparing phase of the package’s installation.
8. Final section; Now the Plesk installation on Linux VPS has been finished.
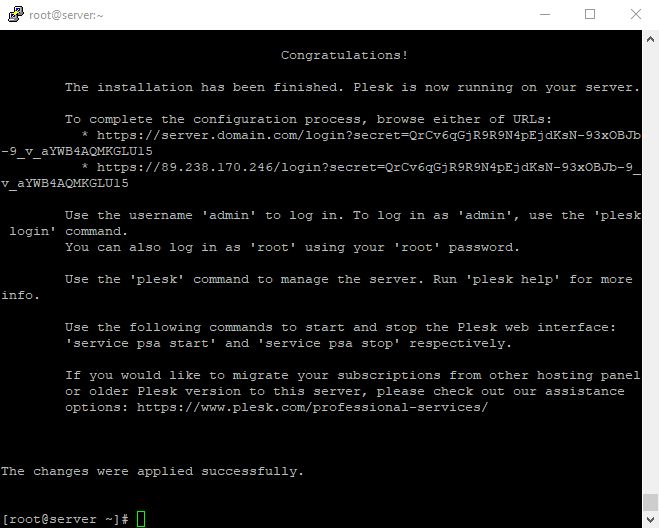
You can access the Plesk Login section by using the bellow address:
"https://server.domain.com/login?secret=QrCv6qGjR9R9N4pEjdKsN-93xOBJb-9_v_aYWB4AQMKGLU15"
After access to the Plesk Login section; Your login details should be like the below side;
If you want to log in as an admin person:
- Username: admin
- Password: select as desired
If you want to log in as root access:
- Username: admin
- Password: use the root password
One-Click Plesk Installation Plesk
For Both Linux VPS and Windows server VPS; But using different commands:
One-Click is the easiest and fastest way to install Plesk; follow the steps below to start installing Plesk.
1. Here, at first, we have to log in to the windows server by RDP; Or Linux Server using putty.
2. Need to switch the working directory to the installer binary has been saved, then we are going to run the following command’s:
For Windows VPS Server using the command prompt:
> plesk-installer.exe --select-product-id=panel --select-release-latest --installation-type=recommendedFor Linux VPS Server in putty:
sh <(curl https://autoinstall.plesk.com/one-click-installer || wget -O - https://autoinstall.plesk.com/one-click-installer)
Note: The installer will download the latest version of Plesk with the default configuration and features on your Windows server.
Also, for security, the following command applies all available updates and patches to increase the performance and security of your server; This method only installs the main components and special features of Plesk, and if you are looking for a more detailed installation, you can use the first method (installation via GUI) and install Plesk control panel. Still, you can add new packages and features that you want to add to Plesk after logging in the Plesk.
FAQ
How Can I Choose cPanel Or Plesk?
It should be said that choosing the best management panel depends more on first considering your conditions and needs and pay attention to what you expect from a management panel; If you look briefly:
Plesk has more support requests than cPanel and allows you to manage MySQL, and MS SQL Server from a web browser is highly compatible with Windows and is easy to use.
On the other hand, cPanel loads many times faster than Plesk and provides aggregates functions to high-level groups for easy access. For Linux, the cPanel environment may be better than Plesk.
How Much Does Plesk Cost?
Plesk pricing starts at $8.00 per month. Plesk does not have a free version, but Plesk offers a 14-day free trial. you can See additional pricing details below:
Try Free trial of Plesk
Check the Plesk Pricing
How do I change my Plesk license key?
By visiting the Plesk licensing page, you can change or upgrade your key.
Is it possible to generate multiple URLs with “Plesk login” and provide them to different agents?
Yes. But every URL will be valid for 24 hours only.
SUMMARY
With the help of this article, we learned how to install Plesk on VPS Server, and we hope that this is an article where you can solve the problems that have arisen. Finally, if you have any questions or problems during the Plesk installation process, contact us in the comments section below. If you have experience using the Plesk control panel, Please share your comment about the Plesk admin panel; thanks for taking the time to read this article.