How To Install AlmaLinux 8.4 [Step-By-Step Guide]
This article is about “how to install AlmaLinux” because recently, Redhat announced that they would stop supporting CentOS 8 by the end of 2021, and they will focus on CentOS stream. In the meantime, many were not satisfied. The issue with CentOS Stream is that it will receive updates sooner while those updates are not tested completely, and the bugs are not detected, so that you won’t have a stable version.
Also, some famous platforms like cPanel have announced that they will not support CentOS Stream. But there is not just bad news. Fortunately, AlmaLinux decided to develop a distribution based on RHEL 8 by the name AlmaLinux.
You can download the stable version of AlmaLinux now. And if you are curious, Alma means soul in Spanish and Latin languages, which is a good name for this distribution. AlmaLinux is the binary fork of the RHEL and was created by AlmaLinux, but the community in the future will develop it. In this tutorial, we will check how to install AlmaLinux step by step.
Note: As long as you follow the steps one by one, I guarantee that you won’t face issues when installing.
Minimum Resource Requirement To Install cPanel
- A Linux VPS Or VMware Workstation
- 1 GB RAM
- 1 core CPU 1.1 GHz
- 20 GB Storage
- ISO file of the AlmaLinux OS
Note: We are installing the minimal version of AlmaLinux on a VPS. If you are installing it on a VMware workstation or your own desktop, you have access to the console but if you are using a VPS, ask your provider to mount the ISO file and give you console access. If you have a dedicated server, you can ask for IPMI access to mount the ISO file and console access.
AlmaLinux Installation Steps
Note: If you use a VPS to install AlmaLinux, buy VPS with proper resources to avoid facing issues when installing your platforms like cPanel.
If you create the virtual machine yourself, the configuration should be something like this.
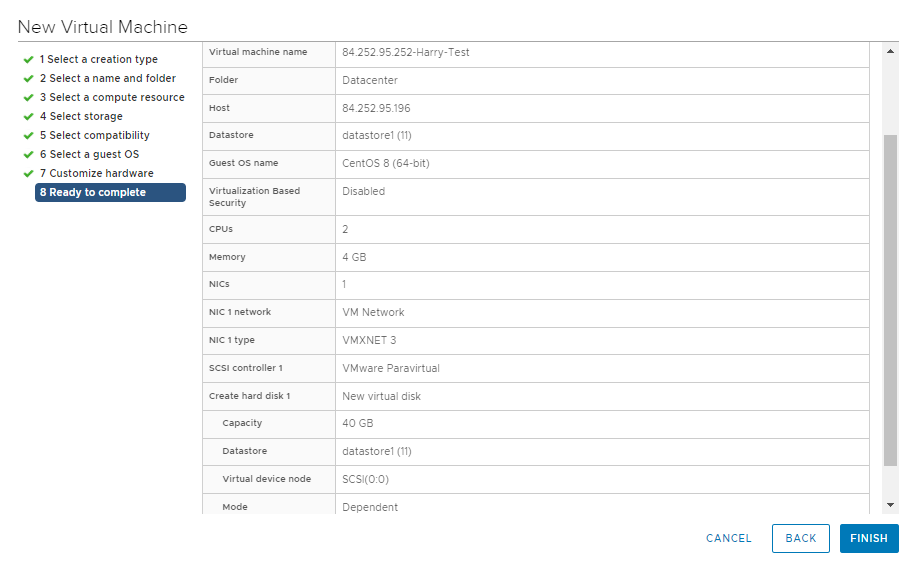
Step 1 – Choose To Install Or Test AlmaLinux
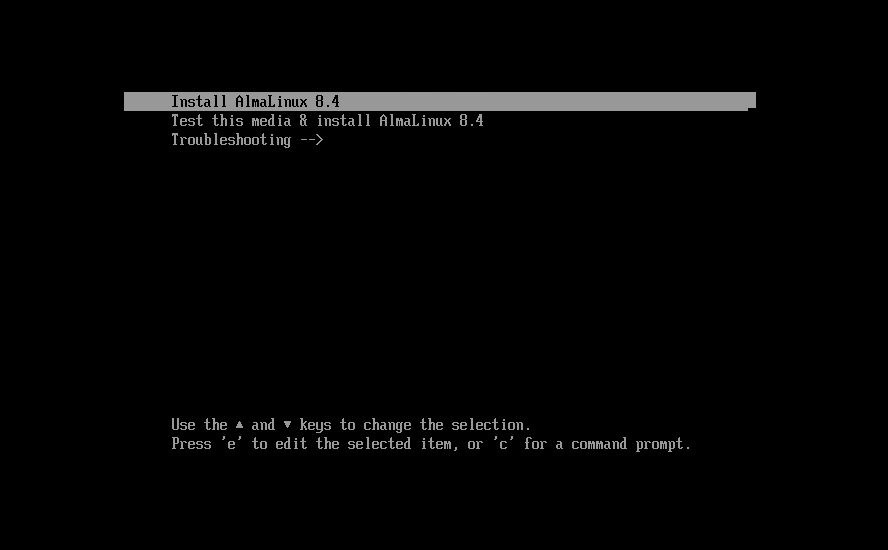
In the first step of the AlmaLinux installation, you will be asked to install AlmaLinux or test it. Choose install AlmaLinux 8.4 and press Enter button and wait until the script load.
Step 2 – Choose Language
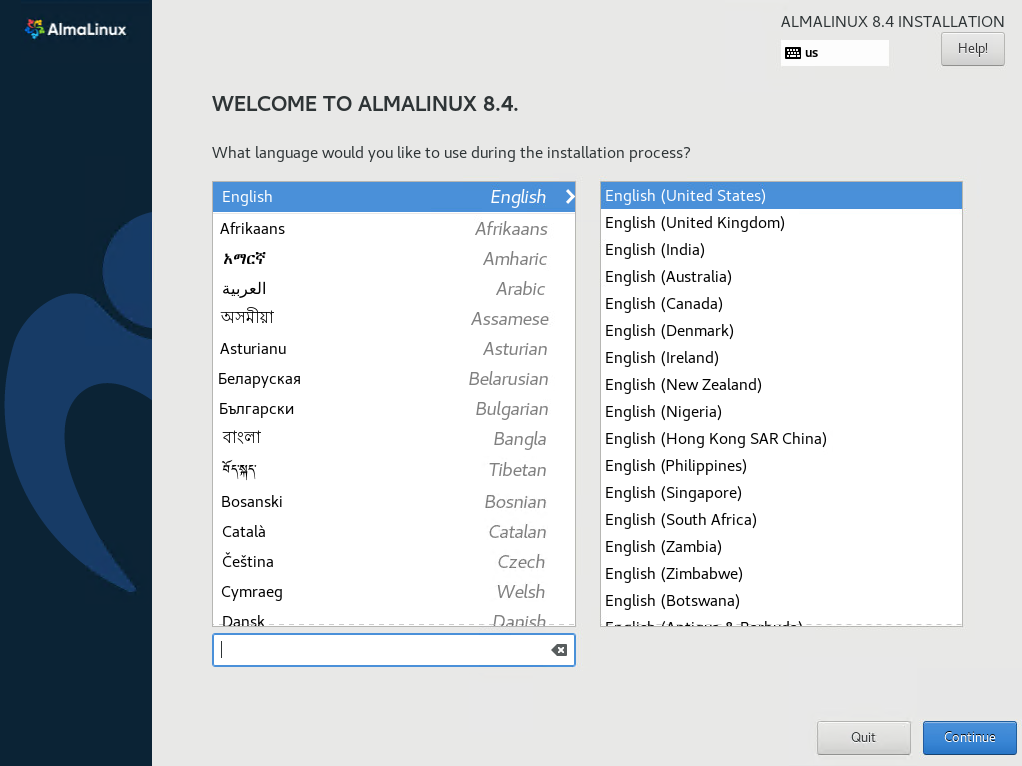
Choose the language that you wish to use during the installation and press Continue.
Step 3 – Partition Configuration
In this section, you are asked to choose the partitioning type that you wish to have. Also, you have an error that says you have to complete the items marked before you can proceed to the next step.
If you install a hosting platform like cPanel or Direct Admin, or if you wish to work on big data management, it is better to configure the partition manually.
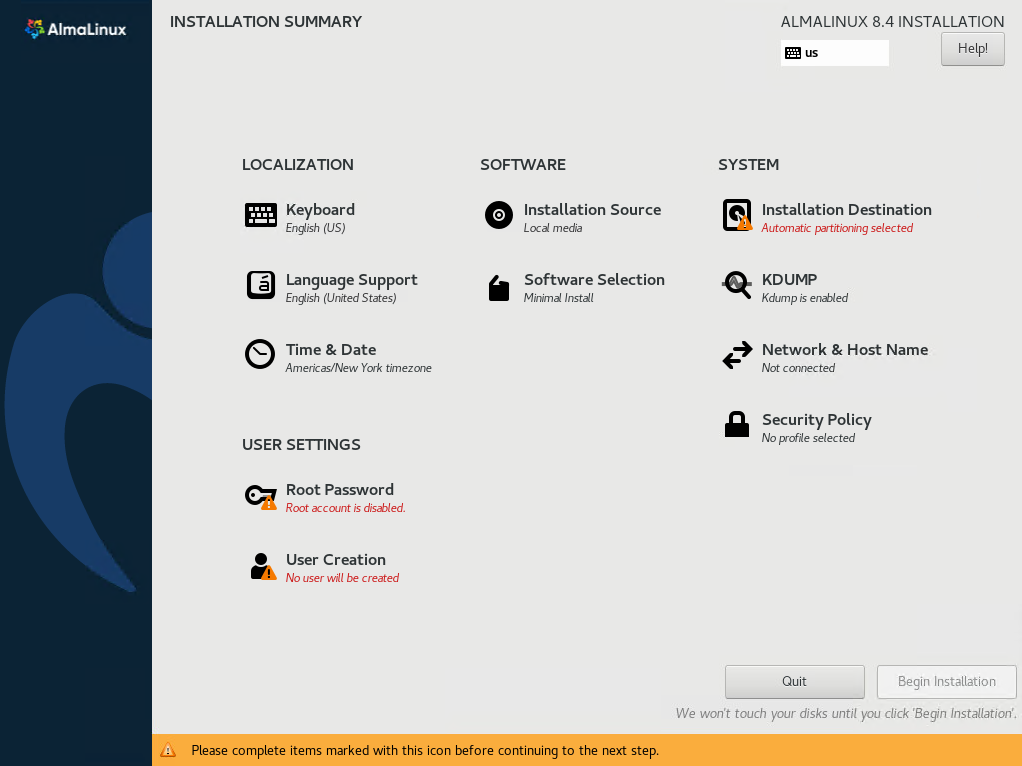
Click on the “Installation Destination” to choose the partitioning type. Consider that you can choose automatic partitioning, but it is not recommended especially because we will install cPanel on our AlmaLinux OS later.
Note: If you configure the partition manually, you will have more control over your server’s data. You can which section of your platform or application uses more storage and why does it happen. It is always good to see what is happening around you!
Note: Also, you can choose the partitioning type to Automatic and click Done to ignore this section.
So put the partitioning type on “I will configure partitioning” and press Done to configure manually.
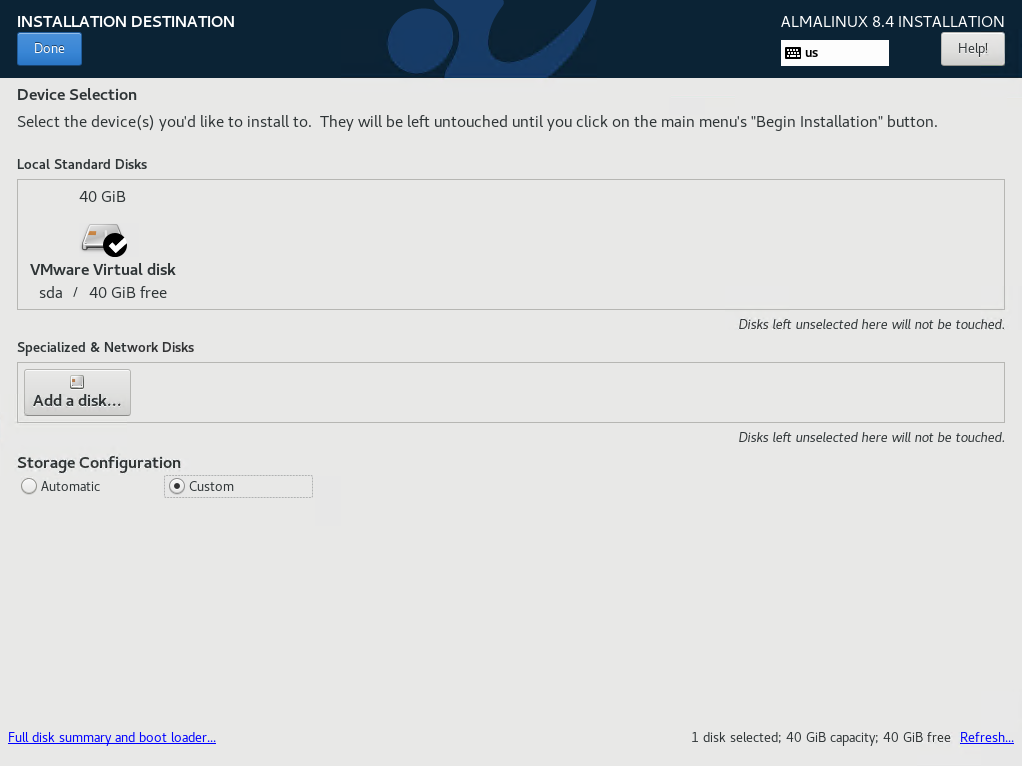
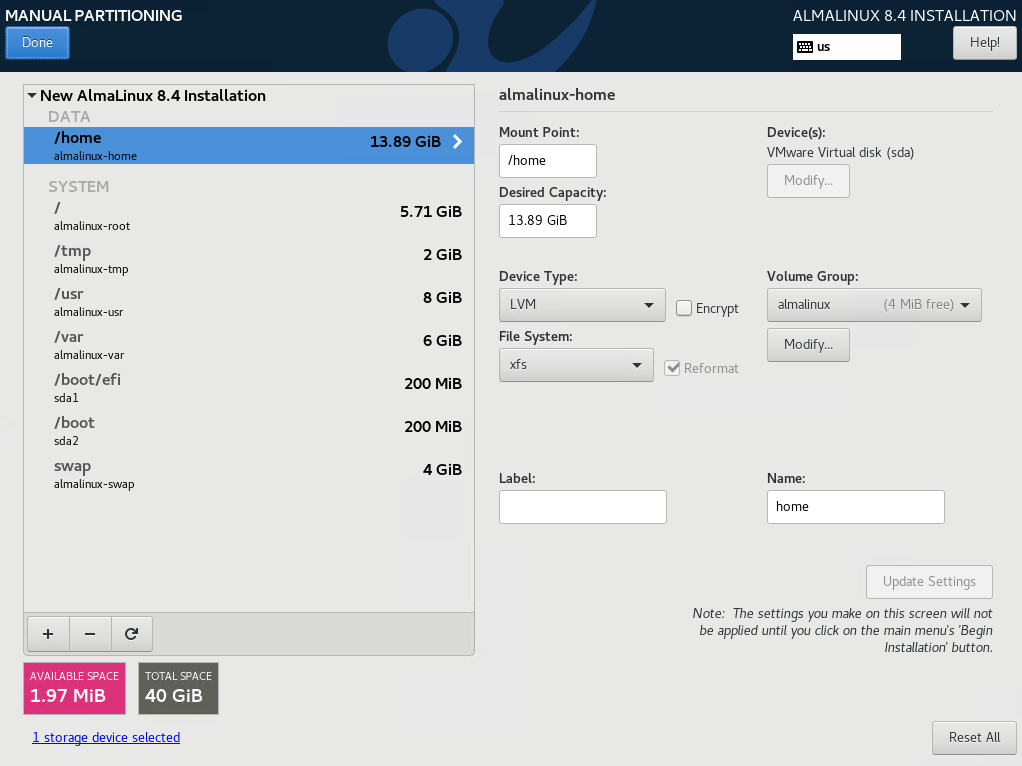
As you can see, I have 40 GB of storage. In this step, we will create 8 partitions. Consider that the amounts that I have used are optional, and you can use different amounts according to your storage amount.
| Partition | Description | Recommended Size | Sizes For 40 GB |
|---|---|---|---|
| / | Root directory is the home directory of the Root account | According to storage space | 5844 MB |
| /Swap | Swap helps RAM to manage processes if you were out of RAM | 2 GB or less — Two times the amount of RAM on the server. 2 GB to 4 GB — The same as the amount of RAM on the server. 4 GB or more — 4 GB | 4096 MB |
| /usr | It contains all binary files related to user programs | Accord | 8192 MB |
| /var | Is used to place database tables and logs | According to storage space | 6144 MB |
| /tmp | Is the place to store temporary files | According to storage space | 2048 MB |
| /Home | Home is used to stored user data like public_html and emails | As much as possible. | 14226 MB |
| /boot | It contains boot related files such as Grub, vmlinuz, and kernel. | 100 MB to 512 MB | 200 MB |
| /boot/efi | It contains boot related files such as Grub, vmlinuz, and kernel in EFI systems | 200 MB |
In the next section, click on the plus + button to add a new mount point. Create all of the partitions one by one. Consider choosing each mount point that you can see in the list, and once they were finished, you should add new mount points by yourself which are not in the list of mount points like /usr and /tmp mount points.
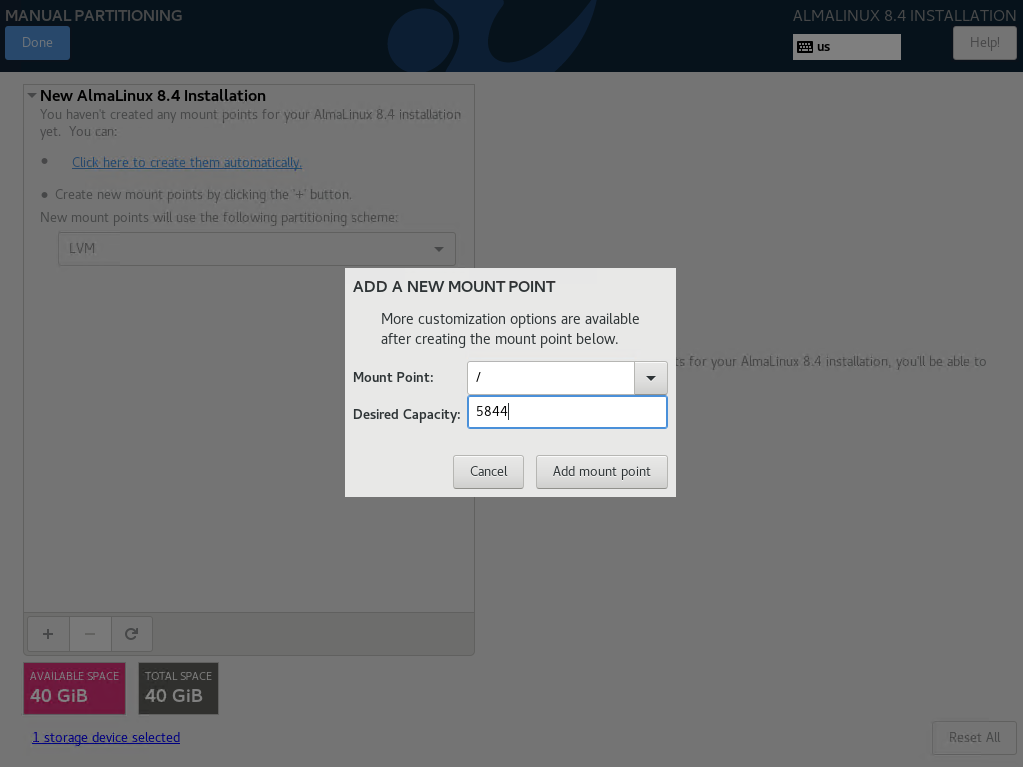
Once finished, you will have a view like the following image.
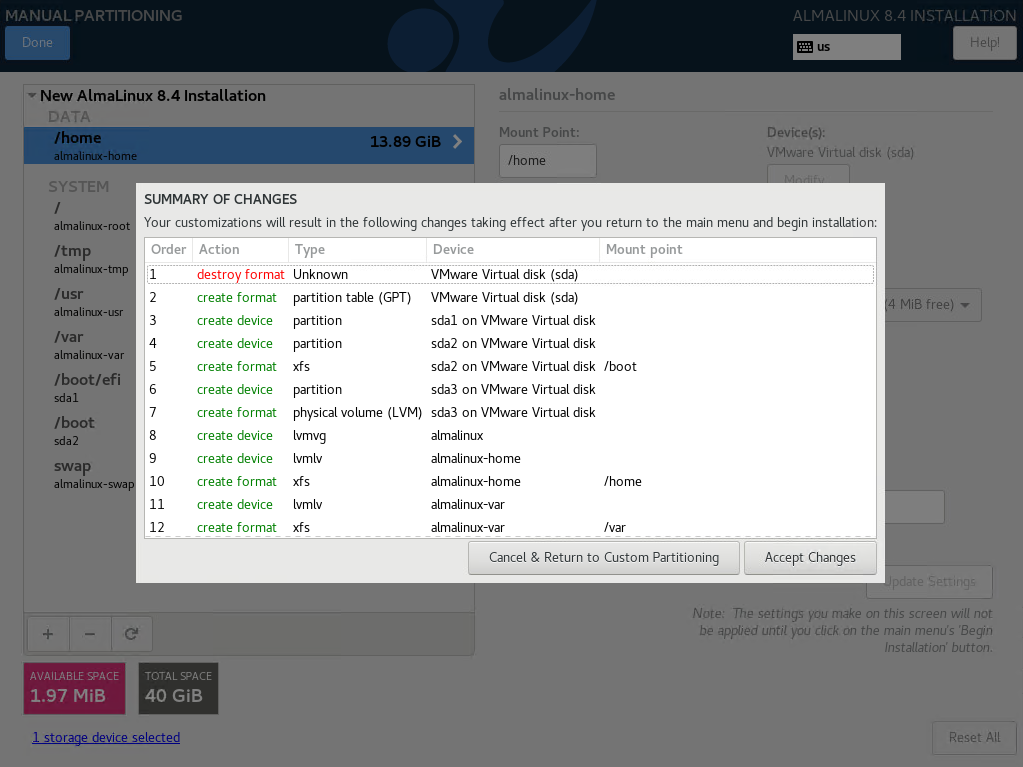
In the next section, you will summarize the changes that you made; click on accept to complete the changes.
Step 4 – Network Configuration
Now we are back again to the main page. Go to the Network & Hostname to configure the network of our AlmaLinux Server.
In General Tab, Tik the option “Connect automatically with priority” and put the priority on 1.
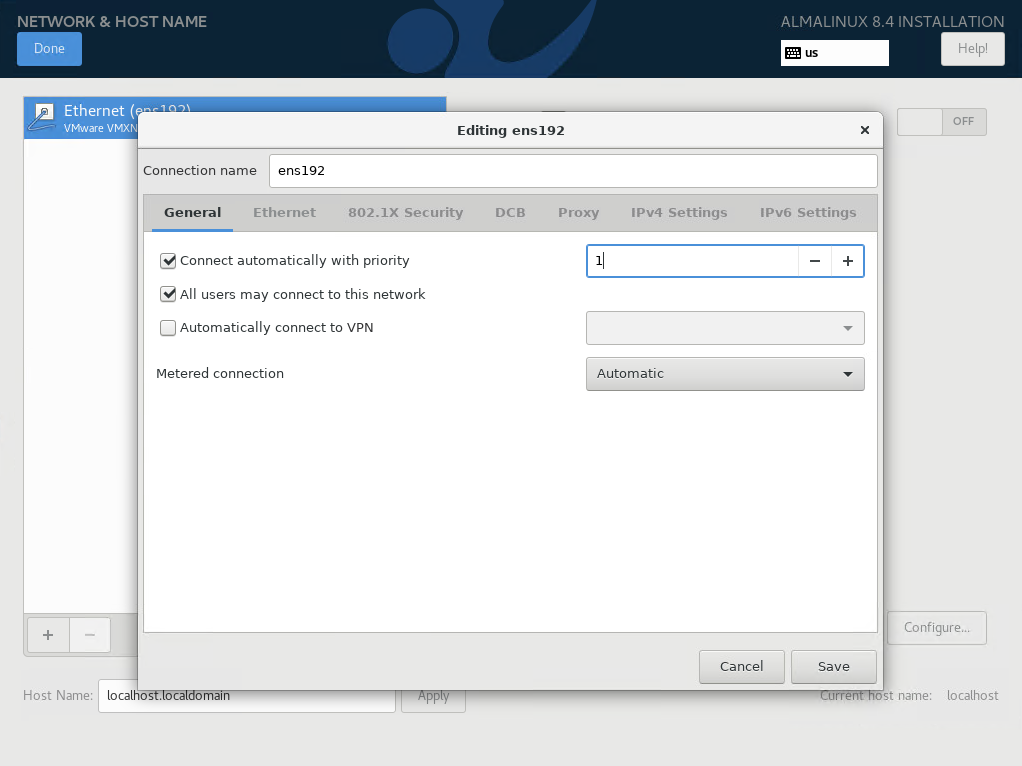
Here I have a Linux VPS Server with static IPV4 so that I will configure manual IPV4. You can change your configuration according to your situation.
Navigate to the IPV4 section, click on Method, choose Manual, and then choose the Add option to add an IP address. Then add a DNS Server and check the option to “Require IPV4 addressing for this connection to complete” and click Save.
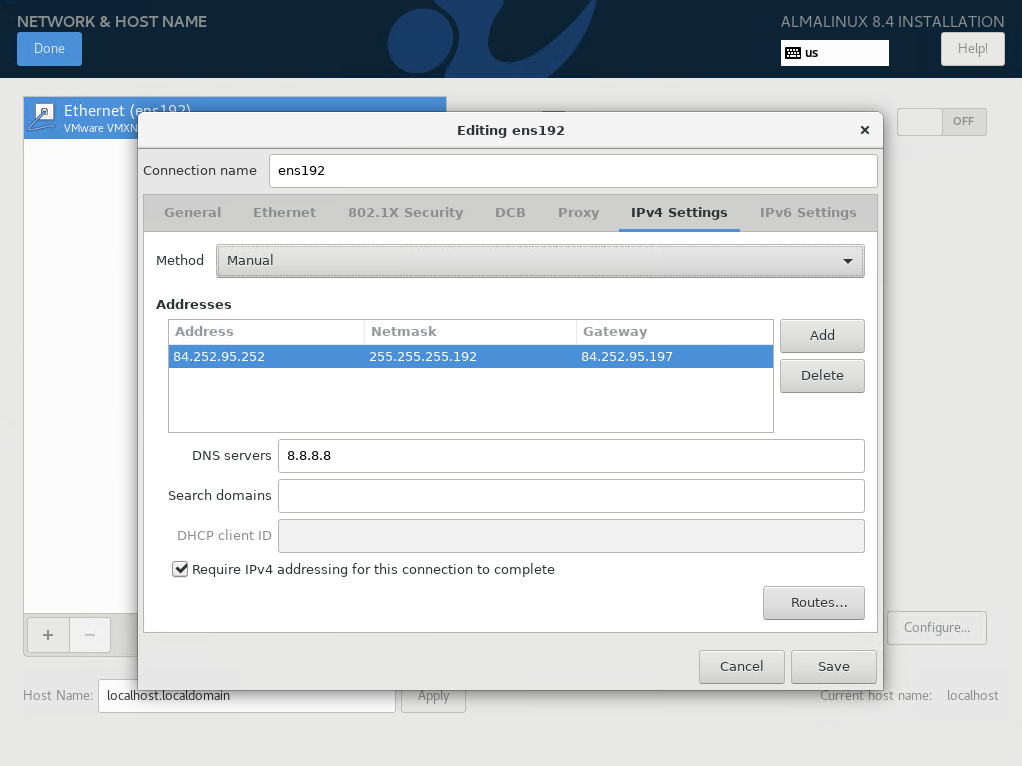
Now you will be back on the same page. Turn On the ethernet by dragging Off To On on the up-left section of the page. Also, choose a hostname for your server, and click Done.
Step 5 – Choose Password For Root
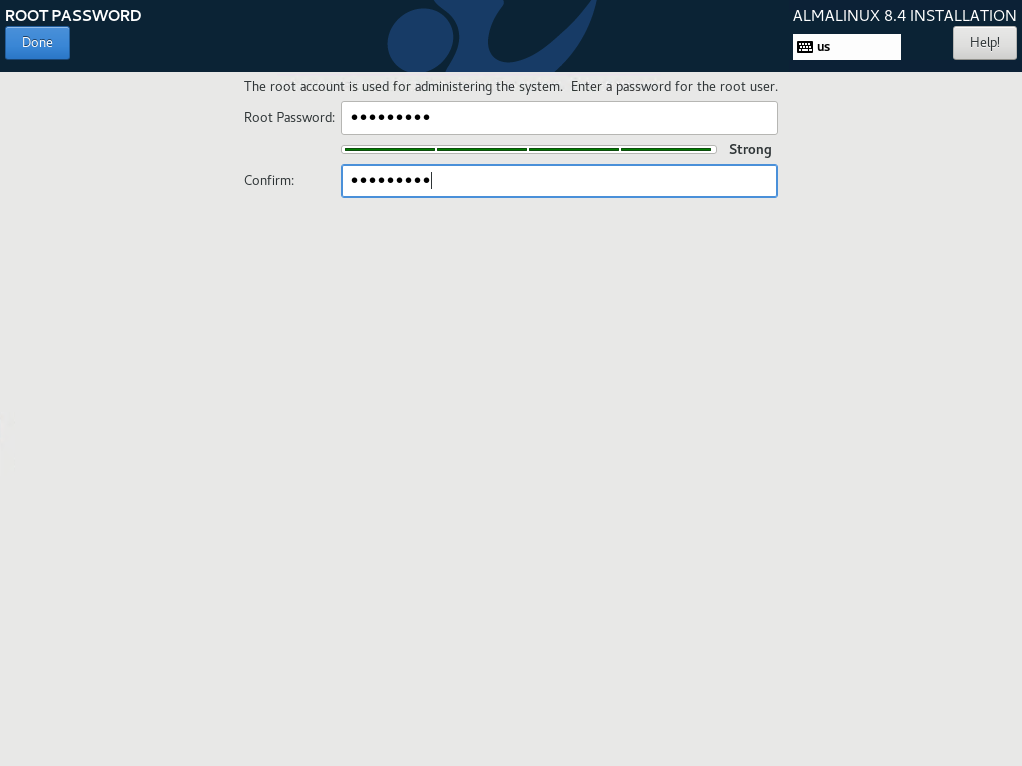
You are back again to the main page of AlmaLinux Installation. As you can see, you are asked to choose a password for the root user, so choose the Root Password option to do it and choose a strong password for your root account.
Step 6 – Software Selection On AlmaLinux
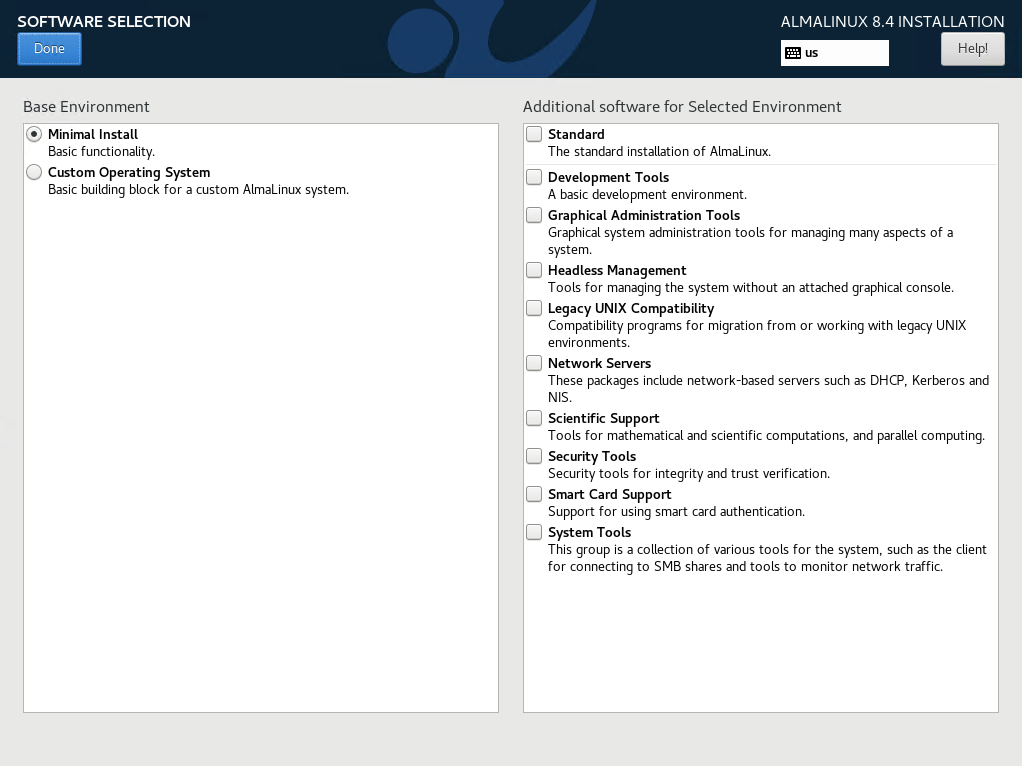
You can choose to install AlmaLinux minimally or with custom software. You can choose any of these packages, and they will be chosen to be installed during the AlmaLinux installation process.
Step 7 – Installation Process
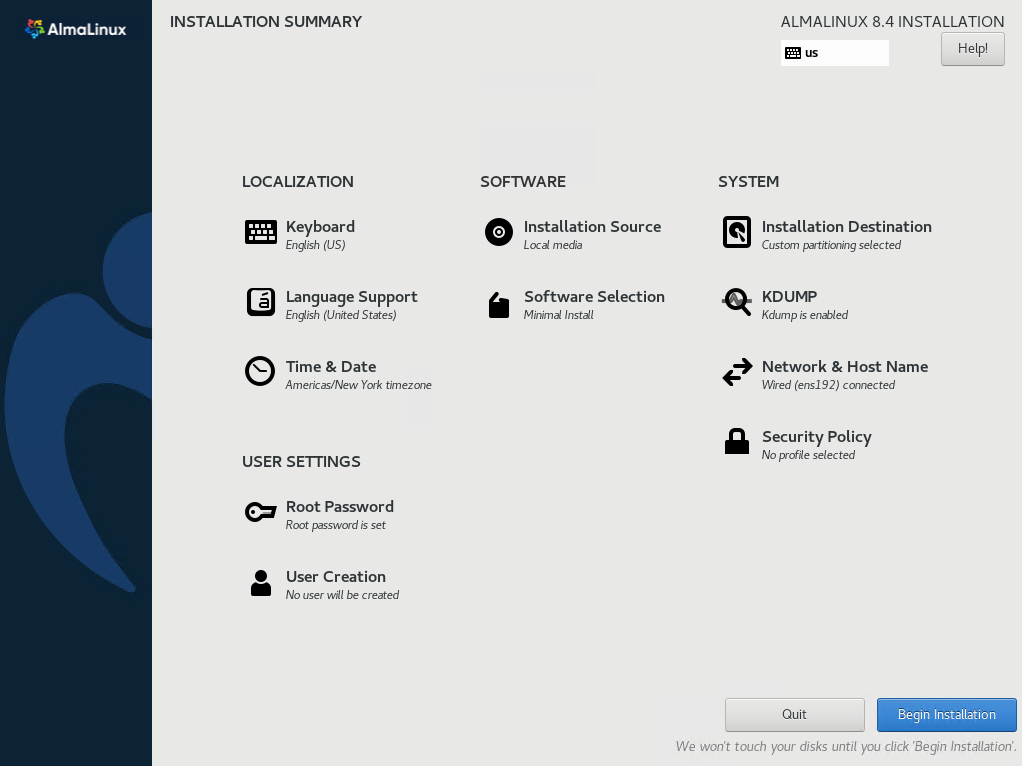
Now, we are done, so we can choose to Begin the Installation.
Step 8 – Installation Finished
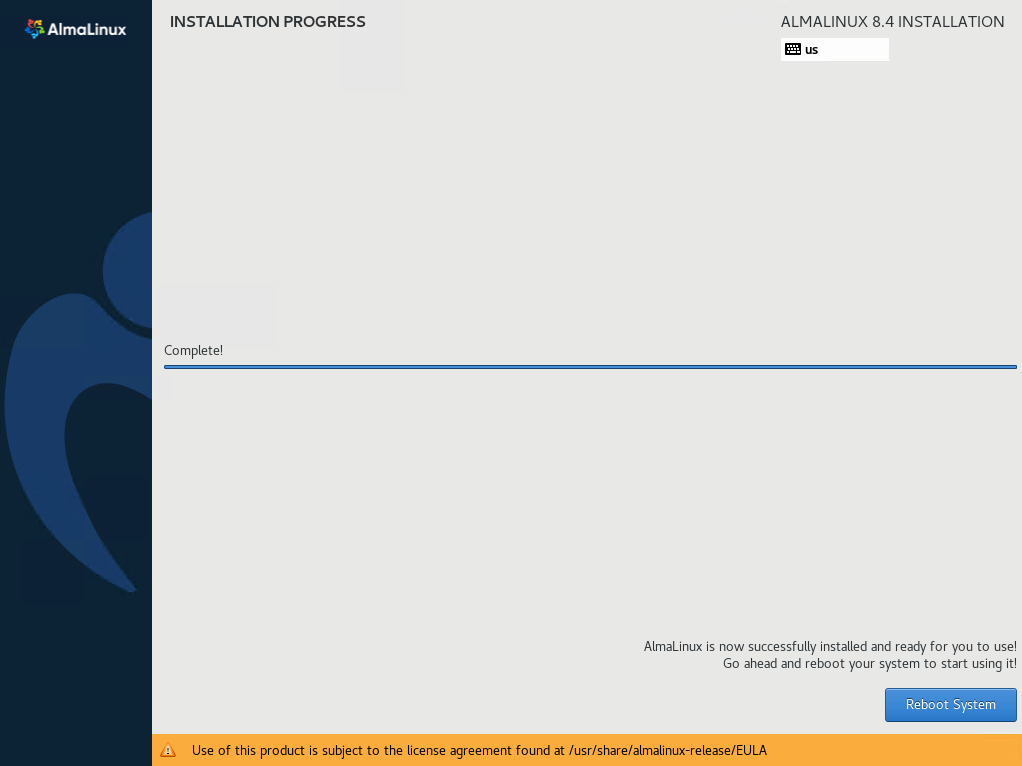
Once the installation was finished, you will have a message that says the installation is completed, and you should reboot the system. Choose Reboot System and wait for it to come up. Put the username to login to the server as root, and you have set the password when installing the server.
As A Summary
As you can see, the installation of AlmaLinux was easy, and it was just like CentOS 8 and CloudLinux Installation.
I hope you have enjoyed this post. If you faced any issues during the installation, just let me know in the comments section, and I will help resolve it as much as possible; thanks for reading this article.
Hi Harry, Wonderful tutorial :) Why did you select "1" instead of "0" in General Tab, “Connect automatically with priority”?! what's wrong with default 0 that you select 1?! Regards
Hi Adi, it's a pleasure that you've liked our article. Actually, there is no need to change that option. You will need to change it when you have multiple connections, and you want to prioritize connections for each. A connection with the higher numbers have more priority to be used and connections with lover (even negative) priorities will be checked at last.