How To Install And Configure Apache Tomcat 9 On CentOS
Apache Tomcat (formerly known as Jakarta Tomcat) is an open-source web server developed by Apache to provide a Java HTTP server that allows you to easily run Java files.
This means that Tomcat is not a normal server similar to Apache or Nginx since its main purpose is to provide a good web environment for running Java applications that other web servers do not.
Recently On February 2, 2021, Apache Tomcat reached version 10 (version 10.0.2), which is the first stable version of the 10.x.0 series.
There are a number of notable changes in version 10 of Apache Tomcat.
In this article, we will install Apache Tomcat 9 on RHEL / CentOS 7.0 / 6.x.
Steps To Install Apache Tomcat 10 On CentOS
- Java 8 installation and settings
- Install Apache Tomcat 10
- Apache Tomcat 10 settings
- Change Apache Tomcat port

Step 1: Java 8 installation and settings
Before you start installing Tomcat, be sure to install JAVA on your Linux to run Tomcat. Otherwise, install the latest version of Java 9 using yum command.
yum install java-1.8.0As soon as java is installed, you can check the version with the following command on your system.
java -versionOutput sample:
openjdk version "1.8.0_191"
OpenJDK Runtime Environment (build 1.8.0_191-b12)
OpenJDK 64-Bit Server VM (build 25.191-b12, mixed mode)
Step 2: Install Apache Tomcat 9
After installing java on your system, it’s time to download the latest version of Apache Tomcat (version 9.0.14), which is the latest stable version now. If you want to know the newer versions, it is recommended that you check the Apache download page.
https://tomcat.apache.org/download-90.cgi
Now download the latest version of Apache Tomcat 9 using the wget command and install it as below.
cd / usr / local
wget http://www-us.apache.org/dist/tomcat/tomcat-9/v9.0.14/bin/apache-tomcat-9.0.1.14.tar.gz
tar -xvf apache-tomcat-9.0.14.tar.gz
mv apache-tomcat-9.0.14 tomcat9
Tip: Replace the version in the above commands with the version you downloaded yourself.
Before starting the Tomcat service, define the CATALINA_HOME environmental variable in your system using the following command.
echo "export CATALINA_HOME =" / usr / local / tomcat9 "" >> ~ / .bashrc
source. / .bashrc
We can now set up a Tomcat web server using the script provided by the Tomcat package.
cd / usr / local / tomcat9 / bin
./startup.sh
Output sample:
Using CATALINA_BASE: / usr / local / tomcat9
Using CATALINA_HOME: / usr / local / tomcat9
Using CATALINA_TMPDIR: / usr / local / tomcat9 / temp
Using JRE_HOME: / usr
Using CLASSPATH: /usr/local/tomcat9/bin/bootstrap.jar:/usr/local/tomcat9/bin/tomcat-juli.jar
Tomcat started.
Now open Tomcat from your browser. Use your IP or Domain with the 8080 port (because the tomcat always runs on the 8080 port). For example, mydomain.com:8080, which uses your IP or domain address instead of mydomain.com.
http://Your-IP-Address:8080
OR
http://Your-Domain.com:8080
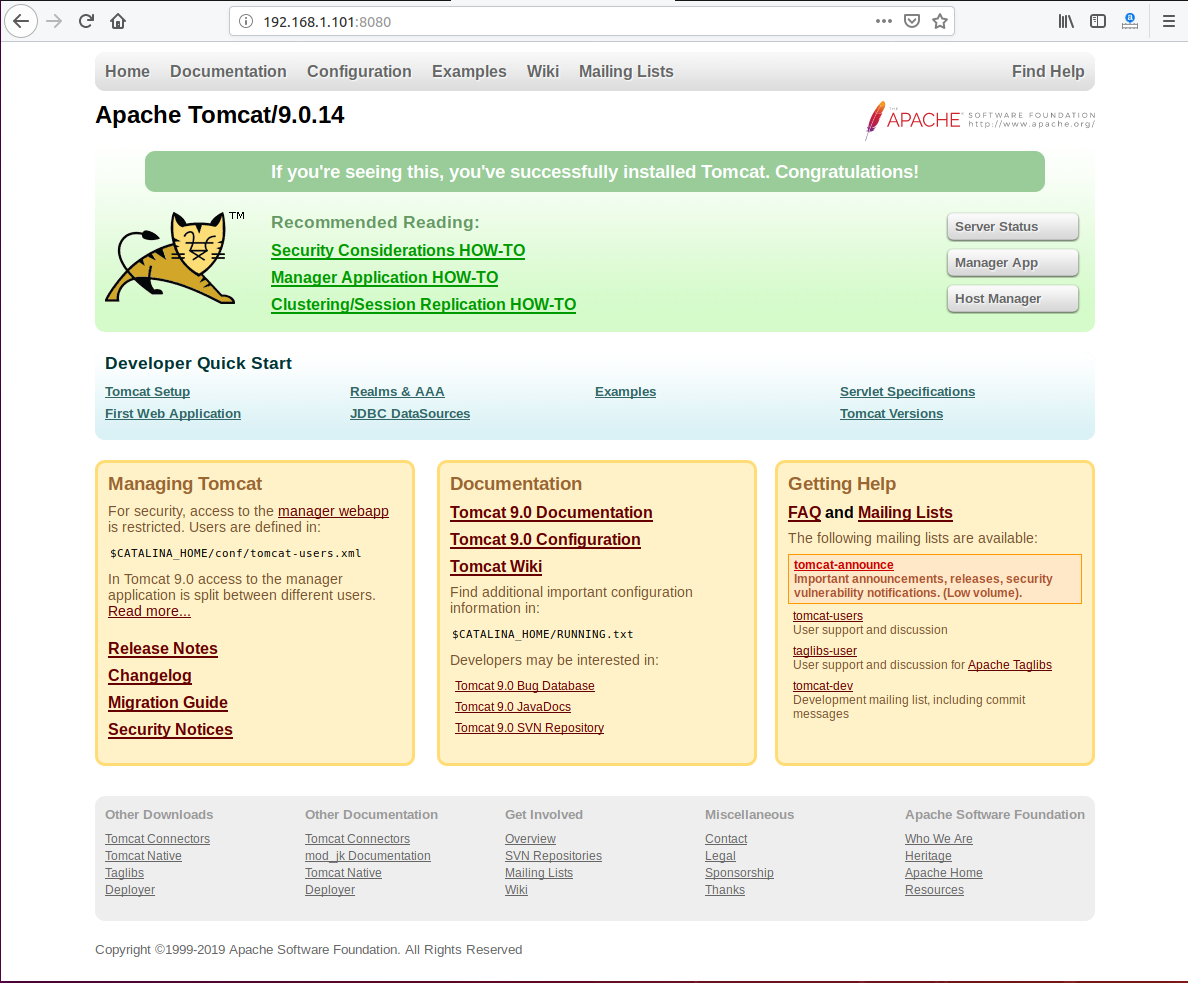
The default directory for Tomcat files is located in usr/local/tomcat9/, You can see the configuration files in the conf folder. You see the above home page he home page when you open your website on port 8080 in the path /usr /local /tomcat9/webapps/ROOT/.
Step 3: Apache Tomcat 9 settings
By default, you will only be able to access the Tomcat default page. To access admin and other sections such as Server Status, App Manager, and Host Manager, you need to configure the user account for admin and administrators.
To do this, you need to edit the “tomcat-users.xml” file located in the /usr/local/tomcat9/conf/ directory.
Set up User Accounts in Tomcat
For example, to assign the role of manager-gui to a user named linuxzone and the password t$cm1n1, add the following line to the config file inside the desired section.
vi /usr/local/tomcat9/conf/tomcat-users.xml
<role rolename = "manager-gui" />
 <user username = "linuxzone" password = "t $ cm1n1" roles = "manager-gui" />
Similarly, you can also add the admin-gui role to an admin user named admin with the admin password as below.
<role rolename = "admin-gui" />
<user username = "admin" password = "adm! n" roles = "admin-gui" />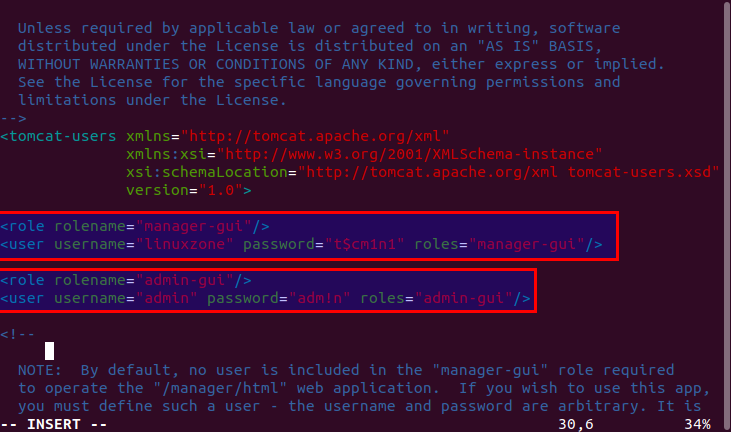
Restart Tomcat after admin settings and management roles, and then try to access the admin section.
./shutdown.sh
./startup.sh
Then click the Server Status tab, you will be prompted to enter your username and password. Enter the username and password that you added to the configuration file above.
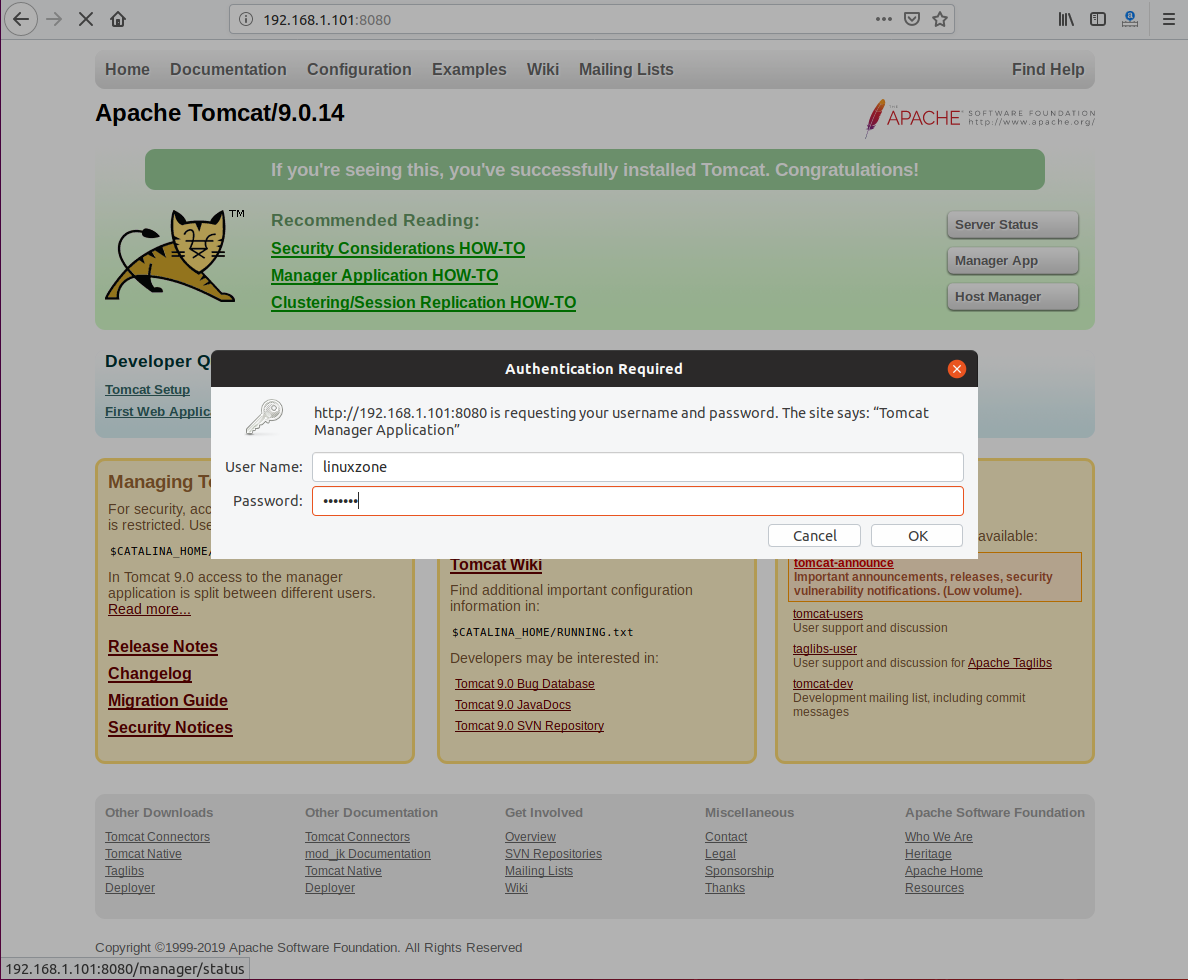
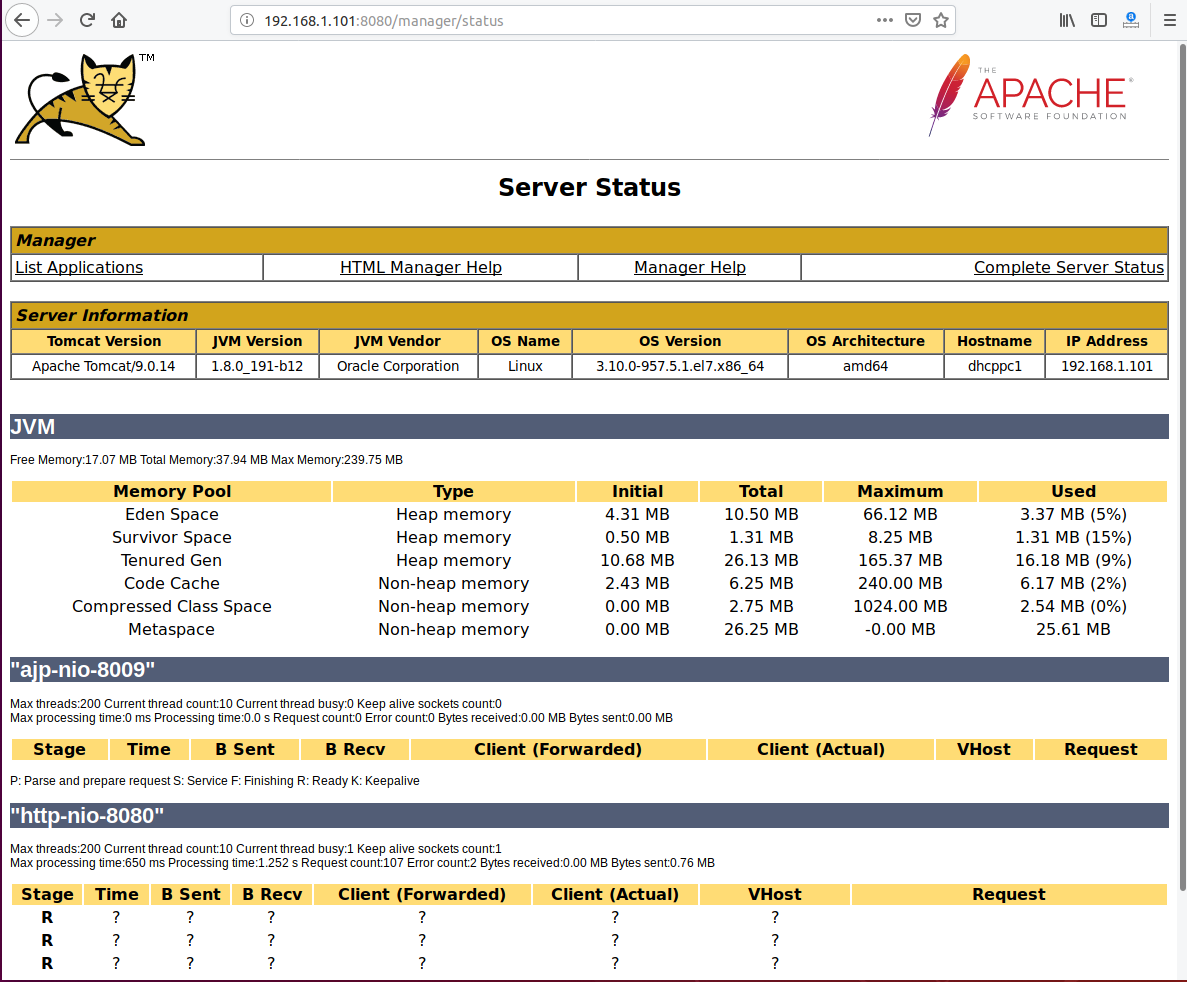
As soon as you enter the username and password, you will see a page similar to the one below.
Step 4: Change Apache Tomcat port
If you want to run Tomcat on a different port like Port 80, you must edit the server.xml file in the /usr/local/tomcat9/conf/ path. Before changing the port, make sure the Tomcat service is stopped using the following command.
/usr/local/tomcat9/bin/shutdown.shNow open the server.xml file using the vi/vim editor.
vi /usr/local/tomcat9/conf/server.xmlNow search for Connector port and change its value from 8080 to 80 or whatever you want.
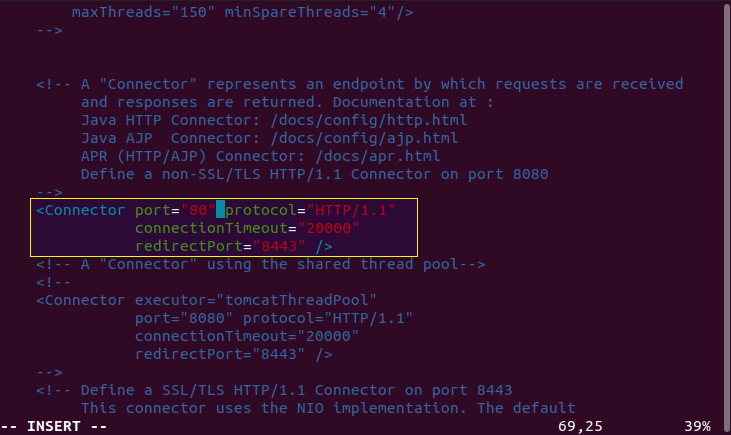
Run the following command to save the file and restart the Apache Tomcat service.
/usr/local/tomcat9/bin/startup.shYour server is now running on port 80.
You must execute all of the above commands under the root user. If you are not a root user, they will not work because we are working in the /usr/local/ directory where the owner of this directory is the only root. If you want, you can run the server with a normal user, but you will have to use your HOME folder as a workspace to download, extract, and run the Apache Tomcat server.
To get some information about the running Tomcat server, run the following command.
/usr/local/tomcat9/bin/version.shOutput sample:
[root @ dhcppc1 bin] # /usr/local/tomcat9/bin/version.sh
Using CATALINA_BASE: / usr / local / tomcat9
Using CATALINA_HOME: / usr / local / tomcat9
Using CATALINA_TMPDIR: / usr / local / tomcat9 / temp
Using JRE_HOME: / usr
Using CLASSPATH: /usr/local/tomcat9/bin/bootstrap.jar:/usr/local/tomcat9/bin/tomcat-juli.jar
Server version: Apache Tomcat / 9.0.14
Server built: Dec 6 2018 21:13:53 UTC
Server number: 9.0.14.0
OS Name: Linux
OS Version: 3.10.0-957.5.1.el7.x86_64
Architecture: amd64
JVM Version: 1.8.0_191-b12
Local JVM: Oracle Corporation
[root @ dhcppc1 bin] #
Now you can use Java-based apps under Apache Tomcat 9
I hope you have enjoyed it and you find this tutorial useful.
Also, you can order for Linux VPS to run your configurations.
Thanks for being with us.
We will be happy to get your opinions in the comments section.