Install Laravel on CentOS 7 Easily
Learn how to install Laravel on CentOS 7 by setting up a LAMP stack, installing Composer, configuring file permissions, and setting up Apache. Follow this guide for a smooth Laravel installation.
🤖AI Overview:
Installing Laravel on CentOS 7 involves setting up a Linux web server with Apache, MySQL, and PHP along with Composer for dependency management. This guide covers installing required components, cloning Laravel, setting permissions, generating encryption keys, and configuring Apache virtual hosts for optimal Laravel application deployment.
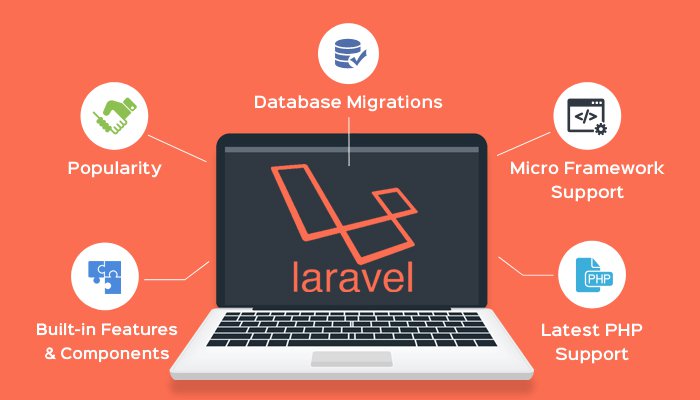
Why Should We Learn And Use Laravel?
-
- Easy to learn and update
- Facilitate routine programming tasks such as authentication, routing, sessions, and caching
- Quick and easy setup of multiple environments and relationships
- Enjoying Remote Component
- Limit Eloquent with simple commands
- Improve speeds and increase speeds by 100%
- Make the development process pleasant for developers without compromising program capabilities.
- Use standard bundle style in earlier versions and use packages in the new version.
- Run multiple unit tests with simple commands
- Easy access to databases and ease of modifying and controlling code and updating and developing applications
- Using Blade Templates Engine
How To Install Laravel On CentOS 7
If you need the Laravel framework and do not know where to start, this article is for you, and you can learn Laravel step by step, but keep in mind that you must have a Linux VPS with a CentOS distribution. Installed. Because in this tutorial, we will teach Laravel on Santos 7.
If you do not have a Linux VPS server, I suggest you buy from OperaVPS so that if you encounter any problems during the installation process, our team can solve the problem for you.
From the link I mentioned below, you can buy a Linux VPS server and start the Laravel installation tutorial: https://operavps.com/vps-server/linux/
Step 1 – ADJUST YUM REPOSITORY SETTING
First of all, we need to add REMI and EPEL rpm repositories to the Centos system. These containers have updated packages.
Connect to VPS with Putty and run the below command:
rpm -Uvh http://dl.fedoraproject.org/pub/epel/7/x86_64/Packages/e/epel-release-7-11.noarch.rpmThen
rpm -Uvh http://rpms.famillecollet.com/enterprise/remi-release-7.rpmStep 2 – Install Apache, MySQL, and PHP (LAMP)
Here is a brief guide to installing LAMP. You need to run the Laravel framework on your CentOS system.
Use this command to install Apache.
> A complete guide to Install LAMP on CentOS 7:
yum --enablerepo=remi,epel install httpdTo install MySQL, use the following commands:
yum --enablerepo=remi,epel install mysql-serverThen
service mysqld startThen
/usr/bin/mysql_secure_installationTo install PHP using the following command:
yum --enablerepo=remi,epel install php php-zip php-mysql php-mcrypt php-xml php-mbstringThen restart the Apache:
service httpd restartStep 3 – Install Composer
Composer is required to install Laravel, and one of Laravel’s prerequisites is to install.
You can install Composer using the following commands.
curl -sS https://getcomposer.org/installer | phpThen
mv composer.phar /usr/bin/composerThen
chmod +x /usr/bin/composerStep 4 – Install Laravel
You can install the latest version of Laurel using the following command.
cd /var/wwwThen
git clone https://github.com/laravel/laravel.gitAfter entering the above command, use Composer to solve the Laravel prerequisite problem.
cd /var/www/laravelThen
composer installThe prerequisite installation is a bit long but wait until it’s fully installed and enter the following commands.
chown -R apache.apache /var/www/laravelThen
chmod -R 755 /var/www/laravelThen
chmod -R 755 /var/www/laravel/storageUse the command to write to the storage directory.
chcon -R -t httpd_sys_rw_content_t /var/www/laravel/storageStep 5 – Set The Encryption Key
Laravel uses the .evn file to configure the environment. Use the .evn file to configure all the environment variables for your program, such as database, SMTP, security key, etc.
cp .env.example .envNow set the 32-bit random encryption key given to you by the Illuminati Encryption Service.
php artisan key:generateThen
Application key set successfully.Step 6 – Create Apache Virtual Host
Now add a virtual host to your Apache configuration file to access Laravel through the web browser.
To do this, edit the Apache /etc/httpd/conf/httpd.conf configuration file and add the following code at the end of the file.
Enter the following command to edit the Apache configuration file
vim /etc/httpd/conf/httpd.confPut the following command in this file:
<VirtualHost *:80>
        ServerName laravel.example.com
        DocumentRoot /var/www/laravel/public
        <Directory /var/www/laravel>
               AllowOverride All
        </Directory>
</VirtualHost>
Restart the Apache service, access Laravel using your favorite web browser, and start developing a great web application.
Use the following command to restart the Apache service.
service httpd restartHow to get the Laravel version?
Artisan is a robust command-line interface that comes pre-installed with Laravel. On your machine, open the command line terminal. Navigate to the directory containing your Laravel application. Then, using the PHP artisan command, verify the Laravel version.
php artisan --versionNow access your Laravel website in a web browser using the server name that we have defined.
The username that we have used is “laravel.example.com”
Conclusion
To install Laravel successfully, start by preparing your environment with the required software and dependencies. Use Composer to create a new Laravel project, configure your environment, and run Laravel’s development server to confirm the installation.
Laravel’s rich ecosystem and robust tools make it a great framework for beginners and experienced developers. By following this guide, you will have a solid foundation to develop your Laravel applications efficiently and effectively.
Remember, following best practices and keeping your tools updated contribute to a smooth development experience. Now you are ready to build modern web applications using Laravel.
FAQ
2. What prerequisites are needed for installing Laravel on CentOS 7?
You need a Linux server with CentOS 7, Apache, MySQL, PHP with required extensions, and Composer for dependency management.
3. How do I install Apache, MySQL, and PHP?
Use the "YUM" package manager with "REMI" and "EPEL" repositories enabled to install Apache, MySQL, PHP, and necessary PHP extensions.
4. What is Composer and why is it necessary?
Composer is a PHP dependency manager essential for installing Laravel's dependencies correctly.
5. How is Laravel installed with Composer on CentOS 7?
Run "composer create-project --prefer-dist laravel/laravel your-project-name" to install Laravel and its dependencies.
6. How should permissions be set for Laravel files?
Set file ownership to the Apache user and ensure storage and "bootstrap/cache" directories are writable.
7. Why generate an application key after installing Laravel?
The key secures encrypted data and user sessions, set via "php artisan key:generate".
8. How do I configure Apache to serve Laravel?
Create a virtual host pointing to Laravel's public folder with "AllowOverride All enabled" and restart Apache.
9. How can I verify the Laravel version installed?
Use "php artisan --version" inside your Laravel project directory.
10. Where can I get a server to install Laravel?
Obtain a Linux VPS with CentOS 7 from reputable providers to follow the installation steps.
Hi mate I can see the same code copied over the internet here and there but no one is mentioning one vital info !! what user account you are using to install composer? when using any other user than root, it cause issue composer.jason file
Thank you for your clear and easy to follow directions. Maybe you can help me understand something I have encountered. I have been given and already developed Laravel site to update, which I've done, but the pre-processors are broken which I'm trying to sort out. My question is related to that but not directly. The site it set up without the directive in the httpd.conf file. Instead there is a storage directory under the html directory that points to /var/www/laravel/storage/app/public directory and the pre-processed assets are also placed under the html directory. There is also an index.php which is a duplicate of the one that is found in the public/ directory. Do you have any idea why this would have been set up this way? Is there any advantage to this or was it just set up improperly? Any input would be greatly appreciated.