How to Install OBS Studio in Ubuntu VPS?
OBS Studio is a powerful free software that turns your computer into a broadcast studio.
This live-streaming tool enables Linux users to capture high-quality video and audio, mix elements like your screen, webcam, and microphone, and even add overlays and editing in real-time.
To install OBS Studio in Ubuntu, you can use any of the below methods according to your system preferences:
- Ubuntu Repository: using
sudo apt install obs-studiocommand after updating your system. - OBS Project PPA: using
sudo apt install obs-studio -ycommand after adding OBS Studio PPA. - Flatpak command: using
flatpak install flathub com.obsproject.Studio -ycommand after enabling flathub.
Regardless of the method, it’s recommended to restart your VPS after installation.
Prerequisites to Install OBS Studio in Ubuntu VPS
To Install the Open Broadcaster Software Studio in Ubuntu VPS, your machine needs to meet all the below specifications:
- A Linux VPS running Ubuntu.
- A non-root user with
sudoprivileges.
Method 1: Install OBS in Ubuntu VPS Using APT
Since OBS studio is available in the Ubuntu repositories, you can install it from the Ubuntu package server.
To do this, open the terminal and follow the below steps:
Step 1: Update Ubuntu
Run the commands below to keep your Ubuntu system updated:
sudo apt update
sudo apt upgrade
Step 2: Install OBS Studio
Use the following command to install Ubuntu VPS Live Streaming Software:
sudo apt install obs-studioOnce you run the installation command mentioned above, you may be prompted with a y/n option. Press y and then Enter to proceed with the process.
When the OBS studio installation is complete, you can begin using OBS studio.
Step 3: Launch OBS Studio
To launch the OBS studio app in your Ubuntu VPS, run:
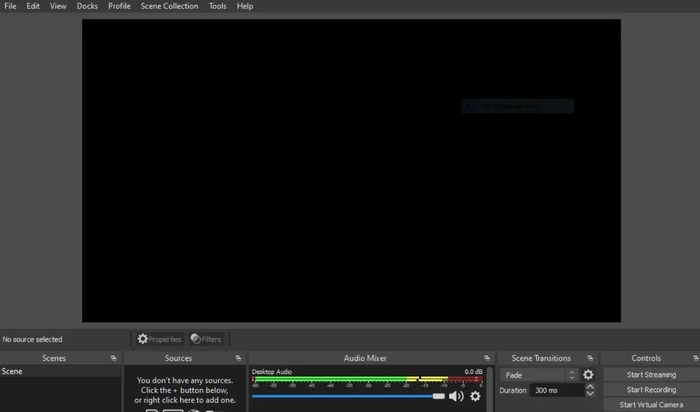
sudo obsOnce you see the below screen, ensure you have successfully installed the OBS Studio in Ubuntu VPS.
Method 2: Install OBS in Ubuntu VPS Using Official PPA
Using Ubuntu repositories (Previous method) might have older OBS Studio versions.
Official PPAs offer the latest updates directly from the OBS Studio team, ensuring you get the newest features and bug fixes.
To use this method, open your terminal and follow the below steps:
Step 1: Import OBS Studio PPA to Ubuntu
Importing the PPA containing the most recent stable version of OBS Studio, which is kept up to date by the OBS Project team, is the first step in this technique.
Run the command below to add it:
sudo add-apt-repository ppa:obsproject/obs-studio -yStep 2: Add the Unstable Version
Ubuntu repositories prioritize stability. By adding the OBS Studio PPA, you gain access to potentially unstable features before they hit the main repositories.
If you import the unstable version and have problems with the unstable build, you can get the most recent stable version, as both the unstable and stable versions install using the same procedure:
sudo add-apt-repository ppa:obsproject/obs-studio-unstable -yRun an APT update command to bring your package management up to date with the new repository after adding the preferred PPA:
sudo apt updateStep 3: Install OBS Studio on Ubuntu VPS
Now, you can run the command below to install the latest stable version of OBS Studio on Ubuntu VPS:
sudo apt install obs-studio -yYou are prepared to utilize OBS studio after the installation process is complete.
Step 4: Launch OBS Studio
Since you used a terminal to install OBS Studio in this method, you can also run the command below to launch OBS Studio directly:
sudo obsMethod 3: Install OBS in Ubuntu VPS via Flatpak
Flatpak lets you install OBS Studio as a self-contained package, independent of the system’s main packages.
This simplifies installation and updates, but may not offer the very latest version or integrate as seamlessly with your system.
If you prefer to use this method, open your terminal and follow the steps below:
Step 1: Enable Flathub
Run the command below to enable Flathub for OBS on Ubuntu VPS and add the Flathub repository to your Flatpak configuration:
sudo flatpak remote-add --if-not-exists flathub https://flathub.org/repo/flathub.flatpakrepoStep 2: Install OBS Studio
Once the Flathub is enabled, use the following command to Install OBS Studio on Ubuntu:
flatpak install flathub com.obsproject.Studio -yNow the most recent version of OBS Studio is installed on your Ubuntu VPS from the Flathub repository.
Step 3: Launch OBS Studio
While you use the Flatpak method to install OBS studio in Ubuntu VPS, you can run the command below to launch this free streaming software:
flatpak run com.obsproject.Studio- Note:
Also, you can launch OBS Studio on Ubuntu using GUI method if you prefer. To do this:
- Open the application menu (either “Show Applications” or “Activities“)
- Search for “OBS Studio.” Click the icon to start the program.
How to Uninstall OBS Studio on Ubuntu VPS?
Based on your preferred Installation Method, you can remove OBS Studio from Ubuntu:
1. Uninstalling OBS Studio from APT Package Manager
If you installed OBS Studio through the traditional APT package manager, run the following command to remove the software:
sudo apt remove obs-studioThis command instructs APT to remove the obs-studio package and its associated files from your system.
2. Removing OBS Studio using PPA (Personal Package Archive)
If you used a PPA to install OBS Studio, it’s good practice to remove it after uninstalling the software.
This helps maintain system cleanliness and avoids potential conflicts in the future.
sudo add-apt-repository --remove ppa:obsproject/obs-studio -yNote: Replace ppa:obsproject/obs-studio with the exact PPA name you used during installation if it was different. The -y flag ensures automatic confirmation for the removal process.
- Uninstalling Unstable Builds:
If you chose the “unstable” version of OBS Studio from a dedicated PPA, you’ll need to remove that PPA as well, in addition to the main PPA mentioned above:
sudo add-apt-repository --remove ppa:obsproject/obs-studio-unstable -y3. Uninstalling OBS Studio using Flatpak Package
If you installed OBS Studio using the Flatpak package manager, the removal process is simpler. Simply run:
flatpak uninstall com.obsproject.StudioThat’s it! If you ever decide to use OBS Studio again, you can easily reinstall it using the same method you used initially.
Which method is best (APT, PPA, Flatpak)?
It’s up to you and your system preferences to use the explained methods. To clarify more, consider:
- APT offers the most stable version from the official Ubuntu repositories.
- PPA (Personal Package Archive) provides access to newer versions with potential bug fixes and features, but might have slight instability.
- Flatpak simplifies installation and updates as a self-contained package, but may not offer the latest version and might not integrate as seamlessly with your system.
How do I know which method I used?
Check your package manager history or search for the software using the respective commands:
apt list --installed | grep obs-studio(APT)- Look for installed PPAs in your software sources.
flatpak list | grep obs-studio(Flatpak)
How to troubleshoot “Package not found” error during installation (APT/PPA):
Check for:
- Update package lists:
sudo apt update - Ensure the PPA is added correctly (refer to installation guides for the specific PPA).
Why to Use OBS Studio? [Best Advantages]
Free and Powerful: Unleash your inner content creator with OBS Studio, a free yet powerful live streaming and recording software for your Ubuntu VPS.
Go Beyond Screen Capture: This versatile tool lets you mix and edit audio and video sources in real time, offering more than just basic screen recording.
Professional Touches: Enhance your content with OBS Studio’s user-friendly interface, allowing you to add professional-looking overlays to your live streams or recordings.
Empowering Creators: Whether you’re a seasoned broadcaster or just starting your journey, OBS Studio empowers you to create high-quality content.
Conclusion
After installing OBS Studio on Ubuntu VPS, you are ready to explore capturing high-definition screens, mixing audio and video sources, and adding overlays for a professional touch.
With its powerful features and user-friendly interface, OBS Studio empowers you to create captivating live streams, record engaging tutorials, or simply showcase your content in a whole new way.