How to Install CloudLinux 7.9 [Complete Guide]
CloudLinux is the optimized version of CentOS for Webhosting. If you have web hosting and you have got many hosting accounts on a server, CloudLinux is the best operating system that you can use to manage your accounts. As you know, it is not possible to supply the security of each account on a server unless they are all yours. if they are not, each of them can easily become infected for any reason and infect others.
Also if some of them have over usage, your server will face different issues and one of them is slowness. The slowness of the whole server will slow down all of the websites and it will make your clients angry and unhappy. To prevent this, CloudLinux provides features such as LVE manager and CageFS to provide dedicated resources to each account and to keep each account in a cage to avoid infecting other accounts.
If you have CentOS installed, it is not necessary to uninstall it and install CloudLinux from zero. You can easily convert CentOS to CloudLinux but in this tutorial, we will check how to install CloudLinux from zero on a Linux VPS Server.
Pre-Requirements Of CloudLinux Installation
- A Linux VPS Server With at least 1 GB of RAM
- ISO file of the CloudLinux OS Version 8.4.2
- An IP based license or a trial license code
Note: We are installing CloudLinux on a VPS. If you are installing it on a VMware workstation or your own desktop, so you have access to the console but if you are using a VPS, ask your provider to mount the ISO file and give you console access. If you have a dedicated server, you can ask for IPMI access to mount the ISO file and to have console access.
Installing CloudLinux
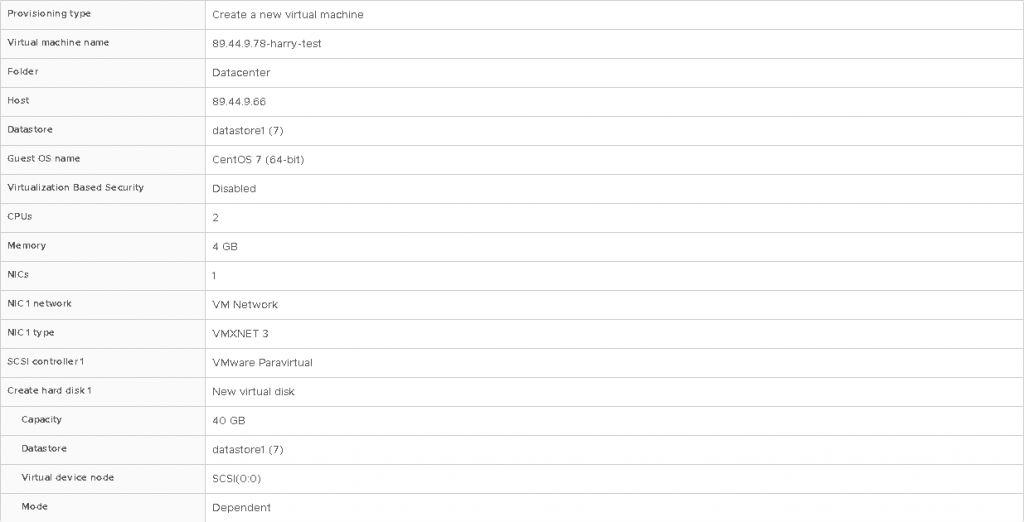
If you create the virtual machine yourself, the configuration should be something like this.
Note: When you wish to buy VPS, you should consider how many resources do you need to install CloudLinux and your control panel properly without facing any issues.
Hardware Requirements
After installing CloudLinux, you will have to install cPanel so you should consider the hardware requirements that cPanel needs. Please check the following table for more details.
Note: CloudLinux 7.9 needs the resources as same as CentOS 7 for cPanel.
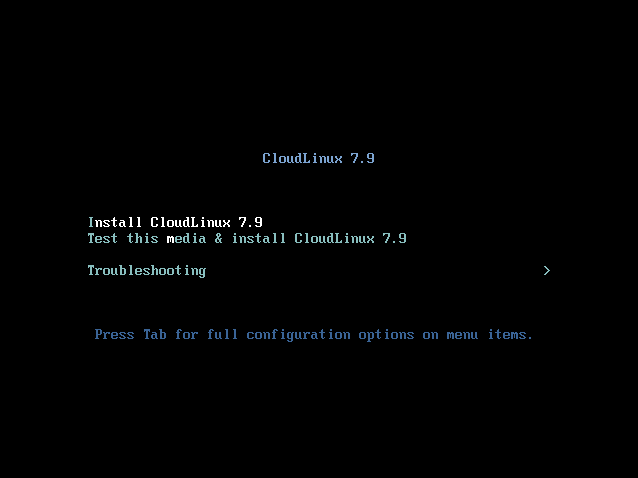
Step 1 – Choose To Install Or Test CloudLinux
In the first step of the installation of CloudLinux, you will be asked to install CloudLinux or to test it. Choose install CloudLinux 7.9 and press Enter button and wait until the script load.
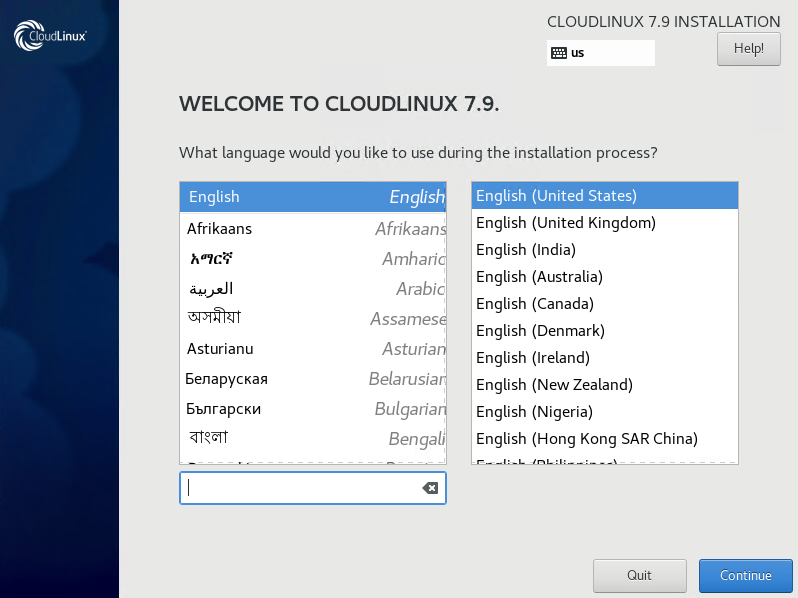
Step 2 – Choose Language
Choose the language that you wish to use during the installation and press Continue.
Step 3 – Partition Configuration
In this section, you are asked to choose the partitioning type that you wish to have. Also, you have an error that says you have to complete the items marked before you can proceed to the next step.
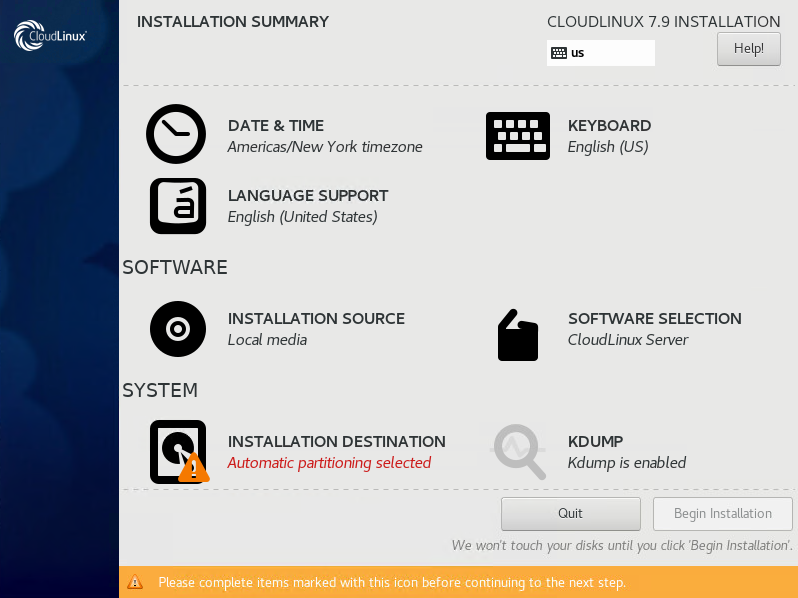
Click on the “Installation Destination” to choose the partitioning type. Consider that you can choose automatic partitioning but it is not recommended especially because we will install cPanel on our CloudLinux OS later.
So put the partitioning type on “I will configure partitioning” and press Done.
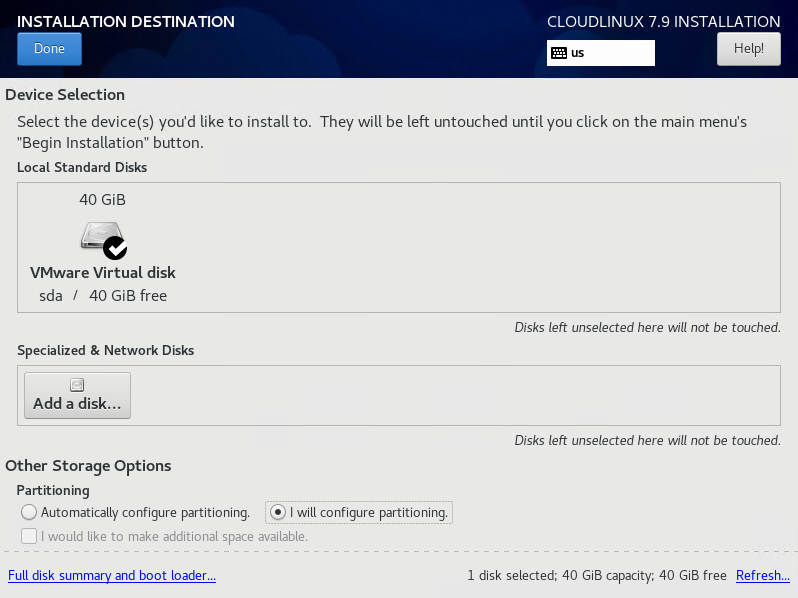
As you can see, I have 40 GB of storage. In this step, we will create 7 partitions. Consider that the amounts that I have used are optional and you can use different amounts according to your storage amount.
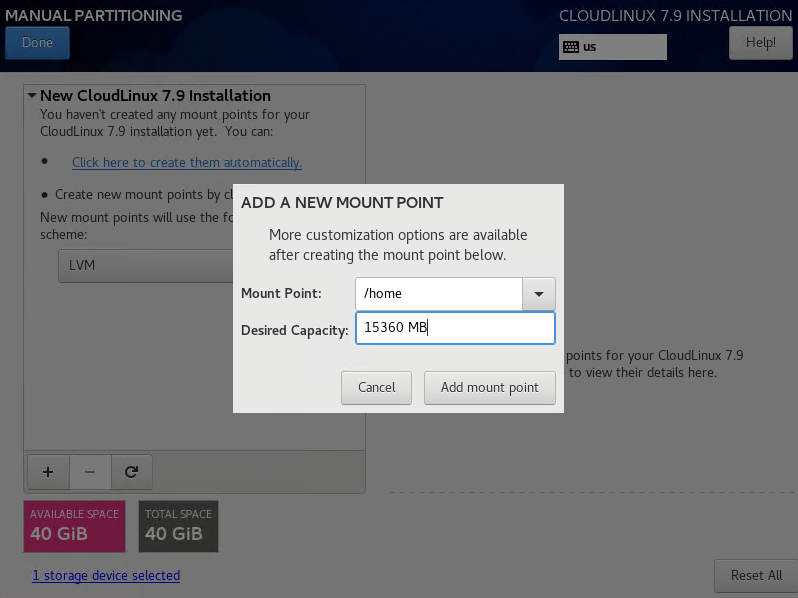
In the next section, click on plus + button to add a new mount point. Create all of the partitions one by one. Consider choosing each mount point that you can see in the list and once they were finished, you should add new mount points by yourself which are not in the list of mount points like /usr and /tmp mount points.
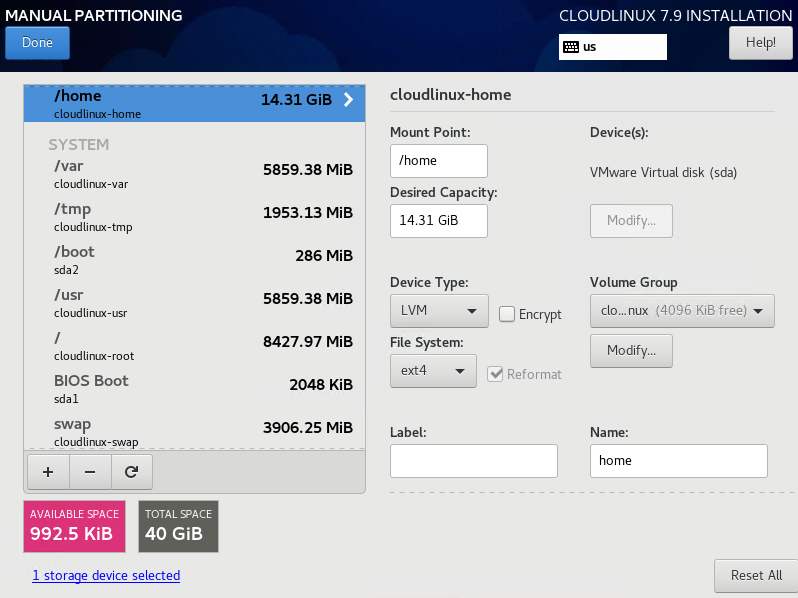
Once finished, you will have a view like the following image.
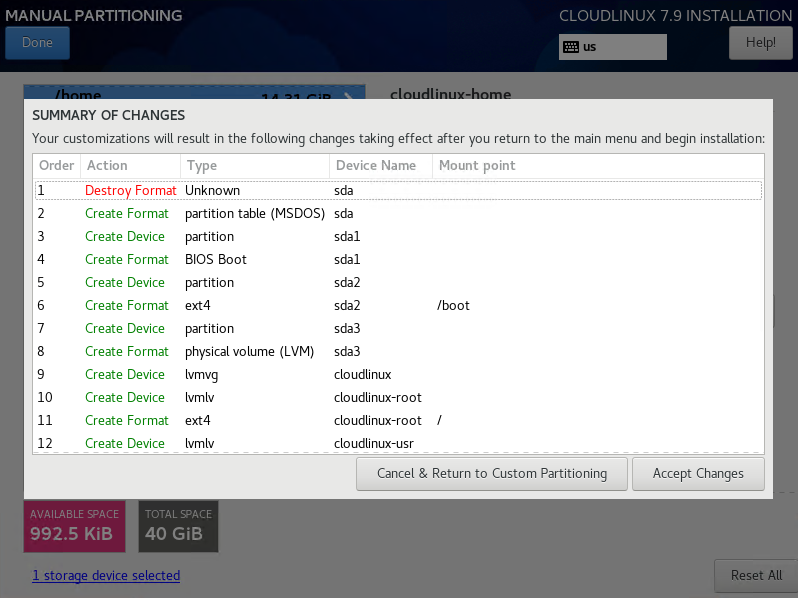
In the next section, you will have a summary of the changes that you made, click on accept to complete the changes.
Step 4 – Network Configuration
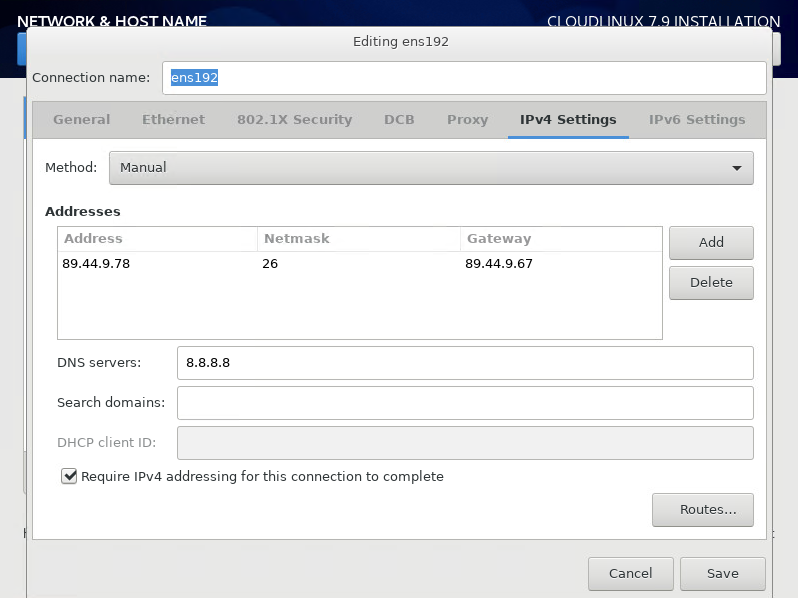
Now we are back again to the main page. Scroll down and click on Network & Hostname to configure the network of our CloudLinux Server. Here I have a Linux VPS Server with static IPV4 so I will configure manual IPV4. You can change your configuration according to your situation.
Choose Configure, navigate to the IPV4 section, click on Method and choose Manual then choose the Add option to add an IP address. Then a DNS Server and tik the option to “Require IPV4 addressing for this connection to complete” and click Save.
Important Note: Also In General Tab, Tik the option “Automatically connect to this network when it is available“.
Now you will be back on the same page. Turn On the ethernet by dragging Off To On on the up-left section of the page and also choose a hostname for your server and click Done. By doing this you will go back to the first installation section. Now, we are done so we can choose to Begin the Installation.
Step 5 – Installation Process
Now the installation is under process. Meanwhile, you can see 2 options which are Root Password And User Creation. Choose a strong password for your root account and another user creation is optional because the Root user will be active from the first.
Once the installation was finished, you will have a message that says the installation is completed and you should reboot the server. Reboot the server and wait for it to come up. Put the username to login to the server as root and you have set the password when installing the server.
Step 6 – License Activation
If you have an IP-based license, it is not needed to activate the license but if you don’t have, you should get a license code from CloudLinux and run the following. Consider putting your own license key instead of <activation key> in the following command.
/usr/sbin/rhnreg_ks --activationkey=<activation key> --forceAs A Summary
As you can see, the installation of CloudLinux was easy and it was just like CentOS. I wish you have enjoyed this post, if you faced any issues during the installation, just let me know in the comments section and I will help to resolve it as much as I can; thanks for reading this article.