How Can I Hide Files and Show Hidden Files in Ubuntu
Despite regular commands in Linux which are visible, several hidden files are not visible by default. The hidden files are used for storing configuration settings, system information, or user preferences. In this article, you will learn How to Hide Files and View Hidden Files in Ubuntu. Hidden files usually start with a dot, and they are not shown by Linux when you list the contents of a directory. Many of the sensitive system files in Linux are hidden by default. System or application files are typically hidden to prevent unintentional changes or protect the privacy of the user.
For example, Linux .bash_history file is a hidden file. A list of every command entered into the Bash shell is contained in this file. It’s hidden since you shouldn’t need to see a system file unless you’re debugging an issue. Join us with this guide to know the most used ways to access your hidden files and folders and view hidden files in Ubuntu.
Should you View Hidden Files in Ubuntu?
There are a few reasons why listing hidden files in Linux might be useful. You could want to examine or update a configuration file, for instance, that is usually hidden. You might also need to access secret log files if you’re trying to diagnose a problem with your system. To safeguard the user’s privacy, you can also want to list hidden folders in Linux. Sensitive information that the user doesn’t want others to see may be present in some hidden files.
For instance, the .bash_history file, which was previously described, holds a list of every command input into the Bash shell. All of your command history would be visible to anyone who gained access to this file.
Just follow this tutorial to review all useful methods to Hide Files and View Hidden Files in Ubuntu.
Prerequisites to Hide Files and Show Hidden Files in Ubuntu
To let this tutorial works correctly, provide the options below and move on.
- A Server running Ubuntu VPS.
- A non-root user with
sudoprivileges. - Access to a terminal window/command line.
Most Used Commands to View Hidden Files in Ubuntu
Previously, you have learned Linux Commands. But how to hide and show hidden files in Ubuntu? Let’s go through this article to review all related commands that help you show hidden files.
1. Show Hidden Files Using ls Command
Your current directory’s contents are listed by the ls command. Already, you are familiar with the ls command to List File & Directory. All files, even hidden files, are listed using the -a switch. Run the following command to display all files in a directory, including hidden ones:
ls –aAlso, you can use the command below to list hidden and regular hidden files in a different directory other than the one where you are currently working.
ls –a /etcYou may not be interested in files other than those that are hidden in particular circumstances. So, you can run the following command to show exclusively hidden files on Ubuntu and view hidden directories in the path specified.
$ ls -dl .[^.]* <path>2. Show Hidden Files Using find Command
To view hidden files in Ubuntu, you can use the find command:
$ find / -name ".*" 2> /dev/nullAlso, you can use the command below to show hidden files in the current working directory:
$ find . -name ".*" -maxdepth 1 2> /dev/nullAnd, to show hidden directories in the current working directory, type:
$ find . -name ".*" -maxdepth 1 -type d 2> /dev/null3. Show Hidden Files Using dir Command
You can use the dir command to view directory content on Ubuntu and display hidden files in a directory.
$ dir -a <path>
$ dir -A <path>
When you run the “dir” command with the “-a” or “-A” option, hidden files will be displayed, and implied files and directories will be excluded.
Note: The dir command, it should be noted, also displays hidden directories that might be present along the path you are looking for. Similar to the ls command, you may select to ignore all other files and just display hidden files in a specific folder.
$ dir -dl .[^.]* <path>4. Show Hidden Files Using tree Command
The tree command is a helpful tool for showing a given path’s directory structure in a tree-like fashion. By including the -a option, you may also use it to display hidden folders on Linux. Use the tree to display hidden files in your current directory:
tree -aIf you want to use the tree to display hidden files in a different directory, add the path after the command:
tree -a /path/to/directoryThe parent directories and hidden files should be identified by a dot (.) at the start of their names.
5. Show Hidden Files Using stat Command
Another method to view hidden files in Ubuntu is the stat command. Detailed information on a file or file system, including size, permissions, ownership, timestamps, etc., is displayed by the stat command.
To display hidden files in your current directory, run:
stat .*Any file that begins with a dot is compatible with the.* pattern. This will reveal files that are obviously hidden. Stat requires the path to be given before the pattern in order to display hidden files in a separate directory:
stat /path/to/directory/.*How to Show Hidden Files Using GUI
To View hidden files in Ubuntu, you can use the simple method of working with graphical interfaces. If you are comfortable using GUI, follow the steps below:
- Browse to your considered directory.
- Press Ctrl+h.
Note: If pressing Ctrl+h doesn’t work, select Show Hidden Files from the View menu. In more recent Ubuntu settings, Ctrl+h is functional. It might not function if you’re using an outdated or different version.
Show Hidden Files Using GNOME Desktop Environment
If you prefer to run a GNOME desktop environment, hide files when you are browsing your Ubuntu system with a file explorer.
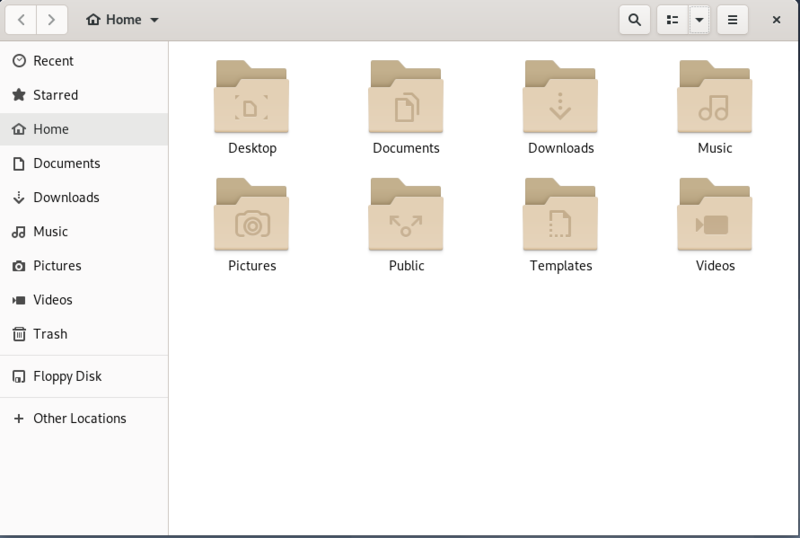
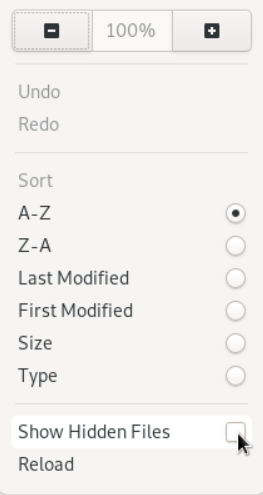
Click the tiny bottom arrow in the top-right corner of the screen to reveal hidden files via the GNOME interface. Make sure to select “Show Hidden Files” from the small menu that displays.
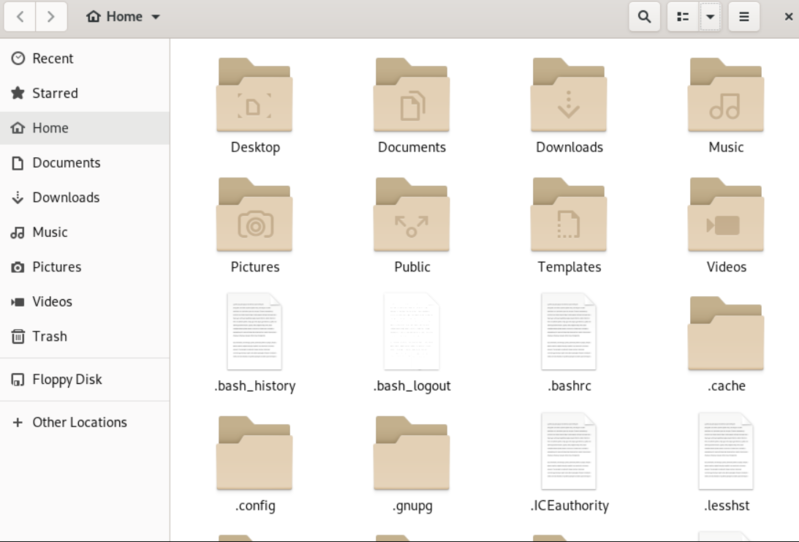
So, you will see the hidden files and folders will be displayed in File Explorer.
Multiple Methods to Hide Files in Ubuntu
So far, you reviewed the most used commands and methods to View Hidden Files in Ubuntu. In this part, you will review multiple methods to hide files in Ubuntu. In order to hide your considered file or directory, you can use the below techniques.
1. Hide Files Using mv Command
To mark a file as hidden, run the command below to create a test file:
touch test.txtRelocate the file under a new filename to hide it. The new filename begins with a period (. ), indicating that it is hidden:
mv test.txt .test.txtUse the command below to display the contents of the current directory. In this way, you can verify whether the file is hidden.
lsTo list the content including hidden files, type:
ls –a2. Hide Files Using GUI
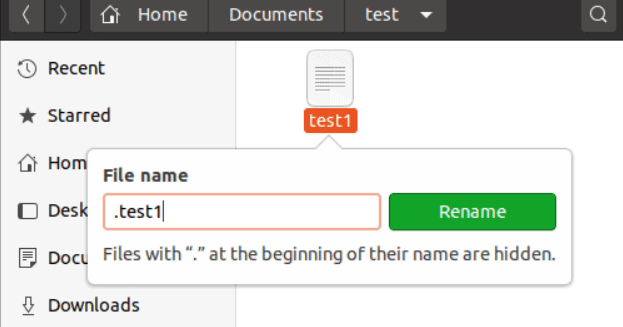
To hide a file, you can use a graphical interface. Follow the below steps to take this simply.
- Right-click your considered file to hide.
- Select Rename.
- By adding a period to the filename, the file will be hidden.
Note: To hide a directory, you can do the same process.
3. Hide Multiple Files and folders Without Renaming Them
This method works for GUI only. With the help of this clever little hack, the file manager on your desktop Linux computer will let you conceal a number of files and folders from the default view. When you close and reopen your file manager, folders that you have added to a new file with the extension “.hidden” will by default be hidden from normal view.
Remember that only the directory you are now in is compatible with this method. If a directory is nested, it won’t work. To hide files and directories, create a .hidden file in any directory.
Note: The Nautilus file manager in GNOME supports this technique. In other file managers, it might or might not function.
Create Password-Protected Hidden Files
Now that you learned how to Hide files in Ubuntu, Let’s continue learning how to create Password-Protected, Hidden File From the Command Line.
Firstly, create a new text file to create a hidden and password-protected archive file:
touch test2.txtTo compress and encrypt that file, run:
zip ––encrypt test2.zip test2.txtA password will need to be entered and verified for the file. Then, use the ls command. The test2.zip should appear in the file list.
Now, you should set the .zip file to hidden. So, type:
mv test2.zip .test2.zipTo verify the file is hidden, use ls and ls –a.
How to Use GUI to Create a Hidden, Password-protected File
In this part, you will learn How to Create a Hidden, Password-Protected File From the Graphical Interface. To encrypt a file in the graphical version of Linux, follow the below-required steps:
1. Open the File Manager to your home directory.
2. Right-click an empty area and then click New Folder/Directory.
3. Name the folder test3 and click Create.
4. Click Activities > Search > type archive manager > launch the Archive Manager.
5. Drag and drop the new test3 folder into the Archive Manager window.
6. Do you wish to create an archive with these files, the system will prompt you to answer. Click Create Archive.
7. The filename in the Create Archive dialog box must be test3. Click the drop-down to the right and choose the.zip format.
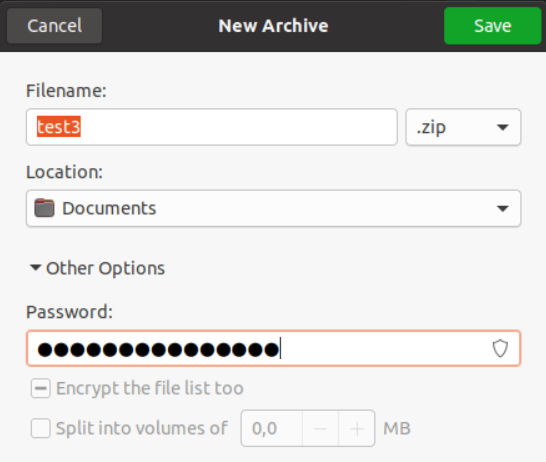
8. Click Other options near the bottom. Type a password to use for your archive, then click Save.
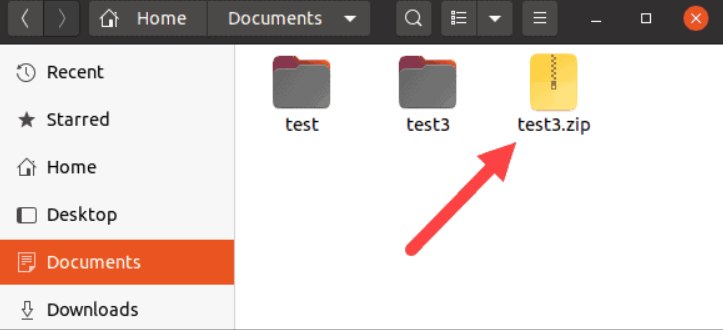
9. Close the Archive Manager. You should now see a test3.zip file in the home directory.
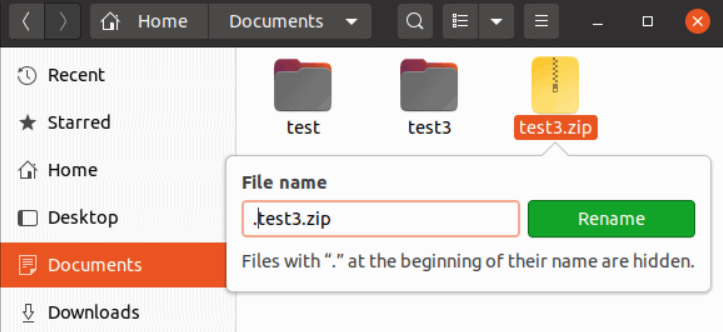
10. Right-click the test3.zip file, click Rename, and add a period at the beginning of the filename.
FAQ
How to show hidden files using CLI in ubuntu?
There are several methods to hide files and show hidden files in Ubuntu. One of them is CLI which is explained in this guide. Refer to ''Most Used Commands to View Hidden Files in Ubuntu'' and review ''ls'', ''find'', ''dir'', ''stat'', and ''tree'' commands that are used to show hidden files and folders in Ubuntu.
How to show hidden files and folders in Ubuntu?
The Ubuntu keyboard shortcut "Ctrl + H" can be used to display hidden files. In the current file browser window, this will turn on or off the visibility of hidden files. As an alternative, you can list all files and folders, even hidden ones, by using the command line and the "ls -a" command.
How to hide a file in Ubuntu?
In Ubuntu, you can rename a folder and start the name with a dot (".") to make it invisible. The folder will become hidden as a result, and unless hidden files are revealed, it won't show up on the file browser. The command "mv folder name.foldername" can be used on the command line to rename and hide the folder.
Is it possible to show hidden files in Ubuntu permanently?
You can open the file browser and use the "Show Hidden Files" option from the "View" menu to always display hidden files and folders in Ubuntu. Until you choose to turn off the feature, this will always make hidden files and folders visible in the file browser.
Conclusion
In this article, you learned How to Hide files and View hidden files in Ubuntu. By reading this guide, you must know how to see or hide files in Ubuntu. Linux should now allow you to show and hide files. If you need to locate configuration files, these commands can be particularly helpful. Additionally, hidden files may contain logs, some application caches, and web browser data.
If you know some commands or methods to hide files in Ubuntu or view hidden files in Ubuntu, then the comment section is all yours.