Install cPanel/WHM on Rocky Linux Server
Install cPanel/WHM on Rocky Linux easily by preparing your server, disabling conflicting services, and running the official installation script to manage websites efficiently.
🤖AI Overview:
Installing cPanel/WHM on Rocky Linux requires preparing the server by updating packages, installing necessary tools like Perl and Curl, setting a proper hostname, and disabling services that may conflict with cPanel. The installation script is then executed, enabling robust web hosting control on a stable Rocky Linux server compatible with Red Hat Enterprise Linux.
What are the reasons to use Rocky Linux?
CentOS has long been a reliable and stable choice for servers. With the ending CentOS8 life cycle on December 31, 2021, the CentOS community has Changed and many distributions have been developed as alternatives to CentOS8, Rocky Linux being one of them. As you know and we have already talked about Rocky Linux, Rocky Linux is a stable, open-source, free, and user-friendly operating system developed based on RHEL in 2021.
Rocky Linux is an RHEL emulator that is compatible with the binary system and is currently supported by large and powerful financial sponsors. The purpose of Rocky Linux development is to satisfy CentOS8 users and choose Rocky Linux as an ideal replacement for CentOS8, so by improving the features of CentOS, it tries to attract the attention of Linux users.
As we mentioned at the beginning of the article, cPanel can be installed on RHEL derivatives, as long as CentOS7 and CentOS8 were supported, the best operating systems to install and use cPanel were CentOS. By stopping CentOS8 and upgrading to CentOS Stream, users hoped to use cPanel on CentOS Stream. With the announcement of cPanel about the lack of support for CentOS stream, users were once again looking for a compatible operating system to install cPanel, till they found Rocky Linux which is one of the compatible and stable choices in this field.
Prerequisites for installing cPanel on Rocky Linux
- Linux VPS with Rocky Linux operating system
- 1 GB of RAM
- 20 GB of storage space
- Static IPv4
- 1 core CPU 1.1 GHz
- Connecting to Linux VPS through SSH (You can connect to Linux VPS using the Putty program)
- Having a user account with Root/Sudo privileges
Steps to install cPanel on Rocky Linux
Installing cPanel on Rocky Linux has simple steps, by following the steps that we will teach later, you can manage your web server and hosting services efficiently with cPanel facilities.
Step 1: Updating Rocky Linux server repository packages
Before installing any program, we recommend updating the Rocky Linux server resources and repositories by running the following command:
yum update -yIf you are asked to confirm the update process, type Y and press Enter.
Step 2: Installing Perl
cPanel is written based on the Perl programming language, so installing Perl on a Rocky Linux server is a prerequisite for installing cPanel on Rocky Linux. To install Perl on Rocky Linux, run the following command:
yum install perlStep 3: Installing Curl
If Curl is not installed, the required cPanel installer script will not be installed, so install Curl using the following command:
yum install curlStep 4: Adding hostnames
To use cPanel, you must enter the hostname in Fully Qualified Domain Name (FQDN) format. So enter the following command:
hostnamectl set-hostname myserver.mydomain.comNote: In the Mydomain and Myserver fields, replace the hostname and domain you want.
Step 5: Disabling Network Manager Service
Cpanel is incompatible with Network Manager Service, which is implemented to manage the connection of computers, so to install cPanel, you need to ensure that Network Manager Service is disabled:
service NetworkManager stop
chkconfig NetworkManager off
Step 6: disabling SELinux and firewall Temporarily
SELinux is a Linux kernel security module that supports access control security policies through a mechanism. Therefore, to avoid problems and incompatibility, it is recommended to temporarily disable SELinux before installing cPanel:
cd /home && curl -o latest -L https://securedownloads.cpanel.net/latest && sh latestThe second way to disable SELinux is to edit the SELinux configuration file using any text editor (preferably VI). To do this, change the content of the SELinux configuration file by running the following command and using a text editor:
vi /etc/selinux/configThen by pressing the I and C buttons, add the desired codes in the content of the SELinux configuration file and change the SELINUX parameter from Enforcing to disabled:
# This file controls the state of SELinux on the system.
# SELINUX= can take one of these three values:
# enforcing – SELinux security policy is enforced.
# permissive – SELinux prints warnings instead of enforcing.
# disabled – No SELinux policy is loaded.
SELINUX=disabled
# SELINUXTYPE= can take one of these three values:
# targeted – Targeted processes are protected,
# minimum – Modification of targeted policy. Only selected processes are protected.
# mls – Multi Level Security protection.
SELINUXTYPE=targeted
Then save the SELinux configuration file by pressing the Esc button and typing wq to apply the changes.
In addition to disabling SELinux, to avoid problems when installing cPanel, it is better to temporarily disable the firewall and use a third-party firewall. To temporarily disable the firewall in Rocky Linux, run the following command:
iptables-save > ~/firewall.rules
systemctl stop firewalld.service
systemctl disable firewalld.service
Step 7: Installing cPanel with a 15-day trial license
By using the command that we will provide below, you can use the features of cPanel with a trial license and do not need to buy a license.
cd /home && curl -o latest -L https://securedownloads.cpanel.net/latest && sh latestYou may have to wait for approximately 1 hour to complete the installation process of WHM /cPane with a trial license. Of course, the waiting time depends on the speed of your network.
Step 8: enabling Network Manager Service
After installing cPanel, re-enable Network Manager Service because computer connections require Network Manager Service. For this purpose, run the following command:
service NetworkManager start
chkconfig NetworkManager on
To apply your changes, reboot the Rocky Linux server using the following command:
rebootAfter restarting the Rocky Linux server, enter the cPanel management panel by using a browser and typing the address https://serverIP:xxxx.
It should be noted that you must replace your IP address in the login address of the cPanel management panel.
Then type your server password for the cPanel login password and Root username for the cPanel login username.
Step 9: License activation for Cpanel/WHM
You have two ways to enable the license for cPanel: 1. Using a free trial license 2. Buying a paid license.
Free trial license activation for Cpanel/WHM
cPanel 15-day free license activation requires configuration, so log into your cPanel Store account.
Note: If you do not have a cPanel Store account, you must register.
- Log in to the cPanel management panel.
- Log in to your account.
- Type your server username and password to enter the WHM panel.
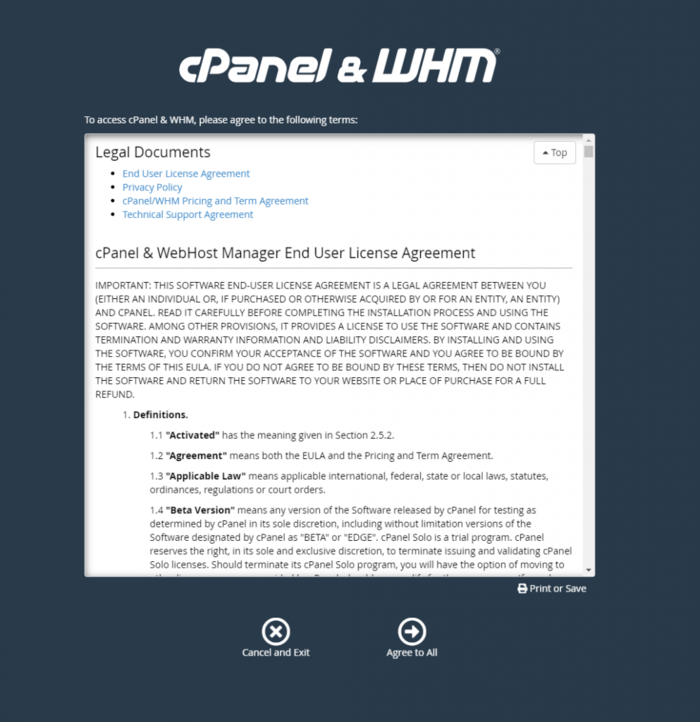
- After reading the conditions, accept them.
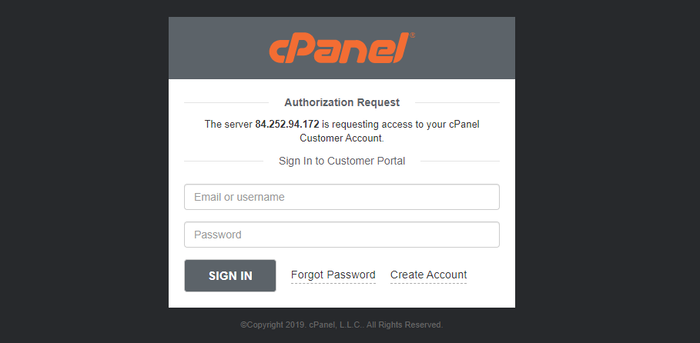
- You will be faced with a cPanel Store account login page, if you already have an account, you can enter by entering your username and password, otherwise, this is where you can create an account for cPanel Store. Assuming you do not have an account, continue the steps to create an account and select the log in option.

- In the window that opens, select the Create Account option to create a cPanel Store user account.
- Enter your email address, after agreeing to the terms of use of cPanel, select the Create Account option.

- To specify the password for the cPanel account, you will receive an email in the email inbox you set for WHM.
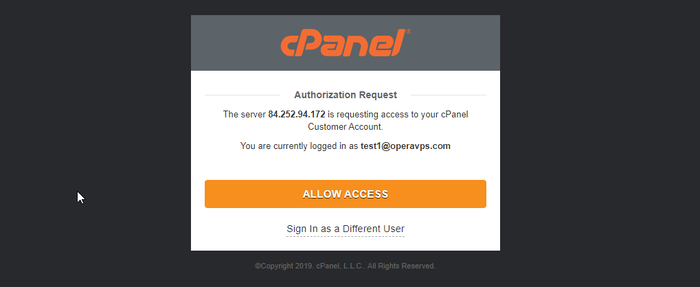
- Select the ALLOW ACCESS option to link your server’s IP address to the email address you have specified.
If you create a user account in the browser you configured WHM and enter your email account, the previous step is applicable, but if you do not use the same browser to enter the email, you can specify a password by clicking on the link you received.
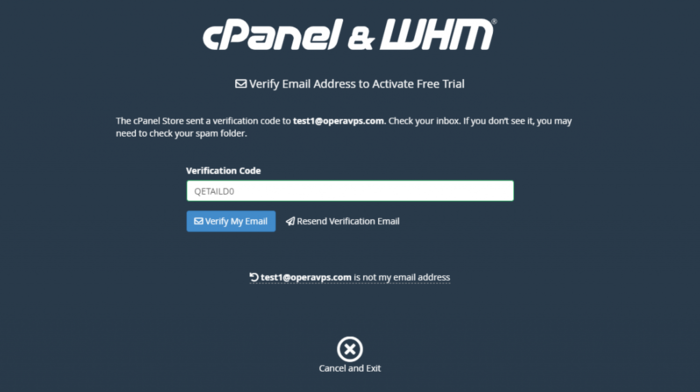
- Enter the code that was sent to your email.
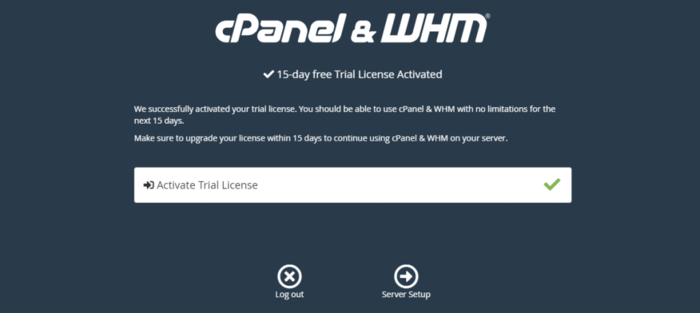
- Displaying the following page and the phrase 15-day free Trial License Activated informs about the activation of the cPanel trial license. Then go to the settings section.
- To be notified of possible WHM errors, enter an email address.
- To connect your domain or subdomains to the WHM server, type the name servers.
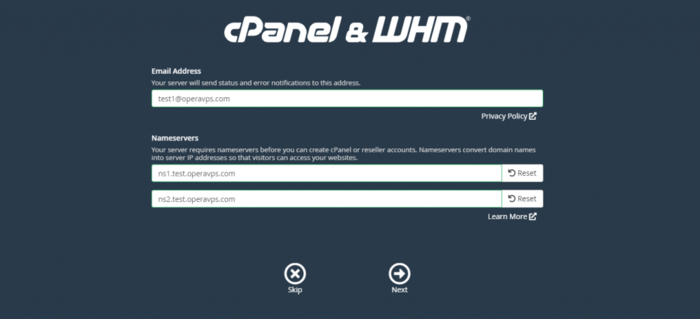
- enter these as child name servers in your domain control panel.
Finally, you have successfully activated your free trial license for cPanel.
After installing WHM and the necessary configurations, reboot the server to apply your settings.
Activation and purchase of a paid license
To order a cPanel license, visit the Opera VPS licenses page.
Then confirm the activation of the license, from the cPanel License Verification site.
Update the desired license by running the following command on the Rocky Linux server:
/usr/local/cpanel/cpkeycltConclusion
This guide has walked you through the comprehensive process to install cPanel/WHM on Rocky Linux, an ideal combination for managing web hosting environments. With cPanel’s powerful features and Rocky Linux’s stability, you can efficiently manage your websites, emails, databases, and security settings. By following these clear steps, even beginners can complete the installation and initial setup smoothly.
If you have any questions or encounter challenges during installation, you can seek help from online forums, the cPanel community, or your hosting provider. Installing cPanel on Rocky Linux opens up a robust platform for managing your hosting services with confidence.
FAQ
2. How do I begin installing cPanel/WHM on Rocky Linux?
Start by updating your system, installing Perl and Curl, setting your hostname, disabling Network Manager, SELinux, and firewall temporarily, then running the cPanel installation script.
3. Can I install cPanel without disabling SELinux or Network Manager?
Disabling SELinux and Network Manager during installation avoids conflicts; they can be re-enabled and configured later.
4. How long does the installation take?
It usually takes about an hour, depending on your internet speed and server performance.
5. Is Rocky Linux compatible with cPanel/WHM?
Yes, Rocky Linux is a stable RHEL-based distribution fully compatible with cPanel/WHM.
6. How do I activate my cPanel license after installation?
You can activate a free 15-day trial via the cPanel Store or purchase a license from authorized providers, then link your server IP.
7. What if I encounter errors during installation?
Check server logs, ensure prerequisites and configurations are correct, and validate that SELinux and Network Manager are disabled during installation.
8. How do I access the cPanel/WHM interface?
Open "https://your-server-ip:2087" in a browser and log in with your root username and password.
9. Should I re-enable Network Manager and firewall after installation?
Yes, re-enable these services and configure your firewall for security after setup.
10. Why choose Rocky Linux for cPanel/WHM?
Rocky Linux offers stability, community support, and compatibility, making it an excellent choice for cPanel web hosting environments.