Install Monit on Linux
Monit is a free and open-source tool that enables Unix users to manage and monitor their systems. With automatic maintenance and repair, this small utility executes helpful actions when something goes wrong. In this article, you will learn How to Install Monit on Linux to Monitor a Server.
When you buy Linux VPS, you must be able to use Monit since most Unix distributions include it. But if not, follow the steps of this tutorial to learn how to install and configure Monit on your Linux.
What is Monit & Why should we Use it?
As a system administrator, you will find Monit a very helpful tool since it monitors and manages processes, files, directories, checksums, permissions, and filesystems automatically. Also, on Unix/Linux-based systems and providers, it manages and monitors services like Apache, Nginx, MySQL, FTP, SSH, and SMTP. Monit includes a simple HTTP(S) interface that you may use to browse the Monit server and view the status of all services that are being tracked. You can start, stop, and restart processes as well as disable or enable service monitoring through the web interface.
A process can be started by Monit if it is not already running, restarted if it is not responding, and stopped if it consumes too many resources. Additionally, Monit may be used to keep an eye on timestamps, checksum, file size, and other changes in files, directories, and filesystems. You can use Monit to track the TCP/IP port, server protocols, and ping of distant hosts. Monit maintains its own log file and notifies users of any urgent error circumstances and recovery progress.
Previously, you have learned about the Load Average in Linux. Install Monit on Linux allows you to keep an eye on localhost’s system resources in general, including average load, memory consumption, and CPU usage.
Tutorial Install and Setup Monit on Linux
This content presents the Monit installation and configuration on RHEL-based and Debian-based Linux distributions, So, CentOS, RHEL, Fedora, Ubuntu, and Debian users can use the following instructions. Let’s go through the steps of this guide to learn how to install Monit on Linux.
Step1. Install Monit on Linux
Since the Monit utility is not available from the default system base repositories, you need to install epel repository first.
On RHEL 8 & 9 based systems:
# dnf install https://dl.fedoraproject.org/pub/epel/epel-release-latest-8.noarch.rpm# dnf install https://dl.fedoraproject.org/pub/epel/epel-release-latest-9.noarch.rpm On RHEL 7-based Systems:
# yum install https://dl.fedoraproject.org/pub/epel/epel-release-latest-8.noarch.rpmOn Fedora 22+:
# dnf install monitOn Debian and Ubuntu:
$ sudo apt-get install monitOn Arch Linux:
$ pacman -S monitRun the following commands to install the Monit packages when you are finished adding the epel repository.
# yum install monitOn Fedora Linux:
# dnf install monitStep 2. Setup Monit on Linux
Install Monit on Linux was successfully completed in the previous step. Now, you are ready to configure it. This step is very easy. You just need to make changes in the Monit configuration file since it has a web interface that runs on port 2812 using a web server.
The main configuration file of monit is located at /etc/monit.conf under (RedHat/CentOS/Fedora) and /etc/monit/monitrc file for (Ubuntu/Debian/Linux Mint).
Open your preferred editor and edit the file below:
# vi /etc/monitrcOR
$ sudo nano /etc/monit/monitrcUncomment the next section, add your server’s IP address or domain name, enable public connections, and either modify the monit user and password or go with the defaults.
set httpd port 2812 and
     use address 0.0.0.0  # only accept connections from localhost
     allow 0.0.0.0/0        # allow localhost to connect to the server and
     allow admin:monit      # require user 'admin' with password 'monit'
     allow @monit           # allow users of group 'monit' to connect (rw)
     allow @users readonly  # allow users of group 'users' to connect readonly
Once configured, the Monit service must be started, enabled, and verified in order to reload the modified configuration settings.
# systemctl start monit
# systemctl enable monit
# systemctl status monit
Step 3. Access the Monit Web Interface
the two previous steps helped you to Install Monit on Linux. Now, you are ready to access the Monit web interface. Just navigate to the following URLs:
http://localhost:2812OR
http://ip-address:2812OR
http://example.com:2812Then type “admin” for the user’s name and “monit” for the password. You ought to see a screen like the one below.
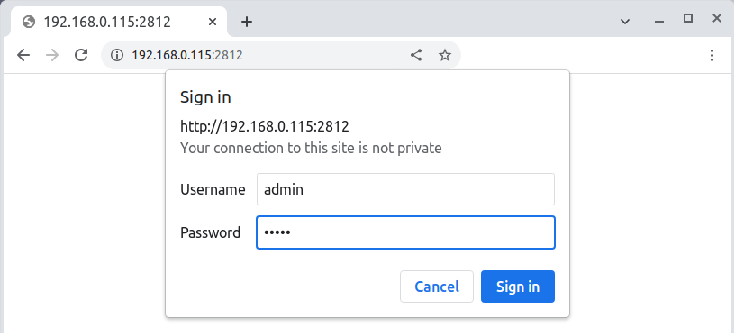
Now navigate to 2812 on localhost in your browser to open the Monit web interface.
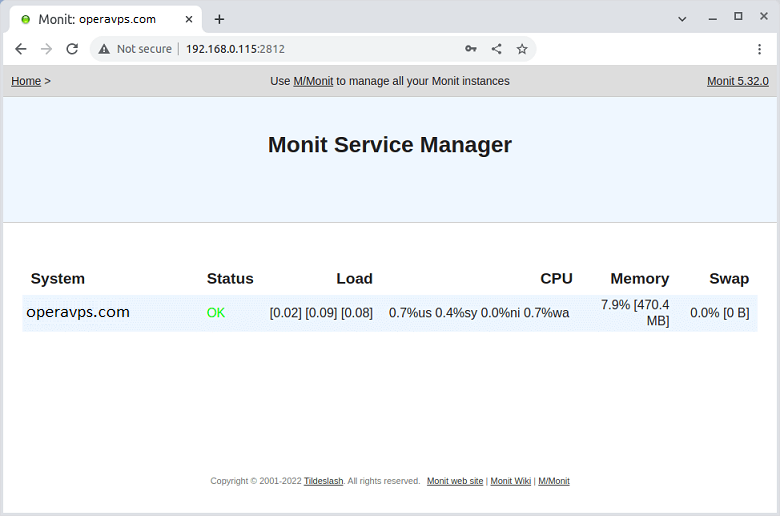
The Monit web interface is set up now.
Step 4. Add Linux Services in Monit
As we mentioned, Apache, Nginx, MySQL, FTP, SSH, and SMTP are the services that Monit can monitor them. In this step, you are ready to add these Linux services to Monit Mentoring. Let’s see some useful examples. To do this, you need to edit your monit configuration file and add the following settings at the end of the file.
How to Monitor Apache in Monit
check process httpd with pidfile /var/run/httpd.pid
group apache
start program = "/usr/bin/systemctl httpd start"
stop program = "/usr/bin/systemctl httpd stop"
if failed host 127.0.0.1 port 80
protocol http then restart
if 5 restarts within 5 cycles then timeout
How to Monitor Apache2 in Monit
check process apache with pidfile /run/apache2.pid
start program = "/usr/bin/systemctl apache2 start" with timeout 60 seconds
stop program  = "/usr/bin/systemctl apache2 stop"
Apache can be stopped or restarted by Monit, which can also notify you. Process attributes, such as how much memory or CPU time a process is using, can also be tracked by Monit.
How to Monitor Nginx in Monit
check process nginx with pidfile /var/run/nginx.pid
start program = "/usr/bin/systemctl nginx start"
stop program = "/usr/bin/systemctl nginx stop"
How to Monitor MySQL in Monit
check process mysqld with pidfile /var/run/mysqld/mysqld.pid
group mysql
start program = "/usr/bin/systemctl mysqld start"
stop program = "/usr/bin/systemctl mysqld stop"
if failed host 127.0.0.1 port 3306 then restart
if 5 restarts within 5 cycles then timeout
How to Monitor SSH in Monit
check process sshd with pidfile /var/run/sshd.pid
start program "/usr/bin/systemctl sshd start"
stop program "/usr/bin/systemctl sshd stop"
if failed host 127.0.0.1 port 22 protocol ssh then restart
if 5 restarts within 5 cycles then timeout
How to Monitor MySQL/MariaDB in Monit
check process mysqld with pidfile /var/run/mysqld/mysqld.pid
    start program = "/etc/init.d/mysql start"
    stop program = "/etc/init.d/mysql stop"
Depending on the version of MySQL you have installed, the PID file’s location and init script may change.
Step 5. Verify Monit Syntax for Errors
Once you’ve set up every program for monitoring, look for any mistakes in the monit syntax.
# monit -tOR
$ sudo monit -tThen, use the commands below to start the Monit service:
# systemctl monit restartOR
$ sudo systemctl monit restartMonit can act if an error situation should occur. At this point, you have verified the configuration, and you are ready to use the Monit monitoring program on Linux.
FAQ
Which sockets are supported by Monit?
TCP, UDP and Unix Domain Sockets are supported.
What protocols are supported by Monit?
Monit includes tests for the major Internet protocols, including HTTP, SMTP, and others. You can set Monit to send any data and test the server's response even if a protocol is not supported by the server.
Why the connection is close when I telnet into the monit http?
use the host's official name or IP address, whichever is more appropriate. Check to see if a firewall is currently active and blocking connections to the monit port.
Conclusion
In this article, you learned How to Install Monit on Linux to Monitor a Server. This content helps you to benefit from all features needed for system monitoring and error recovery. It’s like having a watchdog with a toolbox on your server. The above steps help you to start using Monit and benefit from all features needed for system monitoring and error recovery.
If you follow the above steps properly then you can smoothly install and configure Monit without any errors but do not hesitate to contact us if you encounter any problems. Our technical support team will try their best to solve your problems.