Install Node.js on Windows Efficiently A Guide for Developers
Install Node.js on Windows by downloading the installer from the official Node.js website and running it. Follow the setup prompts and complete the installation process. This setup allows development with JavaScript on Windows systems.
🤖AI Overview:
Install Node.js on Windows refers to the process of setting up the Node.js runtime environment on a computer running the Windows operating system. This allows users to run JavaScript code outside of a web browser and develop server-side applications. The main goal is to provide the ability to build and run modern web tools and applications directly on a Windows computer.
Quick Steps
- Visit the official Node.js website.
- Download the Windows installer for your system.
- Run the installer as Administrator.
- Accept the license agreement and select installation path.
- Choose default components and proceed.
- Click Install to begin installation.
- Complete the setup and close the installer.
- Open Command Prompt and verify installation using “node –version”.
Requirements for installing Node.js on Windows
To smooth Node.js installation on Windows, you need to meet some requirements and prerequisites:
- High-performance Windows VPS with Windows 10 or later version.
- user account with administrator privilege
- At least 4GB RAM for smooth development work.
- At least 10GB of free disk space
- Using modern processor
Comprehensive Guidelines to Install Node.js on Windows
Here are steps to install Node.js on a Windows server for empowering your Windows server:
Method 1: Install Node.js and NPM on Windows using Node.js Installer
1. Go to the official Node.js download page and download the appropriate installer for your system (LTS versions are recommended) by clicking the Windows installer button under the desired LTS version.

2. After downloading the installer, Double-click the downloaded .msi installer file which is saved in the Downloads folder by default to launch the installer.
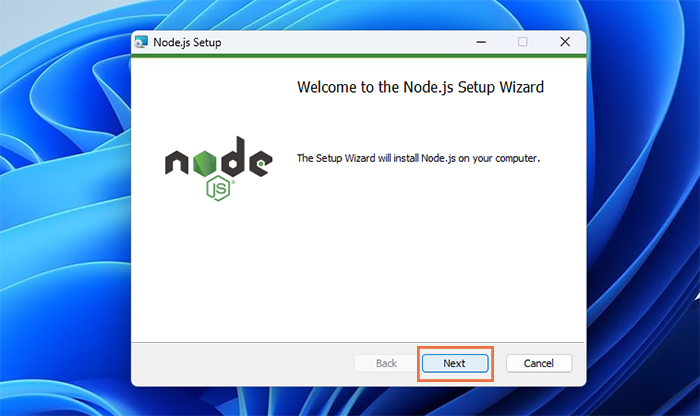
3. Node.js Setup Wizard will appear to guide you through the setup process.
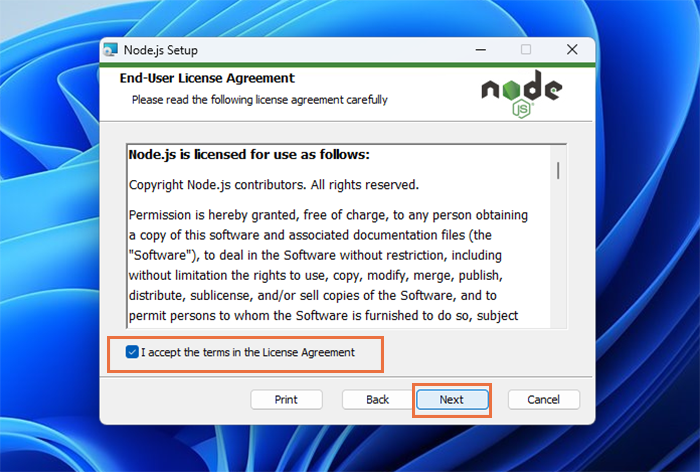
4. After clicking Next, read and accept the End-user license agreement by clicking the checkbox next to “I accept the terms in the License Agreement” and hit the “Next” button to proceed.
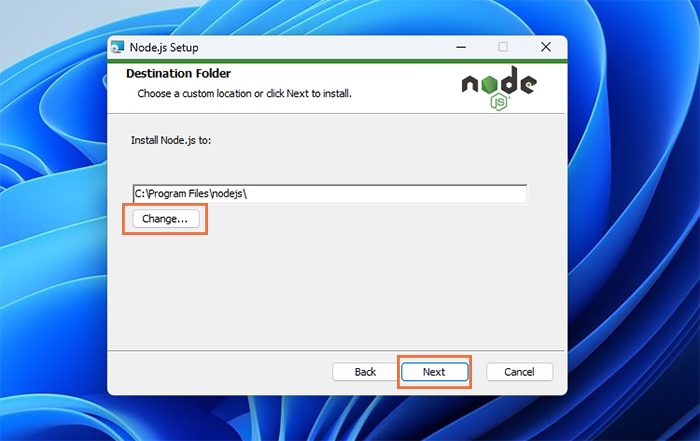
5. Choose the destination folder where you want to install Node.js (default location is usually recommended) and click “Next” to continue.
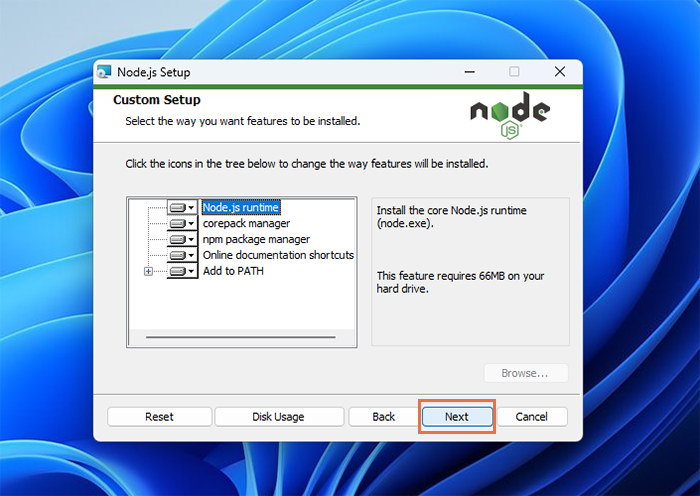
6. Select default options to include from installation (like npm, node, online documentation shortcuts, etc), then click “Next“.
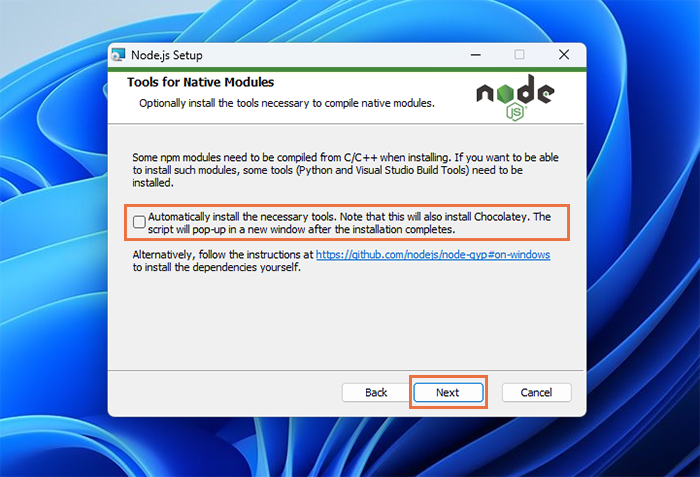
7. You can customize the setup by choosing a checkbox to install additional tools for native modules development (Like, Python, Visual Studio Build Tools, and Chocolatey) and hit “Next“.
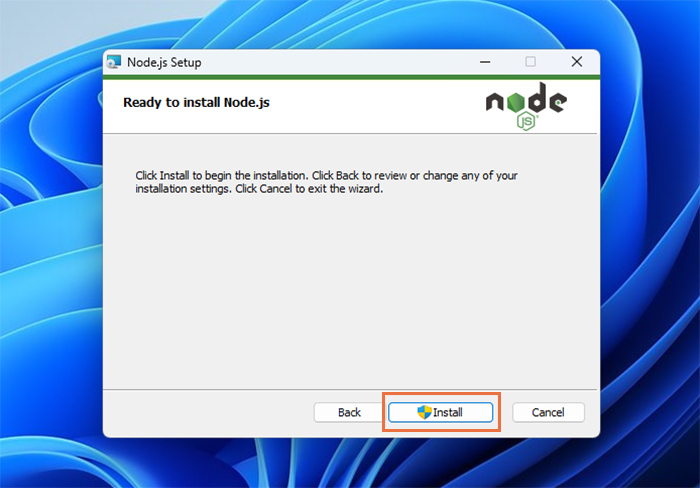
8. Click “Install” to begin the installation process and wait for the downloading and configuring necessary files to finish.
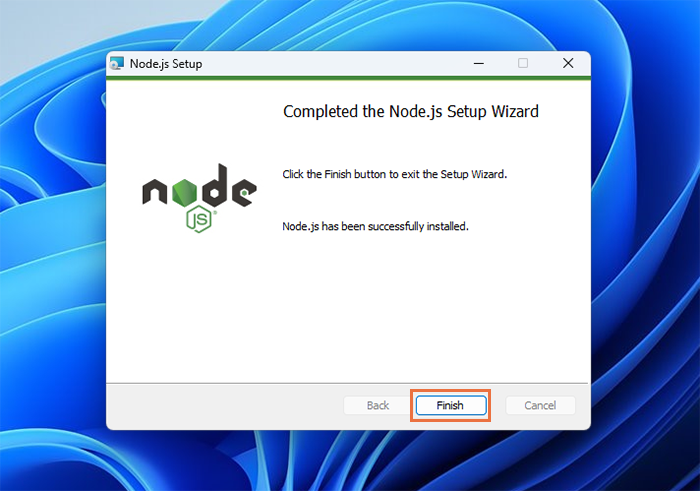
9. When the installation process is complete, click “Finish“.
10. If you have selected to install native tools after closing the installer the PowerShell script automatically starts to install selected tools (such as Chocolatey).
11. To verify Node.js installed successfully, open Command Prompt (press Win + R, type cmd, and press Enter) and type the following commands:
node -v
npm -v
If the output displays installed Node.js and NPM versions, you can ensure the installation was successful.
Congratulations! You’ve successfully installed Node.js on your Windows server using the official installer.
Note: If the output includes the error message “Command not found“, that means npm or Node was not installed.
Additional Tips:
- It is highly recommended to install additional tools along with Node.js installation because they are useful for specific projects and there is no harm in installing them.
- Node.js installation includes installing npm which is Node Package Manager and a useful tool.
- To verify the npm installation, you can run the ”
npm -v” command. - To update npm to the latest version, run the ”
npm install -g npm” command. - Set up Environment Variables (if needed) via selecting Start menu > typing “env” > selecting “Edit the system environment variables“> clicking “Environment Variables” > “Path” variable > “Edit” > “New” > adding the path to the Node.js installation.
- Installing a good Code Editor such as Visual Studio Code is beneficial for Node.js developers.
Method2: Install Node.js and NPM on Windows using Chocolatey
You can install Node.js and NPM (Node Package Manager) using Chocolatey which is a popular package manager for Windows. Chocolatey allows you to install Node.js through a single command. It also simplifies updates and uninstalls packages. Let’s start to install Node.js on the Windows system with Administration access:
1. Equip your Windows server with Chocolatey by installing Chocolatey on Windows through Command Prompt or PowerShell.
2. Open Command Prompt or PowerShell with administrator privileges and run the following command to install the latest version of Node.js via Chocolatey:
choco install nodejs3. To install a specific version of Node.js on a Windows system, you can specify the version number, for example, to install Node.js version 20.14.0 run the following command:
choco install nodejs --version=20.14.04. Accept the installation script prompt by pressing Y and Enter.
5. During installation, you are prompted to accept the license agreements for Node.js and any dependencies.
6. Verify Node.js and npm installation by running the following command and receiving the installed Node.js version:
node -v
npm -v
If the output displays the installed Node.js version, that means you have installed Node.js on Windows servers successfully using Chocolatey.
Additional Notes:
- If you want to upgrade Node.js to the latest version using Chocolatey, run the command ”
choco install nodejs“. - If you need to uninstall Node.js later, run the command ”
choco uninstall nodejs“.
Method3: Install Node.js and NPM on Windows using nvm-windows
The nvm (Node Version Manager), is a useful tool to install, uninstall, and manage multiple versions of Node.js on your Windows system, which is another method to install Node.js on a Windows server that offers greater flexibility. This method is more advanced but it is beneficial for projects that require different Node.js versions. Here are steps to install Node.js and NPM via nvm-windows:
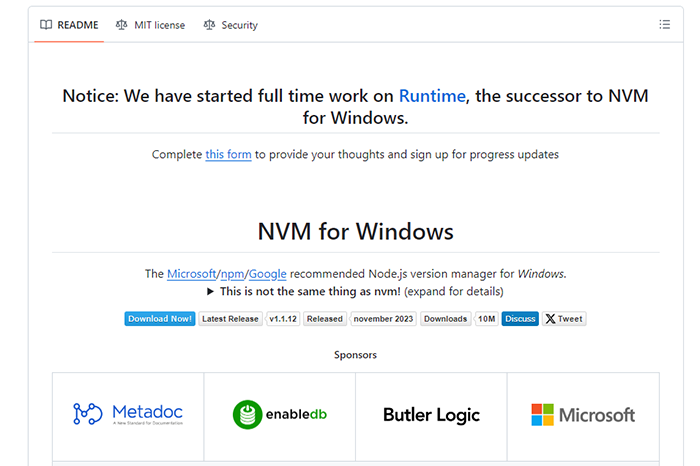
1. Download the latest version of nvm for Windows by referring to the GitHub repository and clicking the “Download Now!” button.
2. Double-click the downloaded nvm-setup.exe file to run the nvm-windows Installer.
3. Follow the wizard prompts to complete the installation process and close the wizard window once the installation finishes.
4. Open the new Command Prompt or PowerShell window (by pressing “Win + R” and typing “cmd” or “PowerShell“) while any existing command prompt or PowerShell windows are closed.
5. Verify nvm-installation by running the following command and receiving the installed nvm-windows version:
nvm -v6. To see the list of available Node.js versions to install, run the following command:
nvm list available7. After checking available Node.js versions, it is time to install a specific version of Node.js on your Windows system:
nvm install <version>For example:
nvm install 20.14.08. If you have installed multiple Node.js versions, to set a specific Node.js version to use, run the following command:
nvm use <version>9. Verify Node.js installation using the following command:
node -vThe output should display the correct version of Node.js you installed.
Additional Tips:
- It is recommended to install the latest LTS (Long-Term Support) version of Node.js.
- To uninstall a specific Node.js version using nvm-windows run the command ”
nvm uninstall <version>“. - To list installed Node.js versions using nvm run the command ”
nvm list“. - To install the latest stable version of Node.js you can also use the commands ”
nvm install node” or ”nvm install latest“. - When installing Node.js using nvm, you have installed npm as well, so you can verify npm installation by running command ”
npm -v“.
Test Node.js installation
To check and confirm that Node.js and npm are correctly installed and functioning on your Windows server, the simplest way is clicking Windows start icon and search for node.js.
You can see the node.js folder that has been created, so click on it and select the Node.js command prompt to launch it.
Write “node” and press enter:
nodeYou should see “Welcome to Node.js with its version”.

Or, you can run a simple Node.js Script. Open the Command prompt or PowerShell, and create a new file named “test.js” with the following content:
console.log('Node.js is working!');Save the file.
Navigate to the directory that includes “test.js” in Command Prompt or Powershell and execute the script using the following command:
node test.jsIf this command prints ” Node.js is working! “, it means Node.js is working fine on your Windows system.
Note: When writing messages to the console, pay attention to parenthesis and semicolon.
Conclusion
The process to install Node.js on Windows consists of precise steps that, when followed meticulously, provide a solid foundation for software development projects.
By adhering to recommended best practices and verifying each phase, developers can ensure the reliability, security, and efficiency of their Node.js environment on Windows.
For further assistance or advanced configuration, refer to the official Node.js documentation or seek guidance from OperaVPS technical support.
FAQ
2. How do I download the official Node.js installer for Windows?
Visit the official Node.js website and select the Windows installer that matches your system architecture (x86 or x64). Download the file and ensure it is from the official source to avoid security risks.
3. What are the steps to install Node.js on Windows?
Double click the downloaded Node.js installer file. Follow the installation wizard by accepting the license agreement, choosing the installation directory, and selecting the required components. Complete the setup and verify the installation via the command prompt.
4. How can I verify that Node.js is installed correctly on Windows?
Open the Windows command prompt and type node -v to display the installed Node.js version. You can also check "npm -v" to confirm the installation of Node Package Manager.
5. What is the best way to update Node.js on Windows?
The recommended method to update Node.js on Windows is to download the latest version from the official website and run the installer. The setup will overwrite the old version while preserving your existing packages.
6. Can I install multiple versions of Node.js on Windows for development purposes?
Yes, you can install multiple Node.js versions using Node Version Manager for Windows (nvm-windows). This tool allows you to switch between different Node.js versions as required by your projects.
7. Are there common errors when installing Node.js on Windows and how can they be resolved?
Common errors include incomplete downloads, permission issues, and PATH environment variable misconfigurations. Ensure you run the installer as an administrator, use the official installer, and restart your system after installation. If problems persist, refer to the Node.js documentation or community forums.
8. How do I uninstall Node.js from Windows if needed?
Go to the Control Panel, open Programs and Features, locate Node.js, and select Uninstall. You may also need to remove related environment variables and residual files to fully clean your system.
9. Is it necessary to restart Windows after installing Node.js?
It is recommended to restart your system after installation to ensure all environment variables are updated and available for command-line use.
10. What should I do if Node.js commands are not recognized after installation on Windows?
If Node.js commands are not recognized, check if the Node.js installation directory is added to the Windows PATH environment variable. Update the PATH variable manually if necessary or reinstall Node.js using the official installer.