How to Install Notepad++ on Windows VPS?
To install Notepad++ on Windows VPS does not take much time. You can install it on Windows VPS using the Notepad++ installer .exe file.
Notepad++ is a highly popular text and code editor, known for its versatility and ease of use, making it an essential tool for developers and system administrators alike. Whether you are setting up a new Windows VPS or enhancing an existing one, understanding how to efficiently install and use Notepad++ can significantly improve your workflow.
How to Install Notepad++ on Windows VPS step by step?
By following the steps outlined in this guide, you’ll have Notepad++ up and running on your Windows VPS in no time, ready to assist you with all your text editing and coding needs.
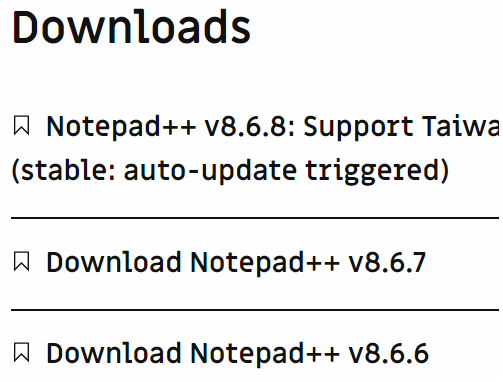
Step 1: To install Notepad++ on Windows VPS, head to Notepad++’s website and download the installer file of any version you want to install.
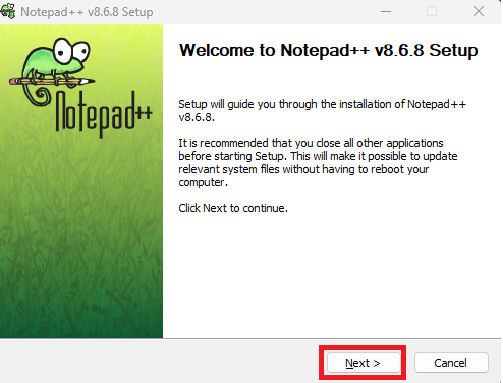
Step 2: Open the installer .exe file and select the language of the installer, then select “Next” to proceed to the next step.
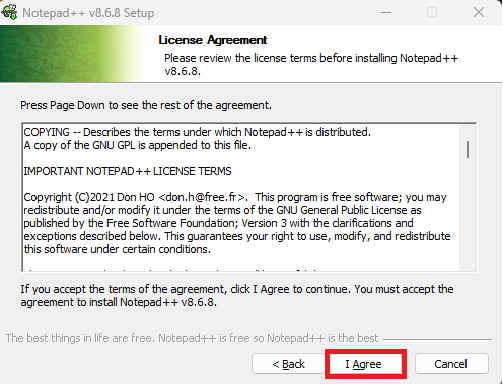
Step 3: In this section, you can review the terms of the agreement and if you accept the terms, you can move on and continue the installation process. If you have no problem with the License Agreement, click “I Agree”.
Step 4: Here, you can create a new folder or select the setup directory of Notepad++ to be installed on your Windows VPS by clicking on “Browse”. After you have selected the directory click “Next” to proceed.
If you do not select any specific folder, Notepad++ will be installed in the “C:\Program Files\Notepad++” directory.

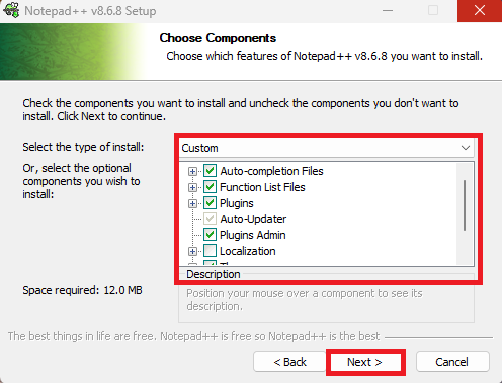
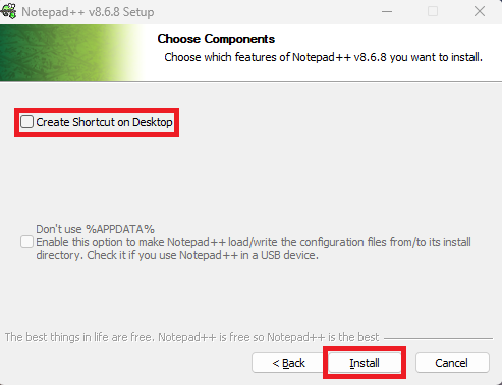
Step 5: As shown in the picture, files auto-completion, themes, auto-updater, context menu entry, localization, and function list files are some of the components of Notepad++. You can check and customize the components in this section of the installation. When you are done with components customization, click “Next”.
Step 6: Select “Create Shortcut on Desktop” if you want a shortcut or an icon of Notepad++ on your desktop.
If you do not wish to do so, leave the box unchecked. It is not necessary to check the second box on this window, since it is for advanced users, so leave it unchecked.
Then hit the Install button.
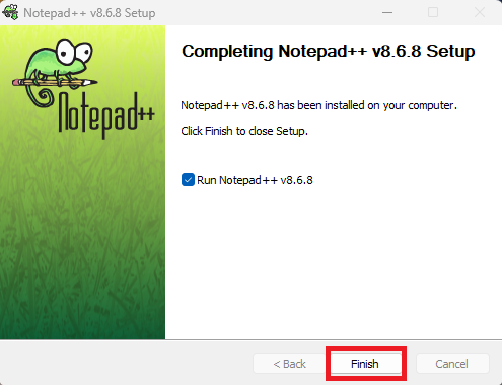
Step 7: Now is the time to wait for the installation to complete. Once Notepad++ is finished being installed, click Finish.
Remember that if you want to run Notepad++ right from here, you can leave the “run Notepad++ vx” box checked. If you do not want to run the Notepad++ right away, uncheck the box before hitting the Finish button.
How to Install Notepad++ on Windows VPS through CMD (Command Line)?
Notepad++ can be installed on Windows 10/11 VPS through cmd. Although, in a way, again you install it using the installer file. It may sound more technical, but it is not and any Windows VPS user with a little knowledge of coding can do this.
Step one: Download the Notepad++ executable installer file from Notepad’s official website. Here you can choose from a variety of Notepad++ versions to download and install on Windows VPS.
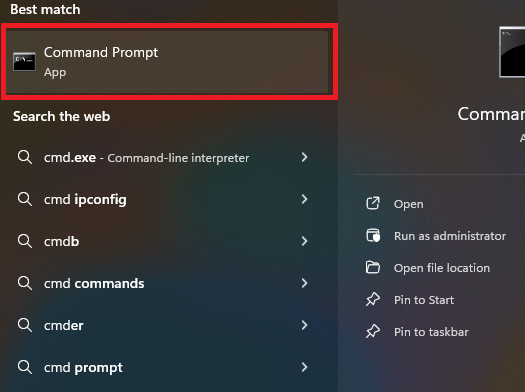
Step two: Now head back to your desktop, open the search bar, and type “cmd” or “PowerShell”. Now run cmd or PowerShell as administrator.
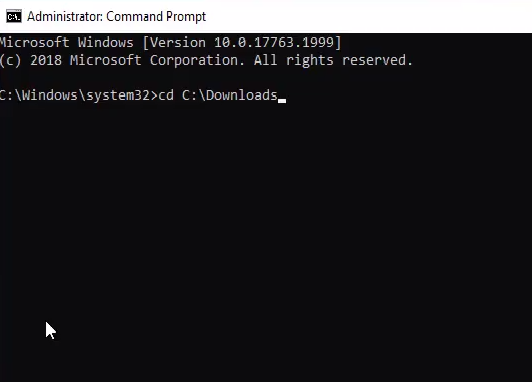
Step three: In cmd, change the directory to the directory in which the installer .exe file is located, which usually is “C:\Downloads”, by running this command:
cd C:\DownloadsIf the directory is something other than “C:\Downloads”, replace it in the command with the “C:\Downloads” and then run the command.
Step four: Now, run the following command to install Notepad++ on Windows VPS through cmd:
"Name of the installer.exe file" /SFor example:
npp.8.0.Installer.x64.exe /S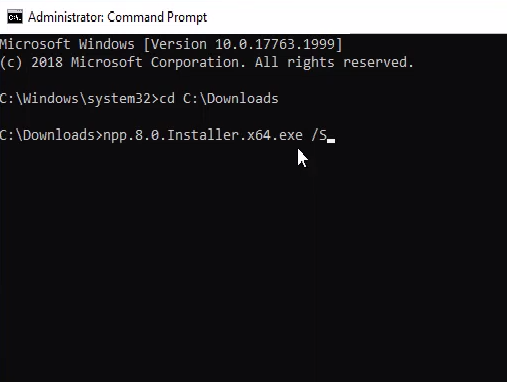
You can also change the directory of the Notepad++ installation folder, by adding an additional element to the previous command:
"Name of the installer.exe file" /S /D="Desired installation folder"for example:
npp.8.0.Installer.x64.exe /S /D=C:\Notepad++By running this command, Notepad++ will be installed in the defined folder instead of its default folder which is “C:\Program Files\Notepad++”.
After a few moments, you can see the Notepad++ shortcut on your desktop and system menu.
How to Uninstall Notepad++ from Windows VPS?
If you want to uninstall Notepad++ from Windows VPS, follow these steps:
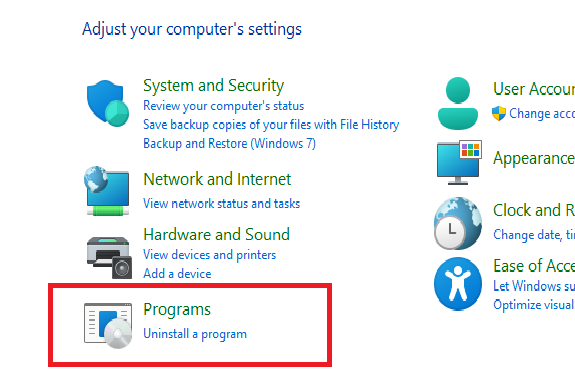
Step one: Go to the Windows VPS desktop, and type “Control Panel” in the search bar. Then go to Control Panel>Uninstall a program.
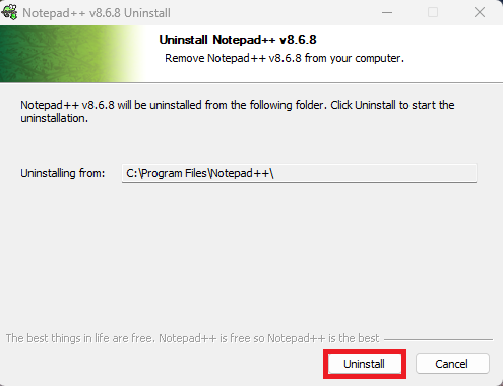
Step two: In the new windows you can see a list of all the installed software on your Windows VPS. Search for Notepad++ among the installed software, right-click on it, and select Uninstall.

Step three: The uninstaller window will show the installation directory and present you with two choices to either uninstall or cancel the uninstallation. Select Uninstall in the new window and wait for the system to finish the uninstallation process.
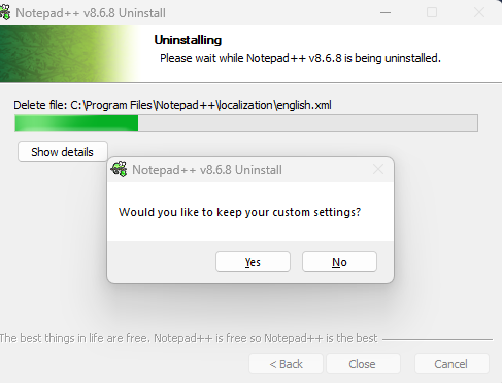
Step four: If a pop-up window comes up, select “Yes” if you want to keep your custom settings and “No” if you do not want to keep them. Then the uninstallation process will continue.
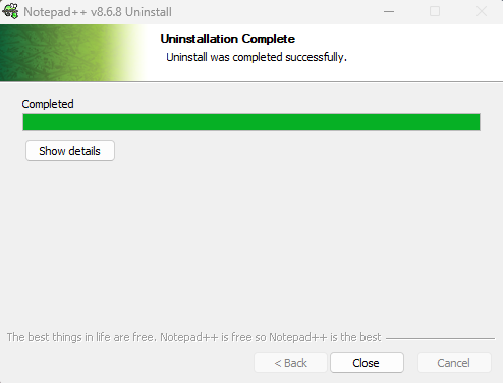
Step five: When Notepad++ is completely uninstalled from your Windows VPS, click on “Close” to close the uninstallation window.
Where to find Notepad++ in Windows VPS?
Once the Notepad++ installation is completed, you can find Notepad++ in Windows VPS in the following sections:
- Start Menu
- Desktop (If you chose to create a desktop shortcut)
- The installation folder which is “C:\Program Files\Notepad++” by default.
Conclusion
Notepad++ can be installed with its installer .exe file. You can also use Command Prompt (cmd) to install it on Windows VPS with two simple commands.
You should now have a good understanding of how to set up Notepad++ on your Windows server, ensuring you have a dependable tool for coding and text editing. With Notepad++ installed on your Windows VPS, you can efficiently handle your editing tasks with ease and precision.