Install OpenSSL on Windows Easily and Quickly
Install OpenSSL on Windows to enable SSL/TLS security. Use trusted installers or package managers, configure system variables, and verify installation via the command prompt.
🤖AI Overview:
To install OpenSSL on Windows, download a compatible installer or use package managers like Chocolatey or Scoop. After installation, add OpenSSL to the system path and confirm by running “openssl version” in the command prompt. This process ensures secure SSL/TLS management on Windows systems.
Requirements for Installing OpenSSL on Windows
You need to provide some requirements before starting to install OpenSSL on Windows. The most common and basic requirements are:
- Windows System Compatibility
First, make sure you are using a compatible version of Windows such as Windows 7, 10, 11, and Windows Server editions. - Visual C++ Redistributable
Visual C++ Redistributable is required for OpenSSL to be installed. So first install this application before trying to install OpenSSL on Windows 11. - Command Line Knowledge
You need to be familiar with the command line of the Windows desktop to be able to successfully install OpenSSL. - Administrator Privileges
Like in Linux, admin access is needed to install software on Windows. - Configuring Environment Variables
Having the ability to set system environment variables can be advantageous. This skill allows you to include the OpenSSL binary path in the system environment variables (PATH), making it easier to execute OpenSSL commands from any command prompt.
Install OpenSSL on Windows
You can choose between various methods to install OpenSSL on Windows. the main ones are:
Method 1. Precompiled Binaries
The simplest way to install OpenSSL on Windows is to use precompiled binaries. You can download OpenSSL installers (both 32-bit and 64-bit) and install OpenSSL easily on your Windows machine.
There are a variety of these installers that you can download, like OpenSSL’s own website. But since you want to install it on Windows, we recommend you download it from third-party sources like Shining Light Productions.
Step one: OpenSSL installation:
After you download the installer, run it and go through the OpenSSL installation process. Here is the installation process, step by step:
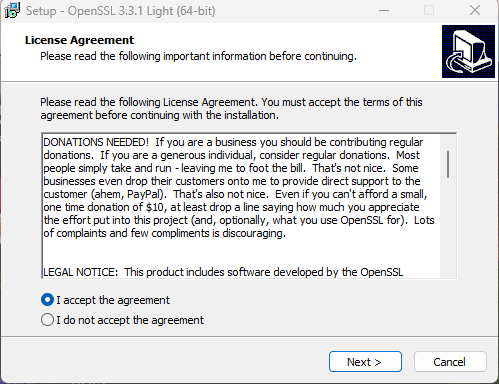
1. Open the installer file. Select “I accept the agreement” and click on the “Next” button.
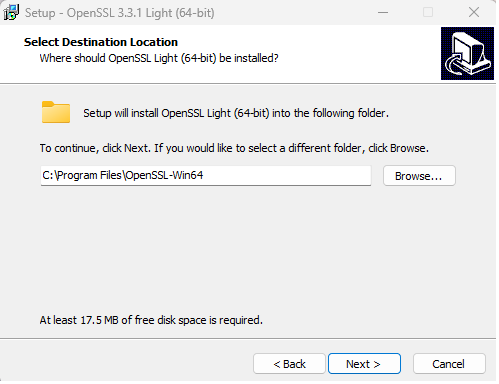
2. Choose the installation path for the OpenSSL installer and click on the “Next” button.
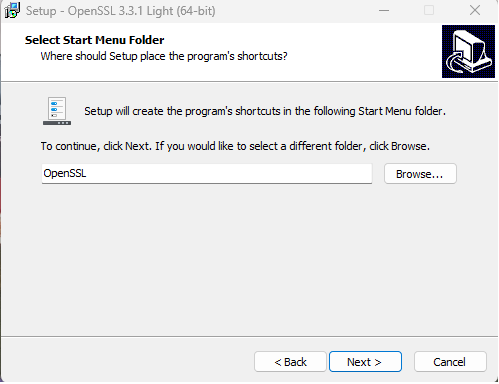
3. Now select the Start Menu Folder for the OpenSSL installer. Then, click Next.
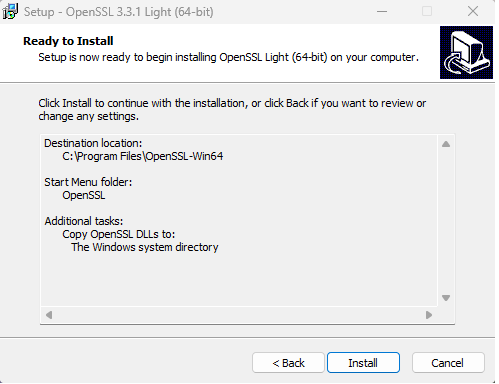
4. Select the first option (The Windows system directory) for the additional tasks of the OpenSSL. Then, click the Next button.

5. Now, by pressing the Install button, the installer will begin to install OpenSSL on Windows 10.
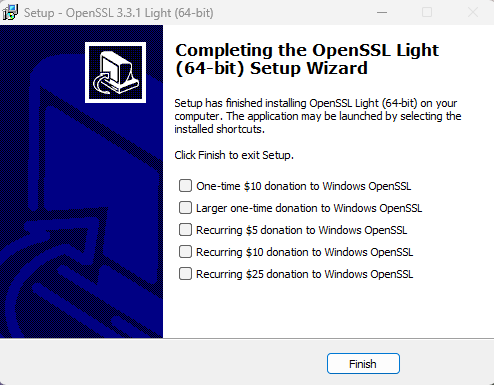
6. Now that the installation process is complete, you can donate to the precombined binary provider by choosing any of the options provided. If you are not willing to do so, uncheck the box and click Finish.
Step two: Add OpenSSL to the system environment variables
Now you need to add the OpenSSL to the system environment variables. Follow the instructions below to do so:
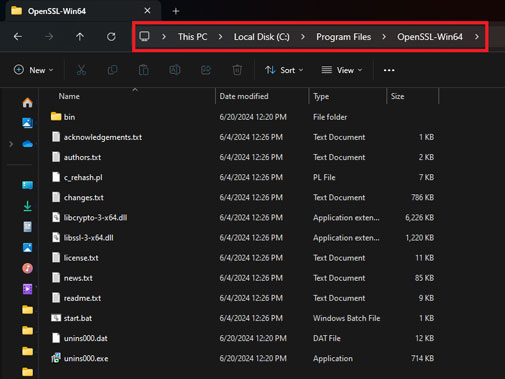
1. First head to the location where the OpenSSL is installed on your Windows.
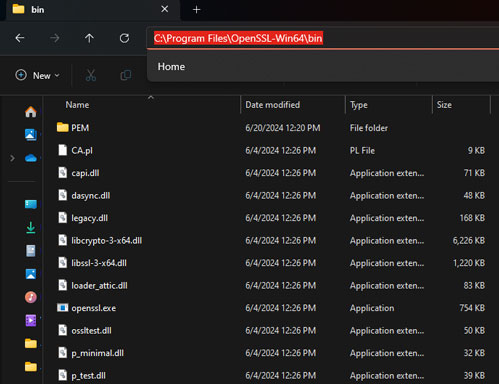
2. Then, open the “bin” folder and copy the address from the address bar.
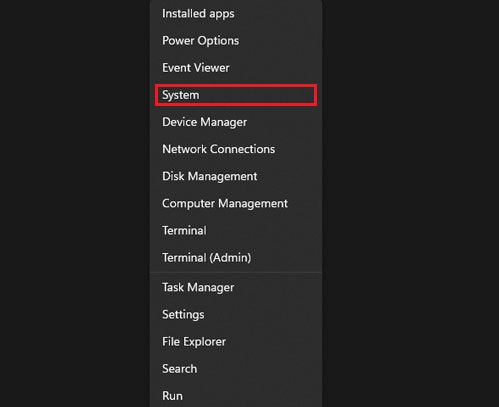
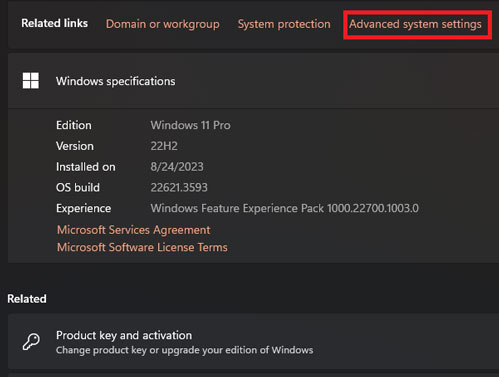
3. Now, right-click on the “Start” button and select “System”.
4. Select the “Advanced system settings”.
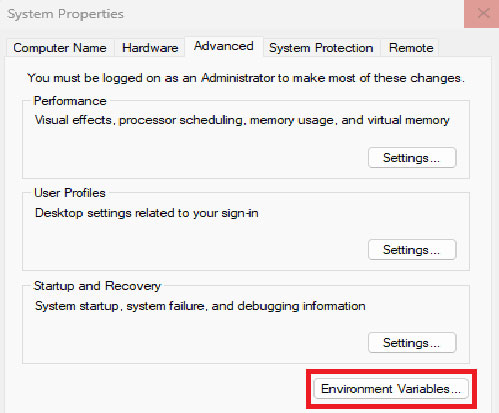
5. Here, choose the environment variables.
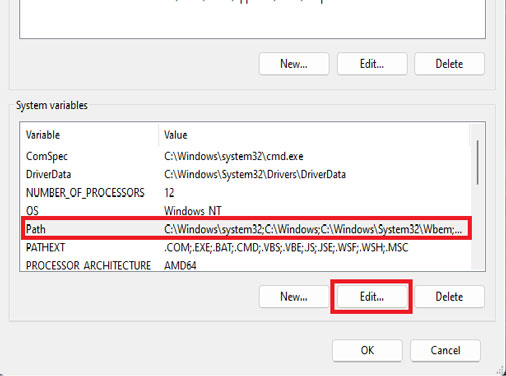
6. Here, you must find the “path” variable among system variables. When you find it, click on the “Edit” button.
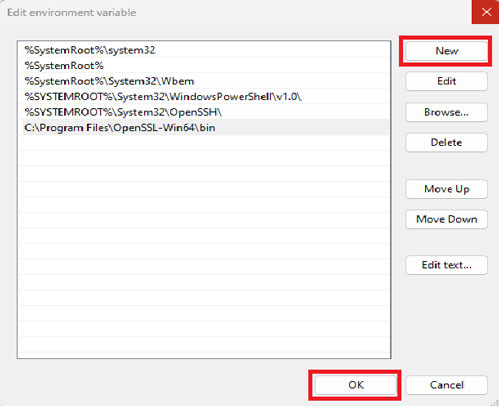
7. In the new window, paste the address you already copied and put a semi-colon (;) at the end of it. If there was no path defined for the OpenSSL, click on “New” and paste the address. Then, click on “OK”. Also, click “OK” in the previous window.
Now, you can verify the successful installation of the OpenSSL on your Windows machine.
Step three: Verification of the OpenSSL installation
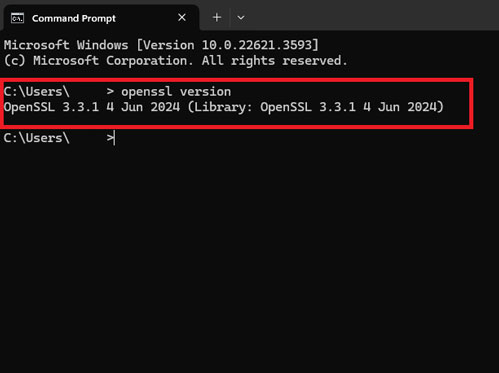
Now that the OpenSSL is installed on your Windows machine and you have defined its path in the system environments, you’d better verify the installation process. To do so, open cmd on your system and run this command:
openssl versionThe result will be identical to this photo:
Method 2. Package Managers
The second way is to install OpenSSL in Windows using PowerShell, or by using package managers. Two of the most famous packet managers for installing OpenSSL on Windows are “Chocolatey” and “Scoop”.
-
Chocolatey
In order to install Chocolatey on your Windows, open cmd or Powershell as admin and run the following command. If you already have it installed, skip this part:
Set-ExecutionPolicy Bypass -Scope Process -Force; [System.Net.ServicePointManager]::SecurityProtocol = [System.Net.ServicePointManager]::SecurityProtocol -bor 3072; iex ((New-Object System.Net.WebClient).DownloadString('https://community.chocolatey.org/install.ps1'))
Now, you need to install OpenSSL using Chocolatey. The following command will do so:
choco install openssl
When the OpenSSL installation is completed, open cmd and run the command below to verify the successful installation of the OpenSSL:
openssl versionThis command’s output will be the current version of the OpenSSL installed on your system.
-
Scoop
Open Powershell or cmd as admin and run the following command to install Scoop on your machine:
iwr -useb get.scoop.sh | iexIf you encounter any problems, execute this command:
Set-ExecutionPolicy RemoteSigned -Scope CurrentUserNow, add the Scoop Bucket to extras using this command:
scoop bucket add extrasThen, install OpenSSL using Scoop:
scoop install opensslAfter the successful installation of the OpenSSL on your Windows, it’s time to verify the installation. Run the following command and it will show the current version of the installed OpenSSL:
openssl versionMethod 3. Building from Source
If you are an advanced user and want to customize the OpenSSL installation, building it from the source is your type of installation.
Step One: Download the Source Code
You can go to the OpenSSL official website and download the master source codes in a tarball or zip file.
Step Two: Extract the Source Code
Now, extract the contents of the downloaded file.
Step Three: Install Build Tools
You will need some tools to install OpenSSL from the source such as:
- A C compiler (Like Visual Studio)
- Perl (ActivePerl or Strawberry Perl is recommended for Windows)
Step Four: Configure and Build
Open the cmd or Powershell and navigate to the directory where you extracted the source code.
Running the following command will configure and build OpenSSL:
perl Configure VC-WIN64A
nmake
nmake test
nmake install
Step Five: Verify the Installation
Now you can verify the installation of the OpenSSL by running this command:
openssl versionHow to check if OpenSSL is installed in Windows?
To check whether OpenSSL is installed in Windows or not, search for “cmd” or “PowerShell” in the search section and open it. Then, type and run the OpenSSL version command.
If the OpenSSL is installed on your Windows, the PowerShell will display the current version of the OpenSSL.
Conclusion
By following the comprehensive steps in this guide to install OpenSSL on Windows, your business will be well-positioned to manage encryption, generate and manage SSL/TLS certificates, and maintain secure communications essential for modern digital business operations.
FAQ
2. What system requirements must be met before installing OpenSSL on Windows?
Compatible Windows versions, Visual C++ Redistributable, administrator privileges, and basic command line knowledge are essential.
3. How do I install OpenSSL on Windows using precompiled binaries?
Download from a trusted source like Shining Light Productions, run the installer, and add OpenSSL's bin directory to system environment variables.
4. Can I install OpenSSL on Windows through package managers?
Yes, tools like Chocolatey and Scoop automate OpenSSL installation via command line.
5. How do I verify that OpenSSL has been successfully installed on my Windows system?
Run 'openssl version' in Command Prompt or PowerShell; it displays the installed OpenSSL version.
6. Why is setting system environment variables important after installing OpenSSL on Windows?
It allows running OpenSSL commands from any command prompt without specifying full paths.
7. Is building OpenSSL from source recommended for business owners?
Typically no; precompiled binaries or package managers suffice unless custom builds are needed.
8. What role does OpenSSL play in securing business websites hosted on Windows servers?
It facilitates generating and managing SSL/TLS certificates to secure data transmission.
9. Do I need administrator privileges to install OpenSSL on a Windows business server?
Yes, admin rights are required to modify system settings and environment variables.
10. Where can business owners download safe OpenSSL installers for Windows?
From reputable sources like Shining Light Productions to ensure authenticity and security.