How to Setup Windows Server 2016 Step by Step
Setup Windows Server 2016 involves installing and configuring the operating system to manage network resources. This process includes selecting the edition, partitioning drives, and securing the server for reliable performance.
🤖AI Overview:
Setup Windows Server 2016 entails installing the OS on a physical or virtual server with tailored configurations. It encompasses hardware preparation, media booting, version selection, disk partitioning, and system setup. Windows Server 2016 features enhanced security and cloud integration for effective network management.
Prerequisite to Install Windows Server 2016
To install Windows Server 2016 on a server or PC, you must consider the minimum hardware requirements, which include the following:
- Purchasing a Dedicated server if Windows Server 2016 is installed on the server
- 512 MB of RAM
- 32 GB hard drive
- 1.4GHz 64-bit processor
- Gigabit (10/100/1000) Ethernet network card
Installation instructions for Windows Server 2016
If you want to personally install Windows Server 2016 on the server, you must configure appropriate virtualization, such as ESXi or KVM, on the dedicated server. Then, based on your goal, to use Windows before starting Windows Server 2016, you should have found the answers to the following questions:
• Does your network need a web server?
• How many users should be supported in your network?
Then follow the steps to set up Windows Server 2016.
Step 1. Download the ISO file of the Windows Server 2016 operating system and put it on USB or burn it to CD/DVD.
Step 2. Insert the USB or DVD containing the Windows Server 2016 boot drive into the system and restart the system. From the BIOS menu, click the logic option and select the DVD drive or USB option to boot.
Note: If you are installing Windows Server 2016 on a PC, you must create and configure a virtual machine, or VMware. To run Windows Server 2016 on a virtual machine, you must attach the corresponding ISO or DVD file to the virtual machine.
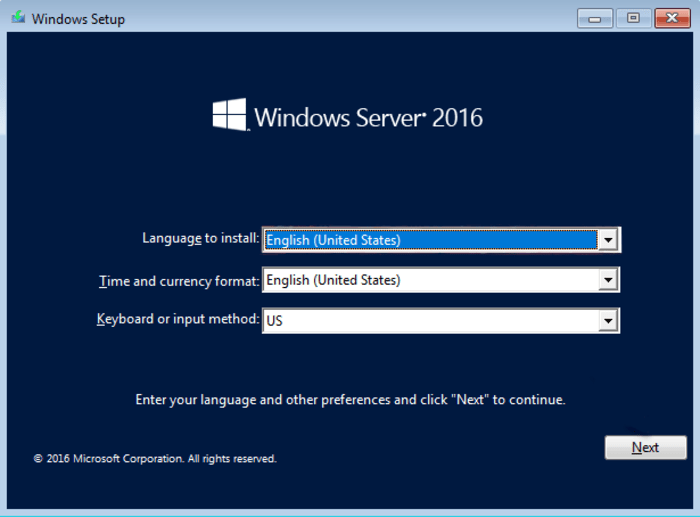
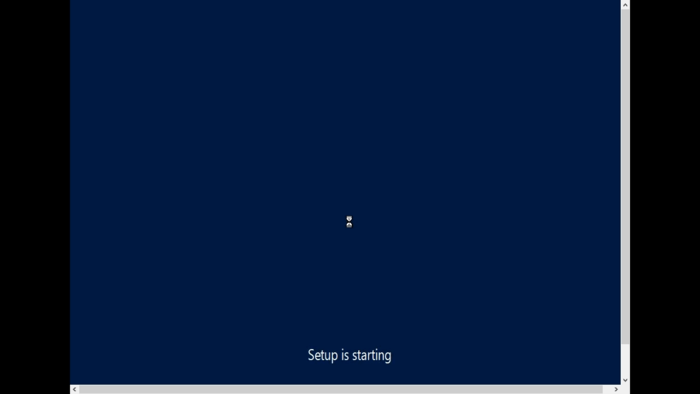
Step 3. After booting the Windows Server 2016 operating system, specify the installation language, time and format, and keyboard language on the Windows Setup page, and start the main steps of the Windows Server 2016 installation by selecting Next.
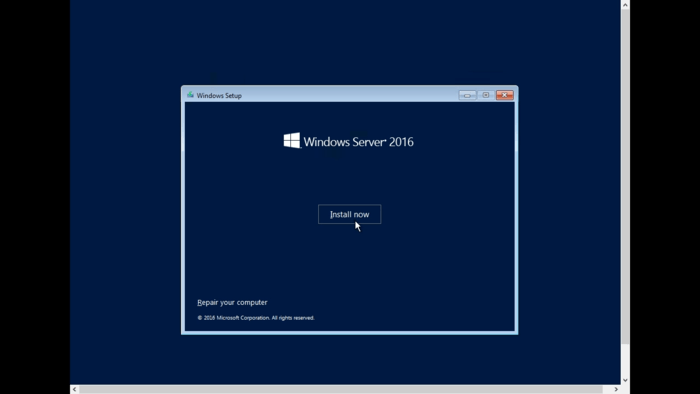
Step 4. Select “Install Now” to begin the installation procedure.
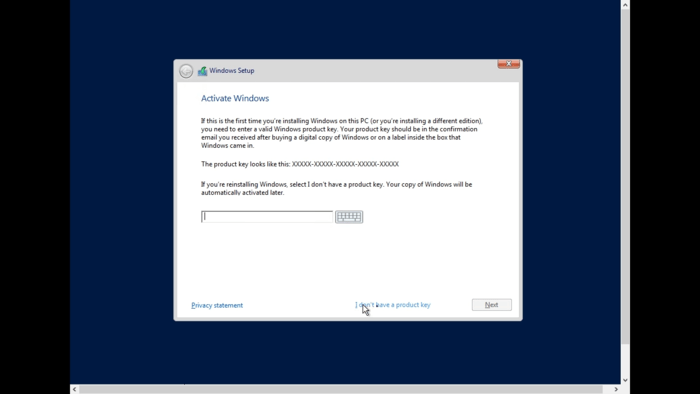
Step 5. This step is for the condition that you have a license key. If you are installing Windows Server 2016 on a PC or server for the first time, you need to enter a valid Windows product key. Since we do not have a license key in this tutorial, skip this step by selecting “I don’t have a product key” and continue to the next step.
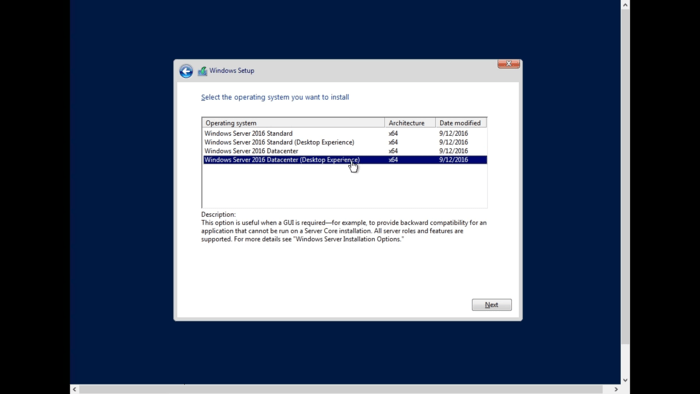
Step 6. At this step, you should choose the right version of Windows based on your goals and preferences. The difference between Windows Server 2016 versions is the number of users they support. The Datacenter version is suitable for cloud, network, and virtual environments. The only difference between the Standard version and the datacenter version of Windows Server 2016 is the number of virtual servers. The data center version supports more virtual servers. On this page, you will see four versions of Windows Server 2016 as follows:
Windows Server 2016 Standard Version: It is the same as the Core version without a graphic environment. The Core environment is one of the environments that you need to use remote commands and software to manage.
Windows Server 2016 Standard Desktop Experience version: This version has a graphical environment.
Windows Server 2016 DataCenter version: This version does not support the graphical environment like the Core environment.
Windows Server 2016 Datacenter Desktop Experience version: It has a graphical environment.
Therefore, you can choose the suitable version according to your goals and then click on the Next button.
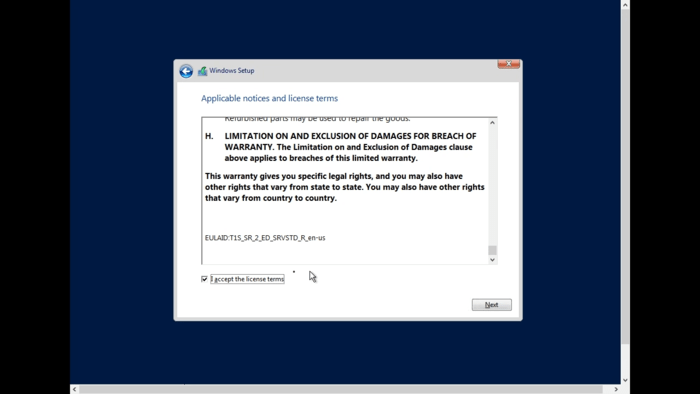
Step 7. At this step, you need to confirm some rules. For this purpose, you must read the license terms to the end, and after scrolling to the end of the page, check the side box “I accept license terms” and click the Next button.
Step 8. At this stage, you have two options to choose from: 1. Upgrade: Install Windows and keep files, settings, and applications 2. Custom: Install Windows only (advanced)
The Upgrade option is selected when a different version of Windows Server has already been installed on your system (for example, you have already installed Windows Server 2012R2 through the windows server 2012/2012R2 installation guide) and you plan to upgrade Windows Server, and you also want the settings and programs of your previous Windows server version will remain.
If you decide to do a clean install that removes settings, programs, etc. from the previous version, select the Custom option. In general, Microsoft always recommends using the Custom installation or fresh installation option to install different versions of Windows Server because upgrading Windows Server versions is often associated with problems. Choosing Custom installation means we want to format the hard drive, erase everything on the server, and do a clean install.

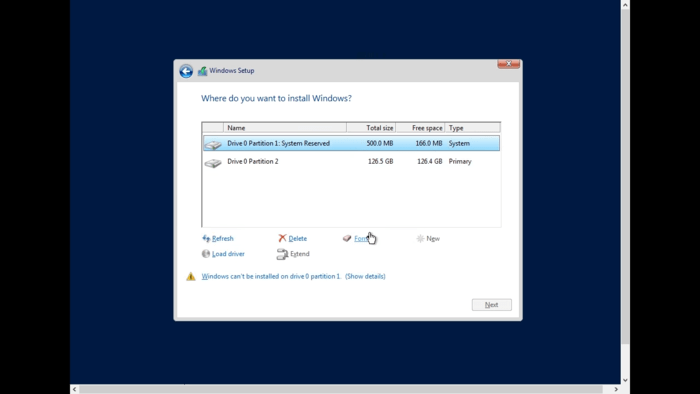
Step 9. It’s time to choose a hard disk to Set up Windows Server 2016. Select the hard disk on which you intend to install Windows Server 2016. You may have pre-partitioned drives, but if you want to allocate unpartitioned storage space for Windows Server 2016 installation, it’s better to follow our method.
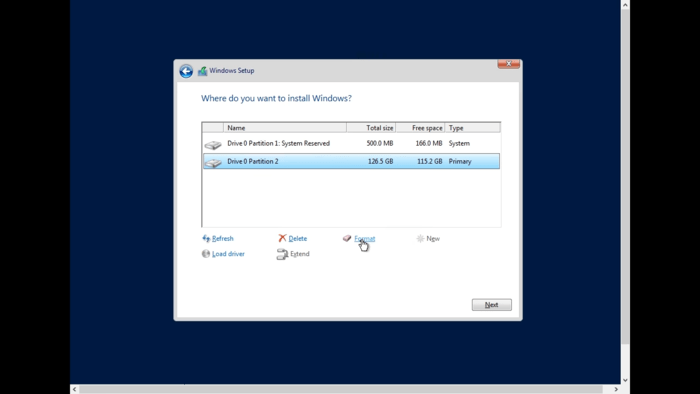
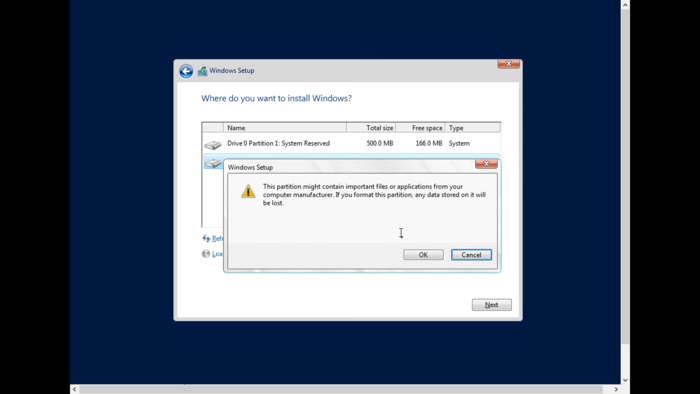
Select one of the drives and select the Format option and then Ok. Then select another drive and click Format and OK again. Select drive 0 portions 1 and click on the delete option and repeat the same for the other drive and put them in a single drive and partition.
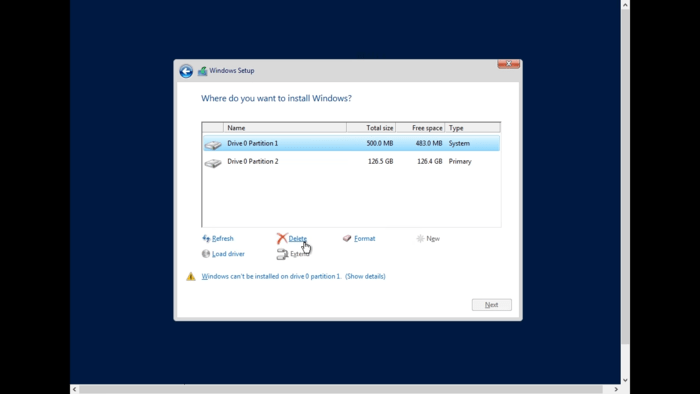
Finally, partition this drive to install Windows Server 2016. Our goal is to consolidate all of our partitions into one format, which is why we are getting a completely fresh installation.
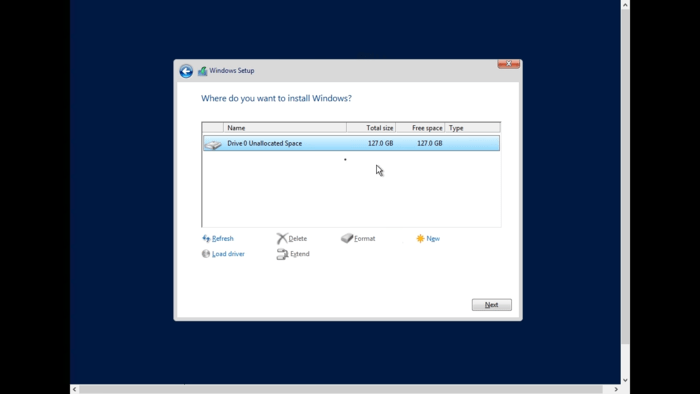
Step 10. Select the New option for custom partitioning on the selected hard disk.
Step 11. Then you will be faced with options for customizing the drive, where you can specify the amount of the drive in megabytes according to your needs and click the Apply button.
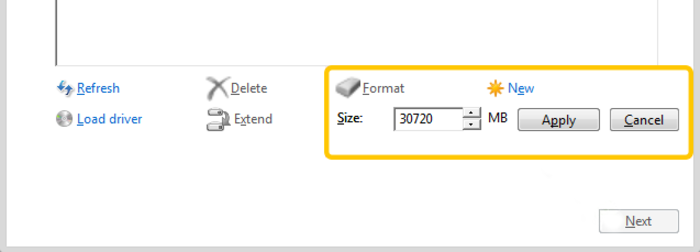
Step 12. You will receive a warning based on allowing the system to create a drive for system files, which you should click on the OK button. If you want to create more drives, you can repeat the previous step several times and then click on the Next button.
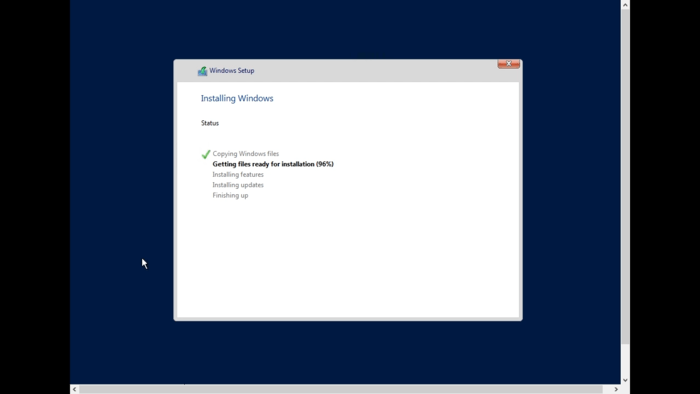
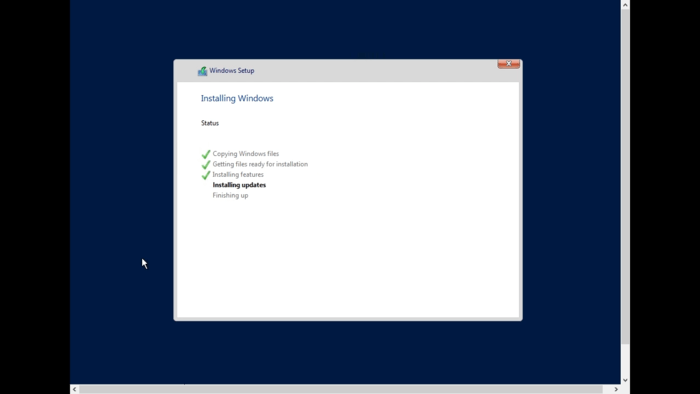
Step 13. After partitioning the hard disk, the system will start copying Windows files to install Windows Server 2016, which may take 15-20 minutes depending on the speed of your server.
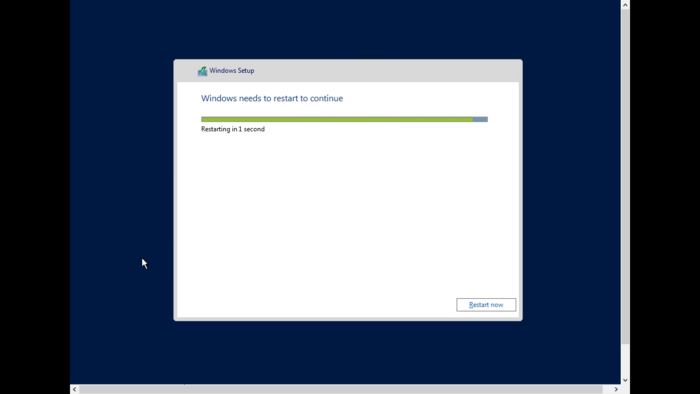
Step 14. After completing the copy of Windows files and restarting the system, you must specify the required information, such as the password and username, and finish the process of setting up Windows Server 2016 by clicking the Finish button.
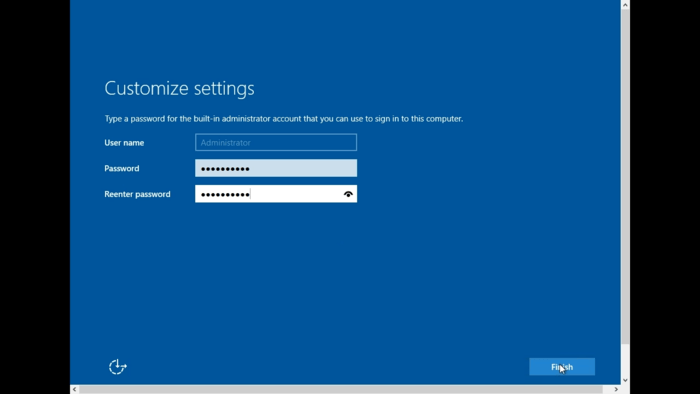
Note: We recommend setting a complex and safe password that consists of numbers, letters, and symbols.
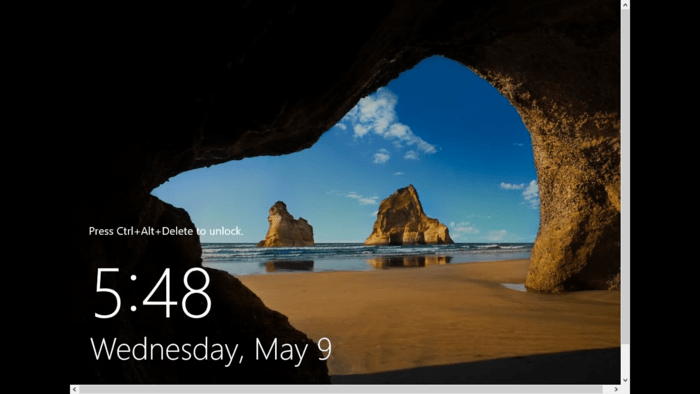
Step 15. To access the login page, press the Ctrl+Alt+Del buttons Simultaneously and enter the password you specified. Then press Enter.
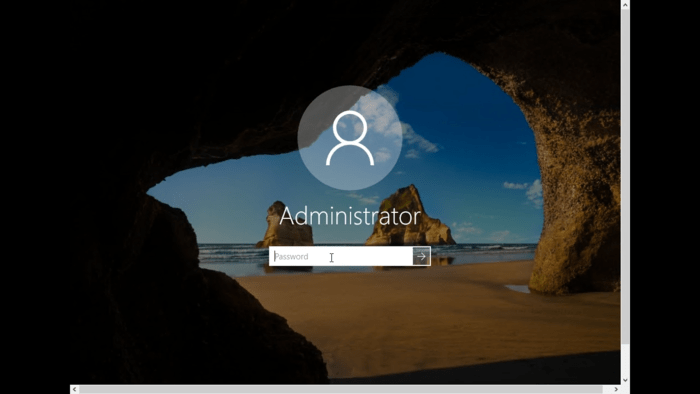
By pressing the Enter button, the desktop will be loaded, and finally, you will succeed in installing Windows Server 2016. Welcome to the wonderful world of Windows Server 2016.
It should be noted that the steps to install Windows Server 2016 on the server and PC are the same. If you decide to set up Windows Server 2016 on a PC, you need to create and configure a virtual machine before following the steps we’ve taught.
Conclusion
Successfully implementing the setup of Windows Server 2016 in your business environment demands careful planning, thorough installation, and detailed configuration aligned with your operational needs.
By following this step-by-step guide, business owners can ensure their server infrastructure is secure, efficient, and scalable. Properly configured servers support business continuity, protect critical data, and enhance productivity, providing a solid foundation for current demands and future growth.
Implementing best practices in security, user management, network setup, and backup safeguards your investment and reduces the risk of costly downtime or data loss.
Regular maintenance and monitoring keep your server running optimally, adapting to evolving business requirements. For business owners seeking to leverage Windows Server 2016 effectively, this guide serves as a comprehensive resource to achieve a successful and professional setup.
FAQ
2. Which version of Windows Server 2016 should I choose for my business needs?
Windows Server 2016 comes in Standard, Datacenter, and Essential editions. The Datacenter edition supports more virtual servers and is ideal for cloud and virtual environments, while the Standard edition suits smaller scale deployments. Choose based on your network size and virtualization needs.
3. How do I install Windows Server 2016 on a physical server or PC?
Download the Windows Server 2016 ISO file and create a bootable USB or DVD. Boot the machine from this media, select installation language, enter the product key or skip if unavailable, choose the appropriate Windows Server version, accept license terms, partition the disk as needed, and follow on-screen prompts to complete installation.
4. Can I setup Windows Server 2016 on a virtual machine?
Yes, Windows Server 2016 can be installed on virtual machines such as VMware or Hyper-V. Create and configure a virtual machine, attach the Windows Server 2016 ISO file, and proceed with the standard installation steps within the virtual environment.
5. What is the difference between a clean install and an upgrade when setting up Windows Server 2016?
A clean install erases all existing data and settings and installs a fresh copy of Windows Server 2016, which is recommended for stability and performance. Upgrading preserves existing files, settings, and applications but may carry over legacy issues.
6. What security features does Windows Server 2016 offer to protect my business network?
Windows Server 2016 enhances security through features like Secure Boot, Shielded Virtual Machines, Host Guardian Service, and improved attack surface reduction, designed to safeguard against modern cyber threats and unauthorized access.
7. How can I prepare my network before installing Windows Server 2016?
Assess whether your network requires a web server, estimate the number of users to support, and ensure hardware meets minimum specifications. Planning these factors helps select the right Server edition and configure the server optimally.
8. What should I do if I encounter issues during the Windows Server 2016 installation process?
Verify hardware compatibility, confirm the integrity of the installation media, and ensure correct BIOS settings for boot priority. Consult official Microsoft documentation or seek expert assistance if problems persist.
9. Is there a way to skip the long installation steps when setting up Windows Server 2016?
Yes, opting for a pre-configured Windows VPS service can save time by providing a ready-to-use Windows Server 2016 environment, eliminating the need for manual installation and configuration.
10. How do I finalize the setup after installing Windows Server 2016?
After installation completes, set a complex administrator password, log in with Ctrl + Alt + Del, and configure server roles and features according to your business requirements to ensure secure and efficient operation.