How to Install Windows Server 2019 Step by Step
Windows Server 2019 is a robust Microsoft operating system designed for enhanced security and hybrid cloud integration. This guide covers a clear, visual installation process to help IT professionals and business users deploy it efficiently.
🤖AI Overview:
Windows Server 2019 delivers advanced security, hybrid cloud capabilities, and virtualization support. It offers flexible installation options, including Server Core and Desktop Experience, suitable for physical, virtual, and cloud environments. This guide walks through the installation steps in detail for optimal deployment.
Prerequisites to Install Microsoft Windows Server 2019
To let this tutorial works correctly, provide the options below and move on.
- Server: Buy Dedicated Server to install Windows Server on it, and then follow the below instructions and screenshots to install Windows Server 2019 on the computer you prefer to be your server machine.
- Processor: 1.4 GHz 64-bit processor
- RAM: 512 MB
- Disk Space – At least 32 GB
- Network: Gigabit (10/100/1000baseT) Ethernet adapter
- Optical Storage: DVD drive (if installing the OS from DVD media)
Windows Server 2019 Visual Installation Steps
Let’s go through the steps of this guide and learn How to Install Windows Server 2019 smoothly. Just prepare a clean USB to create a bootable USB or DVD medium. Connect the USB to your system and start it.
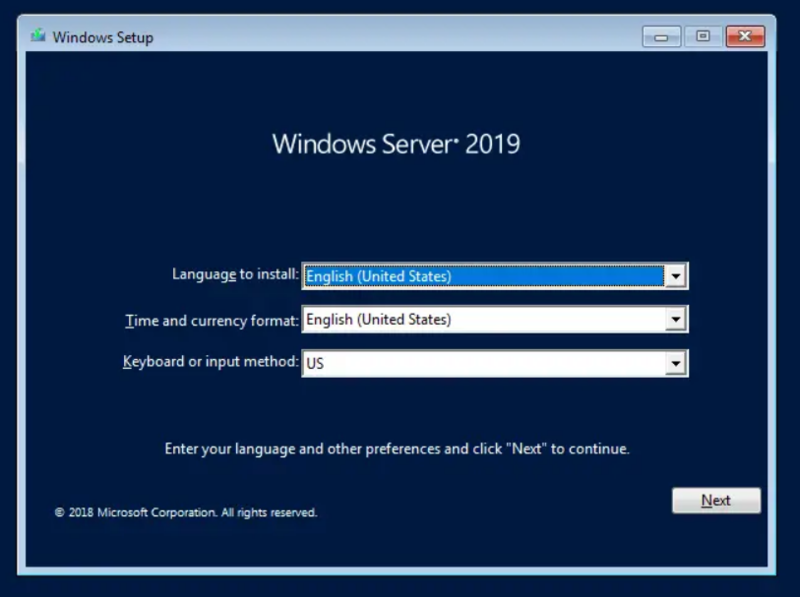
Step 1. Select Language, Keyboard type, and Time Zone
When loading files is finished, you will see the first blue screen. Select your preferred language, Keyboard layout, and Time zone. Then, click ‘’Next’’.
Step 2. Install Windows Server 2019
On the below screen, click on ”Install Now” to let the installation process get started.
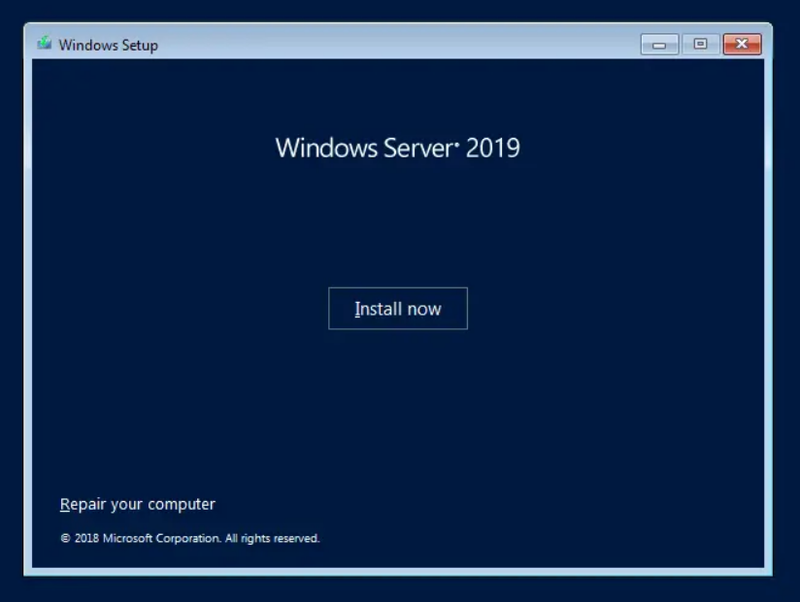
When you see the ”Setup is starting” screen, wait till it ends.
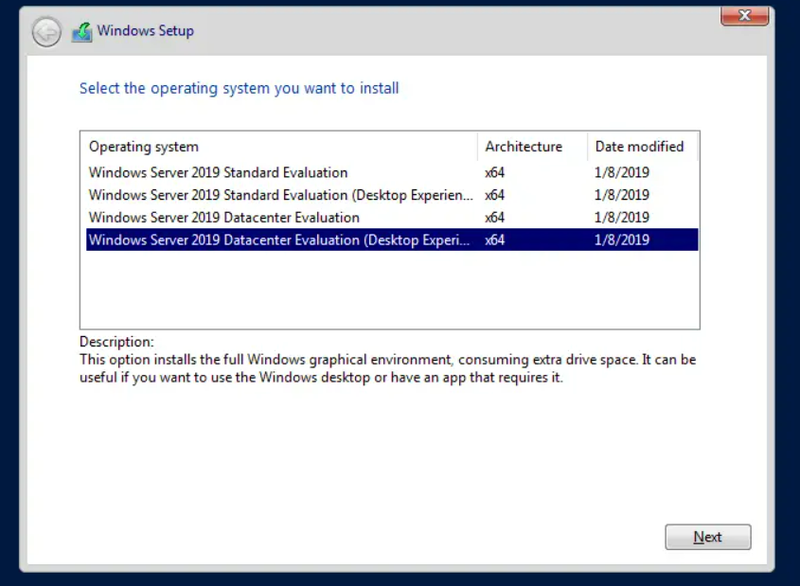
Step 3. Choose the Windows Operating System
At this point in the installation process, select the Windows Server operating system you wish to install and click ‘’Next’’.
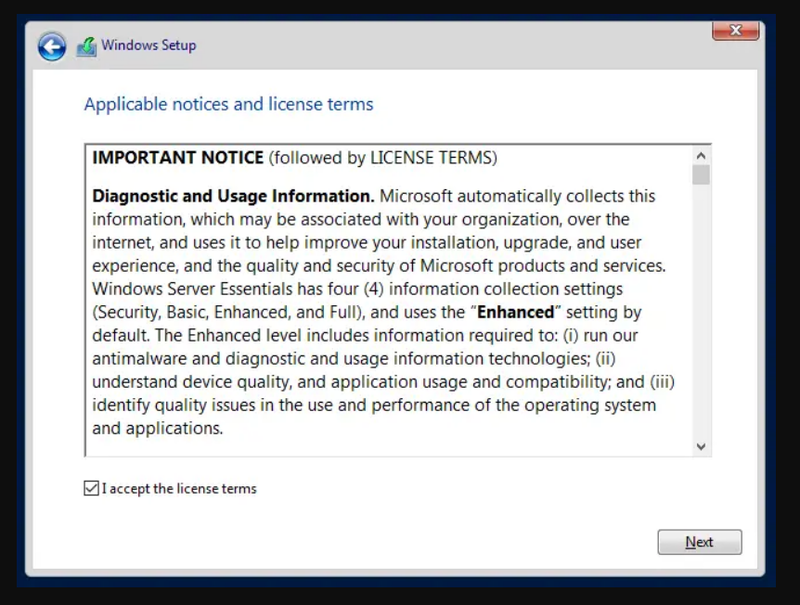
Step 4. License Agreement
By selecting the “I accept the license terms” checkbox after reading the license terms, you can begin the installation.
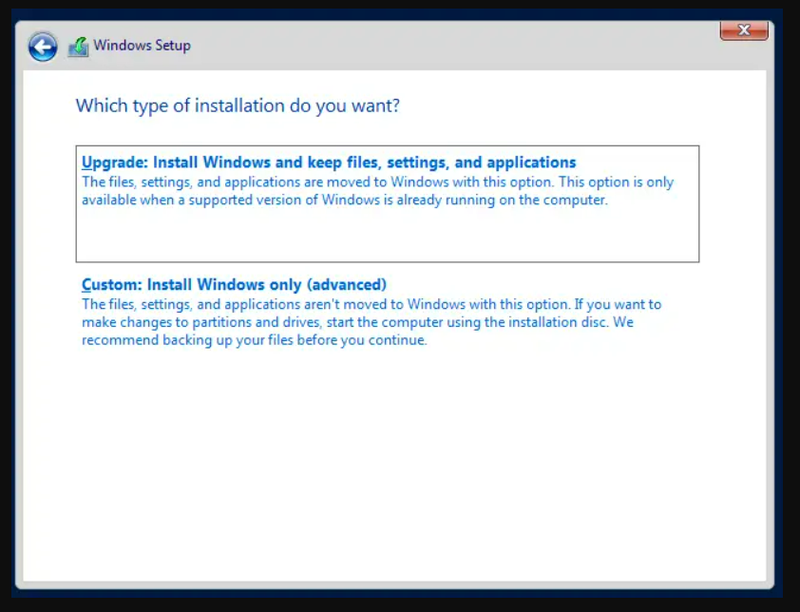
Step 5. Determine Installation Type
When you are asked to choose the type of installation, you must select (Custom: Install Windows only) if this is the first installation of Windows Server 2019 on your Server.
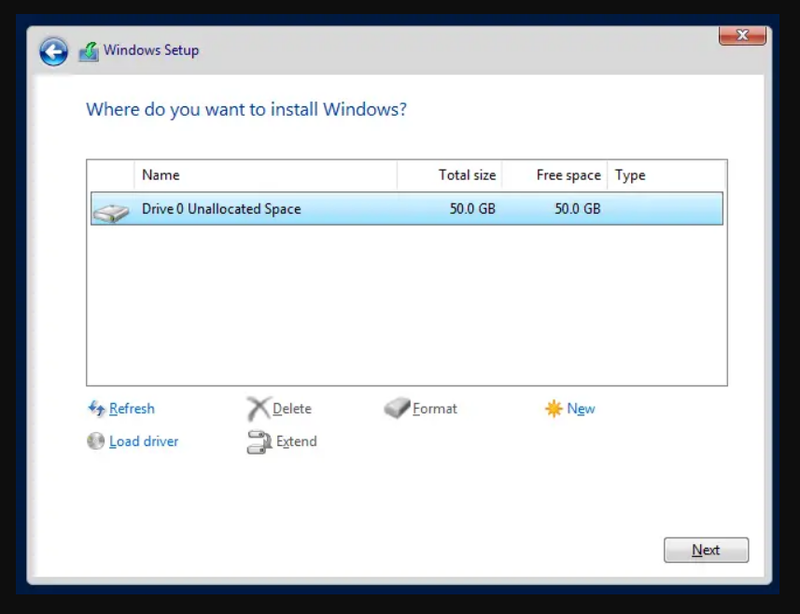
Step 6. Specify where to Install Windows Server 2019
In this part of Installing Windows Server 2019, you need to choose a partition to install Windows Server. Create a new partition for it and specify the size. Also, you can use the entire disk space available by clicking ‘’Next’’.
To consider a separate partition, If the service is going to be used as a full server, it is a good idea to keep the operating system separate from using data. To do this click ‘’New’’ and specify your considered size and click on ‘’Apply’’ and then click ‘’Ok’’.
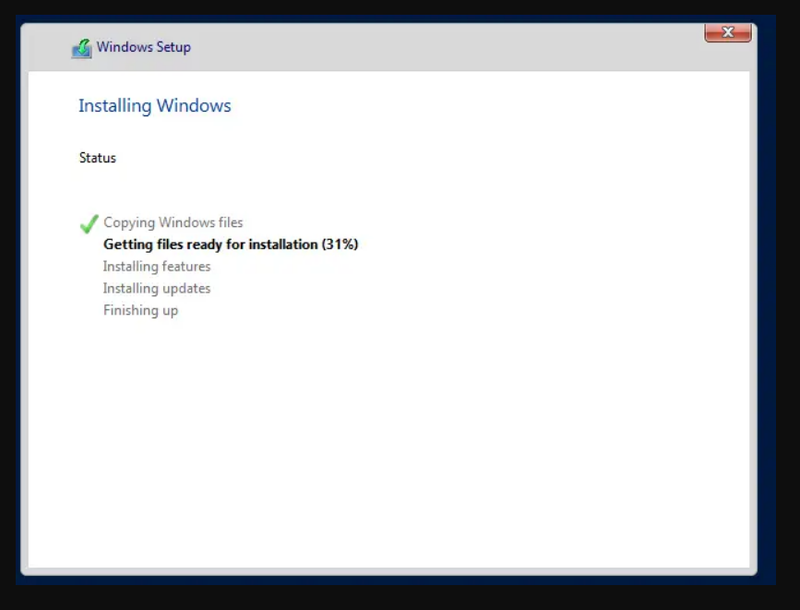
Step 7. Complete the Installation
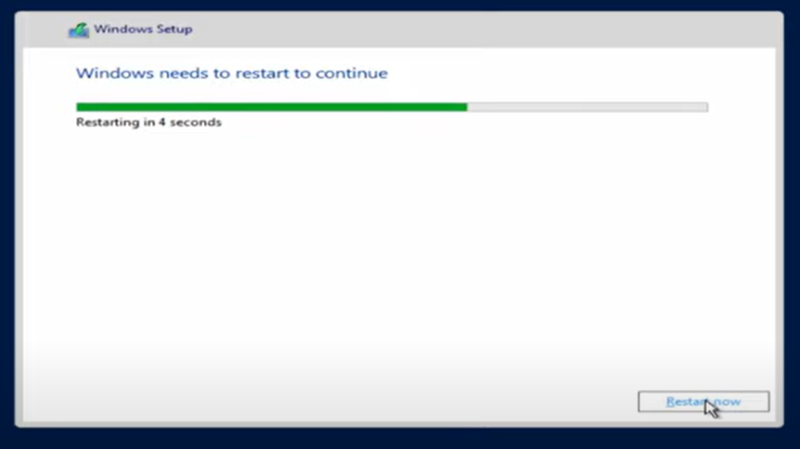
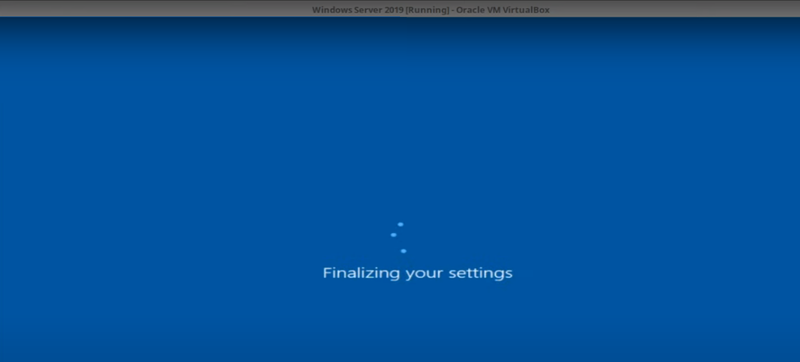
Wait for the installation to complete itself.
Windows will restart a couple of times and after that, the installation is finished.
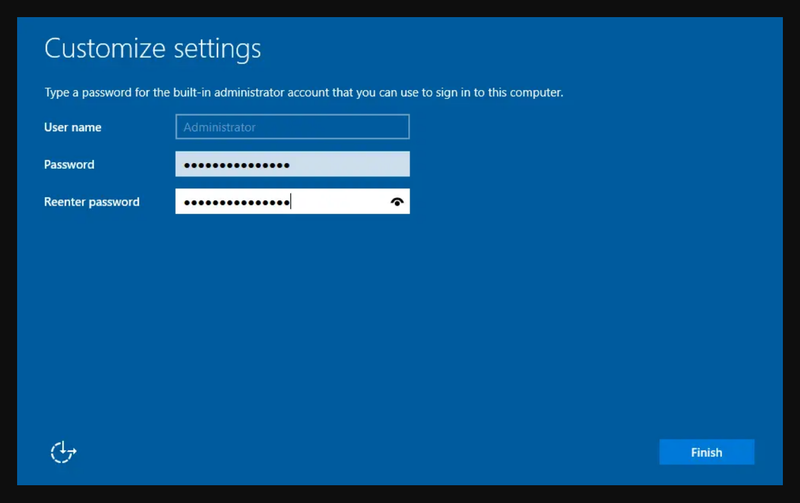
Step 8. Specify a Password for the built-in Administrator Account
On the screen below, choose a complex password for the administrator when you are prompted and click ”Finish”.
Step 9. Enter Your Administrator Password
To enter the user profile service, enter your password and wait for applying user settings and the local session manager. Use the Ctrl + Alt + Del key combination to log in as the Administrator user.

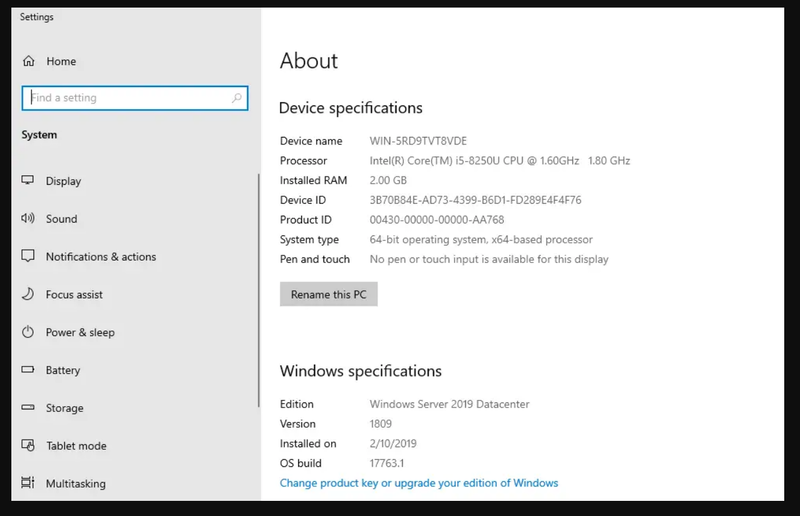
Step 10. Windows Server 2019 Settings
To review Windows Server details, refer to the settings section and customize different fields if you wish.
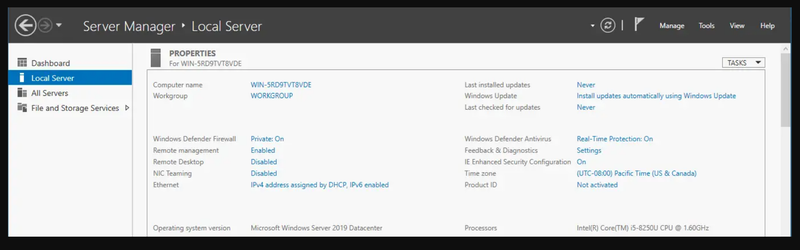
You should also be able to find information about Windows Server 2019 installation in the Server Manager Local Server area.
That’s all. Congratulation. This is the end of installing Windows Server 2019 on your Physical server or Virtual Environment. In the end, you are recommended to get back up in Windows Server 2019.
A Quick Method to Install Microsoft Windows Server 2019
As you know, a Dedicated server is a requirement for installing Windows Server. Since the support team of your provider does not install Windows Server 2019, you need to use virtual machines such as esxi or kvm. if you use any virtualization software, take a snapshot of the final point, as you haven’t yet set any roles or functions (Directory or Certificate Services) for the server.
Installing Windows Server on a PC also requires a virtual machine which seems difficult for many users. So, what is the OperaVPS team’s suggestion? You can easily buy Windows VPS with a pre-installed Windows Server 2019 to not have to do all the required steps of installation and manage the long process of installation.
Conclusion
Windows Server 2019 presents a powerful and versatile platform for business owners looking to modernize their IT infrastructure. Its enhanced security features, hybrid cloud integration, and improved management tools provide a resilient environment capable of supporting both traditional and modern workloads.
Careful planning and adherence to recommended installation and configuration best practices will ensure that businesses derive maximum value from Windows Server 2019. By leveraging its capabilities, organizations can enhance operational efficiency, safeguard critical data, and position themselves for sustainable growth in an increasingly digital business landscape.
FAQ
2. What installation options are available for Windows Server 2019?
Windows Server 2019 can be installed as Server Core or Server with Desktop Experience on physical servers, virtual machines, or cloud platforms.
3. How does Windows Server 2019 enhance security for business infrastructure?
It provides enhanced protection against security threats, integrates with Microsoft Azure for additional security, and includes system insights for proactive server health management.
4. Can Windows Server 2019 integrate with cloud services?
Yes, it supports hybrid cloud environments by connecting on-premises servers to Microsoft Azure for modernized infrastructure management.
5. What licensing options are available for Windows Server 2019?
Licensing includes Standard and Datacenter editions, catering to different business needs, with terms accepted during installation.
6. How does Windows Server 2019 support modern application development?
It supports containerization and micro-services architectures, facilitating efficient cloud-native and modern app deployment.
7. What preparation is recommended before installing Windows Server 2019?
Prepare a dedicated server or virtual machine, create bootable installation media, verify system requirements, and back up important data.
8. How can installation challenges be minimized?
By following detailed guides, selecting appropriate installation types, and correctly configuring partitions, errors can be reduced.
9. What post-installation steps are essential?
Set a complex Administrator password, configure server settings via Server Manager, and establish backup solutions.
10. Is technical support available for Windows Server 2019?
Yes, many providers offer support; consulting with technical teams is recommended for installation and operational assistance.