How to Install Plex in Ubuntu to Store Media
Plex is a media server and streaming platform that allows users to store, play, and manage their media content, such as music, movies, photos, TV shows, and more. So, if you’re into watching movies and TV shows, Plex is an excellent solution for accessing and organizing your digital media content. Through its attractive user interface, Plex displays all your movies, photos, and other media content, and it enables you to share your movie collections with others.
Unlike video streaming services, Plex software lets you stream your movie and video collections to other devices. Plex is compatible with all popular operating systems, so if you’re using a Linux-based operating system like Ubuntu, you can easily install and use the Plex Media on Ubuntu. In this article, you will learn how to install Plex in Ubuntu to store, access, and organize your media so you can enjoy watching media content.
Advantages of installing Plex on Ubuntu
You can be confident in installing Plex in Ubuntu Linux if you get familiar with the features and benefits Plex offers:
- Plex helps you manage and organize your media libraries for watching and accessing movies, TV shows, and music. This makes browsing and searching your media content quicker and easier.
- Plex allows you to stream your media content to various devices, such as smart TVs, smartphones, gaming consoles, and web browsers and enables access to your media from anywhere with an internet connection.
- Plex can transcode media, allowing you to adjust the quality of media streaming according to the capabilities of your playback device and creating a smooth playback experience on different devices.
- With Plex, you can access your media server remotely, which is useful when you’re not at home and want to access your media content or you want to share your libraries with friends and family securely.
- Plex allows the creation of multiple user profiles with different levels of access.
- Plex, with its security features, preserves your privacy and protects your media content and data.
- Using Plex features, you can watch and even record live TV shows and configure DVR and live TV functionalities.
- Plex provides media synchronization for offline watching with mobile devices, ensuring that media content is accessible without an internet connection in any situation.
- Plex supports a variety of plugins and add-ons to expand its functionality, such as subtitles, parental controls, and more.
- Plex is a self-hosted solution that eliminates the need for third-party services and grants you complete control over your media.
Prerequisite for Plex installation on Ubuntu
If you want to create a personal media server, we recommend purchasing Ubuntu VPS with sufficient storage space (RAM and CPU) to store your media libraries and transforming it into an efficient media server by installing Plex. To install Plex in Ubuntu server, it is essential to ensure that you are running a supported version of Ubuntu by Plex Media Server. In general, Plex supports Ubuntu 20.04 LTS and newer versions. However, for information about the supported Ubuntu versions, you can check the official Plex website.
To install Plex in Ubuntu, you should have a user account with sudo privileges. Creating a Plex account for remote access, user management, and enjoying additional features (a Plex Pass subscription provides extra capabilities) is beneficial. Using and assigning a static IP address to your Ubuntu server is a good step for establishing a secure and reliable connection to other devices.
Steps to Install Plex on Ubuntu Server
To install Plex in Ubuntu Linux, follow the following instructions:
1. Update System Packages
Before installing Plex or any new software on Ubuntu, it is recommended to ensure that your packages and repositories are up to date. Therefore, open the terminal and run the following commands:
sudo apt update
sudo apt upgrade
By running the previous commands, you upgraded and updated your system’s old packages.
2. Install Dependencies
For the initial installation of Plex on Ubuntu, make sure to install the following packages first:
sudo apt install dirmngr ca-certificates software-properties-common apt-transport-https curl -y3. Download and Install Plex Media Server
To efficiently install and update Plex, you should add the official Plex repository to your Ubuntu system so that you can directly install and update Plex from its official repository. To import the Plex repository to an Ubuntu system and install the Plex Media Server, follow the steps below:
- To ensure the validity of the package, add the Plex GPG key to the apt repository:
curl https://downloads.plex.tv/plex-keys/PlexSign.key | sudo apt-key add -- Then add the Plex repository to your system resource list:
echo deb https://downloads.plex.tv/repo/deb public main | sudo tee /etc/apt/sources.list.d/plexmediaserver.list- Update the package database once again to refresh the cache and reflect the new repository:
sudo apt updateAs you can see, you have added the Plex repositories to your system’s source list, and now you can install the Plex Media Server through these repositories.
- Install Plex Media Server on Ubuntu:
sudo apt install plexmediaserverOutput:
Reading package lists… Done
Building dependency tree… Done
Reading state information … Done
Recommended packages:
beignet-opencl-icd
The following NEW packages will be installed:
plexmediaserver
0 upgraded, 1 newly installed, 0 to remove and 10 not upgraded.
As a result, all Plex dependencies, along with the Plex Media Server and everything you need, will be installed.
4. Check the Plex Media Server Status
After completing the installation, the Plex service should start automatically. To confirm proper operation and successful installation of Plex software, run the following command to check the status of the Plex service:
sudo systemctl status plexmediaserver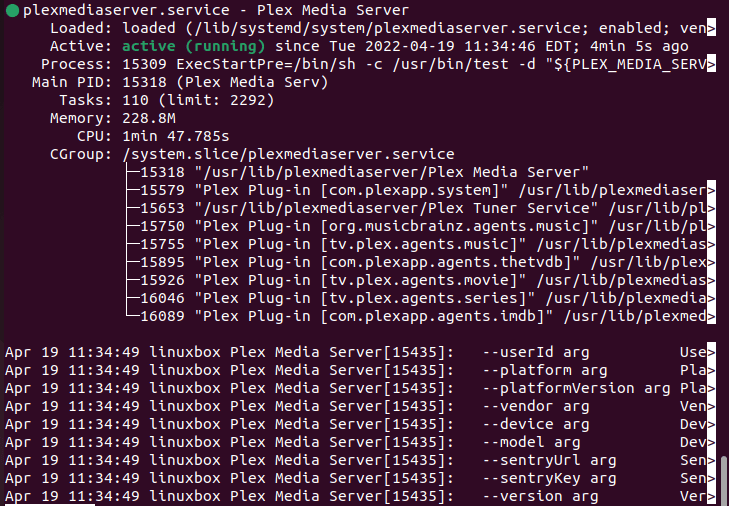
The “Active: active(running)” in the previous command output indicates that Plex will start up automatically every time you reboot the server, so you don’t need to worry.
5. Start and Enable Plex
If you notice that the service is not active, execute the following commands to start the Plex Media Server and enable it for automatic startup during boot:
sudo systemctl start plexmediaserver
sudo systemctl enable plexmediaserver
Also, to restart the Plex service, use the following command:
sudo systemctl restart plexmediaserver6. Configure Firewall
If you use a firewall like UFW on your Ubuntu system, you need to configure it to allow Plex Media Server to communicate over the network. This is especially important for remote access features. By default, the UFW firewall is active, but for assurance, you can first check the status of the UFW firewall:
sudo ufw statusOutput:
inactiveIf the firewall is inactive, enable it first:
sudo ufw enablePlex Media Server typically uses port 32400 by default, so to allow access to the Plex Media server, open the default Plex port on the UFW firewall:
sudo ufw allow 324007. Setting Up an SSH tunnel on a remote Ubuntu server for Plex
If you want to access your Plex server remotely from other devices, you need to log in to your Plex account and configure remote access settings to stream your media outside your local network. If you have set up Plex on a remote Ubuntu server, setting up an SSH tunnel on your local system is a good way to enable external connections. If you are setting up SSH for the first time, run the following command:
sudo apt install openssh-server -yThen enter the following command to set up an SSH tunnel for Plex on the Ubuntu server:
ssh {server-ip-address} -L 8888:localhost:32400Now start the service by typing the following command:
sudo systemctl enable ssh -yTo access the Plex Media Server, launch your web browser and type the following:
http://localhost:8888/webOr
localhost:32400/web/index.html#!/setupAs a result, the remote HTTP server request is directed through an SSH tunnel to the http://localhost:32400/web address. After setup, you can access the Plex Media Server using your remote server’s IP address:
https://{server-ip-address}:324008. Configure Plex on Linux Ubuntu
After installing Plex on the remote Ubuntu server, go to the following address via a user-friendly web browser interface:
http://localhost:32400/webOr
https://{server-ip-address}:32400/webAs a result, you will see the following page:
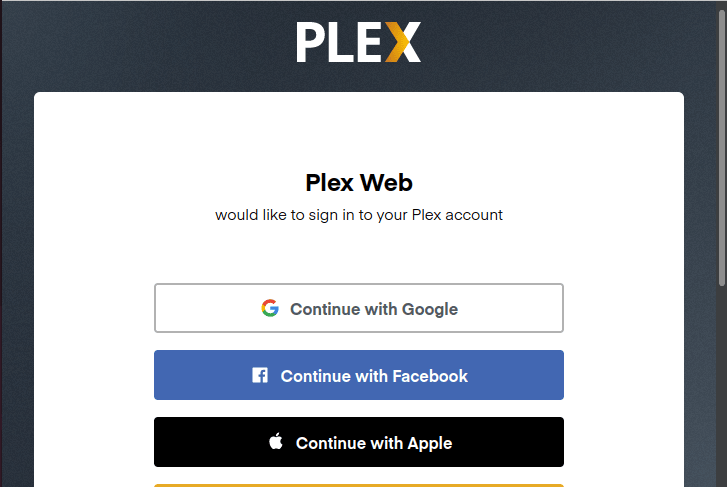
If you have previously created an account, log in using one of the options. But if this is your first time, you will land on this page, sign in to access the Plex service features. After logging into your account, you can configure Plex.
-
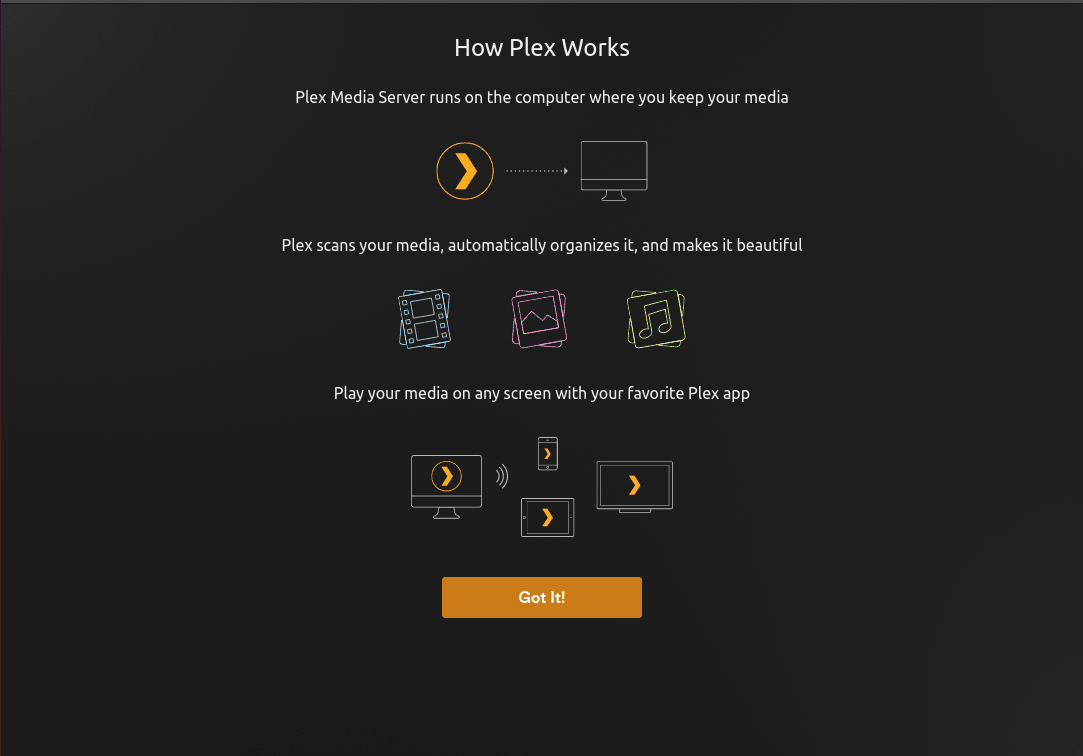
Learning How Plex Works and Its Configuration
On the initial page you encounter, a brief explanation of how the Plex service works is provided. After reading it, click “GOT IT” to proceed to the next page.
-
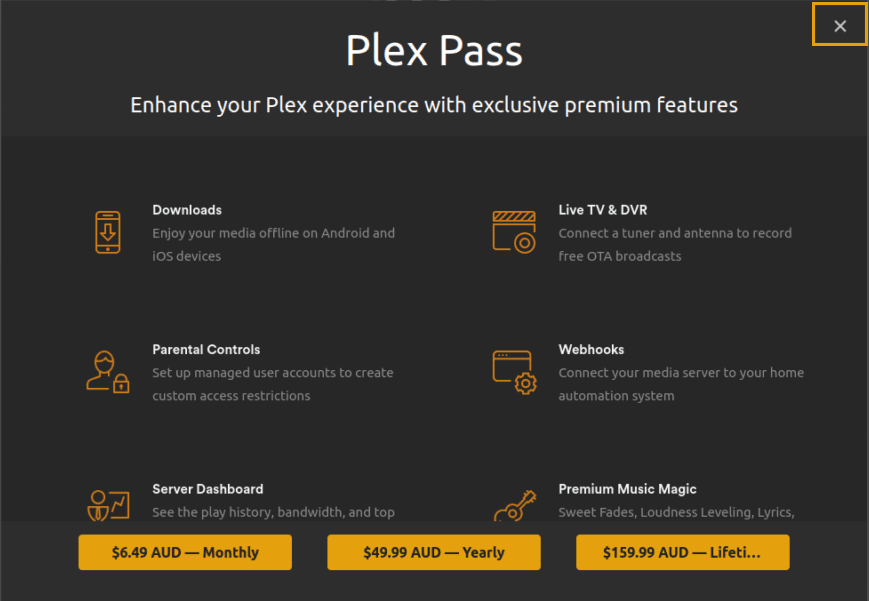
Upgrading to Plex Pass
On this page, you are given the option to upgrade to Plex Pass if needed. Plex Pass is the paid version of Plex that provides additional features such as HDR options, access to Beta builds, Download capabilities, Parental controls, Live TV & DVR, Webhooks, and many other great options. To proceed to the next page, click on the “X” in the upper right corner of the page.
-
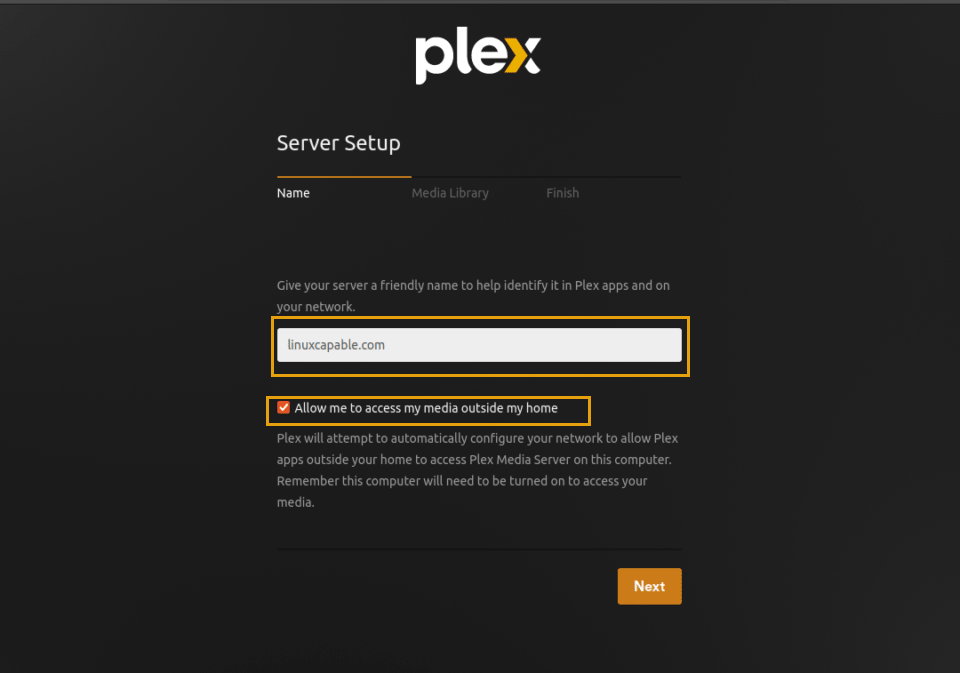
Server Setup
At this step, a default name is set for your server, or you can choose to name your server. Additionally, you can enable or disable the “Allow me to access my media outside my home” feature based on your preferences. Then, after configuring, click “Next” to proceed to the next page.
-
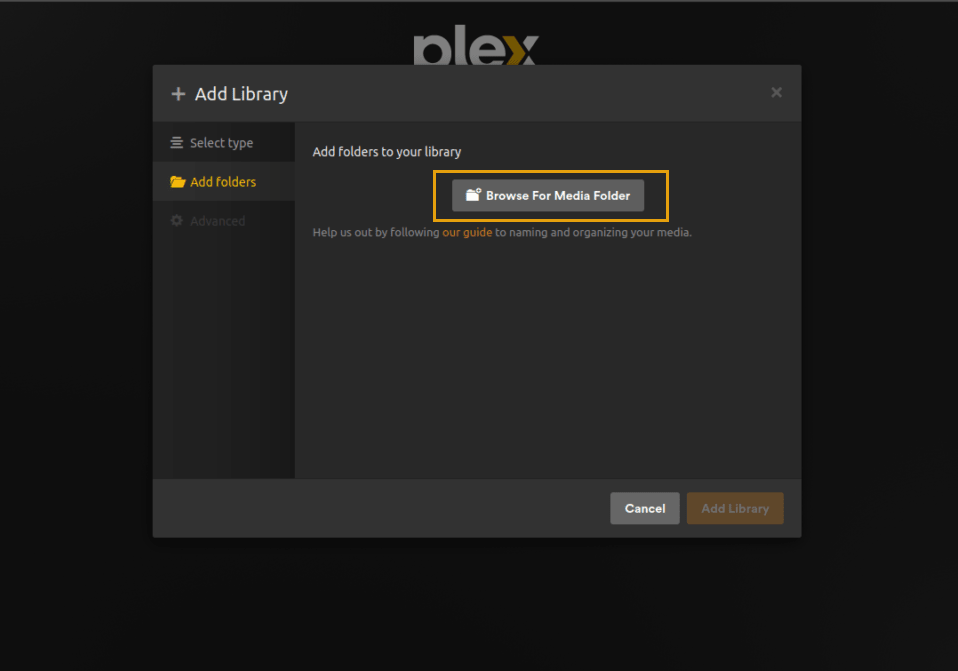
Setting Up Media Library
At this step, you can add your media libraries to the Plex service dashboard. By selecting the ” Add Library ” button, you can add a drive or folder containing your media. So, you can browse for that media folder and select the media directory. You can choose the library type, for example, Movies, TV Shows, Music, Photos, Games, and Other Videos, and then specify a name for the library and click “Next.”. In this way, you can add multiple libraries in the same manner.
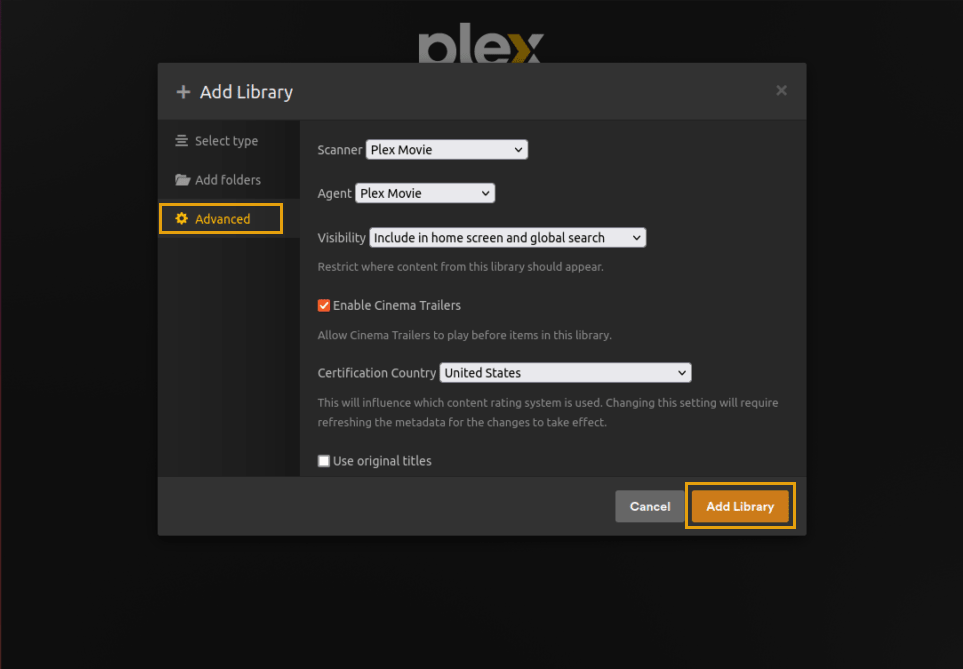
After adding the folder, there are Advanced options for customization.
Finally, after completing the folder addition process, click “Add Library.”
-
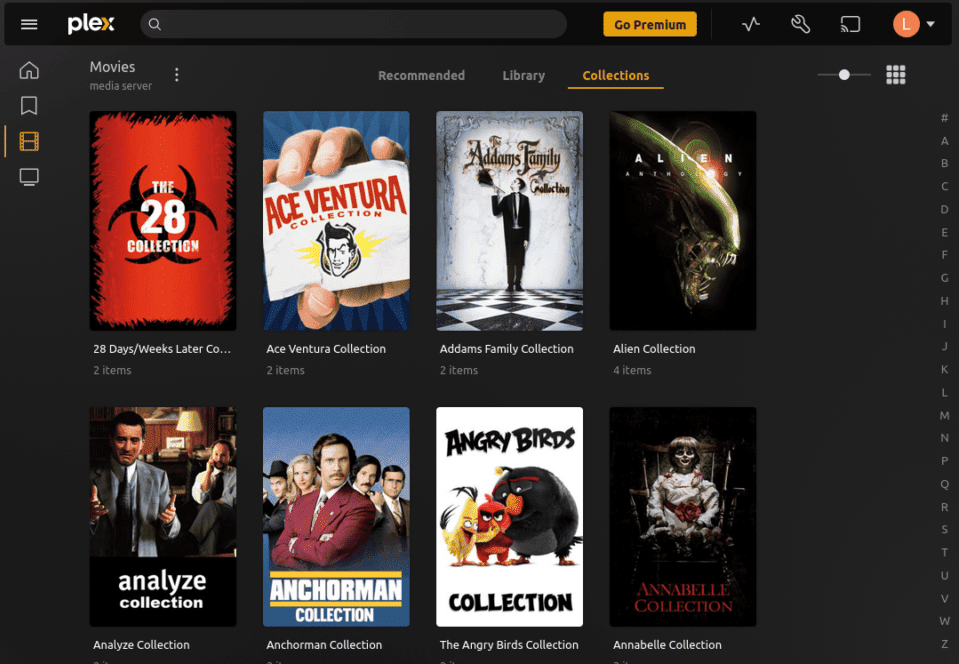
Finish the Plex Initial Setup
After adding the folder, in the next step, by clicking on the “Done” button, the initial Plex setup is completed, and the Plex dashboard appears for use.
Troubleshooting Plex: if media is not appearing while adding to Plex
One of the most common issues you may encounter during the initial setup process of Plex on Ubuntu is that when adding media content to Plex, it’s possible that some media may not be recognized for adding, or Plex may face issues when picking up the media. This problem can be frustrating as it presents challenges when adding your media to Plex.
Solution: Configuring File and Media Folder Permissions in Plex Media Server
This issue is related to the permissions for reading and executing your media files and folders. To display and access your media files and folders, you need to configure read and execute permissions for the media content directories in your dedicated Plex user account, named Plexuser. Otherwise, Plex will be unable to display or pick up the media content without the necessary read and execute permissions.
Commands such as chown (for changing ownership) or setfacl (for setting file access control lists (ACLs) to manage permissions) are useful for setting permissions in Ubuntu. Therefore, by using these commands, you can apply these permissions:
- Applying permissions in Ubuntu using the chown command:
sudo chown -R plex:plex /media/yourfolder/If there are other folders on your hard disk that you want to hide from Plex’s access, run the following command:
sudo chown -R plex:plex /media/yourfolder/tv
sudo chown -R plex:plex /media/yourfolder/movies- Applying permissions in Ubuntu using the setfacl command:
sudo setfacl -R -m u:plex:rx /media/yourfolder/
sudo setfacl -R -m u:plex:rx /media/yourfolder/tv
sudo setfacl -R -m u:plex:rx /media/yourfolder/movies
Executing the previous commands requires the installation of the ACL package. If your Ubuntu system does not support ACL, you can install the ACL package by running the following command:
sudo apt install acl -yUpdating Plex Media Server on Ubuntu
To use the latest features of the Plex service, it’s essential to update the Plex Media Server regularly. To update the Plex service on Ubuntu, update the Ubuntu system via the apt package manager using the following command:
sudo apt updateThis command updates all installed packages in Ubuntu, including the Plex service. However, for upgrading the Plex Media Server package, you can also use the following command:
sudo apt upgrade plexmediaserver -yRemoving Plex Media Server
You may no longer need Plex Media Server and want to remove it from your system. To achieve this, you can simply run the following command:
sudo apt autoremove plexmediaserver --purge -yIf you don’t intend to reinstall Plex Media Server and want to remove it completely, you can delete its official repository, which is located in the /etc/apt/sources.list.d/ directory, using the “rm” command:
sudo rm /etc/apt/sources.list.d/plexmediaserver.listFor a complete and permanent removal of the Plex Media Server in Ubuntu, you won’t need the GPG key anymore. Therefore, by executing the following command, you can get rid of the GPG key:
sudo rm usr/share/keyrings/plex.gpgSo, by running the previous command, you will delete the GPG key located in usr/share/keyrings, and your Ubuntu system will be completely rid of the Plex software.
Important Points for Configuring and Using Plex on Ubuntu
- Don’t overlook the importance of creating and organizing media libraries systematically to create an optimal, fast, and smooth experience.
- Installing Plugins is crucial for optimizing Plex usage and creating a great experience. Manually install Plugins (placing Plugin files in the Plug-ins directory) to utilize their features for enhancing Plex.
- Customize the appearance of Plex Media Server by using skins that match your preferences.
- To optimize streaming performance, configure the server’s transcoding settings through “Settings > Transcoder.”
- Enable subtitles by going to Settings and selecting “Server > Languages.”
- We always recommend not leaving the application to its own but regularly monitoring and controlling the Plex media server’s performance (bandwidth usage, issue identification, and resolution) through the internal dashboard or other software for desired results.
- It’s always a good practice to back up your Plex configuration and databases before making significant changes.
Conclusion
In summary, Plex is an all-in-one media server and streaming solution that offers a wide range of features for an enhanced media experience. It allows you to access your content from various devices, freeing you from location, time, and high-speed internet connection constraints in watching and managing media content. Now, By installing Plex on an Ubuntu server, you’ve created a personal media server that allows you to enjoy its benefits to the fullest. In this tutorial, you’ve learned how to install Plex in Ubuntu and equip your Ubuntu server for using an efficient and secure media environment with Plex. We hope this tutorial has provided you with a good and new experience of managing and accessing media content.
If you have any questions or need guidance in this regard, we are here to help you address your issues. Feel free to leave your questions in the comments section.