Install Ubuntu Beside Windows 10 Easily
Install Ubuntu beside Windows 10 by creating free disk space and setting up a dual boot. Use a bootable USB, manually partition during installation, and keep both OSs safe.
Note: Before doing anything, be sure to back up your system data so that for any reason, if you make a mistake while working, the data will not be lost.
🤖AI Overview:
Installing Ubuntu beside Windows 10 involves preparing disk space, creating a bootable USB installer, and manually installing Ubuntu without removing Windows. This ensures you can choose either OS at startup using the GRUB menu for a seamless dual boot experience.
Get Requirements To Install Ubuntu alongside Windows 10
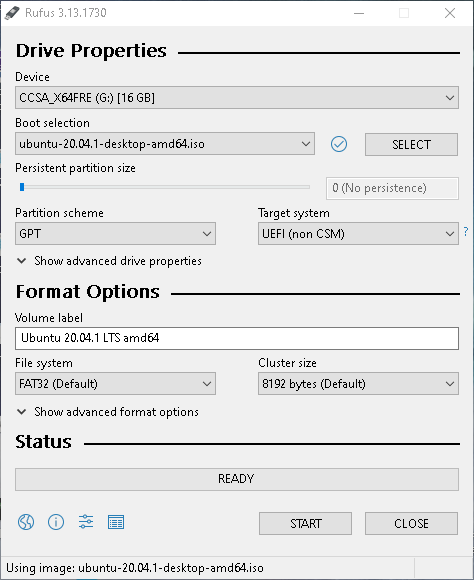
First of all, you should have a flash drive to put the ubuntu iso file inside it to install Ubuntu beside Windows 10. Download the new version of Ubuntu ISO for installation. After downloading, we must also download Rufus. This software puts the downloaded Linux file on the bootable flash drive. Place the downloaded Linux file in the boot selection section as shown below, place the partition scheme on the GPT, and hit Start. Depending on the speed of your flash drive, this process may take several minutes.
we can easily go to the BIOS to select the bootloader on the flash drive that we use to install ubuntu beside Windows 10, which is also different in laptops and other systems, and if Failed to search the internet or let us know so we can teach you how to go to your system BIOS page
Allocating Disk Space for Ubuntu installation
From the Windows 10 search section, according to the below picture, find the Disk Management and enter it. In the next photo, we will see how to allocate a part of the drive to the Linux installation space.
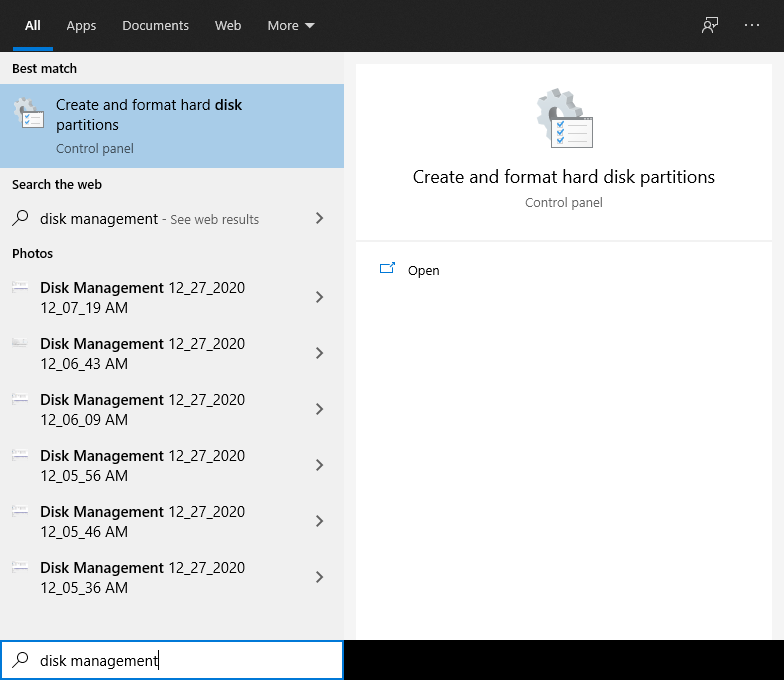
From the Windows 10 search section, according to the below picture, we find the disk management and enter it. In the next picture, we will see how to allocate a part of the drive to the Linux installation space. In this section, first right-click on the C drive and click on the Shrink Volume option, and after clicking on this section, you will see a page that asks you for the amount of space you want to free to install, which in the next photo will show you.
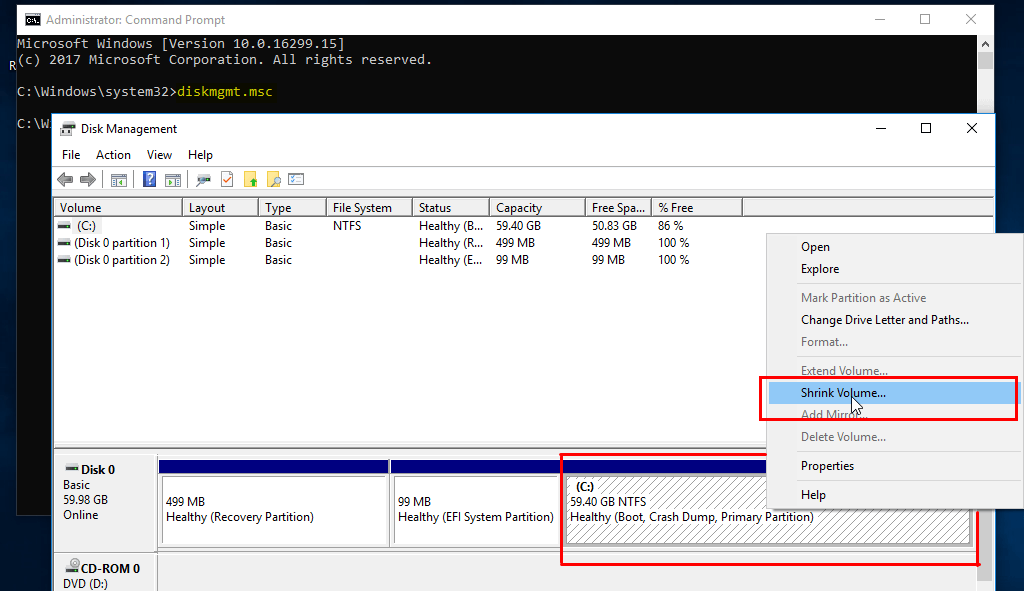
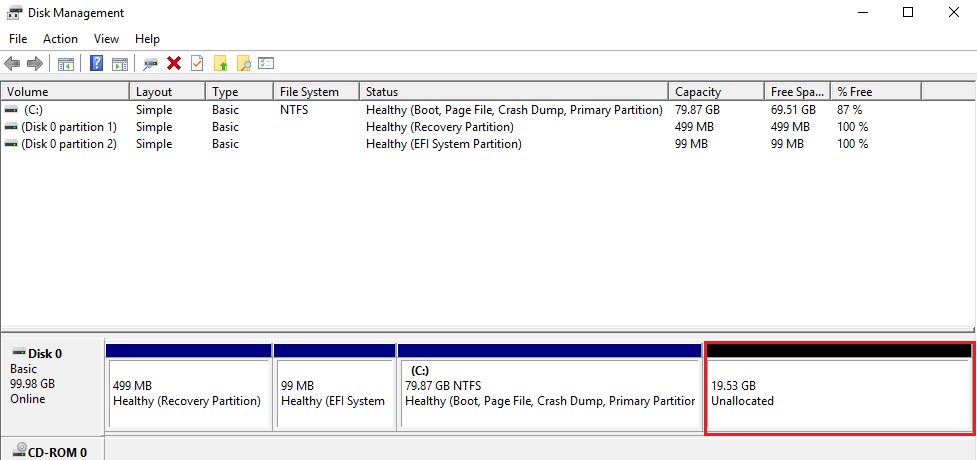
Inside the red box, select the amount of dedicated space to install based on the amount of free memory on the C drive, which is usually 30 GB to 20 GB, but this amount also depends on your interest and work with Linux. I have selected and written 20 gigs and then after confirming it, you will see the empty part in black in the next photo.
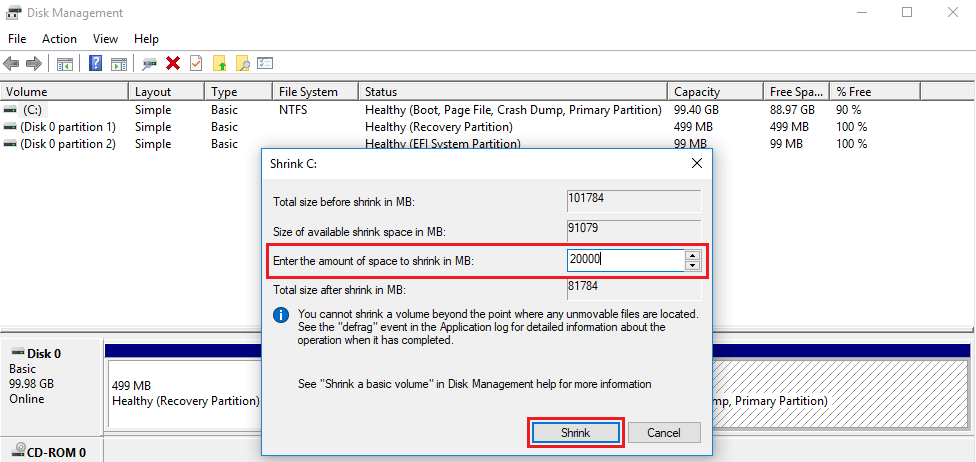
As you can see, we have removed 20 GB of drive C and it is available in raw form to select and use when installing Ubuntu. After completing these steps, we will restart the system and enter the system BIOS to flash Ubuntu. Install on drive C without deleting our data
Enter Bios To Boot The Flash Disk
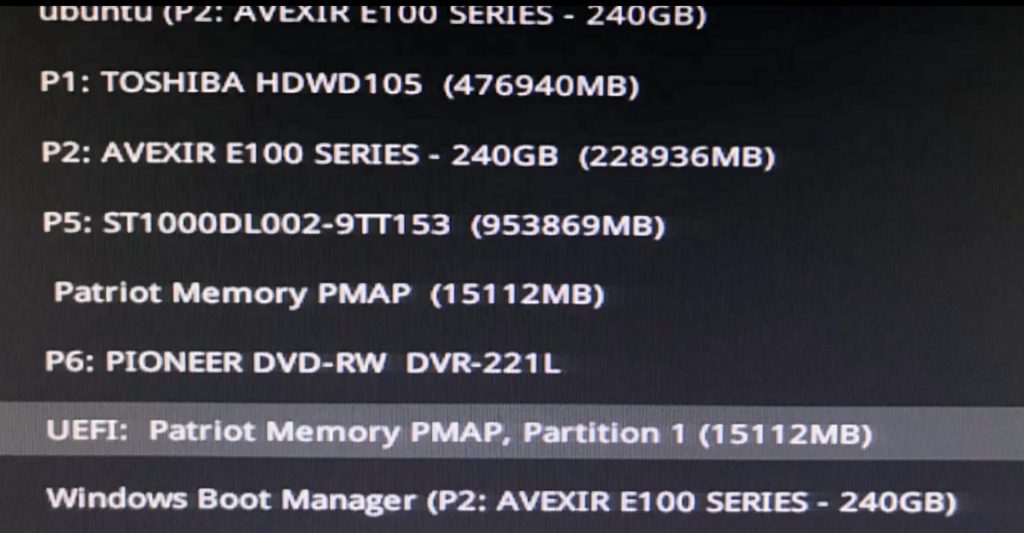
Now to install Ubuntu beside Windows 10, we need to boot the flash disk from the Bios. You can log in to the Bios using different keys in different motherboards. If you don’t know how to login to the Bios you can search it on google to find out how but on most of the devices you can start a page for bootable options with the F11 key after rebooting the system.
After booting Ubuntu, we will see this page, and to start the installation, we must select the Ubuntu installation option.
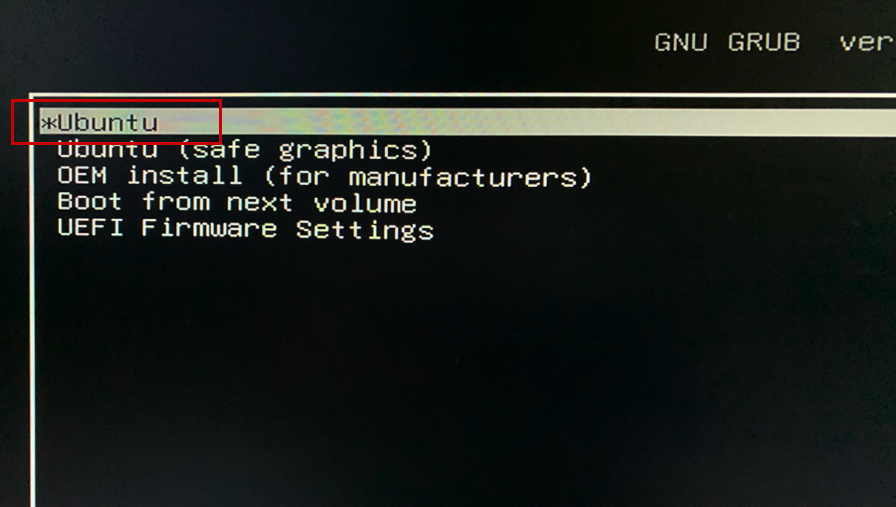
Ubuntu users have been complained in the past about why we can not enjoy the high graphics screen like Windows when installing Linux, which has also succeeded in solving this problem and by putting the graphics in the kernel was able to have a great graphics page when installed, which users are also satisfied with.
Steps To Install Ubuntu Beside Windows 10
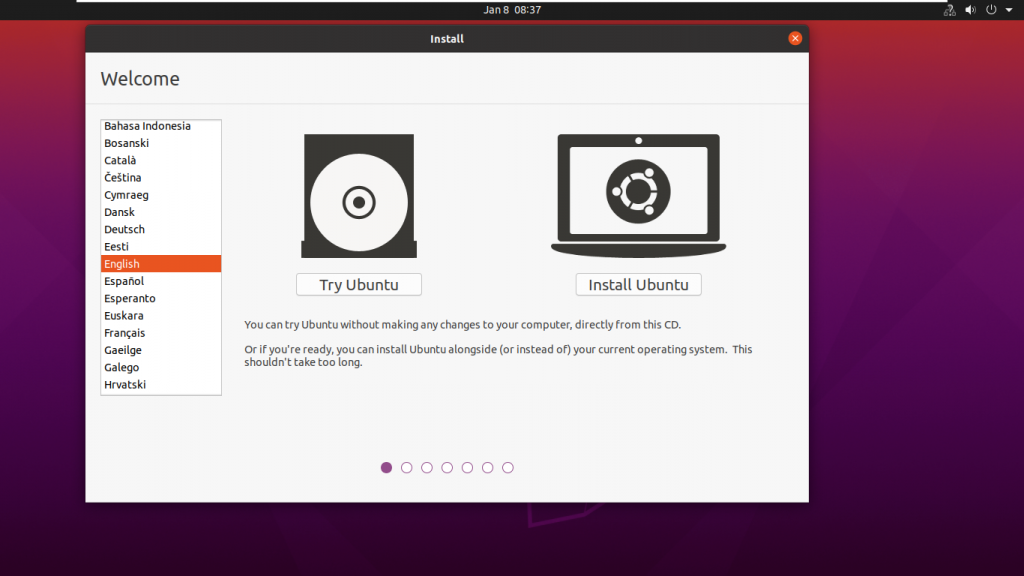
1. First, select the language you want to install, then click on the install Ubuntu option and enter the second part of the installation.
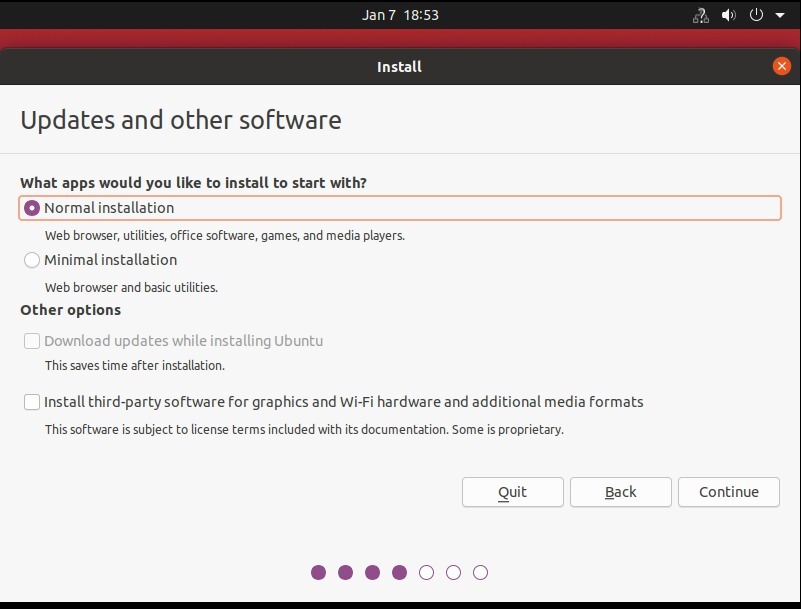
2. Now, we enter this page that we have to select only the normal installation option and select continue. If you are not interested in installing Ubuntu system prerequisites, for example, mp3 player, such additional programs, or downloading updates you can uncheck these two options as shown in the below picture and continue, but if you want, select these two options and continue the installation. Just keep in mind that it may take a little more time to install Ubuntu if you check these options.
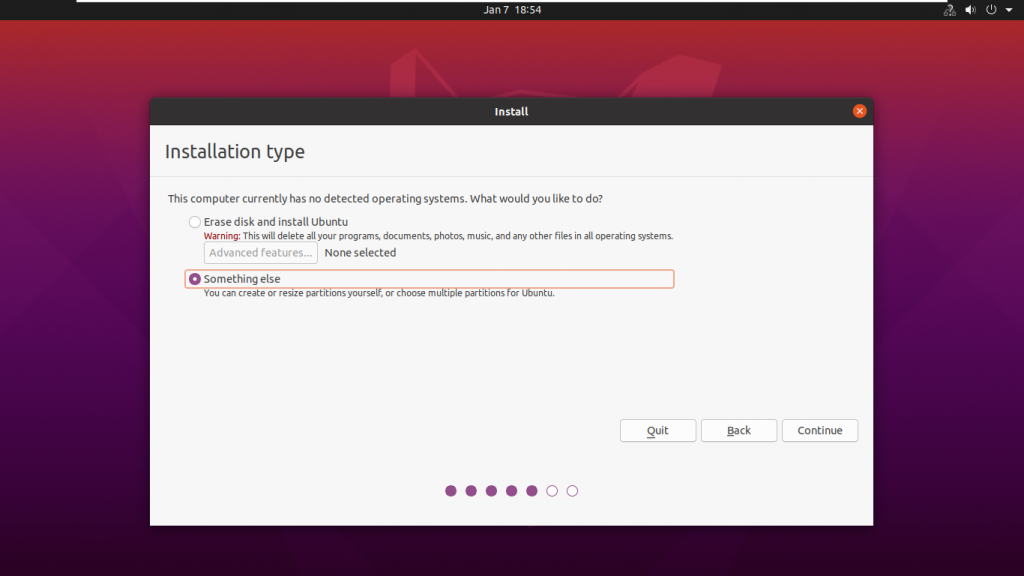
3. One of the most important parts to install Ubuntu beside Windows 10 is that you should not select the install ubuntu alongside windows 10 option in any way, and you should select the last option, something else, so that we can continue installing according to our wishes. Most users In this section, by not observing the said items, have lost their information on Windows 10, so pay attention, do not choose any other option in this section except Something else.
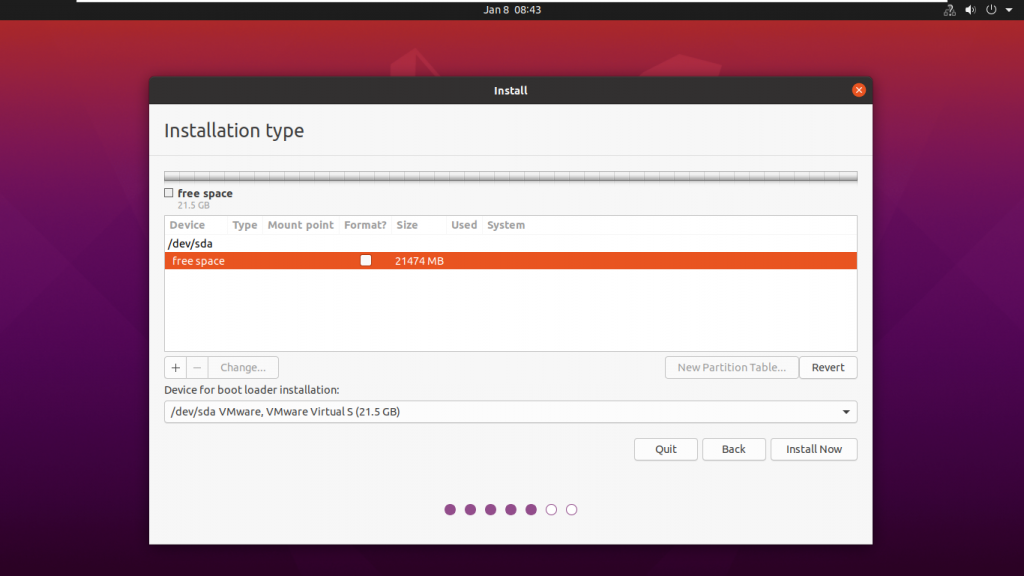
4. Another important part of installing Ubuntu is that we can see the selected memory that we had in Windows 10 to install Ubuntu on drive C and divide it into different sections and continue the installation. First, we go to the free space section and then click on + to allocate memory to the parts needed. To do this, we need to create the root, home, swap, and boot partitions.
ROOT: Ubuntu is installed on this partition.
HOME: This partition stores personal files and user accounts.
SWAP: This partition is used to store temporary information when the RAM is full.
Boot: This partition keeps ubuntu boot files and used when booting the OS.
Note: If you did any of the following steps incorrectly, click the Revert button to return the settings to their original state.
Note: You can enter any amount that you need for the partitions according to your resources instead of the following amounts.
5. To create a swap, click on free space, and then select the + button. Note that if you have 2 GB of RAM, you have to choose the swap twice as your RAM, or if you have 8 GB of RAM, you have to swap half of your RAM. To create a swap in the size area according to the below picture, allocate 4000 MB of space.
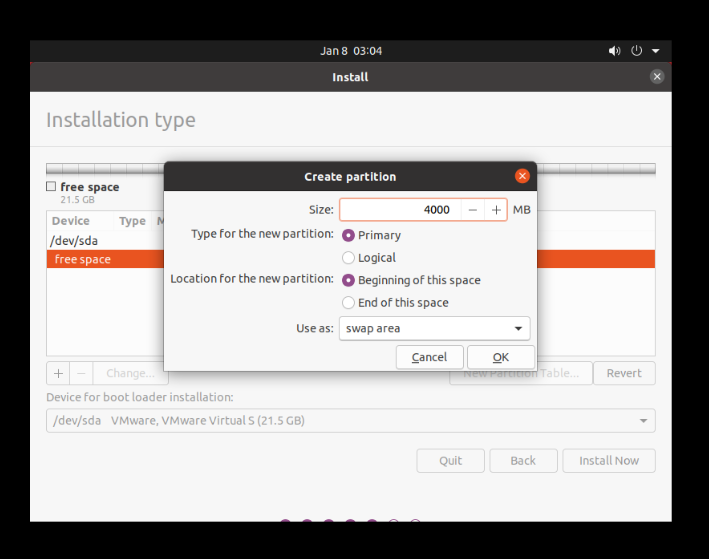
Size = 4000 MB
Type for the new partition = Logical
Location for the new partition = Beginning
Use as = swap area
6. To create the root, click on free space again, and then select the + button. In the open part, we act according to the below picture. In the size section, you should consider the most space required, because this partition keeps OS tools.
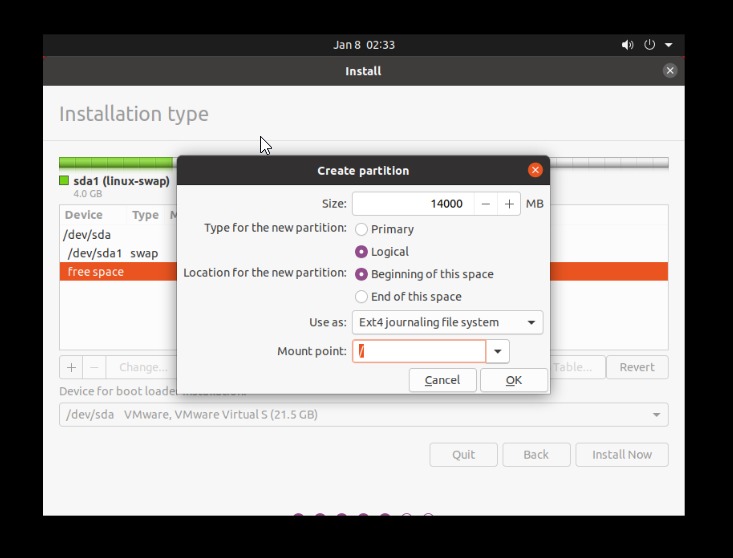
Size = 14000 MB
Type for the new partition = Primary
Location for the new partition = Beginning
Use as = EXT4 journaling file system
Mount point = /
7. To create boot, select + sign, and the resources according to the following picture.
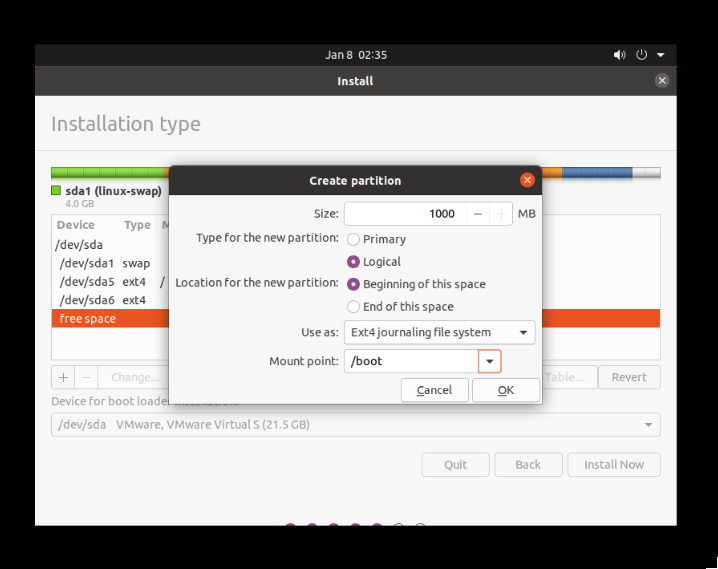
Size = 1000MB
Type for the new partition = Logical
Location for the new partition = Beginning
Use as = EXT4 journaling file system
Mount point = /boot
8. To create a home, click on the remaining free space and select the + button again. In the size section, allocate the remaining free space to it.
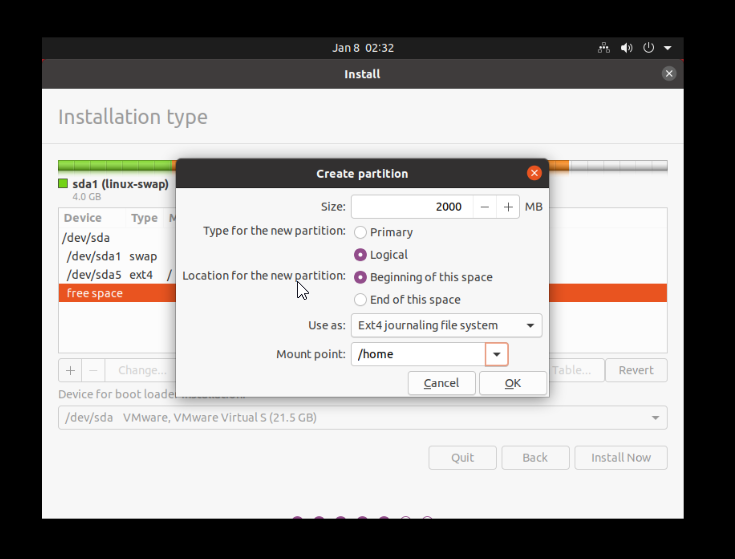
Size = 2000 MB
Type for the new partition = Logical
Location for the new partition = Beginning
Use as = EXT4 journaling file system
Mount point = /home
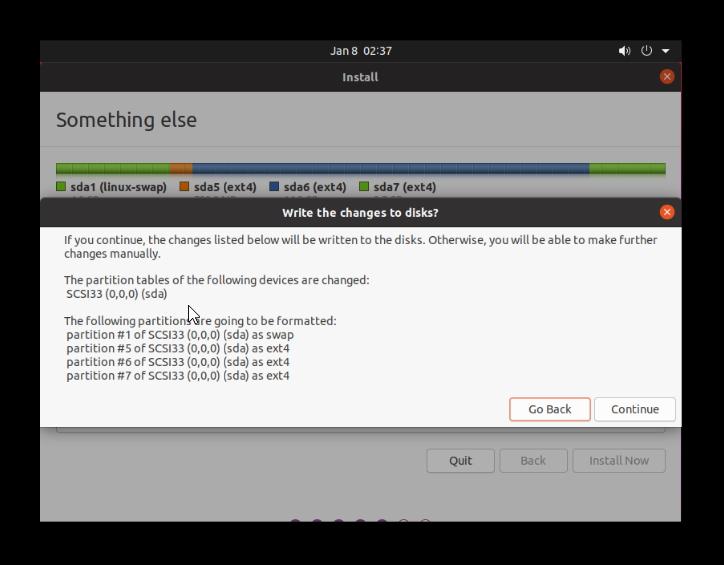
9. After creating the partitions, click Install now like the photo in the second section and select Continue in the window that opens. In this section, the system will tell you that we are going to perform such operations on drive C, which we confirm and click continue.
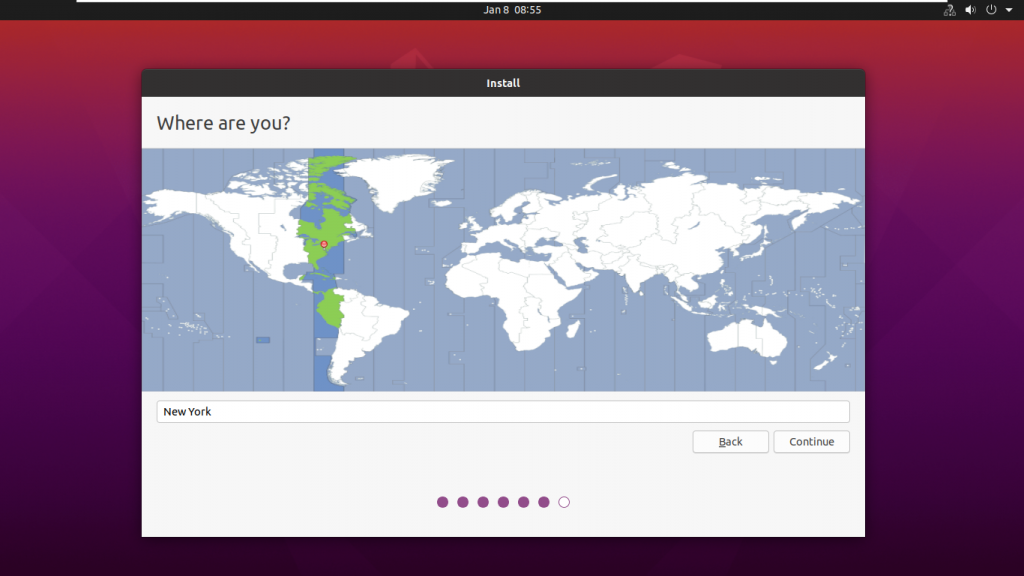
10. Choosing your location is not very important, but try to choose your exact location most of the time to avoid problems
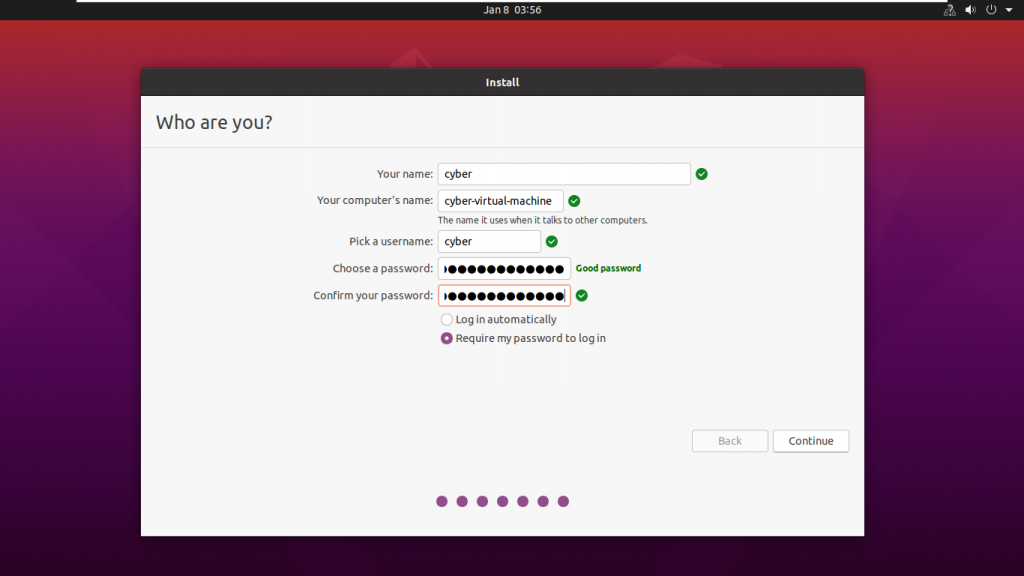
11. Finally, choose a username and a strong password and then select continue. It is true that Ubuntu is known for its security, but you need to create a strong password to avoid security issues.
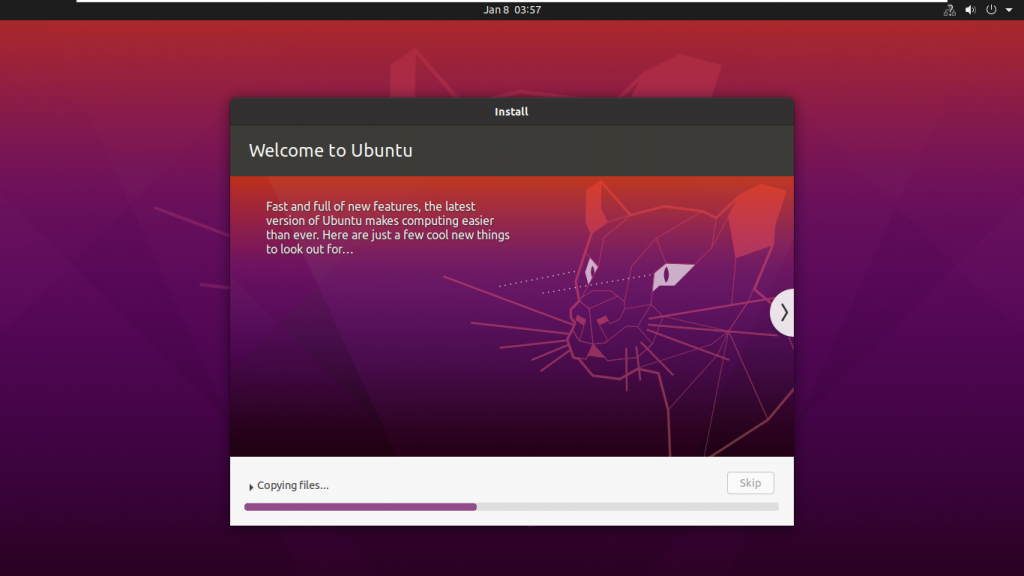
12. Do not turn off the system at all when installing Ubuntu and wait for the installation to complete.
13. After rebooting, log in to grub2. In this menu, you can select Ubuntu to run the Ubuntu operating system to run ubuntu and select the Windows Boot Manager to run Windows 10.

Congratulations, in this article we tried to install ubuntu beside windows 10 and you can choose to run on Windows or Linux.
Conclusion
To install Ubuntu beside Windows 10, you need to prepare by downloading Ubuntu and creating a bootable USB drive. Then, shrink your Windows partition to create space for Ubuntu. Boot from the USB and select manual partitioning to safely set up Ubuntu partitions like root, swap, boot, and home. After the installation, you can switch between Windows 10 and Ubuntu using the boot menu.
This method offers a balanced way to use both Windows and Ubuntu on one machine while protecting your existing data.
We hope this guide has been clear and helpful for beginners interested in dual booting. Feel free to share your questions or experiences in the comments.
FAQ
2. How do I create a bootable USB for Ubuntu installation?
Download Ubuntu ISO and use Rufus on Windows to make a bootable USB flash drive.
3. How can I free disk space in Windows without data loss?
Use Windows Disk Management to shrink your partition after backing up data and creating a system restore point.
4. How do I boot into Ubuntu installer from USB?
Restart, enter UEFI/BIOS settings (often via F2, F11, DEL), and select the USB device as the boot source.
5. What partitions do I need to create for Ubuntu?
Create root (/), home (/home), swap, and boot (/boot) partitions with sizes fitting your needs.
6. How to avoid overwriting Windows during installation?
Choose "Something else" during installation to manually specify partitions and avoid automatic overwriting.
7. How to switch between Windows and Ubuntu after installation?
Use the GRUB boot menu on system startup to select Windows or Ubuntu.
8. What if I encounter GRUB boot issues?
Use Boot Repair tool or check BIOS/UEFI settings; ensure Secure Boot is managed correctly.
9. Does Secure Boot affect Ubuntu installation?
Yes, some systems require disabling Secure Boot or adding Ubuntu to the allowed boot list.
10. Can I install Ubuntu alongside Windows 11 the same way?
Yes, but confirm UEFI and Secure Boot settings as Windows 11 systems commonly use these features.