Install Nextcloud on Ubuntu Linux in 4 Easy Steps
Install Nextcloud on Ubuntu Linux in 4 simple steps to enable private cloud storage. This guide covers system update, dependency installation, Nextcloud setup, and configuration for seamless use.
🤖AI Overview:
Install Nextcloud by setting up the open-source cloud storage platform on a Linux Ubuntu server. This guide covers installing a LAMP stack, database creation, Nextcloud download and configuration, and completing setup via a web interface for secure file sharing and synchronization.
What is Nextcloud and Why Use it?
Nextcloud is the most popular free, open-source, powerful, and secure content collaboration platform based on PHP that is designed for file sharing and synchronization. Users can synchronize one or more files and directories (or folders) on their computer with a Nextcloud server and share them with others using this safe, secure, and adaptable solution. As a file-sharing server, the Nextcloud server software operates on a Linux platform, client apps for Linux, Windows, and macOS, and mobile clients for Android and Apple iOS are all part of the solution.
Approved users can view files and images online from one central location. Nextcloud is regarded as a potent substitute for Google Drive and Dropbox. Since Nextcloud is a fork of the OwnCloud project, these two projects have many features in common except interface and licensing agreements, particularly for Enterprise editions.
Nextcloud’s amazing tool and program integration make it very popular. Nextcloud is a collection of highly configurable cloud storage applications. It has numerous configuration options and is compatible with more than one hundred third-party apps. When you take into account Nextcloud’s general emphasis on cloud storage security, it gets even better. In addition, Nextcloud offers optional connectivity with third-party apps, integrated personal information management, and 2FA. Nextcloud provides its Nextcloud Hub solution to those who want to manage internal cooperation. There are two versions available: Regular and Enterprise.
Nextcloud Features
- Security.
- Large Community.
- Real-time notifications, comments, and multi-user editing.
- Full-text search engine.
- Ease of Use.
- Advanced Account Management.
- Self-Hosting.
- Ability to monitor and record all data exchanges and communications.
Prerequisites to Install Nextcloud on Ubuntu 20.04 & 22.04
To Install Nextcloud in Linux Ubuntu, your machine needs to meet all the below specifications:
- A Server running Linux Ubuntu VPS.
- A non-root user with
sudoprivileges. - LAMP installed on Ubuntu.
- MySQL/MariaDB and PostgreSQL databases installed.
- Apache web server.
Tutorial to Nextcloud Installation in Linux Ubuntu
Let’s go through the steps of this guide to install, configure, and use Nextcloud in Ubuntu. As we mentioned, you need to provide some required options to get ready for the Nextcloud installation process on Ubuntu. Anyway, if you are not prepared, follow the below steps from the first. If you have installed Lamp, you can skip the first step.
Step 1. Install LAMP on Ubuntu
To get started, you need to install the LAMP stack.
- To do this, open up your terminal and connect to your Ubuntu server via SSH. Then, run the following command:
$ sudo apt-get update
$ sudo apt-get install apache2 mariadb-server libapache2-mod-php7.2 php7.2-gd php7.2-json php7.2-mysql php7.2-curl php7.2-mbstring php7.2-intl php-imagick php7.2-xml php7.2-zip
The above command will install Apache, MariaDB server, and PHP packages. Also, you will have all the required PHP modules. The installer will configure the Apache2 and MariaDB services to start for the time being and allow them to start automatically at the system boot after the package installation is finished.
- Try running the following systemctl commands to see if the two services are enabled and running.
$ systemctl status apache2
$ systemctl status mariadb
$ systemctl is-enabled apache2
$ systemctl is-enabled mariadb- To secure the MariaDB server installation, run the command below with a password for your user:
$ sudo mysql_secure_installation- To change your server’s root password, hit the enter key at the following window and then Y. Make sure your password is strong because there will be serious repercussions if your database server is compromised. Also, press Y for all the next questions.
Step 2. Install Nextcloud on Ubuntu
By finishing the previous step, you are ready to Install Nextcloud Ubuntu. So far, you secured the database installation. Now, Nextcloud needs a database and database user:
- To create them, log into your MariaDB server to access the MySQL shell and run sql commands:
$ sudo mysql -u root -pMariaDB [(none)]> CREATE DATABASE nextcloud;
MariaDB [(none)]> CREATE USER ncadmin@localhost IDENTIFIED BY 'Your Password;
MariaDB [(none)]> GRANT ALL PRIVILEGES ON nextcloud.* TO ncadmin@localhost IDENTIFIED BY ' Your Password;
MariaDB [(none)]> FLUSH PRIVILEGES;
MariaDB [(none)]> EXIT;Replace Your Password with your secure password.
- Now, click on Download Nextcloud Server ⇒ on the Nextcloud Download Page to download it and obtain a
.ziparchive. - Also, you can use the Linux wget command to run the commands below and download Nextcloud from the command line.
$ sudo wget -c https://download.nextcloud.com/server/releases/nextcloud-18.0.0.zip- After that, extract the contents of the archive and move the nextcloud directory or folder into the document root of your web server. Additionally, make the following changes to the nextcloud directory’s ownership.
$ sudo unzip nextcloud-18.0.0.zip
$ sudo cp -r nextcloud /var/www/html/
$ sudo chown -R www-data:www-data /var/www/html/nextcloud
Step 3. Configure the Database & User to Serve Nextcloud on Ubuntu
To achieve the purpose of this step, you need to:
- Create an Apache configuration file for Nextcloudunder the /etc/apache2/sites-available directory.
$ sudo vim /etc/apache2/sites-available/nextcloud.conf- Now, the lines below should be copied and pasted into the file. If your installation directory is different, substitute /var/www/html/nextcloud/.
Alias /nextcloud "/var/www/html/nextcloud/"

<Directory /var/www/html/nextcloud/>
  Require all granted
  Options FollowSymlinks MultiViews
  AllowOverride All

 <IfModule mod_dav.c>
  Dav off
 </IfModule>

 SetEnv HOME /var/www//html/nextcloud
 SetEnv HTTP_HOME /var/www/html/nextcloud
</Directory>- When you are finished, save and close the file.
- Then, run the command below to enable the site you have created and other modules in the Apache configuration structure:
$ sudo a2ensite nextcloud.conf
$ sudo a2enmod rewrite
$ sudo a2enmod headers
$ sudo a2enmod env
$ sudo a2enmod dir
$ sudo a2enmod mime- Lastly, to let the changes take effect, use the command below to restart the Apache2 service:
$ sudo systemctl restart apache2Step 4. Use Nextcloud on Linux Ubuntu
Now that you have successfully installed and configured Nextcloud in Ubuntu, you are ready to complete it via the graphical wizard from a web browser. To do this, you just need to:
- Log into the Nextcloud Web Interface. So, open your preferred browser and navigate to the following URL:
http://SERVR_IP/nextcloud/
OR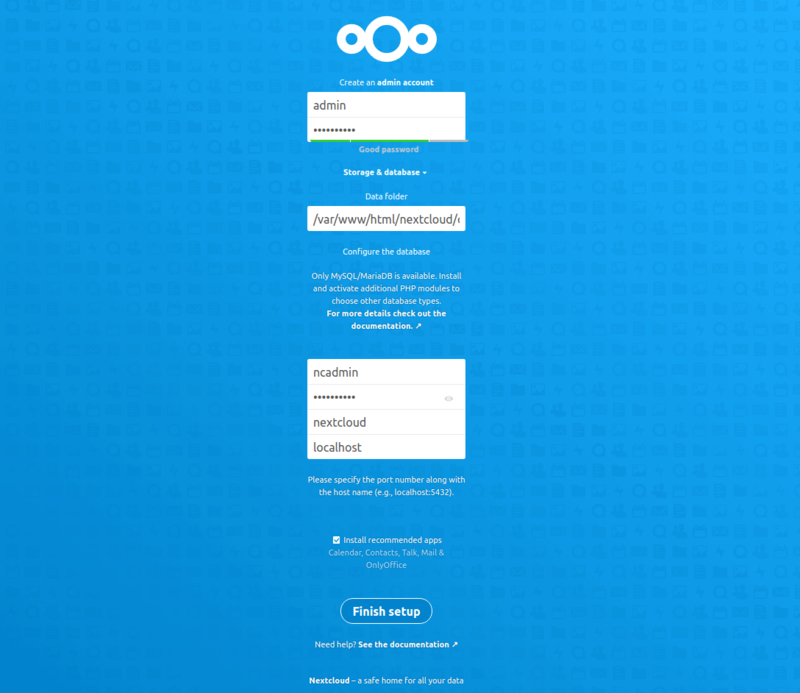
http://SERVER_ADDRESS/nextcloud/- Make an admin or superuser account for nextcloud when the installation wizard loads. Put the password and username in here.
- To access additional installation configuration choices for your Nextcloud data directory and database, click on the Storage and Database page.
- Next, click Complete Setup after entering the database connection information as displayed in the screenshot that follows.
- Following installation completion, the window below will appear. To continue and adhere to the instructions, click the advance arrow that will show up on the right side of the blue window.
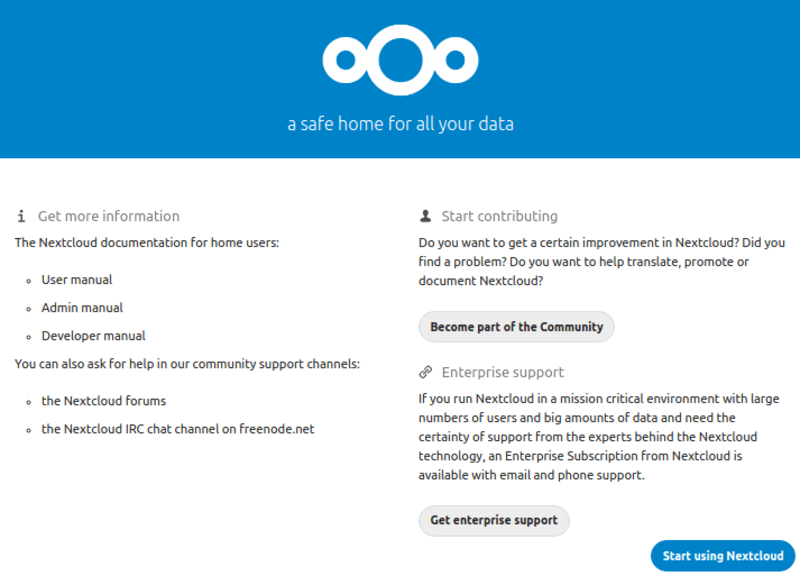
- To begin utilizing your new Nextcloud server, click Finish Setup in the below window.
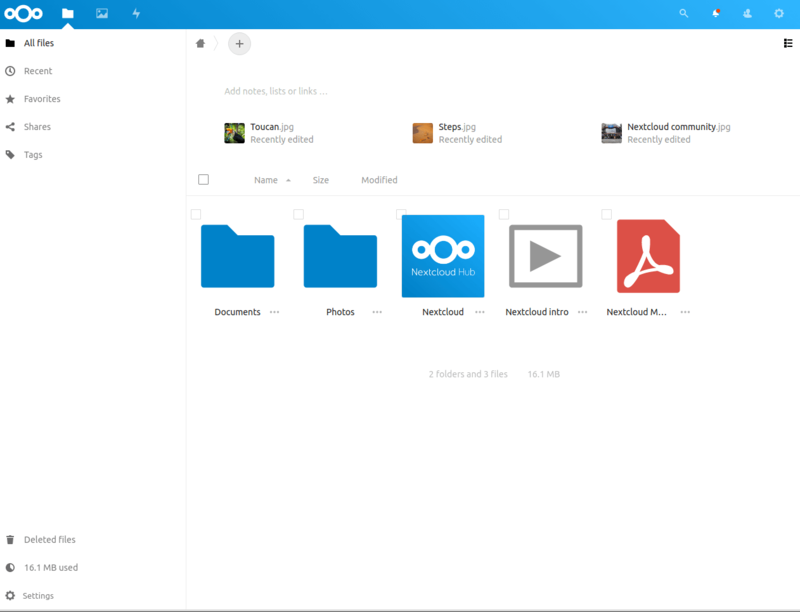
- If all the above steps are done correctly, you must view the Nextcloud web browser client’s main dashboard.
That’s it! Using this guide, you learned how to install Nextcloud in Linux Ubuntu.
To investigate the user interface to become more acquainted with the capabilities and features of your new machine. Check out Nextcloud’s app store for more features. You may add plugins to the service to increase its functionality.
Conclusion
Installing Nextcloud empowers you with your own private cloud environment where your data stays under your control.
Although the installation process may seem intimidating at first, following this comprehensive guide will help you install Nextcloud step by step with confidence.
From server preparation to securing your installation, each stage is important to ensure a reliable and safe cloud server. Start benefiting from the freedom and flexibility Nextcloud offers by setting up your own cloud storage today.
FAQ
2. What are the basic system requirements to install Nextcloud?
To install Nextcloud, you need a server running Ubuntu Linux, a non-root user with sudo privileges, the LAMP stack (Linux, Apache, MariaDB/MySQL, PHP) installed, and sufficient storage space.
3. How do I prepare my Ubuntu server before installing Nextcloud?
Update your packages, install Apache, MariaDB, and necessary PHP modules. Secure your database by setting a strong password.
4. What are the main steps to install Nextcloud on Ubuntu?
Install the LAMP stack, create a database and user for Nextcloud, download and extract Nextcloud files, configure Apache, and complete the setup through the web interface.
5. How do I create a database and user for Nextcloud on Ubuntu?
Log into MariaDB, create a nextcloud database, create a user with a strong password, grant privileges, and flush them.
6. How do I configure Apache to serve Nextcloud?
Create an Apache site configuration with correct document root and permissions, enable required modules like rewrite and headers, enable the site, and restart Apache.
7. How can I access and finish the Nextcloud installation?
Navigate to "http://your_server_ip/nextcloud", use the wizard to create an admin account, enter database details, and finish setup.
8. What security features does Nextcloud provide after installation?
It includes file access control, encryption options, two-factor authentication, and monitoring to secure your private server.
9. Can I add extra features or apps to Nextcloud?
Yes, Nextcloud supports many third-party apps for extended functions like calendars, contacts, and document editing.
10. What should I do if I encounter problems during installation?
Check that requirements are met, review logs for errors, and consult online Nextcloud communities for support.