Installing The Zabbix 5.0 LTS On CentOS Stream 10
Installing The Zabbix 5.0 involves setting up Zabbix, an open-source network monitoring tool, on a Linux server. It includes installing Apache, PHP, MariaDB, configuring the database, and starting Zabbix to monitor network and server performance effectively.
🤖AI Overview:
Installing The Zabbix 5.0 entails configuring the Zabbix monitoring system primarily on CentOS Stream 10 or RHEL 10 servers. The process covers installing prerequisites like Apache, PHP, MariaDB, configuring database and Zabbix server settings, and setting up the web interface to monitor network devices and servers efficiently.

Zabbix Infrastructure (Client-Server)
Zabbix works as a server-client. In this way, the Zabbix client is installed on systems such as Linux, Unix, Windows, and Mac. Then the Zabbix client sends system information to the Zabbix server. Of course, on systems that do not have an operating system, they can also be monitored in Zabbix through the SNMP or IPMI protocol.
What are the new Features in Zabbix 5.0?
Zabbix 5.0 has many changes but the most important changed are:
- The infrastructure of the menus has been changed.
- Security enhancement.
- Enhancements of the server performance.
- Easy management and use for network equipment monitoring.
- Improve automation.
- More advanced environment.
- Communication with other messengers such as Telegram and so on …
- Update templates and plugins.
If you want to know the complete details of the new updates and features in Zabbix 5.0, see the links below:
https://www.zabbix.com/whats_new_5_0
https://www.zabbix.com/documentation/current/manual/introduction/whatsnew500

How To Calculate The Size Of The Zabbix Database To Store Information
Zabbix settings require a constant amount of disk space and will not increase beyond this size. The size of the Zabbix database depends on these variables, which define the amount of data stored.
Number Of Processed Amounts Per Second
This is the average number of new values the Zabbix server receives per second. For example, if we have 3,000 items for monitoring and with a time interval of 60 seconds to refresh each item, the number of values per second is calculated as 3000/60 = 50. This means that 50 new values are added to the Zabbix database every second.
HouseKeeper settings for History
Zabbix keeps the values constant for a while. Normally several weeks or months. Each new value requires a certain amount of disk space for data and indexes. So if you want to keep history for 30 days and get 50 new values per second, the total number will be around 129600000 B or about 130 MB.
(30*24*3600)* 50 = 129.600.000
Depending on the type of database used and the type of values received (floats, integers, strings, log, files, etc.), the disk space for maintaining a separate value varies from 40 by 100 to 100 bytes. Normally it is about 90 bytes per bit for numeric items. In this scenario, this means that we will need 130 MB * 90 bytes = 10.9 GB of disk space.
The size of text/log items can never be accurately predicted, but you can set 500 bytes for each value.
HouseKeeper settings for trends
Zabbix keeps a set of values for each item in the trends table for an hour. Data is used for trending and long-term graphs. It is not possible to customize the amount of an hour.
Depending on the type of database, the Zabbix database requires about 90 bytes per trend. Let’s say Zabbix wants to keep the trend data for 5 years. Values for 3000 items require 3000 * 24 * 365 * 90 = 2.2 GB of space for one year or 11 GB for 5 years.
HouseKeeper settings for Event
Each Zabbix event requires approximately 250 bytes of disk space. It’s hard to estimate the number of events created by Zabbix on a daily basis. The worst-case scenario is to assume that Zabbix creates an event every second.
A record_recovery record is created for each recovered event. Normally, most events will be recovered, so we can assume that we will have an event_recovery record for each event. This means consuming an extra 80 bytes per event.
Optional events can have tags, each tag record requires approximately 100 bytes of disk space. The number of tags per event (eg #tags) depends on the settings. As a result, each tag will require the number of tags multiplied by 100 bytes of disk space.
This means that if we want to keep the event for 3 years, it requires the following disk space.
3*365*24*3600* (250+80+#tags*100) = ~30GB+#tags*100B
The table below contains the formulas used to calculate the disk space required for the Zabbix system. As a result, calculate the total amount of disk space used with the following formula.
Configuration + History + Trends + Events
Disk space will not be used immediately after installing the Zabbix. The database size will increase and will stop at a point that depends on the housekeeper settings.
System clock settings
It is very important to know the exact time and date of the server on which Zabbix is running. If you use the NTP service on your local network, you can use it to set your server’s time and date. It is highly recommended that you set the date and time of the Zabbix server and all of its clients together to be one.
You can use the below link for more information in order to set the date and time in Linux.
https://operavps.com/docs/set-date-time-on-linux/
Installing the Zabbix Server 5.0 LTS on CentOS Stream 10 / RHEL 10
prerequisites
To add at least 500 hosts:
Processor: 2 Core
Memory: 2 GB
To add at least 1000 hosts:
Processor: 4 Core
Memory: 8 GB
+ Raid-10
To add at least 10,000 hosts:
Processor: 8 Core
Memory: 16 GB
+ Raid-10
And MySQL 5.5.62 or 8.0.x or MariaDB 10.x database
Apache webserver 1.3.12 or higher
PHP 7.2.0 or higher
Follow the instructions given during the tutorial with root access. First, log in to the root user.
# su -If you are not a fan of SELinux, we recommend disabling it and switching to Permissive mode. If you do not disable SELinux, the following steps will explain how to configure it.
# setenforce 0
# sed -i 's/^SELINUX=.*/SELINUX=permissive/g' /etc/selinux/config
# cat /etc/selinux/config | grep SELINUX=
Apache webserver installation
First, we update our system, then install the Apache webserver with its modules and a number of functional tools using the following commands.
# yum update
# yum install httpd httpd-tools vim net-tools -y
# yum install php php-cli php-common php-devel php-pear php-mbstring php-gd php-bcmath php-ctype php-xml php-xmlreader php-xmlwriter php-session php-mbstring php-gettext php-ldap -y
After the installation, you can check the webserver version of Apache and PHP using one of the following commands.
# httpd -v
# php -v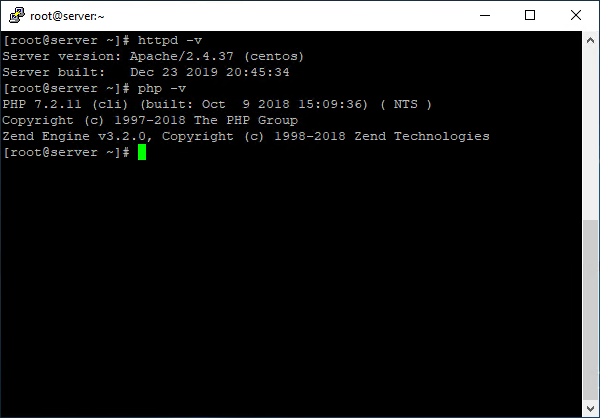
To set up an Apache web server, start the httpd and php-fpm service and run the following commands to activate these services during the system boot.
# systemctl start httpd php-fpm
# systemctl enable httpd
# systemctl enable php-fpm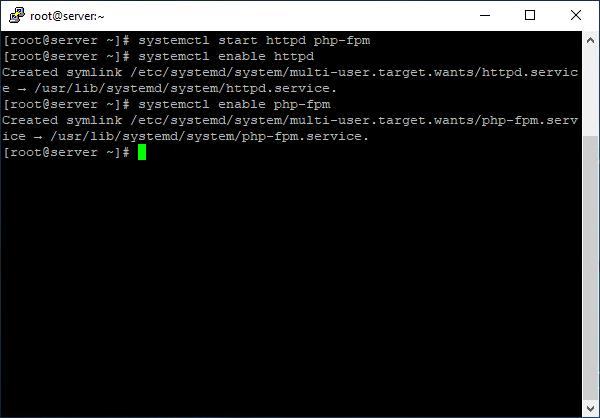
Use the following commands to verify the accuracy of these services.
# systemctl status httpd
# systemctl status php-fpm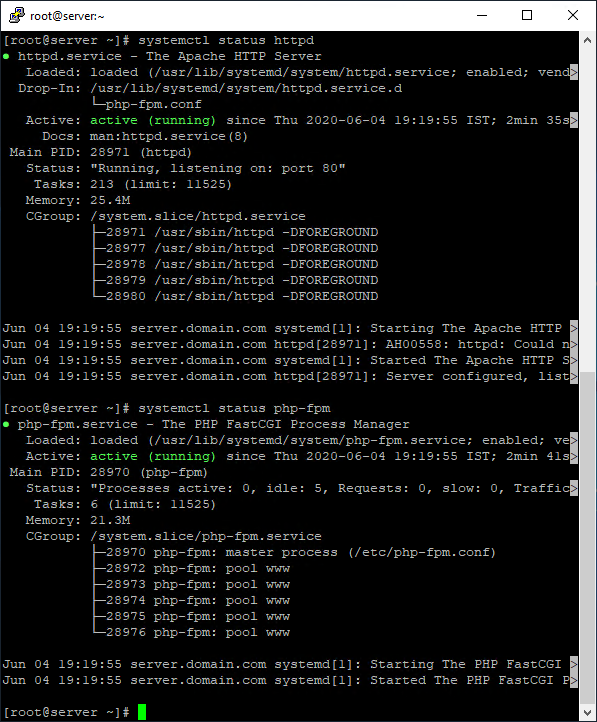
MySQL / MariaDB database installation
You can use other databases such as Oracle, etc., but in this tutorial, we will use the MariaDB database to store data. Install the MariaDB database using the following command.
# yum install mariadb-server mariadb -yThen run the MariaDB service and activate the system in Boot.
# systemctl start mariadb
# systemctl enable mariadb
Use the following command to verify the performance of our database.
# systemctl status mariadb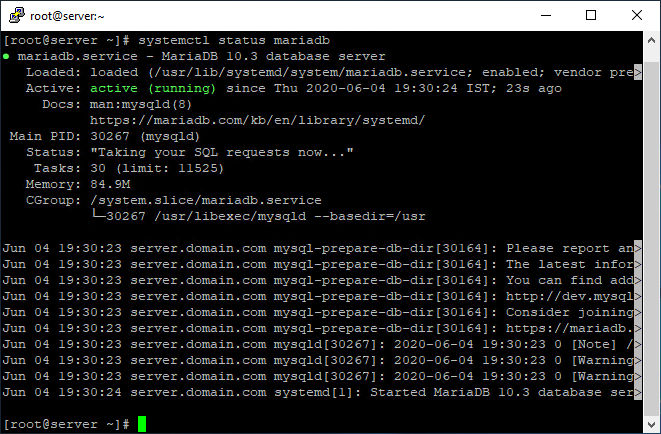
MySQL / MariaDB database is not secure by default. To secure our MySQL database, we use the following script to define the root password, delete anonymous users, disable the root user login, and so on. (Answer the questions with a “Y” and choose a strong password for the root user.)
# mysql_secure_installation
Once the database is installed, you need to create a Zabbix database and Zabbix user. Enter a strong password for the Zabbix user instead of 123456.
# mysql -u root -p
password
mysql> create database zabbix character set utf8 collate utf8_bin;
mysql> create user zabbix@localhost identified by '123456';
mysql> grant all privileges on zabbix.* to zabbix@localhost;
mysql> flush privileges;
mysql> quit;
Installing the Zabbix server on CentOS Stream 10 / RHEL 10
All the prerequisites needed to set up Zabbix monitoring have been installed. We will be installing the Zabbix repository using the following command.
# rpm -Uvh https://repo.zabbix.com/zabbix/5.0/rhel/8/x86_64/zabbix-release-5.0-1.el8.noarch.rpm
# yum clean all
Then we will install the Zabbix and the packages it needs.
# yum install zabbix-server-mysql zabbix-web-mysql zabbix-apache-conf zabbix-agent -yMake SELinux settings
SELinux or Security-Enhanced Linux is actually a mechanism that creates an extra layer for system security. If SELinux is enabled on your server, you need to execute all commands in this section. To get more information about SELinux, use the below link:
Note: If you disable SELinux as you did in the early stages of the article, ignore this section.
First, install the packages and tools needed by SELinux as shown below.
# yum install policycoreutils checkpolicy setroubleshoot-server -yOnce the SELinux is installed, create a Zabbix-SELinux directory and log in using the cd command.
# mkdir -p ~ / zabbix-selinux
# cd ~ / zabbix-selinux /
Now, using the vim text editor, we create a module called zabbix_server_add.te for SELinux.
# vim zabbix_server_add.teAnd copy the following lines into it.
module zabbix_server_add 1.1;

require {
type zabbix_var_run_t;
type tmp_t;
type zabbix_t;
class sock_file {create unlink write};
class unix_stream_socket connectto;
class process setrlimit;
class capability dac_override;
}
# ============== zabbix_t ==============

# !!!! This avc is allowed in the current policy
 allow zabbix_t self: setrlimit process;

# !!!! This avc is allowed in the current policy
 allow zabbix_t self: unix_stream_socket connectto;

# !!!! This avc is allowed in the current policy
 allow zabbix_t tmp_t: sock_file {create unlink write};

# !!!! This avc is allowed in the current policy
 allow zabbix_t zabbix_var_run_t: sock_file {create unlink write};

# !!!! This avc is allowed in the current policy
 allow zabbix_t self: capability dac_override;
Save the settings file and exit. Then use the checkmodule command to convert the file we created above to the SELinux module.
# checkmodule -M -m -o zabbix_server_add.mod zabbix_server_add.teThen use the semodule_package command to compile the zabbix_server_add.mod module.
# semodule_package -m zabbix_server_add.mod -o zabbix_server_add.ppAfter that, we load the compiled zabbix_server_add.pp module into the system.
# semodule -i zabbix_server_add.ppTo perform additional SELinux settings, run the setbool command as below.
# setsebool -P httpd_can_network_connect 1
# setsebool -P httpd_can_connect_zabbix 1
# setsebool zabbix_can_network on
After SELinux settings, restart your Zabbix service and enable it in the system boot.
# systemctl restart zabbix-server zabbix-agent
# systemctl enable zabbix-server zabbix-agent
Use the following command to check the accuracy of the Zabbix service.
# systemctl status zabbix-server
# systemctl status zabbix-agent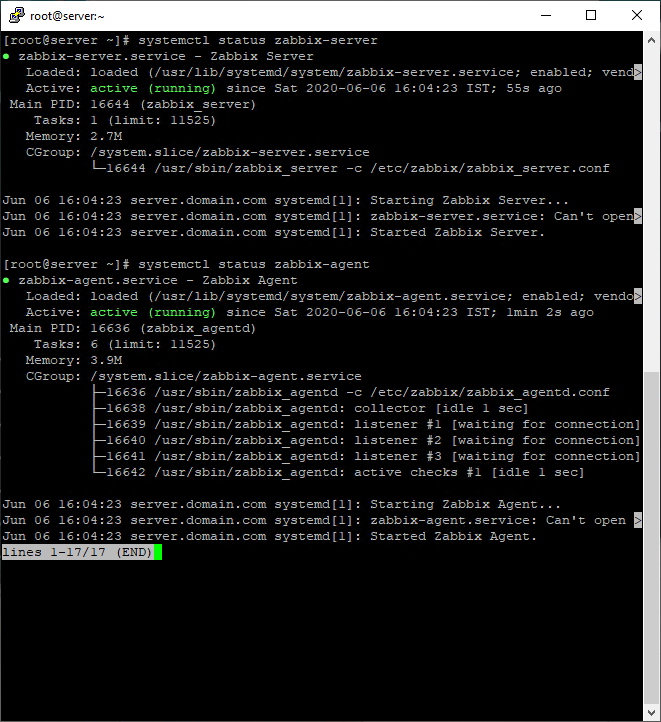
You can also use the rpm command to check the installed version of Zabbix.
rpm -q zabbix-server-mysqlWe use the netstat command to check if our Zabbix service is licensing on its own ports.
# netstat -ant | grep LISTEN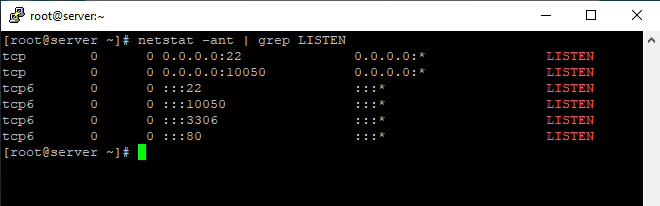
Enter the basic information in the Zabbix database with the following command. After entering the command, you will be asked for a password, which you must enter in the previous step for the Zabbix user and its database. This step is a bit time consuming, please be patient.
# zcat /usr/share/doc/zabbix-server-mysql*/create.sql.gz | mysql -uzabbix -p zabbixZabbix Server settings in CentOS Stream 10 / RHEL 10
Open the Zabbix settings file from /etc/zabbix/zabbix_server.conf, enter the user, password, and database name of the Zabbix we created in the previous step. (If you follow the instructions in this tutorial and create a Zabbix user and database, do not change the DBName and DBUser sections and only set DBPassword to your password.)
"vi /etc/zabbix/zabbix_server.conf"
DBHost=localhost
DBName=zabbix
DBUser=zabbix
DBPassword=password
Note: When you use vim editor, after opening the file, you should press i button one time to let you edit the file and once you finished editing, you should write :wq and press enter to save and exit the file.
PHP Setting For Zabbix
Open the zabbix.conf file using your favorite text editor.
# vi /etc/php-fpm.d/zabbix.confFind the following line.
"; php_value[date.timezone] ="
Uncheck it, then enter your correct time zone. (In our scenario, America/New_York)
Note: By unchecking it means to remove ;
php_value[date.timezone] = America/New_YorkThen open the php.ini file and find the following parameters and change as below.
"vi /etc/php.ini"
date.timezone = America/New_York
memory_limit = 128M
post_max_size = 16M
upload_max_filesize = 2M
max_execution_time = 300
max_input_time = 300
session.auto_start = 0
Use the below link to find the path of the configuration of files:
Where is the path of the configuration files in Linux?
Then restart httpd and php-fpm.
# systemctl restart httpd php-fpmWe now use the following commands to access the HTTP / HTTPS service and the ports used by Zabbix in our firewall.
# firewall-cmd --permanent --zone=public --add-service=http
# firewall-cmd --permanent --zone=public --add-service=https
# firewall-cmd --permanent --zone=public --add-port=10051/tcp
# firewall-cmd --permanent --zone=public --add-port=10050/tcp
# firewall-cmd --reload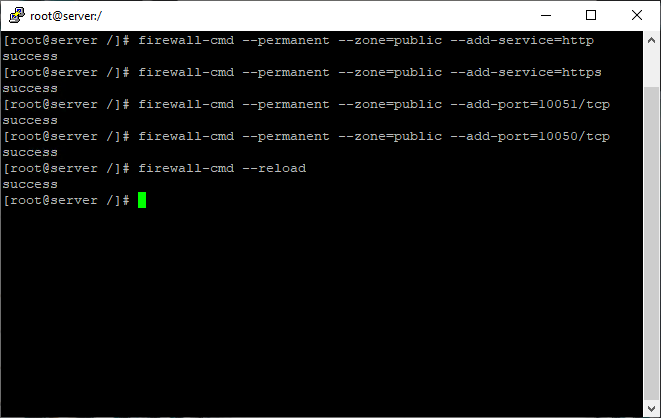
Zabbix setting in the web interface
To continue installing the Zabbix, we need to enter the address http://server_ip_or_name/zabbix in our browser.

Click the Next step button. At this stage, make sure that all the prerequisites are installed and the status of them is OK. Optional prerequisites may also be on the list. If there is a problem with the optional prerequisites, it will be displayed in orange with an alert status. You can continue the installation without any prerequisites. If there is no problem, click the Next step button.

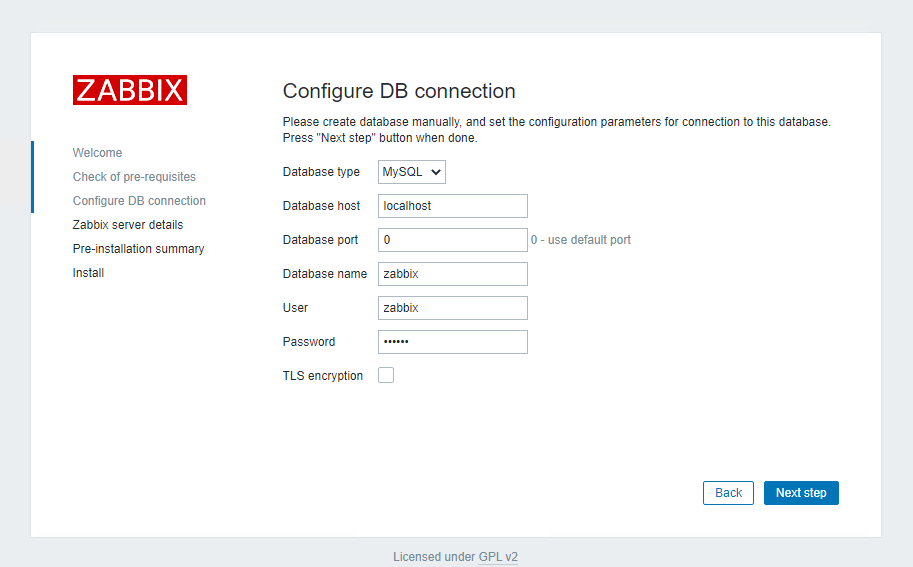
Here we need to configure our database. In the Password section, we need to enter the password for the user and the Zabbix database that we created in the above steps. Then click the Next step.
Enter a name for installing the Zabbix in the Name section and click Next step.

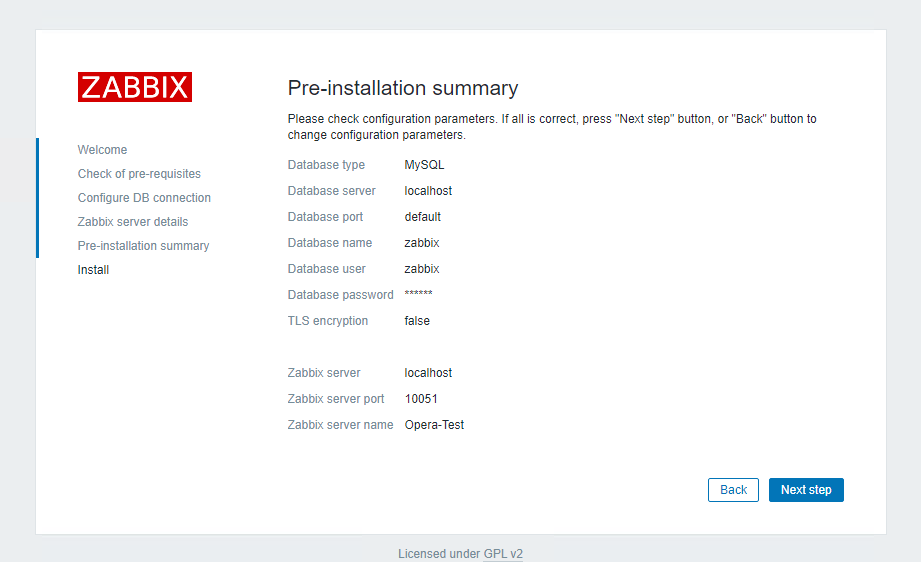
In this step, we will see a summary of the settings made before installing the Zabbix. Click the Next step.
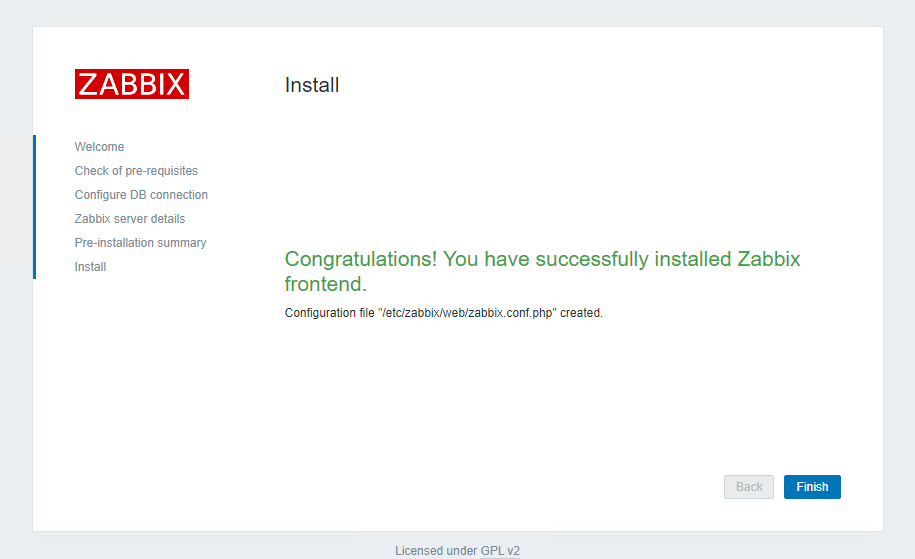
Zabbix Server installation is complete. Click the Finish button.
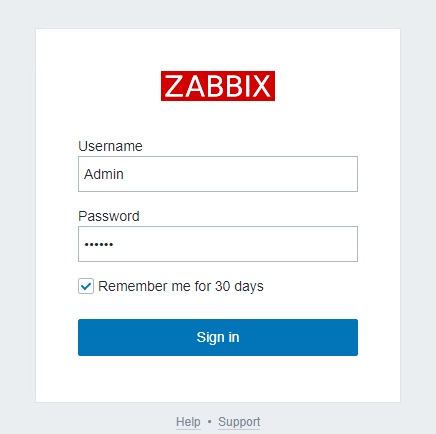
As soon as installing the Zabbix, it will direct you to the login page. Enter your Zabbix username and password here. The default Username and Password of Zabbix are as follows.
Username: Admin

Password: zabbix
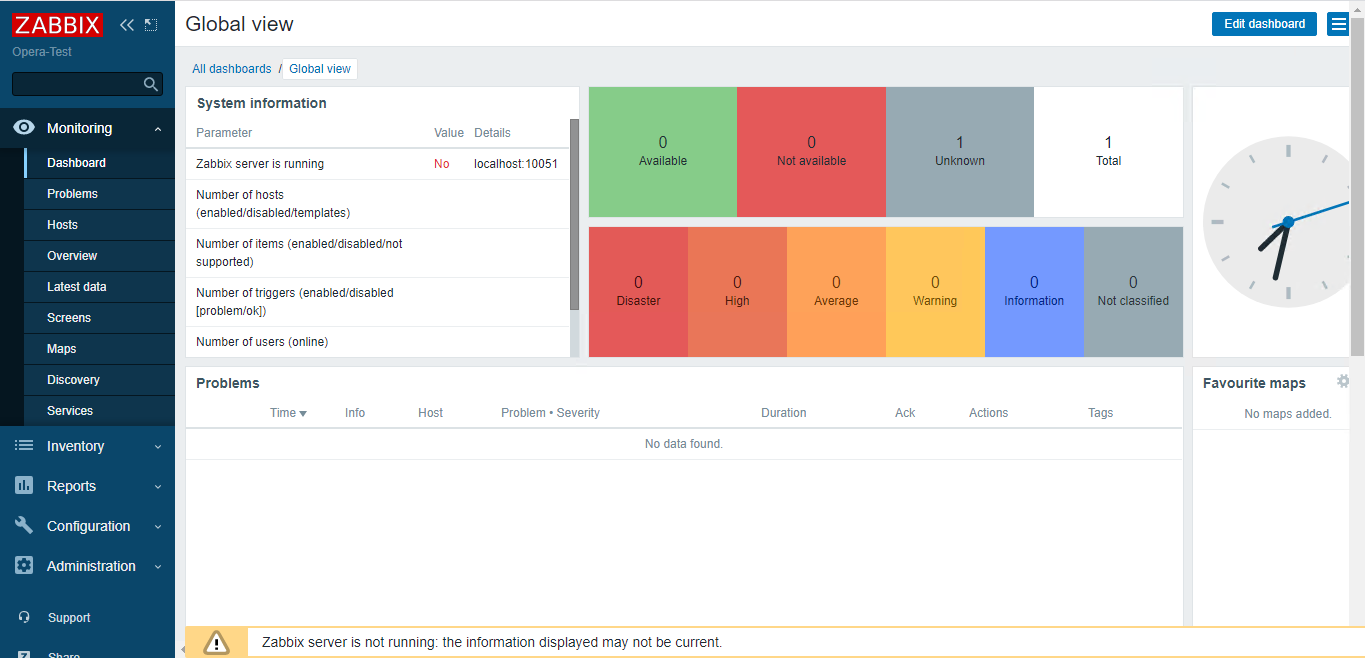
Here you should see the new Zabbix monitoring dashboard.
Conclusion
Installing The Zabbix 5.0 properly is key to establishing a robust monitoring system that can track the health and performance of your entire IT infrastructure.
This beginner-friendly guide has covered all necessary steps to install, configure, and secure Zabbix 5.0 on CentOS 8 or RHEL 8 systems.
By following these instructions, you can confidently deploy Zabbix to monitor a range of devices and services, helping you to proactively manage resources and minimize downtime.
FAQ
2. Which operating systems support Installing The Zabbix 5.0?
Zabbix 5.0 is compatible with Linux distributions including CentOS 8 and RHEL 8; clients can also be installed on Unix, Windows, or Mac systems.
3. How do I install the necessary web server and PHP for Zabbix 5.0?
Install Apache and PHP 7.2 or higher with required modules via the package manager, then enable and start the services.
4. How is the database prepared for Installing The Zabbix 5.0?
Install MariaDB or MySQL, secure the installation, and create a dedicated Zabbix database and user with full permissions.
5. What SELinux configurations are needed for Installing The Zabbix 5.0?
Set SELinux to permissive mode or configure appropriate policies allowing web server and Zabbix service communications.
6. How do I configure Zabbix server settings after installation?
Edit the zabbix_server.conf file to specify the database details, linking Zabbix with its database.
7. How do I complete the Zabbix 5.0 installation via the web interface?
Access the Zabbix web URL, follow the setup wizard, input database and server details, and finish to log in.
8. What are common performance considerations when Installing The Zabbix 5.0?
Ensure hardware and database configurations match monitoring scale; manage monitored items and data retention for optimal performance.
9. Can I monitor different operating systems using Zabbix 5.0?
Yes, Zabbix agents support multiple OS types including Linux, Windows, Unix, and macOS.
10. How to troubleshoot if Zabbix services are not running after installation?
Check service status with systemctl, verify firewall settings, and inspect SELinux permissions if enabled.
Sir how to avoid this" zabbix server is not running the information displayed may not be current" message from dashboard.
Hi, thanks for your reading this article. You can find and resolve the issue on the Zabbix forum.
Disregard my last! I now understand the syntax of the piping of the .gz script into the mysql command. I had left off the "zabbix" at the end, which I now realize is the name of the database (argument).
Ran into problem at step of "zcat" - entered text "zcat /usr/share/doc/zabbix-server-mysql*/create.sql.gz | mysql -uzabbix -p" Get "ERROR 1046 (3D000) at Line 1: No database selected" Note, I am installing latest 5.2 release not 5.0. Other steps till now worked well.