How To Install Lamp on Ubuntu 18.04, 20.04, 22.04
To install Lamp on Ubuntu 18.04, 20.04, 22.04, we should know that LAMP is abbreviated as Linux, Apache, MySQL, and PHP. These 4 programs are among the most popular Open Source programs in the web world. The idea of using the word LAMP was first coined by Mr. Michael Kunze in the German magazine C’t (Computer technik) in 1998, and in that year the four words were first used in one word.
Install LAMP on Ubuntu 18 by setting up Linux Apache MySQL and PHP. First update your system then install Apache MySQL server and PHP with the apt command. Enable services to complete setup.
🤖AI Overview:
Install lamp on ubuntu 18 refers to setting up the Linux Apache MySQL and PHP stack on an Ubuntu 18 server. This process allows users to host dynamic websites and web applications by providing a web server, database, and scripting language. The main goal is to create a reliable environment for web development and hosting on Ubuntu 18. This setup is widely used due to its compatibility, performance, and support for open source technologies.
Quick Steps
- Update your Ubuntu system using
sudo apt updateandsudo apt upgrade - Install Apache web server with
sudo apt install apache2 - Start and enable Apache using
sudo systemctl start apache2andsudo systemctl enable apache2 - Install MySQL by running
sudo apt install mysql-server - Secure your MySQL installation with
sudo mysql_secure_installation - Install PHP and common modules using
sudo apt install php libapache2-mod-php php-mysql - Restart Apache server with
sudo systemctl restart apache2 - Test your LAMP setup by creating a PHP info page in
/var/www/html
Requirements:
- A system running Ubuntu 18.04, 20.04, or 22.04.
- Access to Server Via SSH.
- Root user access using the
Sudocommand to execute all commands.
Tutorial Install Lamp on Ubuntu 18.04, 20.04, 22.04
As we mentioned, installing the LAMP stack needs the installation of four different programs individually. Since installing each of these programs has its own part, let’s go through the required steps of this guide to learn how to install LAMP on Ubuntu.
Step 1: Installation of Apache Web Server
Apache Web Server (HTTP) is one of the most common web servers in the world. In this step, we are going to explain how to install the Apache web server on Ubuntu 18.04 20.04, 22.04 along with the firewall setting configuration for HTTP and HTTPS traffics.
✍️ Note:
I do not need to use the Sudo command because I logged in to the server as a root user. You do not need to use this command if you are also logged in as a root user, otherwise, you should use it.
First, update your server software packages, then install the Apache server using the following commands.
sudo apt update
sudo apt install apache2
After the installation process is complete, the Apache web server should start automatically and run at system boot when booting. Also, if you want to know if Apache is running, you can use the following command.
sudo systemctl status apache2If your system firewall is active and running, you need to open ports 80 and 443 and respond to user requests to the Apache web server using HTTP and HTTPS, then reload the firewall settings as below.
sudo ufw allow 80/tcp
sudo ufw allow 443/tcp
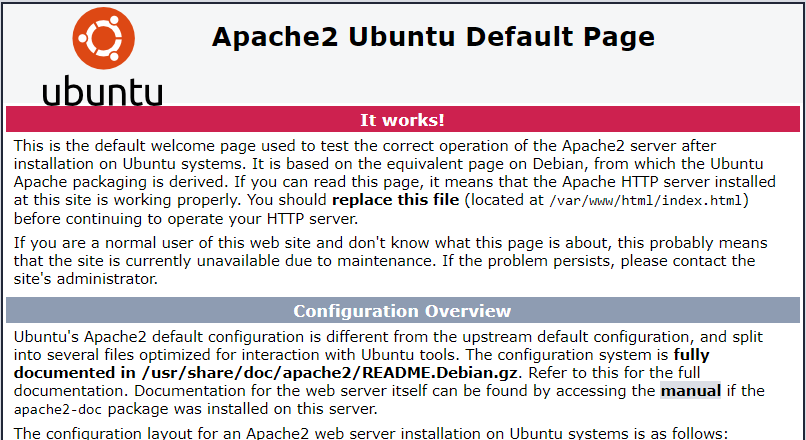
sudo ufw reloadNow test your installed Apache with the default Apache test page in a browser, using the link below.
http://DOMAIN_NAME/OR
http://SERVER_IP/✍️ Note:
If your server is connected to a domain name, enter the domain name in the browser instead of DOMAIN_NAME, otherwise enter the IP of the server instead of SERVER_IP.
If you see the default Apache web server page, it means that your installation was successful. Apache installation is complete, let’s go to the next step.
Step 2: Installation of MariaDB
MariaDB Database is a free and open-source database management system that is a branch of MySQL and is an extended project run by leading MySQL developers when you install Lamp on Ubuntu 18.04 20.04, 22.04, it is better to install MariaDB instead of MySQL.
First, we install the MariaDB database with the following command.
apt install mariadb-server mariadb-clientAfter installation, MariaDB services should start automatically, to make sure it is up and running, check its status as below.
sudo systemctl status mysqlMariaDB is insecure by default, you need to run the following security script to secure it. It then asks you for the root password to make sure that not everyone can log in to the MariaDB database.
sudo mysql_secure_installationWhen you run the script, it asks you to enter the current root password. (Do not enter anything and press Enter). Then enter yes / y in answer to the following security questions.
Set root password? [Y / n]: y
Remove anonymous users? (Press y | Y for Yes, any other key for No): y
Disallow root login remotely? (Press y | Y for Yes, any other key for No): y
Remove test database and access it? (Press y | Y for Yes, any other key for No): y
Reload privilege tables now? (Press y | Y for Yes, any other key for No): y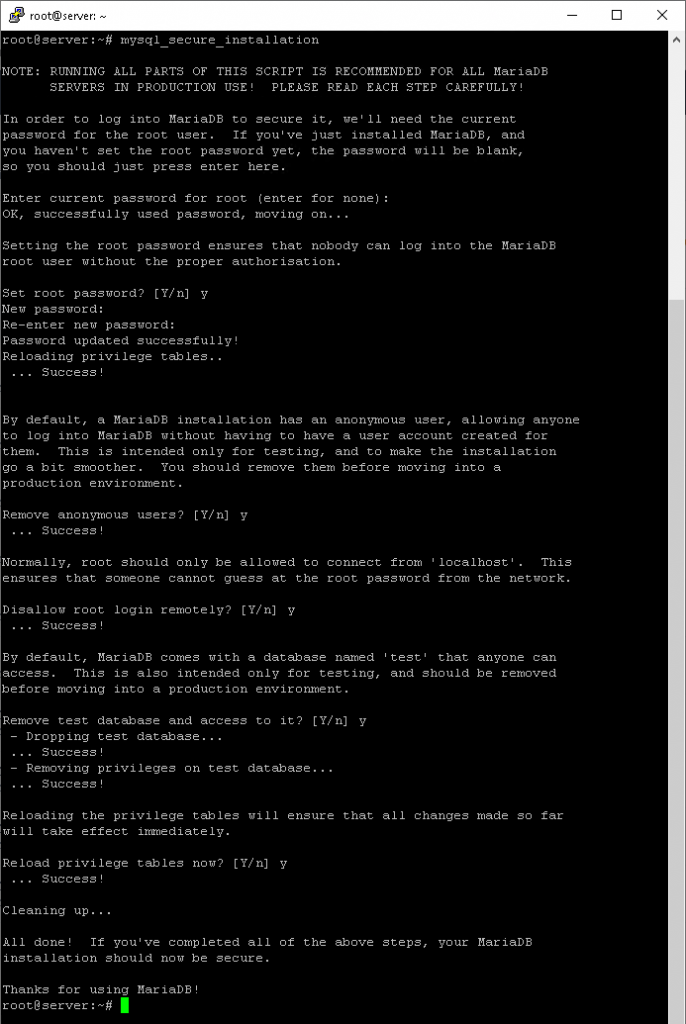
Step 3: Installation of PHP
PHP is one of the most widely used scripting languages on servers, used to generate dynamic content on websites and applications. In this section, we will explain how to install PHP on Ubuntu 18.04 20.04, 22.04. You can install PHP along with other modules (PHP version 7.2 by default) to deploy the web using the following commands.
Ubuntu 18.04:
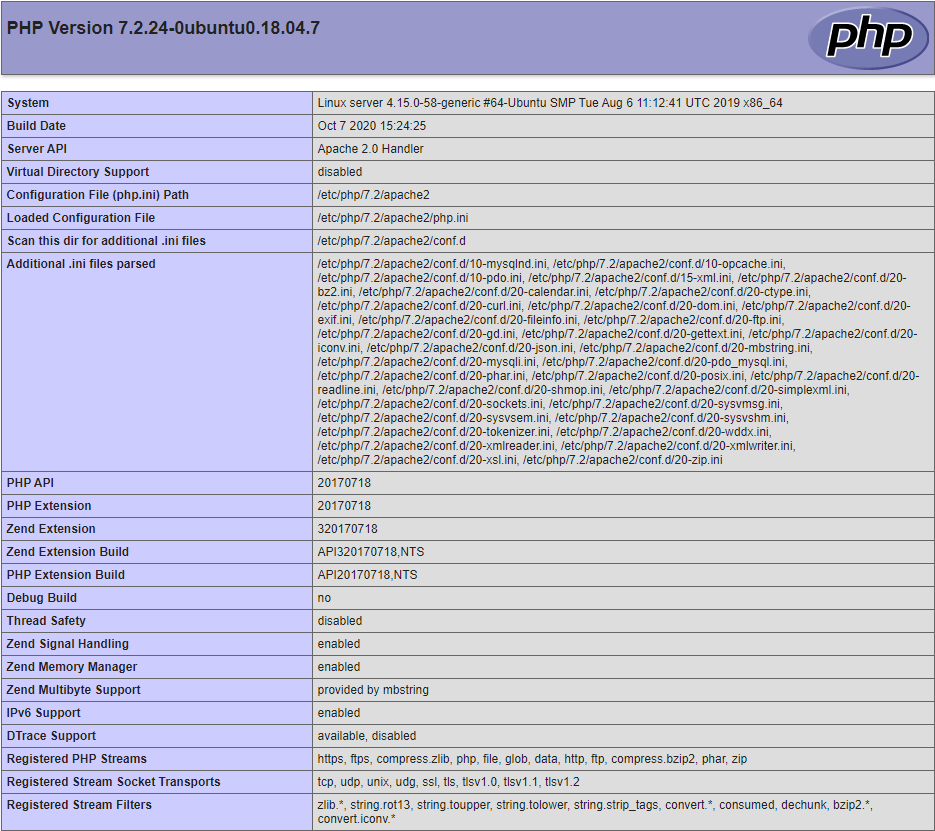
sudo apt install php php-common php-mysql php-gd php-cliAfter installing PHP, you can test the installed PHP by creating a simple info.php page in your web server document root using the following command.
nano /var/www/html/info.phpThen add the following content inside this file and save it using CRL + x.
<?php
phpinfo( );
?>
Then open a browser, and enter the following address in it to view your server’s PHP information page.
http://DOMAIN_NAME/info.phpOR
http://SERVER_IP/info.php
Ubuntu 20.04 & 22.04
As a component of your setup, PHP is required to be installed. In this way, it will process code to display dynamic content to the final user. Also, you need to install php-mysql a PHP module that allows PHP to communicate with MySQL-based databases. libapache2-mod-php is also needed to enable Apache to handle PHP files. Finally, core PHP packages will automatically be installed as dependencies. run the command below to install packages.
sudo apt install php libapache2-mod-php php-mysqlNext, type the following command to confirm your PHP version:
php -vStep 4: Installation of PhpMyAdmin
In this section, we are going to explain how to install PhpMyAdmin on Ubuntu Linux 18.04 20.04, 22.04. PhpMyAdmin is an interactive web interface for managing databases. In this regard, some users may not feel comfortable with MySQL commands and managing their databases, and meeting their needs through the web interface, so it’s better to install PhpMyAdmin too when you install LAMP on Ubuntu 18.04 20.04, 22.04.
You can easily install PhpMyAdmin using the following command to manage the MySQL / MariaDB database through a web browser.
sudo apt install phpmyadminDuring the package installation process, asks you to select the web server that should be configured automatically to run PhpMyAdmin, just select the apache2 option with the space key, then press Enter.
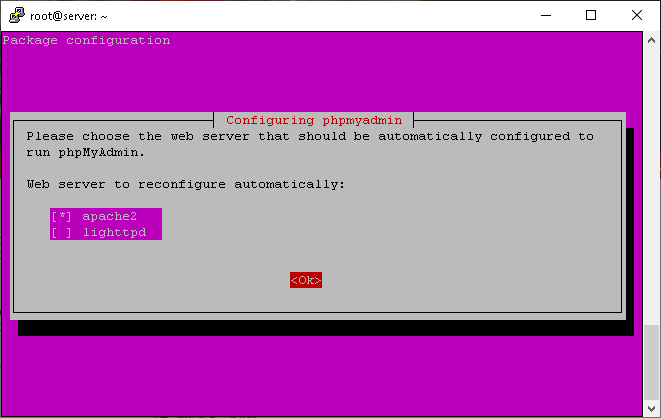
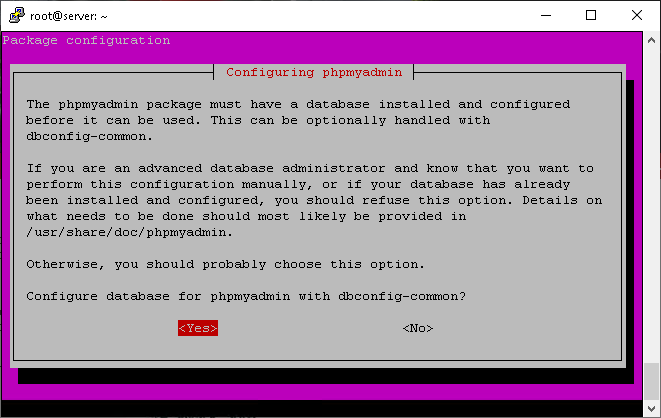
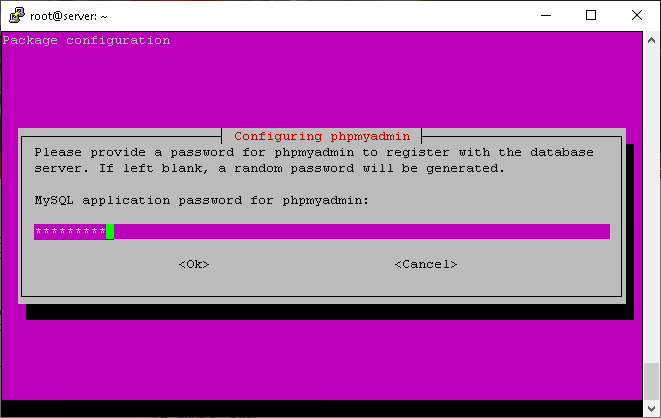
Then, enter the MySQL / MariaDB admin password, and then the installer can create a database in PhpMyAdmin.
Once everything is done, you can restart the apache2 service to apply the latest changes.
sudo systemctl restart apache2✍️ Note:
If the PhpMyAdmin package could not work automatically with the Apache web server, follow the instructions below to copy the PhpMyAdmin config file to Apache from/etc/phpmyadmin/to/etc/apache2/conf-available/(existing config files directory On the Apache Web Server) and then enable it using the a2enconf tool, and finally restart the Apache service to see the changes made.
sudo cp /etc/phpmyadmin/apache.conf /etc/apache2/conf-available/phpmyadmin.conf
sudo a2enconf phpmyadmin
sudo systemctl restart apache2
Finally, to access the PhpMyAdmin web interface, enter the following address in a browser as shown below.
http://DOMAIN_NAME/phpmyadminOR
http://SERVER_IP/phpmyadmin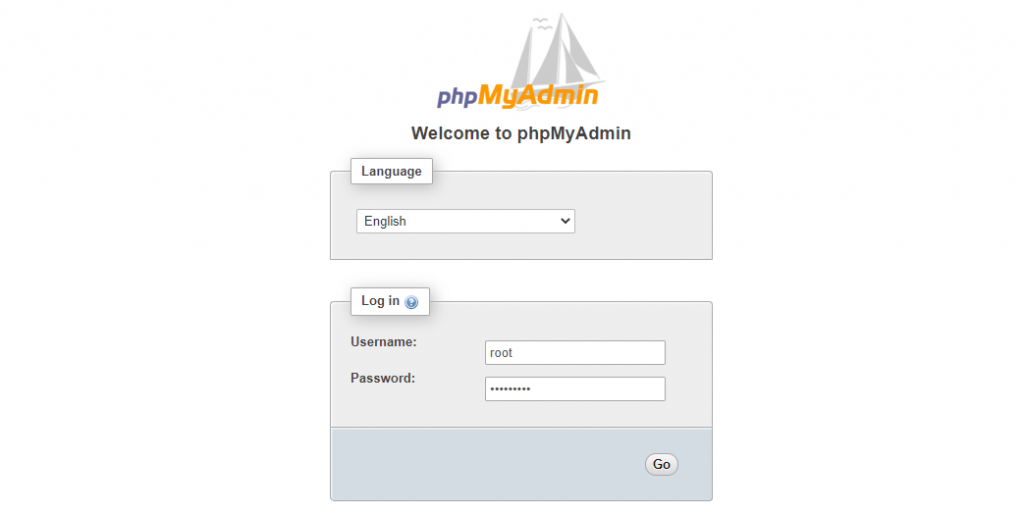
✍️ Note:
If you are unable to log in with the root user (because we have to run MySQL 5.7 with Sudo), you will probably need to create a new admin user to access the MariaDB shell. To create this user, you must log in with the root user in the terminal and run the following command.
sudo mysql -u root -pEnter the password of MySQL and run the following commands.
MariaDB [(none)]># CREATE USER 'admin' IDENTIFIED BY '@NewPass1';
MariaDB [(none)]># GRANT ALL PRIVILEGES ON *. * TO 'admin' WITH GRANT OPTION;
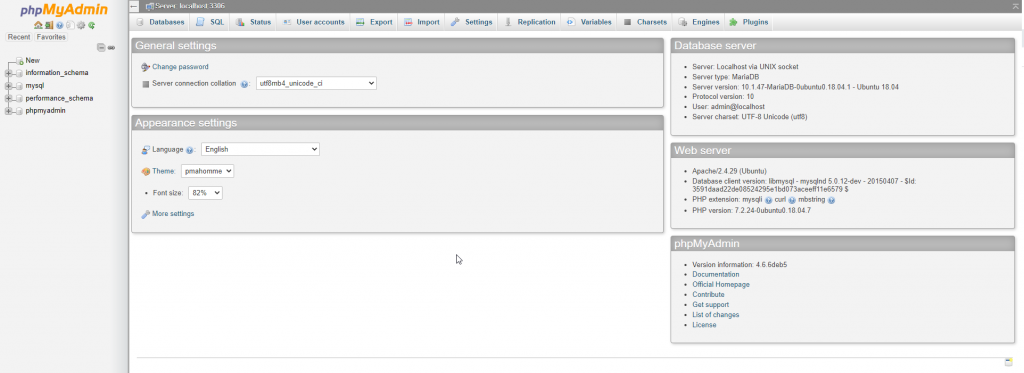
MariaDB [(none)]># FLUSH PRIVILEGES;You can now enter the PhpMyAdmin web interface with the new admin username and password you set for it.
How to create a Virtual Host for your Website [Recommended]
To encapsulate configuration details and host more than one domain from a single server, you can use a virtual host when using the Apache Web server. Keep in mind to replace your_domain with your own domain name while setting up the domain.
On all versions of Ubuntu discussed in this article, Apache has one virtual host enabled by default that is configured
documents from the /var/www/html directory. What If you host multiple sites? Create a directory structure within /var/www for the your_domain site instead of modifying /var/www/html leaving /var/www/html in place as the default, directory to be served if a client request doesn’t match any other sites.
sudo mkdir /var/www/<span style="color: #0000ff;">your_domain</span>Now, assign ownership of the directory with the $USER environment variable, which will reference your current system user:
sudo chown -R $USER:$USER /var/www/<span style="color: #0000ff;">your_domain</span>On Ubuntu 18.04
Use the command below to check if the permissions of your web root directory are correct or not.
sudo chmod -R 755 /var/www/<span style="color: #0000ff;">your_domain</span>Then, use your preferred editor to create a simpleindex.html page.
nano /var/www/<span style="color: #0000ff;">your_domain</span>/index.htmlInside, add the following sample HTML:
/var/www/your_domain/index.html
<html>
    <head>
        <title>Welcome to <span style="color: #0000ff;">Your_domain</span>!</title>
    </head>
    <body>
        <h1>Success!  The <span style="color: #0000ff;">your_domain</span> server block is working!</h1>
    </body>
</html>
When you are done, save and close the file.
On Ubuntu 18.04 20.04, 22.04
Open a new configuration file in Apache’s sites-availabledirectory using your favorite command-line editor to create a new blank file.
sudo nano /etc/apache2/sites-available/your_domain.confPaste in the following bare-bones configuration:
/etc/apache2/sites-available/your_domain.conf
<VirtualHost *:80>
    ServerName <span style="color: #0000ff;">your_domain</span>
    ServerAlias www.<span style="color: #0000ff;">your_domain</span>
    ServerAdmin webmaster@localhost
    DocumentRoot /var/www/<span style="color: #0000ff;">your_domain</span>
    ErrorLog ${APACHE_LOG_DIR}/error.log
    CustomLog ${APACHE_LOG_DIR}/access.log combined
</VirtualHost>
When you are finished, save and close the file. If you are using nano , press CTRL + X to do this and then Y and ENTER .
Run the command below to enable the new virtual host.
sudo a2ensite <span style="color: #0000ff;">your_domain</span>To disable the default site defined in 000-default.conf , type:
sudo a2dissite 000-defaultNow, you can use the command below to check if your configuration file contains syntax errors or not.
sudo apache2ctl configtestTo let the changes take effect, run the following command to reload Apache.
sudo systemctl reload apache2Now, you can check if the virtual host works or not.
nano /var/www/your_domain/index.htmlAnd include the following content in this file:
/var/www/your_domain/index.html
<html>
  <head>
    <title><span style="color: #0000ff;">your_domain</span> website</title>
  </head>
  <body>
    <h1>Hello World!</h1>

    <p>This is the landing page of <strong><span style="color: #0000ff;">your_domain</span></strong>.</p>
  </body>
</html>
Again, open your browser and access your server’s domain name or IP address.
http://server_domain_or_IPYou will see something like this:
It means your virtual host is fully set.
FAQ
How to limit firewall access to HTTP requests?
To limit firewall access to HTTP temporarily during configuration, use the Apache profile instead. The Apache Secure profile only allows encrypted HTTPS traffic through the firewall. Do not use this profile until HTTPS is enabled on the server.
What is LAMP and why should I install it on Ubuntu?
LAMP stands for Linux, Apache, MySQL, and PHP. It is a popular open source stack used for hosting websites and web applications. Installing LAMP on Ubuntu 18 allows you to create a stable and secure environment for developing and running dynamic websites.
What are the system requirements to install LAMP on Ubuntu?
To install LAMP on Ubuntu, you need a system running Ubuntu 18.04 with at least 512MB of RAM and 1GB of disk space. A stable internet connection is also necessary to download the required packages.
How can I install Apache as part of the LAMP stack on Ubuntu 18?
You can install Apache by running the command sudo apt update followed by sudo apt install apache2. Apache will provide the web server functionality in the LAMP stack on your Ubuntu 18 system.
What are the steps to install MySQL on Ubuntu 18 for the LAMP stack?
To install MySQL, use the commands sudo apt update and then sudo apt install mysql-server. After installation, you can secure your MySQL server using the mysql_secure_installation command.
How do I install PHP and make it work with Apache and MySQL on Ubuntu?
First, install PHP by running sudo apt install php libapache2-mod-php php-mysql. This command installs PHP and the necessary modules to connect PHP with Apache and MySQL for dynamic website development on your Ubuntu system.
How can I test if my LAMP installation on Ubuntu is working correctly?
After installing all components, create a simple PHP file in the /var/www/html directory with the code <?php phpinfo(); ?>. Then, open your web browser and go to http://your_server_ip/phpinfo.php to check if PHP is running on your Apache server.
What are the common troubleshooting steps if LAMP does not work properly on Ubuntu?
Ensure all LAMP components are installed with the correct versions and are running. Check Apache and MySQL service statuses with sudo systemctl status apache2 and sudo systemctl status mysql. Review error logs in /var/log/apache2 and /var/log/mysql to identify any issues.
How do I secure my LAMP stack after installation on Ubuntu?
After you install LAMP on Ubuntu 18, change default database passwords, disable root access to MySQL from remote locations, and configure firewall rules to allow only necessary ports like 80 and 443. Keep your system updated for better security.
Can I install LAMP on Ubuntu using a single command or script?
There is no official one command solution, but you can create a script with all necessary install commands or use tasksel to install the LAMP server by running sudo tasksel install lamp-server
10. Where can I find further resources or support for managing LAMP on Ubuntu?
You can refer to the OperaVPS blog for step by step guides or visit the official Ubuntu and Apache, MySQL, PHP documentation for more advanced topics. Community forums and support pages are also helpful for resolving specific issues.
Conclusion
In this article, you learned How to Install LAMP on Ubuntu 18.04 20.04, 22.04. As you reviewed, the individual components are designed to work together and are easy to install and use. From now on, you will be able to use this platform to install most kinds of websites and web software on your server.
If you follow the above steps properly, you can smoothly install LAMP without any errors. But if you encounter any problems, please do not hesitate to contact us. Our technical support team will try their best to solve your problems.
Hi Harry, Error creating the page "info.php" thank you for correcting Error = <? php phpinfo (); Correction = thank you
Hi Rezki. The code has been modified. Thanks for your feedback.