How to Connect to Mikrotik Using SSH?
Mikrotik is a powerful network router, specifically designed for enthusiasts and professionals.
It goes beyond the typical home router, offering granular control over network traffic, security, and configurations.
To access this control panel securely, you can Connect to Mikrotik using SSH.
SSH encrypts data exchanges between your PC and the Mikrotik router. By adding a layer of security, public and private keys replace the need for readily cracked passwords.
To connect to a MikroTik Router using SSH via private and public keys, you need to follow the below process:
- Download and install the Putty Key Generator on your PC.
- Create a private key and a public key.
- Save the private key on your PC.
- Copy the public key.
- Create a new text file and paste the copied public key into the text file.
- Rename the text file extension to “.pub”
- Open Winbox and copy the public key to the MikroTik Router.
- Import the public key on the MikroTik Router.
- Try connecting to the MikroTik Router using SSH without using the private key (it should fail).
- Open Putty and configure it to use the private key.
- Connect to the MikroTik Router using SSH with the private key.
- Disable password login on the MikroTik Router. (Optional).
Why SSH Connecting to Mikrotik via Private & Public Keys
Connecting to Mikrotik using SSH with keys gains you the following benefits:
Enhanced Security: Passwords are vulnerable to hacking, while keys offer a more robust authentication method.
Convenience: No need to remember passwords, you will use your private key for secure access.
Peace of Mind: Your Mikrotik router will be protected by an extra layer of defense.
So, if you are serious about network security and managing your Mikrotik router with maximum control, consider the power of SSH and private/public keys.
Prerequisites
- To Connect to Mikrotik Using SSH, you must have an already running Mikrotik VPS.
Understanding:
- Private Key: A unique key stored on your computer, used to unlock the connection.
- Public Key: Shared with the MikroTik router, used to verify the private key’s authenticity.
Steps to Connect to Mikrotik Using SSH
Since passwords are vulnerable, using SSH with keys for MikroTik helps in security enhancement. Keys offer a more robust, hack-proof authentication method.
Step 1: Download and Install PuTTY
Go to putty.org to download the putty package file and install it on your system.
Press the Download Putty button.

Click on the 64-bit package file to download it.
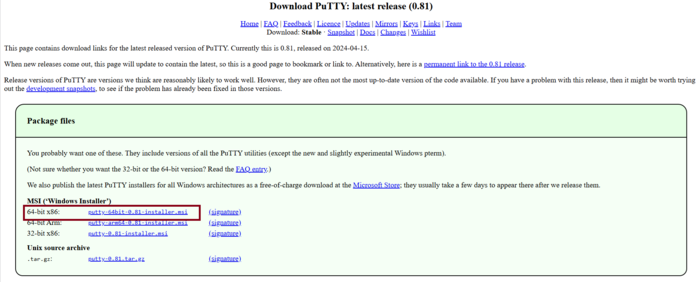
Once the download is finished, install file packages on your PC to have the Putty key generator.

Step 2: Generate Private and Public keys
The private keys will be used on your PC and the created public key must be put on the router to let the PC connect SSH via the keys to the router.
To generate keys, open Putty Key Generator and click on Generate.
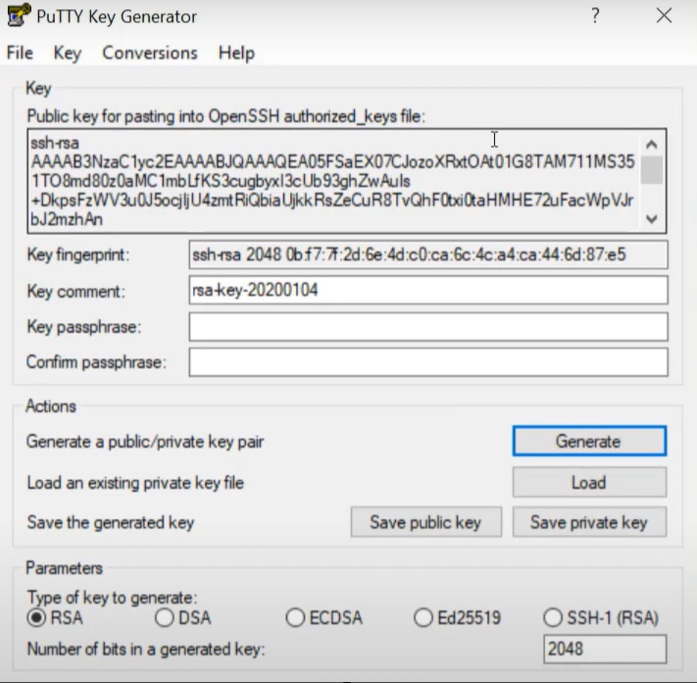
There, you will have private and public keys generated.
Note: To make more layer of security, you can put a password on the key passphrase.
In this way, if someone connects to your router via a key, it will not go to the root directly and that password will be required.
Step 3: Save the Private Key on a Folder
Click on the Save private key on the window that you opened in the previous step.
Specify where you prefer to save it on your PC and click Save. (The extension must be PPK)
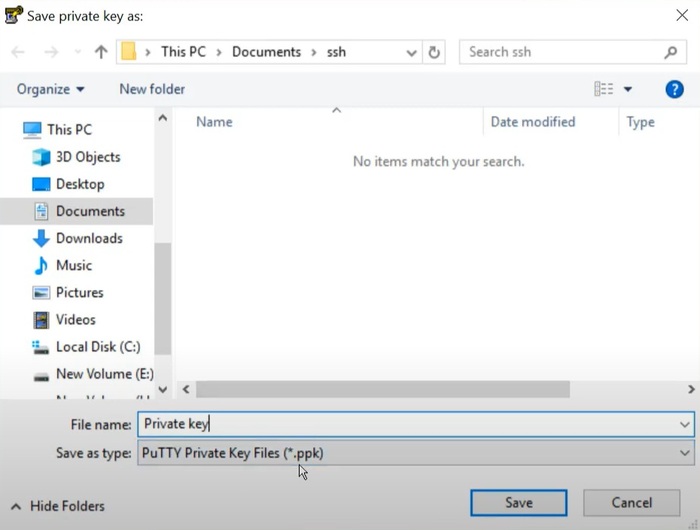
The private key is now generated and saved in your folder.
Step 4: Copy the public key to Router
Go to the folder you just created. Right-click on it and make a Text Document. (For example, name the folder Pub Key)
Open the Pub key file.
Go to the Key Generator to copy the string and paste it on a notepad file.
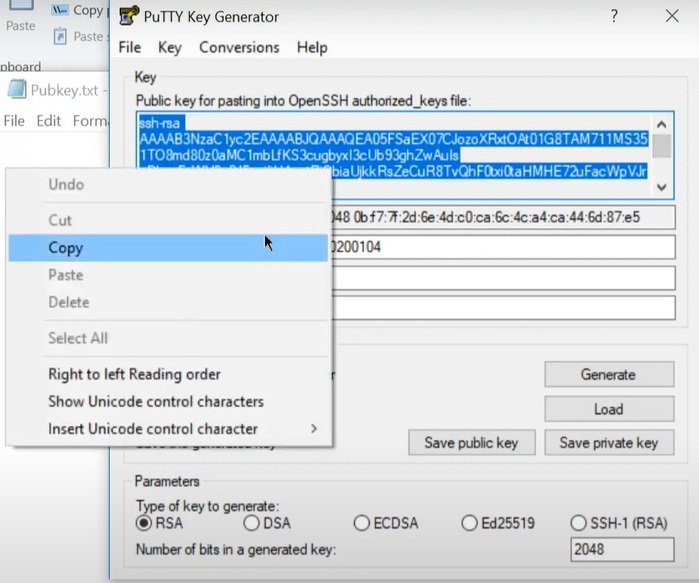
When you are finished, save the file.
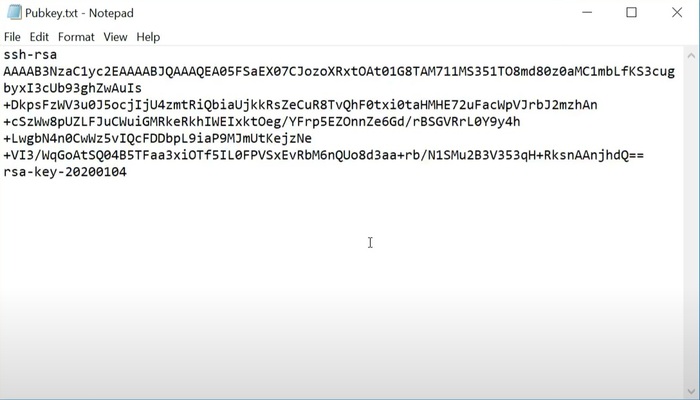
Then, change the extension of the file from ”txt” to ”pub”.

Now, you can connect to the Mikrotik router using the private key and public key.
Step 5: Copy the Public key to the MikroTik Router in Winbox
Open Winbox and paste the public key to the router to be able to view it in the file list.
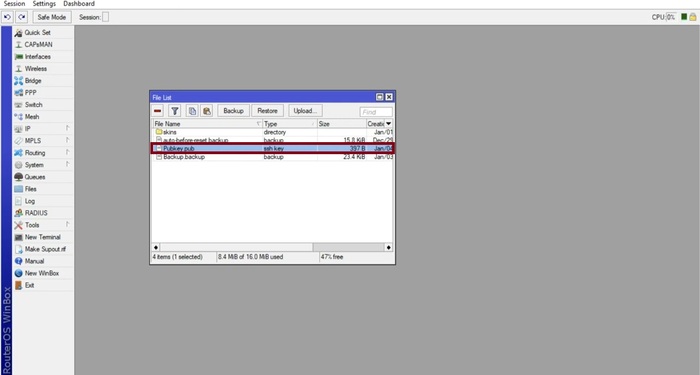
Step 6: Import Public Key
To let the Mikrotik know that it must look at the public key when someone tries to connect via the key.
To do this, go to the Mikrotik router > System > Users > Import SSH Key.
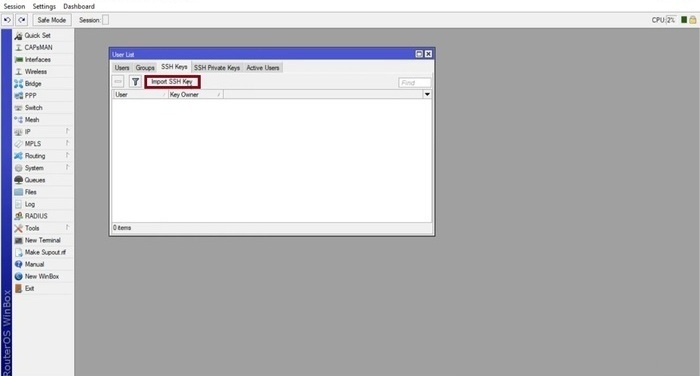
The default option for the User is admin which has the full privilege.
For the Key file, select Pubkey.pub.
Finally, click on Import SSH Key.
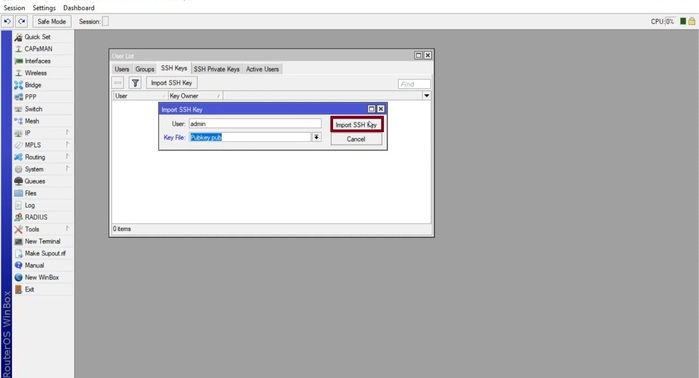
Once the public key is imported into the Mikrotik, you can see the admin file shown in the list.
It means that you have the private key on your PC.
So, you can now test connecting to SSH using the keys.
To do this, open Putty and try to make an SSH connection to the router without using the private keys.
Step 7: Test Connecting to the MikroTik Router Using SSH (without using the private key)
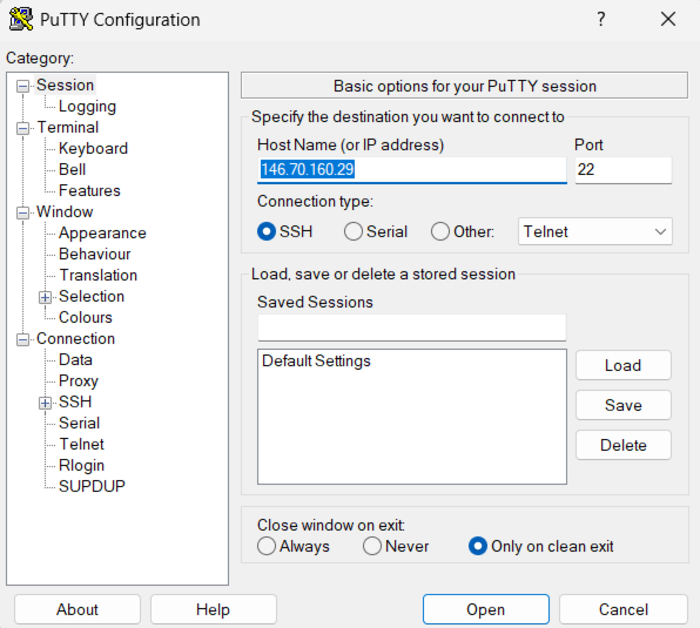
Open Putty and enter the IP address.
Select SSH as the connection type.
Press the Open button.
Once it is opened, log in as admin and press Enter.
There is no password on admin (As set in User settings), so Access denied will be shown.
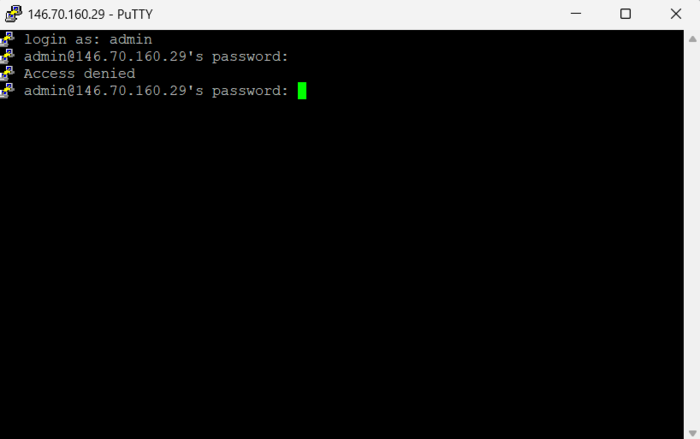
As you see, you can not connect to the Mikrotik router using the username and password, even though the username and password are correct.
So, you need to connect to the Mikrotik router on SSH using only the keys.
Step 8: Use Private Key to Make an SSH Connection on the Mikrotik Router
Open Putty > SSH > Auth > Select Key (Private key.PPK file, you created in step 3) > Open.
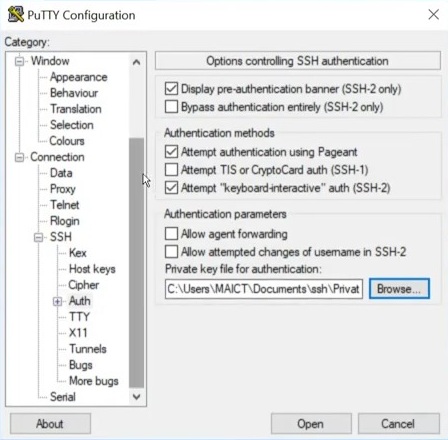
Go to Session > Enter IP address >Name the session in the Saved session field (Optional) > Click Open.
You must be able to log in to the Mikrotik Crowd directly, since you are using the right key.
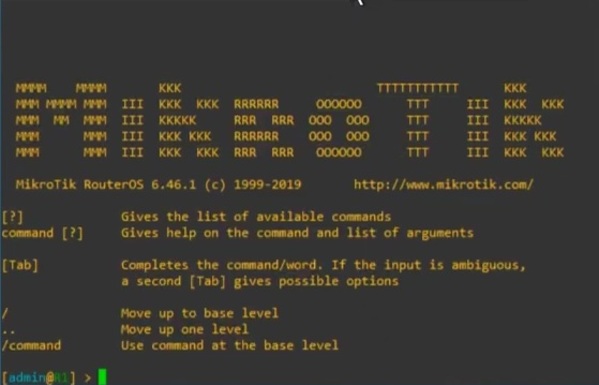
To log in again using the same (Saved) key, you can go to Putty and enter ”admin@ Your IP” instead of writing username in the Host Name field.
Step 9: Enable always-allow-password-login
On the router, go to the terminal put IP ssh print and press enter.
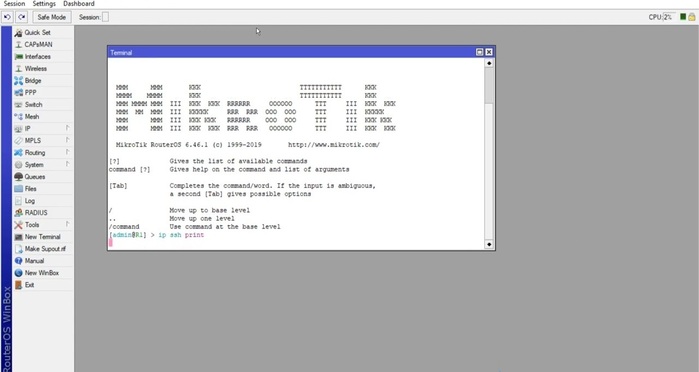
There, you will see the always-allow-password-login comment.
To allow it even if there is a key, enter:
ip ssh set always-allow-password-login=yes
ip ssh print
There, you can see always-allow-password-login: yes
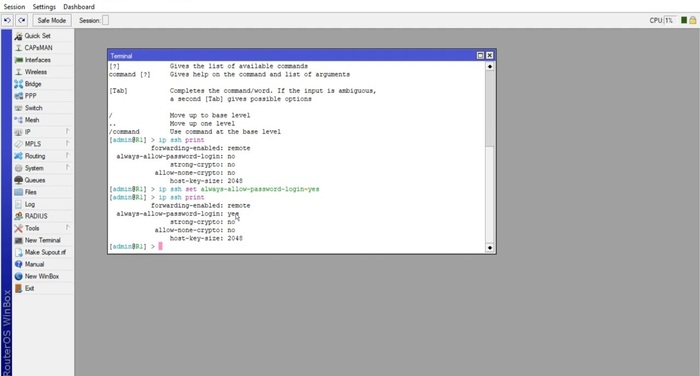
In this way, you will be able to connect to the Mikrotik router via SSH using the key and using username and password.
Step 10: Login via SSH Using the key and without it
Open Putty > Select the saved SSH session with key > Press Load > Press Open > Log in as admin > Press Enter.
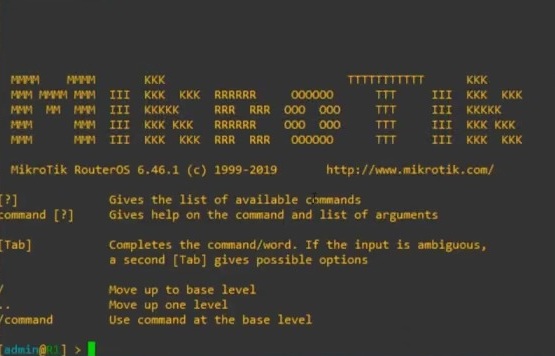
As you see, you can log in using the key.
To check if you can log in without the key, again:
Go to Putty > Select the saved SSH session without the key (If check Auth, there should not be a key) > Press Load > Press Open Log in as admin > Press Enter.
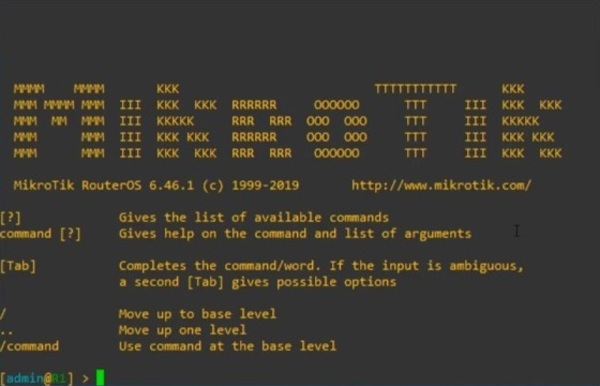
You will also log in using the username and password.
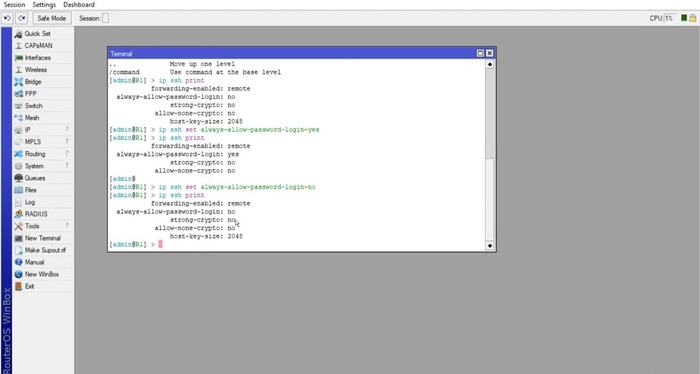
Step 11: Disable always-allow-password-login
On the Mikrotik terminal, run:
always-allow-password-login: no
ip ssh print
By pressing enter, you will see that always-allow-password-login is SET to no.
Again, in the Putty, select the saved SSH session with the key and press the Load, and Open buttons.
On the log-in window, put admin, and press enter.
There, you see that you are logged in with the key.
If you make a normal SSH connection (with IP address) without using a key on putty, with no password in the login windows, you will face Access denied.
So, once you disable that one (which is recommended), you can only connect via the key.
What are the Security benefits of disabling password login?
Eliminates the risk of brute-force password attacks, further enhancing security.
What if I lose my private key?
You will be locked out of the MikroTik router, requiring a reset to factory settings.
Conclusion
Using the steps of this article, you can make an SSH connection using the keys and create the keys using the Putty key generator.
Remember not to disclose the location of your private key to anyone, and ensure it is stored somewhere other than your PC to prevent loss or damage.