How to Change/Customize Shell Prompt in Ubuntu VPS?
Customizing the shell prompt in Ubuntu VPS can significantly enhance your command-line experience by making essential information readily available. You can either change or customize Shell Prompt permanently or temporarily based on your preference.
The main method to change the Shell Prompt is to edit the PS1 (Prompt String 1) line in the .bashrc file.
Prerequisites to change/customize Shell Prompt in Ubuntu VPS
There are some prerequisites to change or customize Shell Prompt in Ubuntu VPS:
- A linux VPS running Ubuntu
- a Root user or a user with sudo privileges
- Access to the Ubuntu terminal
How to change the Shell Prompt in Ubuntu VPS permanently?
First, make sure to back up your .bashrc file.
Changing the Shell Prompt in Ubuntu VPS can be done in two easy ways:
Method 1. Editing the .bashrc file
Step 1: Log in to your Ubuntu VPS as the root user and open the terminal.
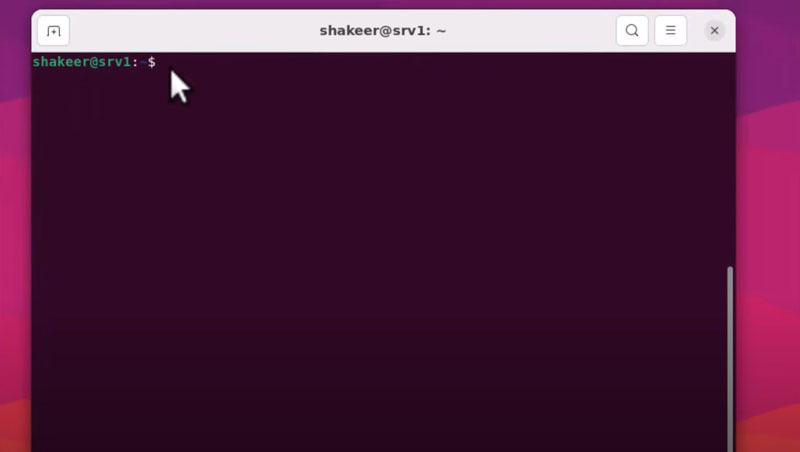 As you can see, the Shell Prompt’s phrase in the terminal is “shakeer@srv1” and we want to change it.
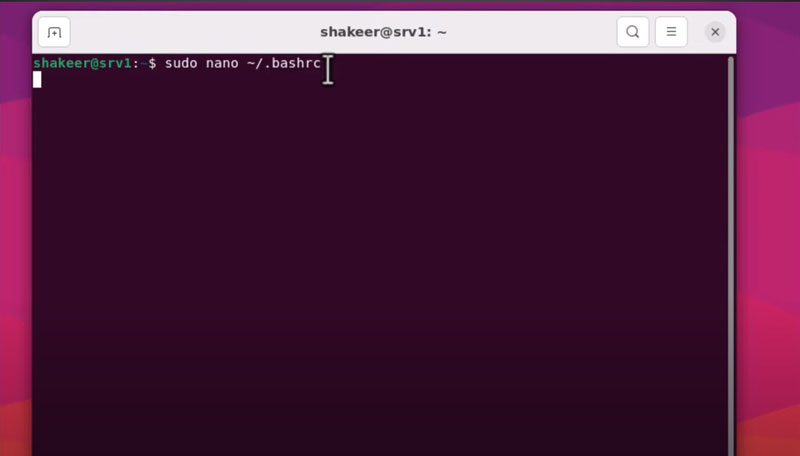
Step 2: Run the following command as the root user to open the .bashrc file in the nano text editor:
nano ~/.bashrcIn case you are not the root user, run this command:
Sudo nano ~/.bashrcIt will ask for your password. Type it in then press the Enter button.
Step 3: Now you will see a screen full of colorful texts. Navigate the lines and find the one starting with the “PS1”. In this line, replace the “\u@\h” with the phrase you want to see as your Shell Prompts.
By default, “\u@\h” will show the Shell Prompt in the form of”username@hostname”, which in my case is “shakeer@srv1”, meaning “shakeer” is the username and “srv1” is the hostname.
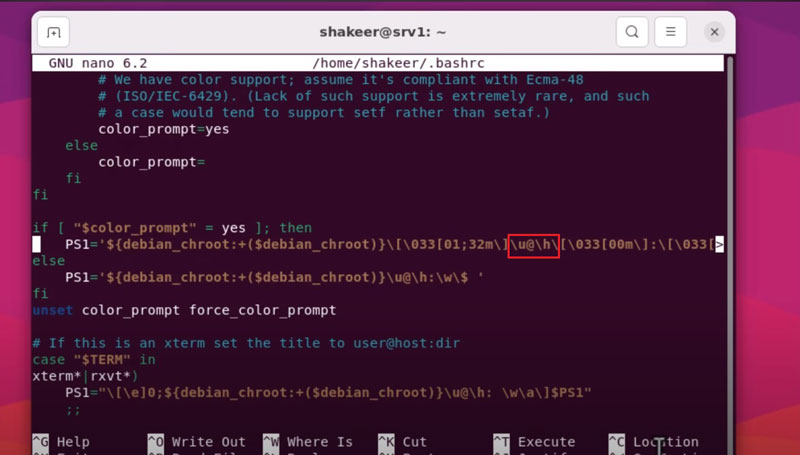
Now replace “\u@\h” with any phrase you want to see in your terminal as the Shell Prompt, then save the file and exit. You can also get $ prompt in the Ubuntu VPS by replacing $ with “\u@\h”.
I save it as “SRV”, as shown below:

Step 4: Let’s open a new terminal window to check the new Shell Prompt:
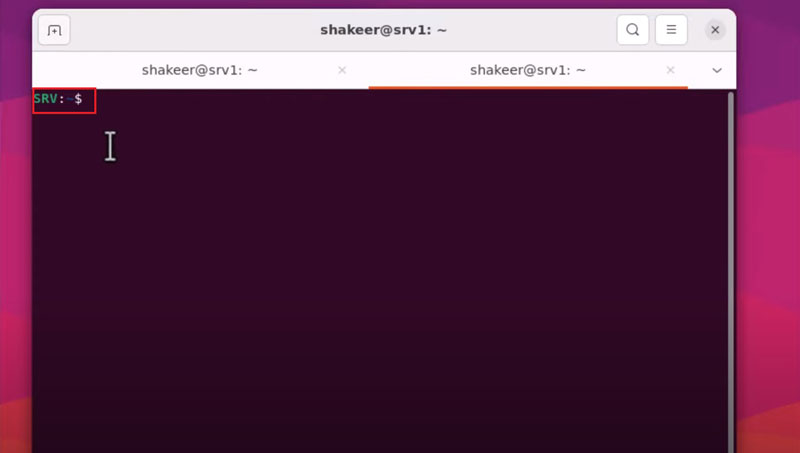
As you can witness, the Shell Prompt in my terminal has changed to the “SRV”.
Method 2. Adding a new line to the bashrc file
Step 1: Log in to your Ubuntu VPS, open the terminal and run the following command as the root user to open the .bashrc file:
nano ~/.bashrcIf you are not the root user but have sudo privileges, run this command:
Sudo nano ~/.bashrcThis command will prompt for your password.

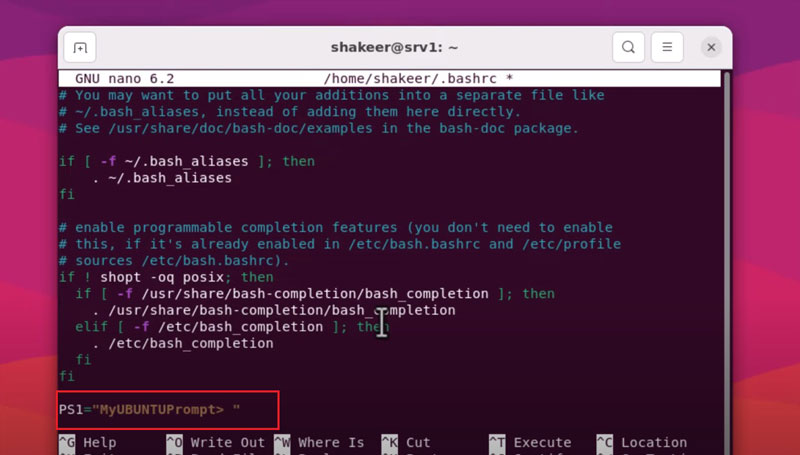
Step 2: Scroll down to the bottom of the .bashrc file in the text editor, and add this line of text:
PS1="MyUBUNTUPrompt> "You can replace “MyUBUNTUPrompt>” with any text you want to set as your Shell Prompt in Ubuntu VPS.
Step 3: Save and exit the file. It’s time to open a new terminal window to check the Shell Prompt.
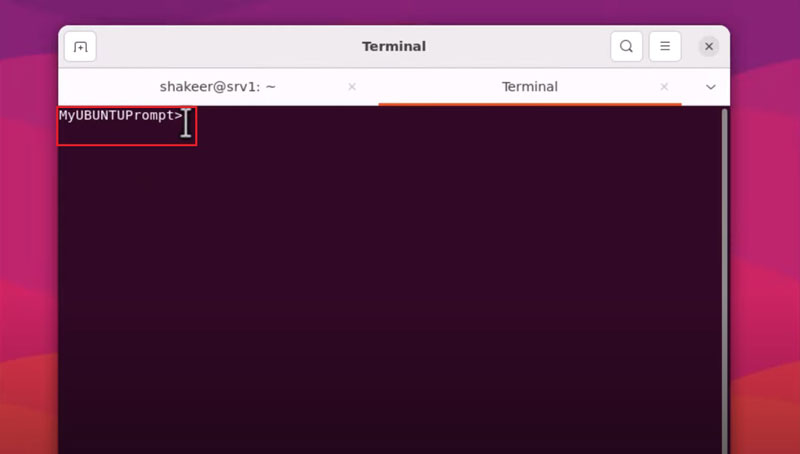
The Shell Prompt has changed to “MyUBUNTUPrompt>” as it is depicted in the picture.
How to change the Shell Prompt in Ubuntu VPS temporarily?
You can customize your Shell Prompt in Ubuntu VPS temporarily, meaning the changes will vanish. The changes will take place immediately and will be reverted once the current session ends.
As an example, you can set the Shell Prompt to only display the username by this command:
export PS1="\u >"The output should be like this:
username >Once you log out of the current user or the session ends, the changes will revert to the original state.
How to Change BASH Prompt Color?
You can also change and customize the Shel Prompt’s color and appearance in Ubuntu VPS. The command to change the Shell Prompt’s color to red is as follows:
export PS1="\e[0;31m[\u@\h \W]\$ \e[0m"We are going to discuss more about this command. First, remember to make a backup copy of your .bashrc file before modifying it.
The elements of the command are:
\e[
-Begin color changes
0;32m
-Define the color code
[\u@\h \W]\$
-The code for your normal BASH prompt
\e[0m
-Exit color-change mode
Now, here is how the color is defined:
A. The first number in the color code specifies the typeface:
- 0 = Normal
- 1 = Bold (bright)
- 2 = Dim
- 4 = Underlined
B. The second number displays the color you want:
- 30 = Black
- 31 = Red
- 32 = Green
- 33 = Brown
- 34 = Blue
- 35 = Purple
- 36 = Cyan
- 37 = Light gray
You can Combine the bright option with a color code which will result in a lighter shade of that color. For example, using the color code `1;34` will produce light purple (pink maybe) instead of the standard purple. Similarly, the code `1;33` will give you yellow instead of brown.
Additionally, here are the detailed commands for the variations, compositions, and other syntaxes that you may need when changing the color of the Shell Prompt in Ubuntu VPS:
# ANSI color codes
RS="\[\033[0m\]"    # reset
HC="\[\033[1m\]"    # hicolor
UL="\[\033[4m\]"    # underline
INV="\[\033[7m\]"   # inverse background and foreground
FBLK="\[\033[30m\]" # foreground black
FRED="\[\033[31m\]" # foreground red
FGRN="\[\033[32m\]" # foreground green
FYEL="\[\033[33m\]" # foreground yellow
FBLE="\[\033[34m\]" # foreground blue
FMAG="\[\033[35m\]" # foreground magenta
FCYN="\[\033[36m\]" # foreground cyan
FWHT="\[\033[37m\]" # foreground white
BBLK="\[\033[40m\]" # background black
BRED="\[\033[41m\]" # background red
BGRN="\[\033[42m\]" # background green
BYEL="\[\033[43m\]" # background yellow
BBLE="\[\033[44m\]" # background blue
BMAG="\[\033[45m\]" # background magenta
BCYN="\[\033[46m\]" # background cyan
BWHT="\[\033[47m\]" # background white
How to add a timestamp to the Shell Prompt in Ubuntu VPS
You may need or want to add a timestamp to your Shell Prompt. Follow these steps to do so:
Step one: Run the terminal in your Ubuntu VPS, and open the .bashrc file by this command:
nano ~/.bashrcIn case you are not the root user, run this command:
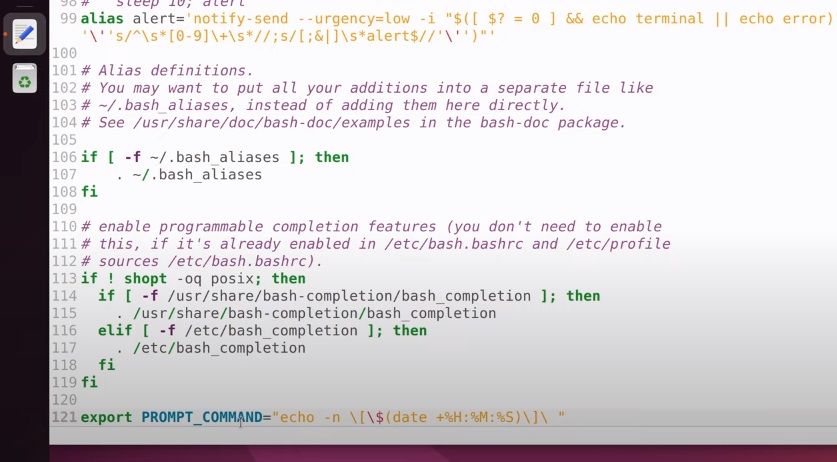
Sudo nano ~/.bashrcStep two: In the editor, go to the bottom of the .bashrc file and add this command:
export PROMPT_COMMAND="echo -n \[\$(date +%H:%M:%S:%3N)\]\ "This command will show the Time in the form of Hours, Minutes, and Seconds in the Shell Prompt.
In this instance, we have already changed the Shell Prompt to the “$” sign.
Step three: Svae and exit the editor. Go back to the terminal, and either open a new window or run this command:
source ~/.bashrc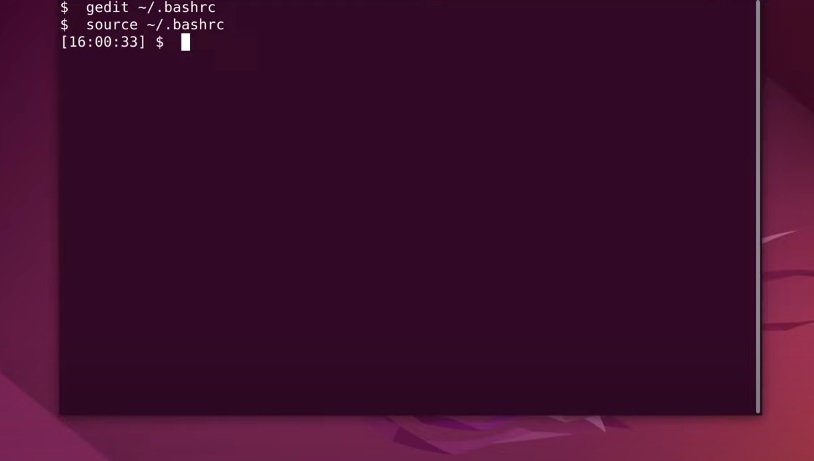
As you can see, the timestamp is added to the Shell Prompt.
How to Reset BASH Changes to Default Settings
If the changes made to the shell Prompt are temporary, they will reset once you log out or the current session ends.
But if the changes you made are permanent, meaning you have edited the .bashrc file, there are two ways to reset the Shell Prompt changes to default settings:
- Make the changes (lines) you made in the .bashrc file as comments by adding the “#” at the beginning of the line.
- Restore default settings from your backup file by using this command:
sudo cp ~/.bashrc.bak ~/.bashrcConclusion
So far, we explored the simple steps to change and customize the Shell Prompt in Ubuntu VPS. By modifying the `PS1` variable and understanding the various options available, you can tailor your terminal environment to better meet your needs.
This not only enhances your productivity but also makes your Ubuntu VPS management more intuitive and visually organized. With these customizations, your Ubuntu VPS Shell Prompt can provide you with immediate, relevant information, improving your overall user experience.