How to Install Stacer on Ubuntu
Stacer is an open-source and user-friendly system optimizer and visualizer designed to empower Ubuntu users.
Stacer simplifies system optimization for LinuxUbuntu users, offering tools for disk management, startup control, and in-depth system analysis, transforming complex data into actionable insights.
This guide offers step-by-step instructions for installing Stacer on Ubuntu. Choose from two installation methods according to your preferences:
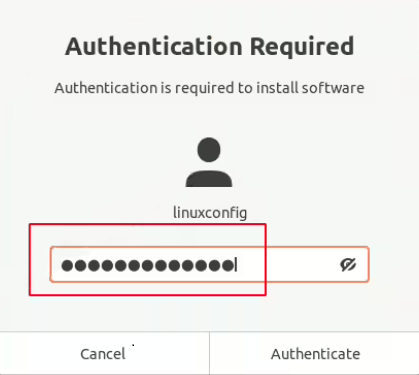
- GUI: Open the Activities menu, search for Stacer, click Install, enter your password, and then launch it from the Applications menu.
- Command-Line:
sudo apt install stacer
Prerequisites to Install Stacer on Linux Ubuntu
Before installing Stacer monitoring tool on Ubuntu 20.04 and Ubuntu 22.04, make sure your system is meeting the below specifications:
- A Linux VPS running Ubuntu.
- A non-root user with
sudoprivileges.
Steps to Install Stacer on Ubuntu with GUI
Let’s go through the steps of this part to learn how to install Stacer, the popular system optimizer and visualizer for Linux.
Step 1: Access the Software Center
Click on the “Activities” icon in the top-left corner of your screen.
Step 2: Search for Stacer
In the opened search bar, type “Stacer” and press Enter.

Step 3: Install Stacer on Ubuntu
- Locate the Stacer application in the search results.
- Click the “Install” button.

- Enter your password when prompted.
Step 4: Launch Stacer on Ubuntu
- Once the installation is complete, you can find Stacer in the “Activities” overview or your application’s menu.
- Click on it to start the application.

Note: To view the software version, open Stacer. Locate and click on the “About” or “Version” section.
As you reviewed, the Stacer Ubuntu GUI installation is straightforward and user-friendly.
How to Install Stacer on Ubuntu from Command Line
Stacer Installation Ubuntu is also possible using the command line for Linux users who prefer to work with the terminal.
Step 1: Update Your System
To ensure that all of your system packages are up-to-date, use the terminal to run the following commands:
sudo apt update
sudo apt upgrade
Step 2: Install Stacer on Ubuntu
Stacer is available on Ubuntu’s default repository.
To start Stacer installation Ubuntu, open your terminal window and run the command below:
sudo apt install stacerYou can also find different Stacer releases on the Stacer releases page on the GitHub site. To download the most recent Stacer release’s.deb package, use:
wget https://github.com/oguzhaninan/Stacer/releases/download/v1.1.0/stacer_1.1.0_amd64.debTo install the downloaded.deb package, type the following command when it has finished downloading:
sudo dpkg -i stacer_1.1.0_amd64.debStep 2: Access Stacer on Ubuntu
After the installation, use the CLI command Stacer to launch the application:
stacerRunning the above command helps you to start Stacer on Ubuntu.
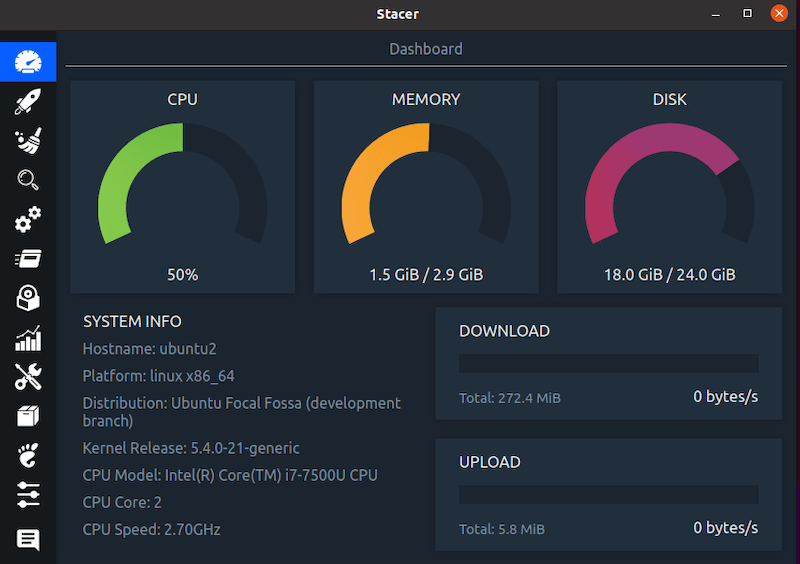
Step 3: Open Stacer on Ubuntu
The Stacer Dashboard will appear below, allowing you to view important system details including CPU, Memory, and Disk information.
Step 4: Verify Stacer Version
To check the installed Stacer version, run:
stacer --versionStep 5: Updating Stacer
It is a good idea to know how to update Stacer on Ubuntu. To update Stacer to the latest version, run:
sudo apt upgradeThat’s it! The Stacer Ubuntu command-line installation is a quick and efficient method for experienced users.
How to Uninstall Stacer on Ubuntu 22.04?
To uninstall Stacer from your Ubuntu system, run the following command in your terminal to remove the Stacer package and its dependencies:
sudo apt remove stacerIf you’ve installed Stacer from a .deb package, you can use the following command to remove it:
sudo dpkg -r stacerWhy to Install Stacer System Monitoring Tool on Ubuntu?
Stacer is a powerful tool for Ubuntu users. It provides valuable insights into your system’s performance and health.
After installing Stacer on Ubuntu 20.04, you will benefit from the advantages:
Optimize system performance: Free up disk space, manage startup apps, and fine-tune resource usage.
Monitor system health: Track CPU, memory, disk, and network activity in a user-friendly interface.
Gain system insights: Get detailed information about hardware, software, and processes.
Why does Stacer installation fail or encounter errors on Ubuntu?
To troubleshoot it:
- Ensure your system is up-to-date.
- Verify correct syntax in commands.
- If using a PPA, double-check its validity.
- Consider alternate installation methods like AppImage or Snap.
Why Stacer doesn’t launch after installation on Ubuntu?
To troubleshoot Stacer installation Ubuntu:
- Check for missing dependencies.
- Verify Stacer’s installation directory and permissions.
- Try running Stacer from the terminal with
stacerto see if any error messages appear.
Why does Stacer behave unexpectedly or crash on Linux Ubuntu?
To solve this issue:
- Check for Stacer updates.
- Look for conflicting software or resource limitations.
- Consider reinstalling Stacer or creating a bug report.
Conclusion
This guide is helpful for both beginners and users with some Linux experience, since it covers two methods to install Stacer on Ubuntu system.
Ubuntu Stacer Install enables Linux users to optimize disk space, manage startup programs, and monitor system vitals effortlessly.
Choose your preferred installation method and enjoy deep insights into your computer’s health and performance.