Install WAMP On Windows VPS for Reliable Business Hosting
To install WAMP On Windows VPS allows you to set up a Windows server with Apache MySQL and PHP. Access your VPS, download WAMP, run the installer, and follow setup prompts to complete installation.
🤖AI Overview:
Install WAMP On Windows VPS refers to the process of setting up the Windows Apache MySQL PHP stack on a virtual private server running Windows. This setup enables you to host websites and web applications using popular open-source tools on a Windows-based server. The goal is to create a reliable development or production environment for web services on a Windows VPS.
Quick Steps
- Download the latest WAMP installer from the official website
- Run the WAMP installer as an administrator on your Windows VPS
- Accept the license agreement and follow the setup prompts
- Choose your installation directory and continue installation
- Set a browser and PHP mail parameters when prompted
- Finish the installation and launch the WAMP server
- Open the WAMP dashboard in your web browser to verify installation
- Confirm server status is green for successful WAMP setup
Steps To Install WAMp On Windows VPS
- Install Prerequisites
- Download WAMP
- Install WAMP On Your Windows VPS
-
Installing Prerequisites
To install wamp on windows VPS and run it correctly, first, you should install the Visual C++ library on your server. Let’s do it together.
-
Download WAMP On Your Windows Server
You can download the latest version of the WAMP On The Below Link.
-
Install Wamp On Windows VPS
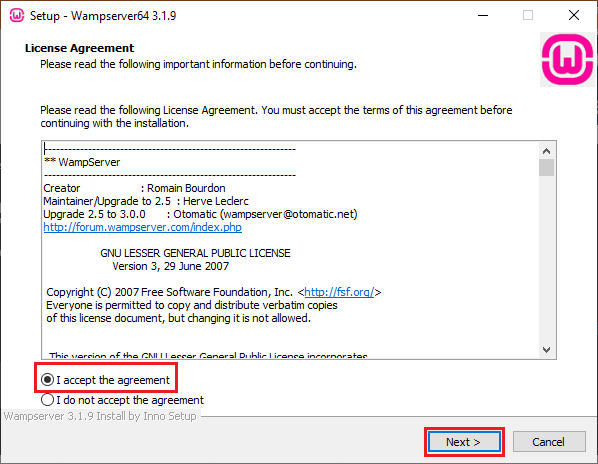
Step 1. The language should be selected. Accept the agreement and click Next.
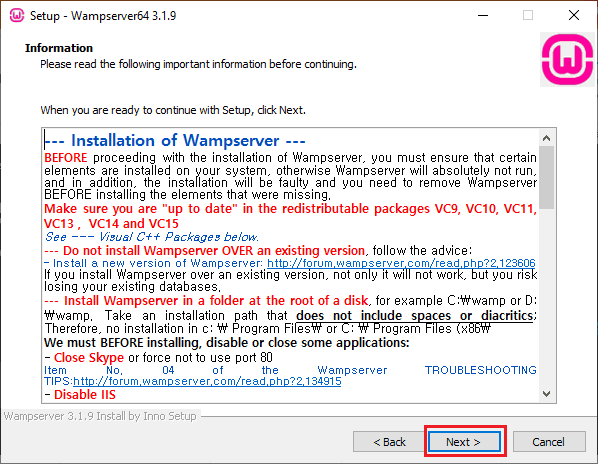
Step 2. Read the important information and click Next.
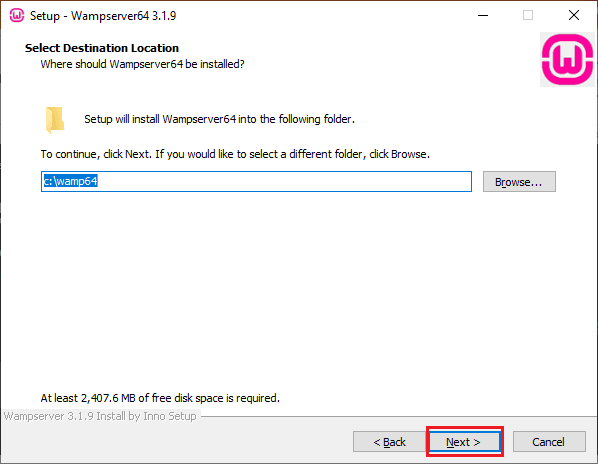
Step 3. Select the destination folder that the WAMP should be installed in.
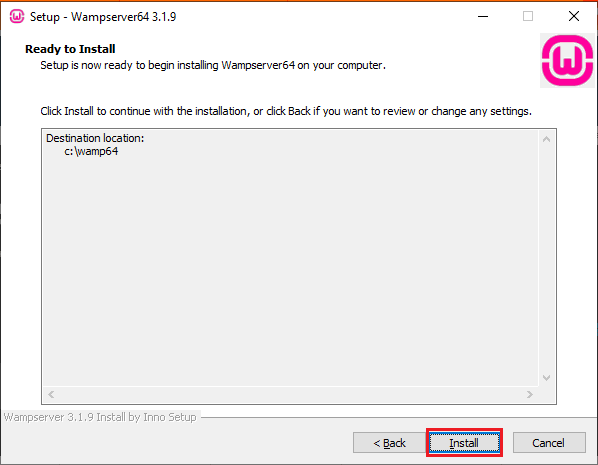
Step 4. Click on Install to start the installation process:
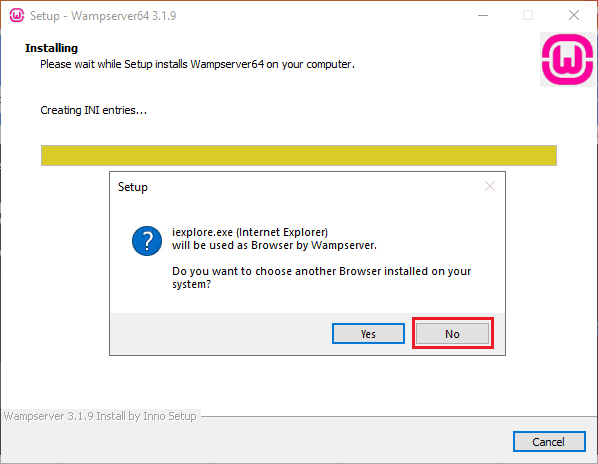
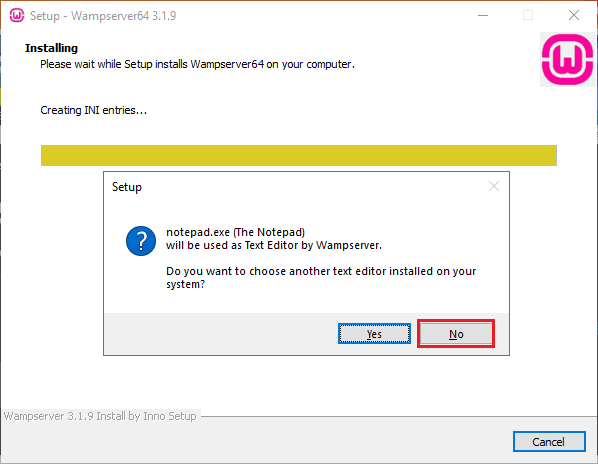
Step 5. Before the install finishes, you will be asked 2 questions.
Question 1. The first one is about the default browser, so if you choose yes, you will be asked to choose a new browser. If you choose no, the default browser will be kept, which is Internet Explorer.
 Question 2. The second one is about the default editor. If you choose yes, you will be asked to choose a new editor. If you choose no, the default editor will be kept, which is notepad.
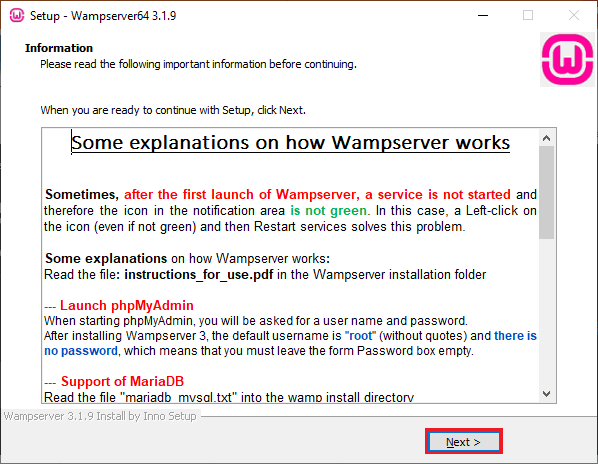
Step 6. In this step, you will be shown how Wampserver works, and you should click Next.
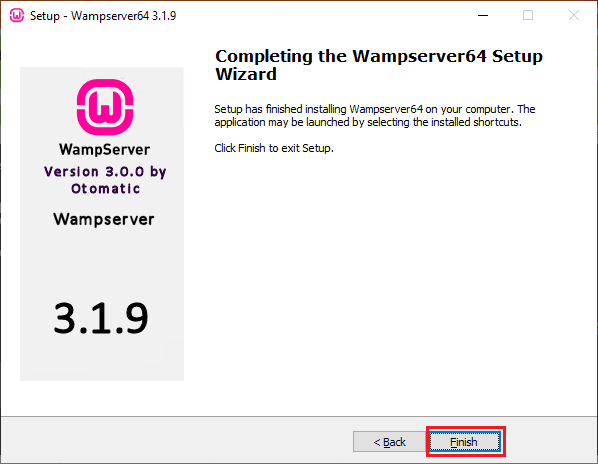
Step 7. The installation is finished. You can click on Finish.
Note: If you faced any error when installing it, you can ask it in the comments section.
Step 8. Once the installation is finished, you can start the wamp service by writing the wampserver64 in the search bar.
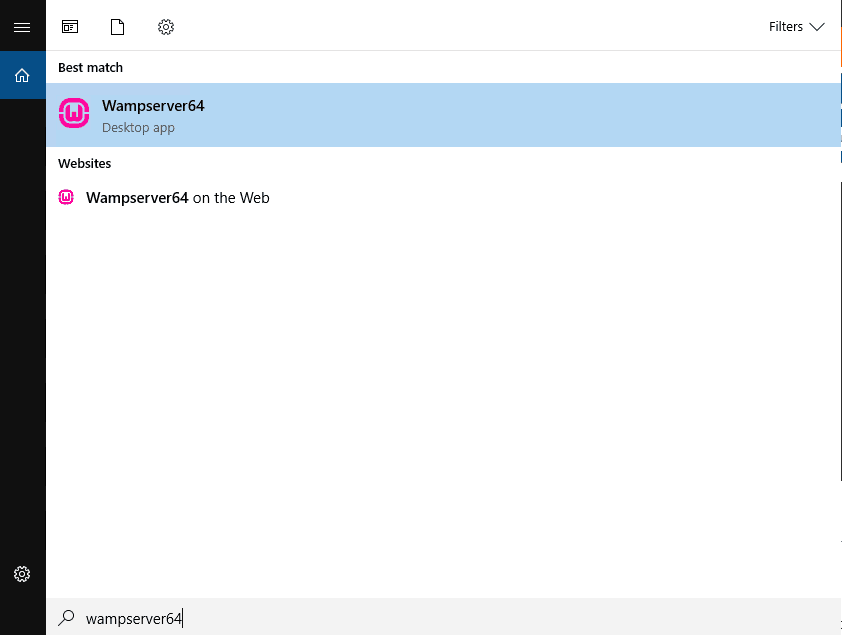
Once you click on it, the icon of the Wamp should be green.
If it’s not, try to restart the Wamp by right-clicking on the Wamp icon and choosing the Restart All Services.
If still, it was not green, it means there is a problem with the wamp server.
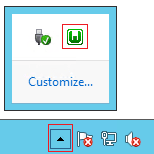
In this situation, you may try to reinstall the wamp. If still, it’s not working after reinstall, it should be checked and troubleshoot completely.
Troubleshoot WAMP Not Starting
- Click on the WAMP icon select Apache -> Service -> Test Port 80; this will check if any other program uses the port.
- Also, try this: Select Apache -> Service -> Install Service. This will make apache use port 80 if it is not already used by any other program like IIS or Skype.
Conclusion
By following this step-by-step guide to install WAMP on Windows VPS, business owners gain a dependable platform for developing and hosting web applications. Utilizing a structured installation process reduces risks and supports the long-term success of your business initiatives.
FAQ
2. What are the system requirements to install WAMP on a Windows VPS?
To install WAMP on Windows VPS, you typically need a Windows Server operating system, at least 2GB RAM, 20GB disk space, and administrative access to your VPS. Meeting these requirements ensures stable operation and optimal performance of your web server.
3. How do I install WAMP on Windows VPS step by step?
To install WAMP on Windows VPS, download the official WAMP installer, run the setup, follow the installation prompts to configure Apache, MySQL, and PHP, and then start the WAMP services. Detailed instructions are provided in our installation guide for business owners seeking reliable results.
4. Is it secure to install and run WAMP on a Windows VPS for my business?
When properly configured, WAMP can be secured on a Windows VPS by setting strong passwords, updating components regularly, restricting access, and using secure connections. OperaVPS recommends following security best practices to protect your business data and web applications.
5. What advantages does installing WAMP on a Windows VPS offer compared to shared hosting?
Installing WAMP on a Windows VPS provides dedicated resources, greater control over configurations, scalability, and enhanced performance. This setup is ideal for business owners needing reliability, customization, and growth flexibility for their online presence.
6. Can I use WAMP on a Windows VPS to host multiple websites?
Yes, WAMP on Windows VPS supports the management and hosting of multiple websites through Apache's virtual hosts feature. This allows your business to operate several domains efficiently from a single VPS environment.
7. How do I troubleshoot common issues during WAMP installation on my Windows VPS?
Common issues when installing WAMP on Windows VPS include port conflicts, missing system libraries, or permission errors. Review the installation logs, check if required ports are free, and ensure you have administrative privileges. OperaVPS support is available to assist business owners in resolving technical challenges.
8. Can I upgrade or customize WAMP components after installation on my Windows VPS?
Yes, you can upgrade or modify Apache, MySQL, or PHP versions in your WAMP installation on Windows VPS. Regular updates and custom configurations allow your business to meet specific application requirements and maintain system security.
9. What support does OperaVPS provide for installing WAMP on a Windows VPS?
OperaVPS offers professional guidance, remote installation assistance, and ongoing technical support for business owners installing WAMP on Windows VPS. Our team ensures your environment operates efficiently and meets your business objectives.
10. Is WAMP suitable for running business-critical applications on a Windows VPS?
WAMP is suitable for many business-critical web applications, especially when configured for high performance and security. For best results, consult with OperaVPS experts to tailor your WAMP installation to your business needs and ensure ongoing reliability.