How To Stop Automatic Updates In RDP
Updating your RDP is important! In this article, we will check how to stop Automatic updates in RDP, but first, we should check that is it good to disable updates in RDP or not. Updates in Windows Server fixes security issues and in main updates, you will also get extra features with updating your RDP.
Why Should We Update The RDP Server?
Over time, new viruses and trojans are created. And over time you should be able to have the equipment to stand against these viruses and security dangers. Your equipment is the Windows Server Update Services (WSUS).
In these updates, Microsoft always provides updates for Windows defender service. If you do not update your RDP server, you will definitely have issues in the future. Furthermore, during the main updates of Microsoft, you will receive extra features and options with your services.
The other issues are bugs. Windows VPS has been created with thousands of codes and every day new processes and applications are coming out which has also thousands of codes. Between these codes, completely removing bugs is impossible.
Microsoft resolves and fixes the reported bugs in every new update and it is valuable.
I hope you have been given up till now to stop the updates on your RDP server or Windows VPS. But if still, you want to do this, stay with me.
There are two ways to stop auto-updates in RDP.
- Stop the automatic updates through Group Policy Manager.
- Stop the automatic updates through Windows Server Powershell.
1- Stop Automatic Updates Through Group Policy Manager.
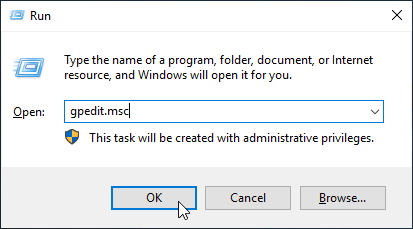
To do this, press the Win + R combination keys and type gpedit.msc in the new windows which will appear. This will take you to the Group Policy Editor environment.
Go to the below path:
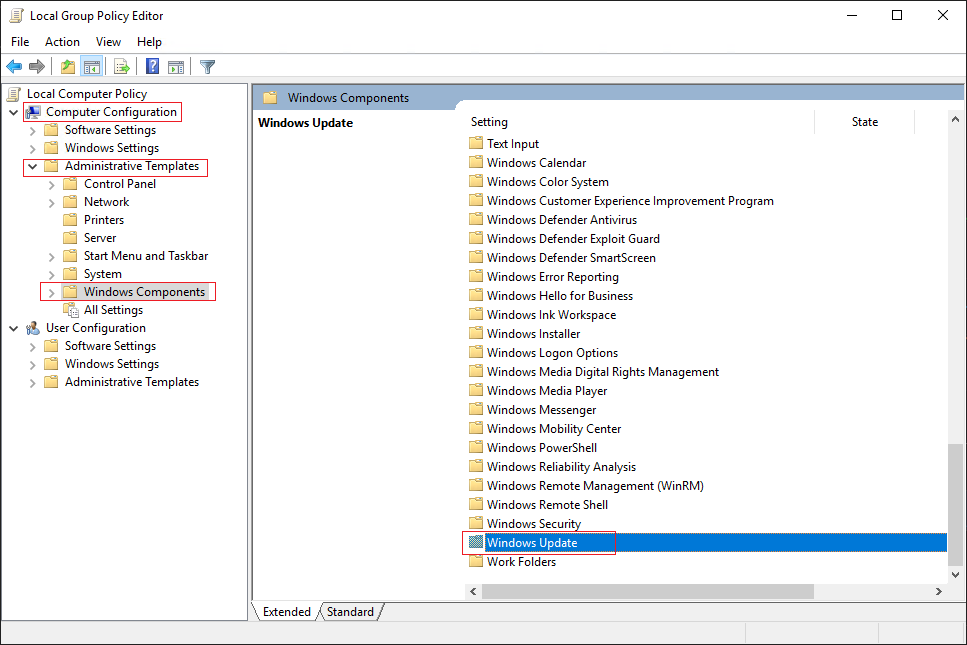
Computer configuration >> Administrative templates >> Windows Components
In this path, find the Windows Update folder and open it.
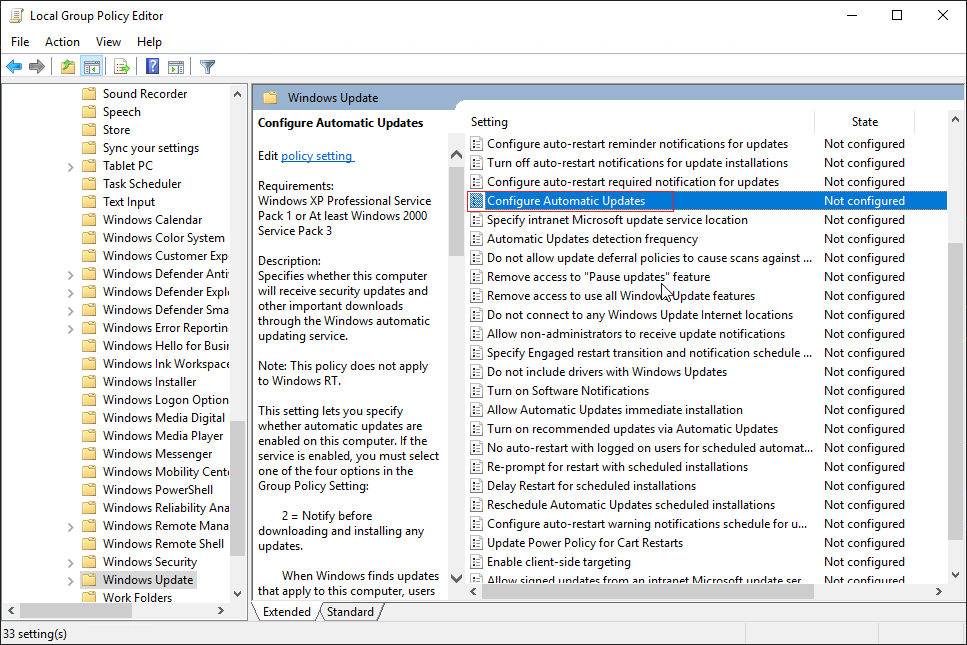
In the right panel, find Configure Automatic Updates and double-click on it.
Inside the window that appears, select Enabled. Once you do this, you will have 4 options to choose for automatic updates which we will choose “Notify for download and auto-install” in this tutorial. Now click on Apply and OK to save and apply the setting.
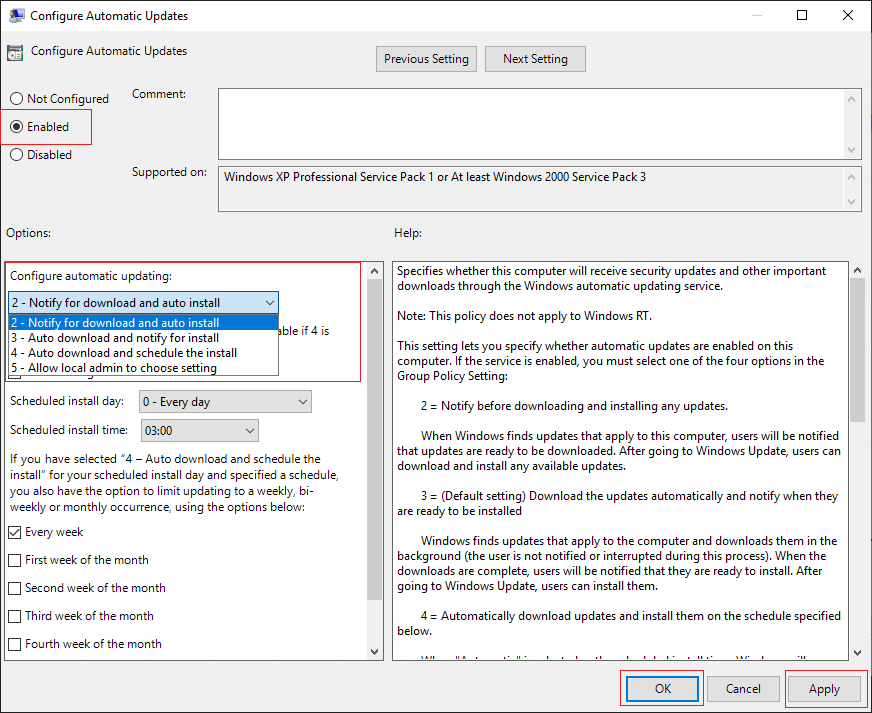
From now on, Windows VPS updates will only be downloaded and installed manually.
2- Stop Automatic Updates Through Windows Server Powershell.
Search for Windows Powershell and run it in the search section of your RDP server.
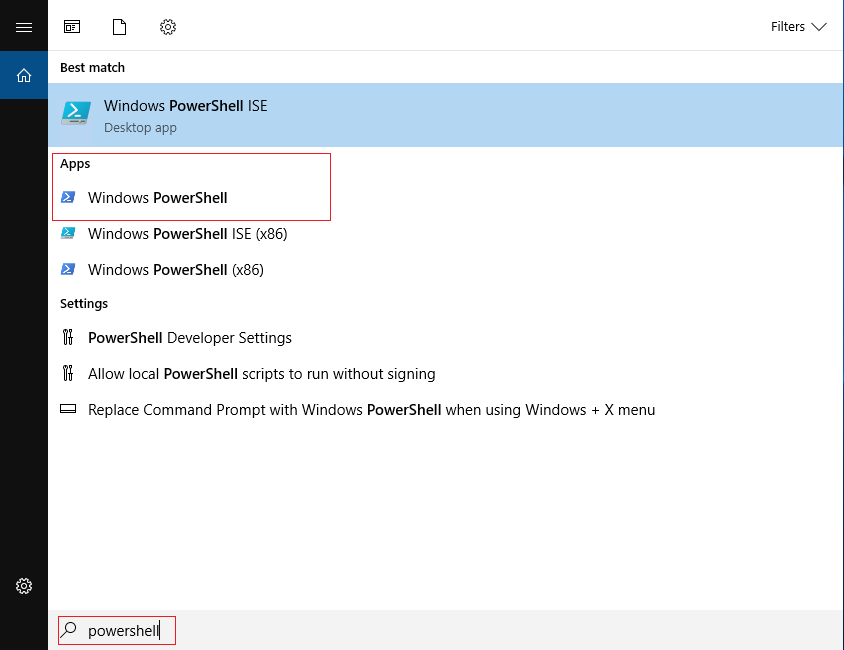
Type the sconfig command in the Powershell and press Enter. Some settings will appear. Type 5 which is Windows Update Setting and press enter.
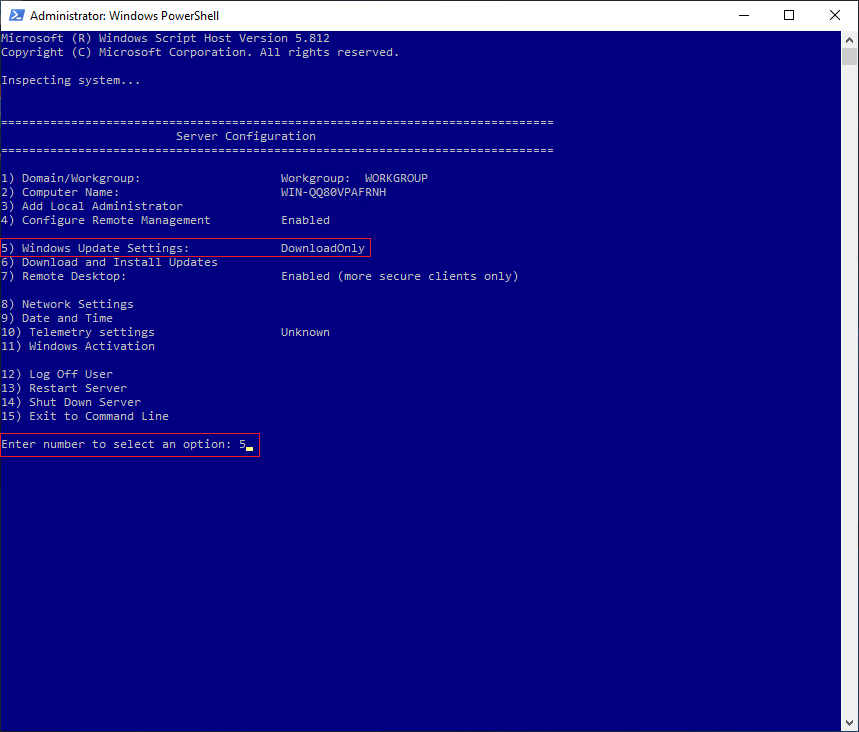
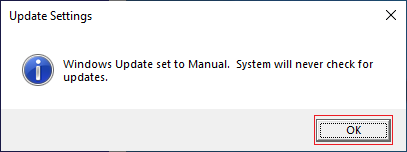
Then type M which is the option for Manual updates and press Enter.

By doing this, you have set the setting to download and install the updates manually. That’s it!
Conclusion
Disabling the updates is as easy as this. If you do not have a logical reason, do not try to disable the updates because they are critical for the system to work correctly. We will be happy to hear your opinions regarding this article.