How to Enable WiFi in Kali Linux
There are two ways to enable WiFi in Kali Linux. You can either use the Graphical User Interface (GUI) or use the terminal on Kali to enable WiFi..
Enabling WiFi in Kali is easier if you go with the GUI solution. You can enable WiFi in famous Linux GUI like KDE, GNOME, and Xfce.
And you can use the nmcli, nmtui, and ip commands in the terminal to enable the WiFi in Kali.
Prerequisite for enabling wifi on Kali Linux
You need some prerequisites to connect Kali Linux to wifi. These prerequisites are:
- A system or VPS server With Kali Linux or virtualization software like VMware and VirtualBox with the Kali distribution
- A root user logged in
Enable WiFi in Kali Linux via GUI
The first way to turn on wifi in Kali Linux is using the GUI. The ways to connect to WiFi in KDE, GNOME, and XFCE desktops are almost the same.
The following steps depict the way to connect Kali Linux to wifi.
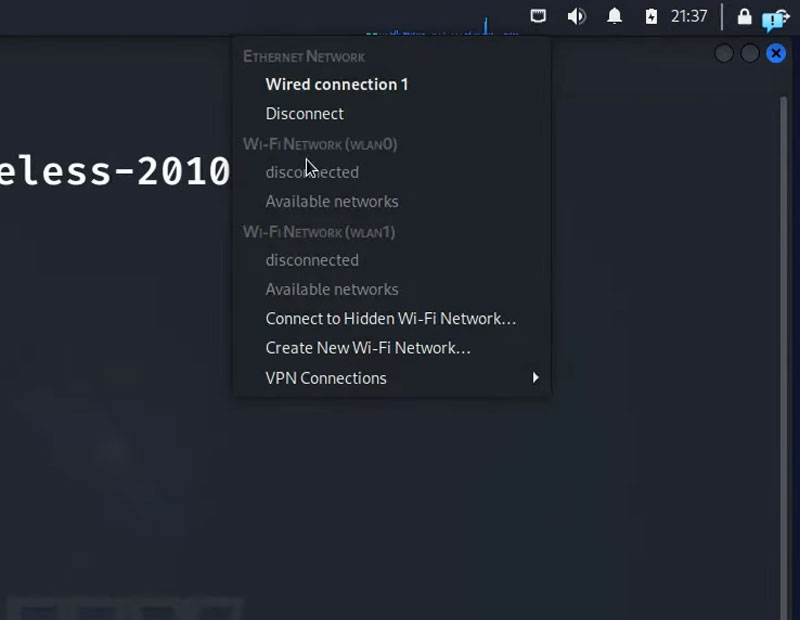
First step: Find the network icon
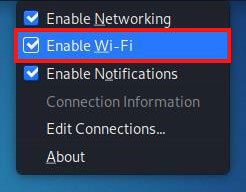
Find the network icon at the top right corner of your Kali screen and right-click on it.
![]()
Second step: Enable wifi
Now that a small window has appeared select “Enable Wi-Fi” from the options.
After enabling the WiFi, you can choose any wireless network you want to connect to from the available WiFis.
Then, you will be asked to provide the password of the wifi network in order to connect to it.
Also, you can right-click on the Network icon and select “Connection Information” to review the connection details.
How to disable wifi in Kali via GUI
To disable the WiFi through GUI in Kali Linux, find the network icon, right-click on it, and uncheck the “Enable Wi-Fi” box.
Enable WiFi Network in Kali Linux through the terminal
You can use various commands to connect to the desired WiFi in Kali Linux. We will teach different methods for connecting to wifi in Kali using the terminal.
1. Connect Kali Linux to WiFi via nmcli command
Using the nmcli command is a simple and practical method to control the NetworkManager and connect to any network.
To run the nmcli command, you need to enter the network name and password in the following format:
nmcli d wifi connect [The desired network name ] password [The desired network password]You will be connected to the desired network by executing the above command.
If you need help with the nmcli command, you can refer to the nmcli command’s web page.
2. Connect to WiFi in Kali Linux via nmtui command
The nmtui command, like the nmcli command, enables you to control the NetworkManager. To connect to the desired WiFi network, type the following command:
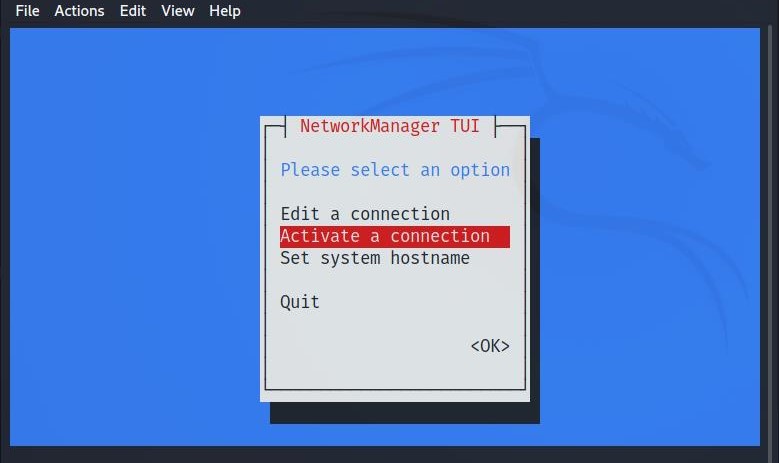
nmtuiAfter running the command, the menu shown in the image below will be displayed for you.
You must select the “Activate a Connection” option using the keyboard and then press the Enter button.
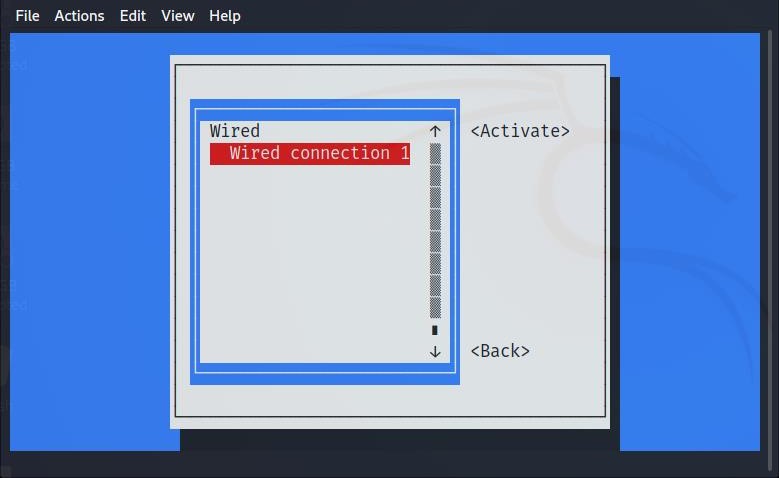
In the next menu, you will see the available networks. Select your desired option using the keyboard and then press Enter.
Select the Back option after connecting to the desired network and press Enter.
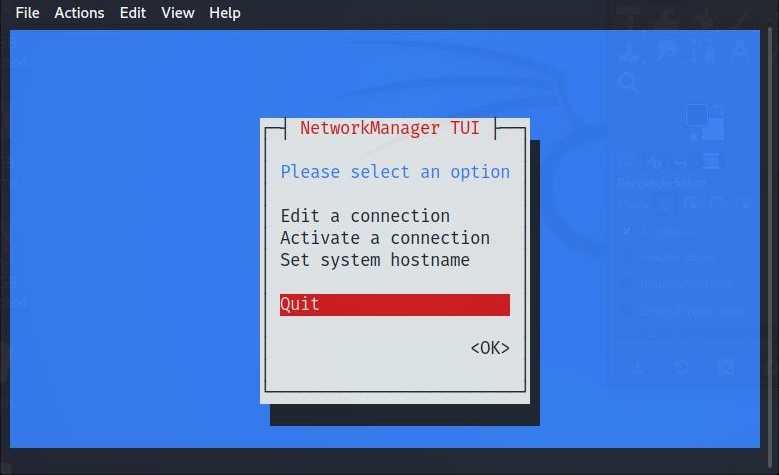
To exit the nmtui command prompt, select Quit and press Enter.
3. Connect to the WiFi network through the ip command
Another way to connect to a WiFi network in Kali Linux is to use the ip command.
To access the desired WiFi, enter the following command in the terminal environment:
$ ip a
Also, to enable WiFi by Backupping your desired adapter, run the following command:
$ sudo ip link set dev [name of desired WiFi ] upYou can run the “ip” command again to check the WiFi connection.
How to disable wifi in Kali via terminal
If you want to disable your WiFi connection in Kali Linux through the terminal, the following command is of help:
$ sudo ip link set dev [name of desired WiFi ] downHow to list wifi networks through the terminal
If you need to list the available wifi networks via the terminal, this is the command you need:
iwlist wlan0 scan
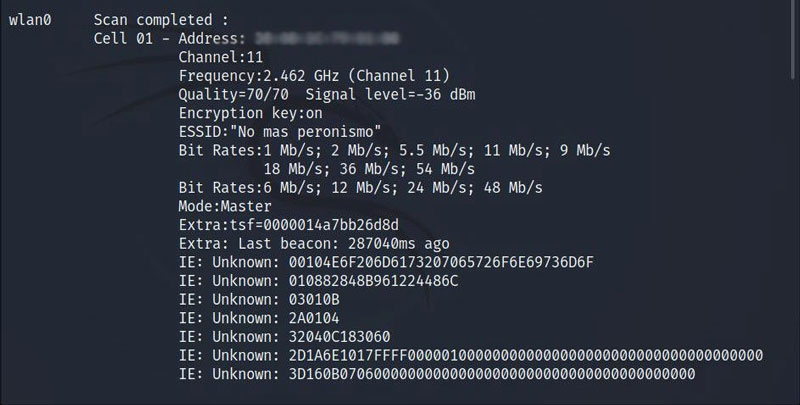
In case you need the ESSID (Extended Service Set Identifier) of the available networks, you can run the following command:
iwlist wlan0 scan | grep ESSID

How to fix wifi not showing in Kali
This problem is not common in Kali Linux, but if you encounter this issue, you can use the following command to fix it:
sudo apt install kali-linux-wirelessOf course, this problem may be related to the failure of your wireless card, so it is better to identify your network device name first so that you can make the necessary changes:
iwconfigAfter identifying the name of your network device, run the following command:
ifconfig [wireless card name ] upHow to Enable WiFi Adapter in Kali Linux
Disabling Wifi Adapter may be one of the reasons why you cannot see the wireless device and available networks in the list.
To enable the Wi-Fi adapter in Kali Linux, open the Kali Linux terminal environment and execute the following command:
sudo ifconfig wlan0 upBy running this command, you should access a list of available networks. Otherwise, it is better to restart the Kali Linux operating system.
The WiFi adapter is used when connecting to the WiFi network. So you must enable the Kali Linux Wifi and enter the Wifi network password to connect to it in the same.
Kali Linux may not recognize the wireless adapter in virtual environments like VMware and Virtualbox. Using an external adapter can solve this common concern.
If executing the provided command and restarting the Kali Linux system does not activate your WiFi adapter, consider using an external adapter.
Wireless adapter enhances Kali Linux WiFi on physical systems, which is unnecessary for VMware and Virtualbox.
How to enable wlan0 in Kali Linux VMware/Virtualbox?
Follow this method if you have run your Kali Linux on VMware or Virtualbox and have trouble connecting to the wifi.
Step one: Download the wireless adapter driver
Download the “compat-wireless” file directly from the download link. Then, go to the directory where it is saved and unzip the file.
Step two: Change the directory in the terminal
First, switch to the root user using the command below:
$ sudo su
Now, change the directory to where the file has been downloaded. Here, we switch it to the Downloads directory using this command:
cd Downloads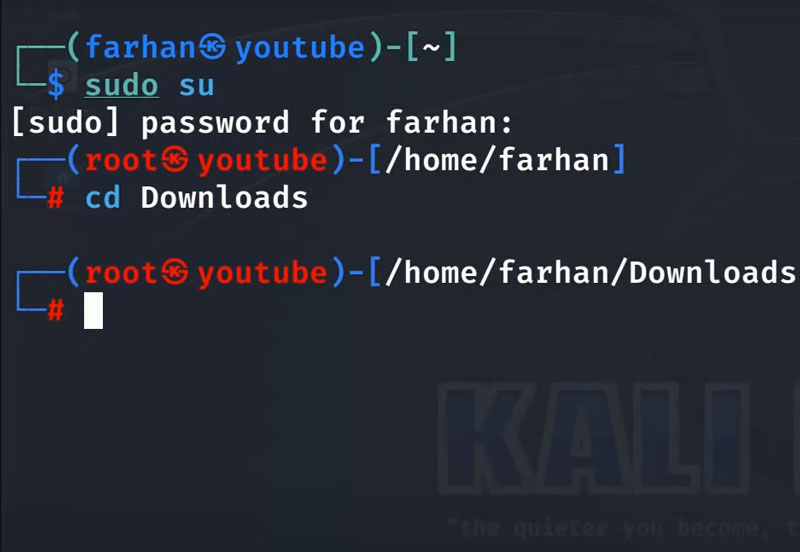
Then, move to the directory where the file has been extracted. The command will be:
cd compat-wireless-2010-06-28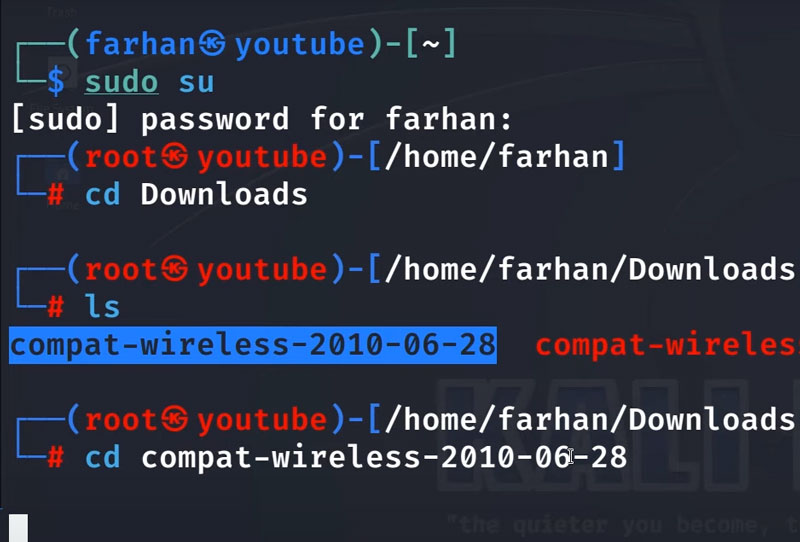
The compat-wireless-2010-06-28 is the extraction directory.
Step three: Unload and load the driver
In this directory, type the following commands respectively:
make unload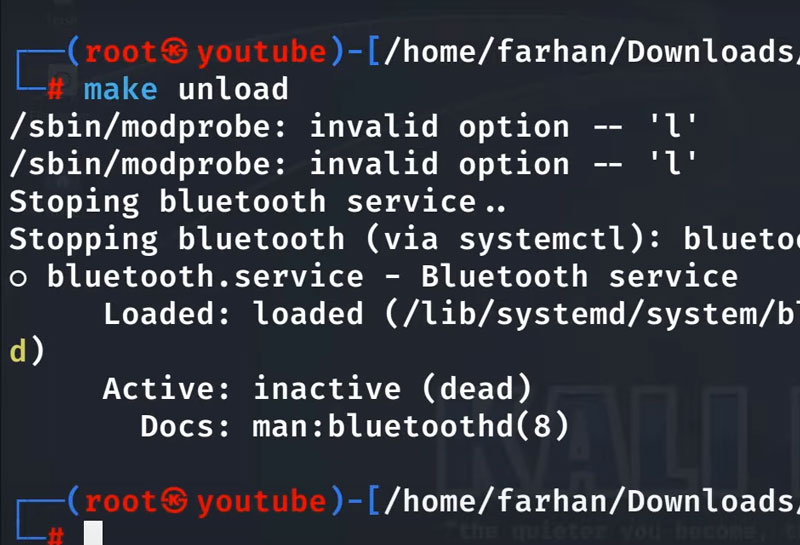
make load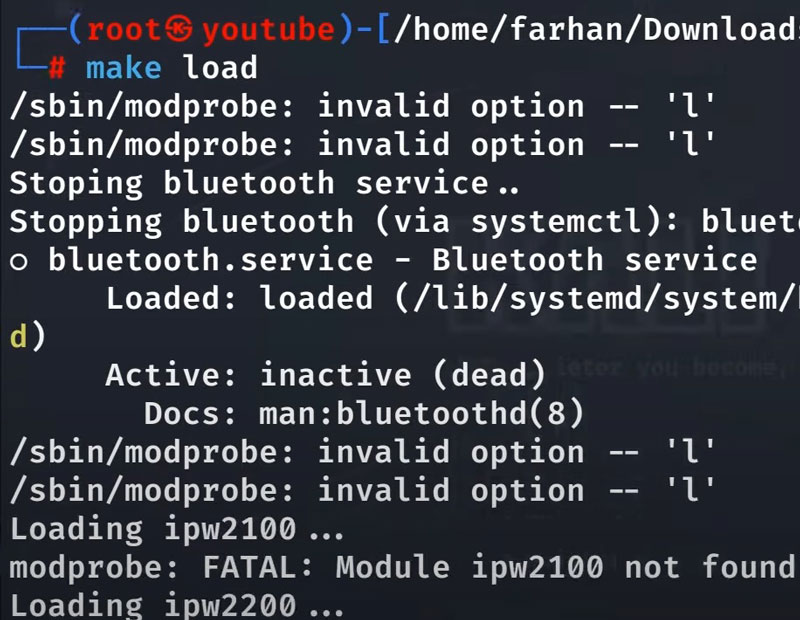
The Kali Linux not showing available wifi networks is fixed, and you can see the available wifis if you click on the network icon.
Also, you can see the “wlan0” and “wlan1” enabled by typing the following command in the terminal:
iwconfig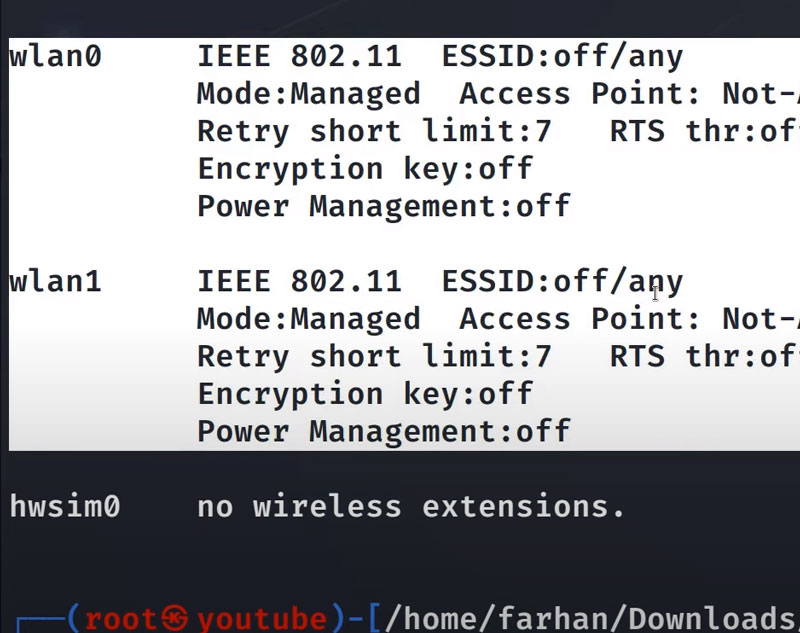
Why is Kali Linux WiFi not Working?
If you are experiencing connectivity issues, it’s likely due to incorrect network drive configuration or not having them installed.
However, if your hardware is functioning properly and you still can’t connect, it could be because your network drives are outdated.
You must click on the shell button on the bottom right side of the screen and find and update the desired software by typing “software and updates” in the search bar.
How to install WiFi driver in Kali Linux without Internet?
If you do not have access to the internet and want to install the wifi driver, here is what you have to do:
- Run either of the commands below to identify your wifi adapter’s model.
lspcilsusb- Download the adapter’s driver on another system connected to the internet.
- Transfer the driver using a USB to your Kali Linux system.
- In the terminal, navigate to the directory where you have put the driver’s file and install it by the method mentioned earlier.
Now you can check if your wifi in Kali Linux is working.
How to check WiFi adapter in Kali Linux?
To check the WiFi adapter, open the terminal in Kali Linux and run:
airmon-ngYou will see the WiFi cards, for example, wlan0. To observe any card, here wlan0, run this command:
airmon-ng start wlan0Its name will be changed to “wlan0mon” because it is in monitor mode.
Now type the command below to list all the networks:
airodump-ng wlan0monYou can stop observing by pressing the “ctrl” and “c” buttons, then running the command:
airmon-ng stop wlan0monFinally to reclaim your WiFi, run the:
systemctl restart NetworkManager.service
What command should we use to check available WiFi networks?
Nmcli is a command that allows you to control NetworkManager and provides information about the network status, so run the following command to scan WiFi networks:
nmcli dev wifiConclusion
Kali wifi not working can sometimes happen on your system. The GUI and terminal/cmd solutions both help you fix the problem.
We also provided the ways to check the WiFI adapter in Kali, install WiFi driver in Kali Linux without Internet and the way to to enable wlan0 in Kali Linux VMware/Virtualbox.