Install Apache Hadoop on Windows
While it’s primarily designed for Linux systems, many developers and students want to install Apache Hadoop on Windows for testing, learning, or development purposes.
In this guide, you will learn how to set up Hadoop in a single-node cluster on Windows 10 or Windows 11.
The process involves downloading Hadoop binaries, configuring environment variables, setting up core configuration files, and starting the Hadoop daemons (NameNode, DataNode, ResourceManager, NodeManager).
By the end, you will have a working Hadoop installation on Windows that can run MapReduce jobs and store data in HDFS.
Prerequisites to Install Apache Hadoop on Windows
To install Apache Hadoop on Windows, your machine needs to meet all the specifications below:
- OS: Windows 10 / 11 or Windows Server (latest updates).
- Java: JDK 8 (Java 1.8) installed and tested with
java -versionandjavac -version. - RAM / CPU: 4 GB min (dev); 8 GB+ recommended for comfortable testing. SSD recommended.
- Tools: 7-Zip (or similar) for
.tar.gzextraction. - Hadoop binary: download a stable binary from Apache Hadoop releases.
- Windows native binaries (winutils): required for Windows compatibility, get a matching build for your Hadoop version (community builds on GitHub are commonly used).
Complete Guide to Install Hadoop on Windows
Before diving into the detailed steps for Hadoop installation on Windows, it’s essential to ensure that your system is properly prepared.
This guide will walk you through the setup process to get Hadoop up and running for big data tasks.
If you prefer using a virtual private server to handle big data tasks remotely and add flexibility, a reliable Windows VPS can streamline your experience.
Step 1: Install Java Development Kit (JDK)
Hadoop requires Java to run, so the first step in installing Hadoop on Windows is setting up the JDK.
- Download the latest JDK (Java 8 or Java 11 recommended for Hadoop compatibility) from Oracle or OpenJDK.
- Install it in a directory using the command below:
C:\Java\jdk1.8.0_351To set the JAVA_HOME environment variable:
- Go to System Properties → Advanced → Environment Variables.
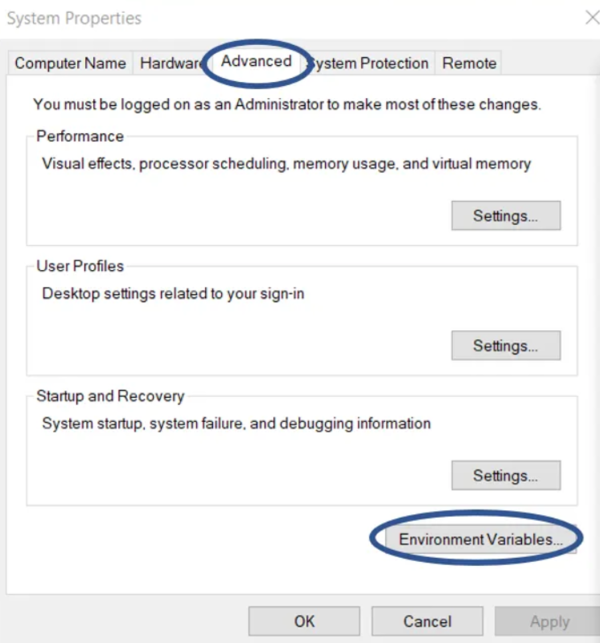
- Add a new variable:
JAVA_HOME = C:\Java\jdk1.8.0_351Append ;%JAVA_HOME%\bin to your Path variable.
The screenshot below shows how the JAVA_HOME variable should look when added in the Environment Variables window on Windows:
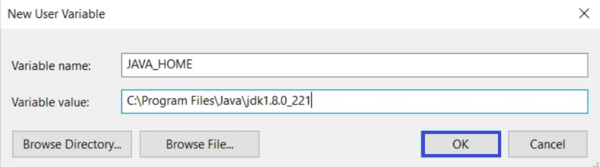
This ensures Hadoop can detect Java when you run commands. If java -version returns correctly in Command Prompt, you’re good to continue.
Note: Make sure not to use spaces in the folder names, as this can cause issues later on.
Step 2: Download and Extract Hadoop Binaries
You should always use a recent stable Hadoop version to benefit from bug fixes and security updates.
Download the Hadoop binary package (ZIP) from the Apache project (or official mirrors) and extract it into a clean directory without spaces in the path.
- Go to the official Apache Hadoop releases page and download the binary ZIP of the latest stable release.
- Extract the ZIP file into a folder, such as below:
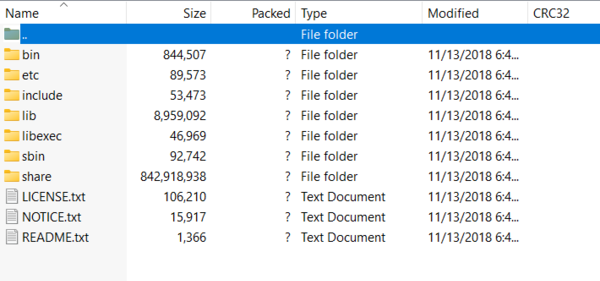
C:\hadoop- Ensure the extracted folder has the structure:
bin,etc\hadoop,lib,sbin,share, etc.
Here’s an example of the Hadoop directory structure after extraction. Make sure your folder looks similar before continuing
Set HADOOP_HOME environment variable to the root of that extracted directory.
Add %HADOOP_HOME%\bin and %HADOOP_HOME%\sbin to your system Path.
Example (Windows GUI / Commands):
- Environment Variables → New system variable:
HADOOP_HOME = C:\hadoopEdit Path → append:
;%HADOOP_HOME%\bin
;%HADOOP_HOME%\sbinNote: Always open a new Command Prompt window after making environment changes to see the effect.
Step 3: Add Hadoop Windows Binaries (winutils.exe)
Because Hadoop is built for Linux, you need Windows-compatible binaries (winutils.exe) to make it work properly.
- Download the
winutils.exebinary for your Hadoop version from a trusted repository. - Place it inside:
C:\hadoop\binWithout this step, you’ll see errors such as “Hadoop not recognized” or missing winutils.exe.
Step 4: Configure Hadoop Environment Variables
Hadoop requires some extra variables:
- Add this to your environment variables:
HADOOP_HOME = C:\hadoop
HADOOP_COMMON_HOME = %HADOOP_HOME%
HADOOP_HDFS_HOME = %HADOOP_HOME%
HADOOP_MAPRED_HOME = %HADOOP_HOME%
HADOOP_YARN_HOME = %HADOOP_HOME%
HADOOP_OPTS = -Djava.library.path=%HADOOP_HOME%\bin- Verify setup by running:
hadoop versionIf the command prints the Hadoop version, you’re on the right track with your Hadoop Windows setup.
Step 5: Edit Hadoop Configuration Files
Next, configure the Hadoop single-node cluster. Navigate to:
C:\hadoop\etc\hadoopUpdate these XML files:
core-site.xml
<configuration>
  <property>
    <name>fs.defaultFS</name>
    <value>hdfs://localhost:9000</value>
  </property>
</configuration>
hdfs-site.xml
<configuration>
  <property>
    <name>dfs.replication</name>
    <value>1</value>
  </property>
  <property>
    <name>dfs.namenode.name.dir</name>
    <value>file:/C:/hadoop/data/namenode</value>
  </property>
  <property>
    <name>dfs.datanode.data.dir</name>
    <value>file:/C:/hadoop/data/datanode</value>
  </property>
</configuration>
mapred-site.xml
(Rename mapred-site.xml.template → mapred-site.xml)
<configuration>
  <property>
    <name>mapreduce.framework.name</name>
    <value>yarn</value>
  </property>
</configuration>
yarn-site.xml
<configuration>
  <property>
    <name>yarn.nodemanager.aux-services</name>
    <value>mapreduce_shuffle</value>
  </property>
</configuration>
These settings define Hadoop’s HDFS file system, replication factor, and YARN framework.
Step 6: Format the Hadoop NameNode
Before starting Hadoop daemons, initialize HDFS:
hdfs namenode -formatThis creates the metadata directories for NameNode.
Run this only once when setting up Hadoop.
Step 7: Start Hadoop Services
Start Hadoop daemons on Windows:
start-dfs.cmd
start-yarn.cmd
Check if processes are running using Task Manager (look for NameNode, DataNode, ResourceManager, NodeManager).
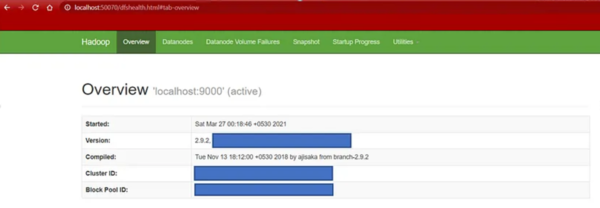
- Once services are started, you can verify the NameNode by accessing
http://localhost:50070. A page similar to the one below should appear, showing cluster status and metadata.
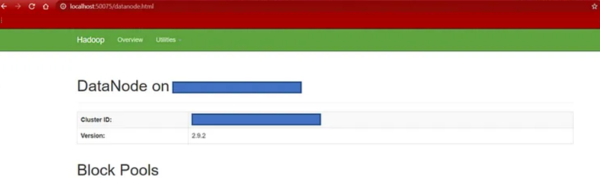
- To confirm DataNode functionality, check
http://localhost:50075. The following interface will display storage block pools and cluster details.
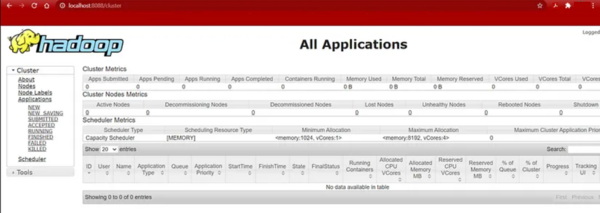
- Similarly, verify YARN’s ResourceManager on
http://localhost:8088. If configured correctly, you’ll see the application scheduler dashboard as shown below.
Step 8: Test Hadoop Installation on Windows
Verify by creating directories in HDFS
hdfs dfs -mkdir /test
hdfs dfs -ls /
If you see the /test directory listed, congratulations, you’ve successfully installed Hadoop on Windows 10/11.
Can I install Hadoop on Windows 10?
Yes, Hadoop installation on Windows 10 is possible by downloading the Hadoop binaries, setting up environment variables, configuring XML files, and replacing the bin folder with a Windows-compatible version.
Why is Hadoop not working after installation on Windows?
If Hadoop isn’t working after installation, it might be due to improperly configured environment variables, missing or incorrect paths in the core-site.xml and hdfs-site.xml files, or an outdated version of the bin folder.
To solve this issue, ensure you’ve set the paths correctly and replaced the bin folder with a Windows-compatible version.
How to fix ‘Hadoop is not recognized as an internal or external command’?
This error means your environment variables are not set up correctly.
To troubleshoot this error, ensure that the %JAVA_HOME%\bin, %HADOOP_HOME%\bin, and %HADOOP_HOME%\sbin paths are added to the system PATH.
Also, verify the settings by running echo %JAVA_HOME% and echo %HADOOP_HOME% in a new command prompt.
Conclusion
This article is a step-by-step process for successfully setting up Apache Hadoop on a Windows machine, from unzipping files and configuring environment variables to editing essential Hadoop configuration files.
After completing the Windows install Hadoop process and running Hadoop, you can start working with it by uploading data, running MapReduce jobs, or exploring YARN for resource management.
With your environment ready, Hadoop can now be utilized for big data processing and analytics tasks on your system.