Install and configure phpMyAdmin on CentOS 7
Need an amazing tool to increase your VPS quality? This is the right place to learn how to install and configure phpMyAdmin on CentOS 7 which is the developer’s favorite. phpMyAdmin is an open-source and free administration tool used to manage and interact with MySQL and MariaDB databases. This portable web application is written in PHP and is used for web hosting services. To let users interact with databases through the browser, phpMyAdmin uses a web-based management interface. phpMyAdmin offers features like managing users and privileges, importing and exporting databases, and executing database queries.
The command line is the native tool to access MySQL. Advanced users need to have an amazing utility for MySQL database management and balancing speed and features. On the other hand, novices might prefer to use GUI, but it is not always possible. That’s why you need to have phpMyAdmin. In this article, you will learn how to Install and configure phpMyAdmin on CentOS 7.
Prerequisites to Install phpMyAdmin on CentOS 7
To let this installation work correctly, consider the below prerequisites:
- A non-root user with
sudoprivileges. - A system running CentOS 7.
- LAMP (Linux, Apache, MySQL, PHP) stack installed on the server. Refer to installing LAMP on CentOS 7, if LAMP is not installed on your system.
- Access to Terminal.
- A text editor, Vim or Nano.
Benefits of phpMyAdmin
phpMyAdmin is translated into 72 different languages and supports both RTL and LTR languages. phpMyAdmin is a database tool that enables you to manage MySQL databases through a graphical web-based interface. In this way, having phpMyAdmin on your CentOS 7 server means enjoying a user interface instead of using the command line and start managing databases, tables, columns, relations, and users. Installing phpMyAdmin allows you to execute any SQL statement directly. phpMyAdmin is able to display multiple results sets and load text files into tables. To use all its features, try to pass all the required steps of this guide to Install and configure phpMyAdmin on CentOS 7.
Tutorial Install phpMyAdmin on CentOS 7
Join us with this article to pass the required steps of installing phpMyAdmin on CentOS 7. phpMyAdmin is not available in the default repository of CentOS 7. After installing the LAMP, you are ready to let this section get started.
Step 1:
Firstly, you must install Apache on your CentOS 7 VPS. Run the command below to do this.
yum install httpd -yIf you prefer to check the status of Apache, type:
systemctl status httpdAlso to check if Apache is running correctly or not, enter your server’s IP address into your favorite browser URL. If the below screen is displayed, you are all set about Apache.

Once you viewed the screen above, you can install PHP. Use the following command to do this.
yum install phpsystemctl restart httpdStep 2:
In the second step, you will install the EPEL (Extra Packages for Enterprise Linux) Repository which contains additional packages, like phpMyAdmin. So, you need to install a specific package to access EPEL. Run the command below to install epel-release to be able to continue on installing phpMyAdmin on your CentOS.
sudo yum install epel-releaseStep 3:
After a successful EPEL installation, you are ready to install phphMyAdmin on your CentOS 7. To do this, type:
sudo yum install phpmyadminEdit the phpMyAdmin configuration file when you are done with the installation. This is essential and helps prevent unauthorized access. To know more, go to the next section.
How to Configure phpMyAdmin on CentOS 7
Once you finished the phpMyAdmin installation, get ready to configure phpMyAdmin on your CentOS 7. Follow the required steps below to finish this part too.
Step 1:
To access your PhpMyAdmin client directly, you need to configure the PhpMyAdmin.conf file. It is located in the directory /etc/httpd/conf.d/. Open it and use your considered editor to do the edition. Here, we use Vim.
vim /etc/httpd/conf.d/phpMyAdmin.confStep 2:
PhpMyAdmin is configured to grant access to the server it is installed on. But also, it is configured to deny access to any connection not being made from the server itself. To access any workstation remotely, you can use the method of Restrict IP Addresses. So, modify some lines to specify the address of your home connection. When you do the changes, it lets you allow or restrict access to a considered IP address of different or additional machines. The file is located at: /etc/httpd/conf.d/phpMyAdmin.conf.
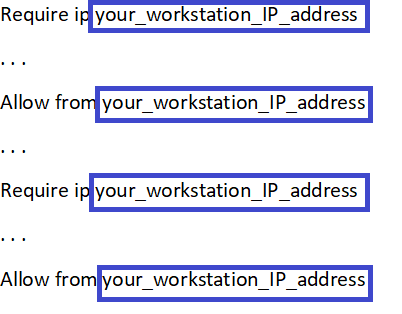
To refer to your own home connection’s IP address, change the lines that readrequire ip 127.0.0.1orallow from 127.0.0.1
As you see below, the four locations in the file must be changed.
Step 3:
Now, it is time to restart the Apache web server. Use the command below to do this.
systemctl restart httpdHow to access phphMyAdmin on CentOS 7
Here, you can check if PhpMyAdmin is working or not. To do this, enter your server’s IP and /phpmyadmin in a web browser to see the phpMyAdmin login screen.
Your ip/phpmyadminThen, follow the below steps to access the interface without using the command line.
Step 1:
In your web browser, go to your server’s domain name or public address followed by/phpMyAdmin to access the interface. When the below login screen is shown, make sure that phpMyAdmin is working correctly.
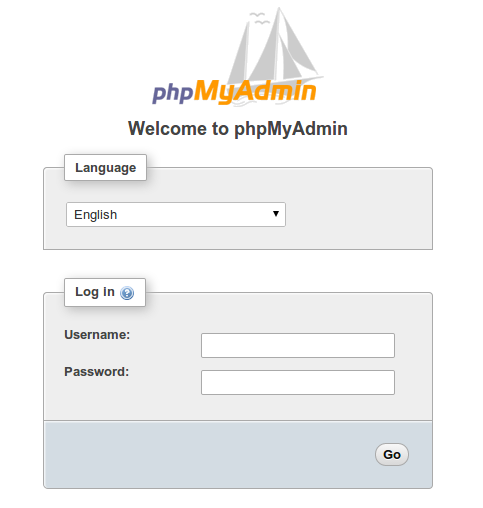
Step 2:
The location of your username and password is in the config.inc.php file that is in the phpMyAdmin installation directory. Use your favorite editor to open the file and edit the username and password and save and exit the file. Here, we use Vim.
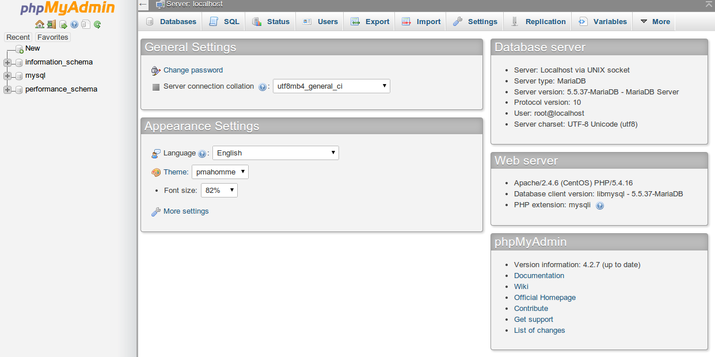
vim config.inc.phpAlso, you can use another method without running a command line. To access the administrative interface, you need to sign in. So, use a username/password pair of a valid MariaDB user.
Conclusion
In this article, you learned how to Install and Configure PhpMyAdmin on CentOS 7. If you review all the required steps of installing and configuring sections, you will be able to finish this guide successfully. Then, you can enjoy using phpMyAdmin even though you are not an expert in database administration. phpMyAdmin is a good solution for many business database needs and is really easy to use. If you encounter any problems, please do not hesitate to contact us. Our technical support team will try their best to solve your problems.