Install Pip in Linux Step by Step
Install Pip in Linux to manage Python packages from the command line. For Ubuntu, update your system with “sudo apt update”, then install using “sudo apt install python3 pip”. Verify the installation by running “pip3 version”.
🤖AI Overview:
Install Pip in Linux to manage Python packages from the Python Package Index. For Ubuntu or Debian, update repositories with “sudo apt update” and install using “sudo apt install python3-pip”. Verify with “pip3 –version” and upgrade via “sudo pip3 install –upgrade pip” for the latest features.
Prerequisites to Install Pip in Linux
Before tracing the installation steps in this guide, make sure you consider the ones below to get ready to install Pip on Ubuntu.
- Log in as root or a user with
sudoprivileges and a basic firewall. - A Linux system running Debian, Ubuntu, CentOS, Fedora, or Arch Linux
While using Pip is recommended within a virtual environment, a Linux server is required. To buy a Linux VPS, check some cheap but reliable plans to purchase your own VPS and continue learning with this article.
Tutorial Install Python Pip in Debian/Ubuntu-based systems
If you are running Ubuntu 20.04, Python 3 is included in its base system installation. Python 2 is available for installation from the Universe repository. As expected, Python 3 packages are prefixed with python3, and Python 2 packages are prefixed with python2.
To install Pip for Python 2 and Python 3 on Debian-based distributions ( Ubuntu 18.04 and Ubuntu 20.04 ) quickly and easily, follow the below steps:
Install Pip for Python 2 on Debian/Ubuntu 18.04
Depending on which Ubuntu version you are running, you will be an expert in installing Pip on Ubuntu using Python 2 & Python 3 by following the below instructions:
Since Pip and Python are not installed on Ubuntu 18.04 by default, you need to install them manually by running command lines.
So, open the Terminal by pressing Ctrl+Alt+T and follow the steps below to start the install Pip on Debian/ Ubuntu.
Step 1: Check if Python 2 is available
Run the following command to check if your Ubuntu 18.04 system is running Python 2 or not.
python2 –versionStep 2: Update repository packages
To update the repository package list, type:
sudo apt updateStep 3: Install pip for Python 2
Now, you can use the command below to install Python 2 and Pip. Running this command will install all the dependencies required for building Python modules will be installed too.
sudo apt install python-/pipStep 4: Verify installation
If you are prompted, press Y or Enter to complete the installation. Then, you can put the command below to check whether Pip is installed correctly or not.
pip --versionSo, if your Pip version is displayed in the output, the installation has been successful. But keep in mind that you may find out that the installed version is different from the version of Pip you have installed on your Ubuntu system.
Step 5: Install requirements
Using Pip, you can install a file – requirements.txt – which contains a list of all the packages. To install the requirements, run the command below:
sudo pip install -r requirements.txtAt the time this article is being written, the latest version of Pip that supports Python 2 is the 20.3.4 version. To make sure you have the latest version, you can upgrade Pip to the latest version. So, run:
sudo pip install --upgrade pipThat’s all you need to do to Install Pip for Python on your Ubuntu 18.04 system.
Install Pip for Python 2 on Ubuntu 20.04 &22.04
Since Pip Python 2 is not included with Ubuntu 20.04, you need to use the get-pip script to install Pip for Python on Ubuntu 20.04. So, open the terminal window by pressing Ctrl+Alt+T and follow the steps below to install Pip on Ubuntu.
Step 1: Run the following command to update the repository package list.
sudo apt updateStep 2: If you have not installed Python 2, use the command below to install it first.
sudo apt install python2Step 3: Now, you can download the get-pip.py script by running the curl command.
curl https://bootstrap.pypa.io/pip/2.7/get-pip.py --output get-pip.pyStep 4: Once the script is downloaded, as a Python 2 sudo user, run the command below to install Pip at your system level. But if you prefer to only install Pip on your account, you must run the script without sudo.
sudo python2 get-pip.pyStep 5: Then, try to check if Pip has been installed successfully by running the command below and viewing the current version:
pip2 --versionYou may view something like the following output due to the installed version of Pip on your Ubuntu system.
pip 20.3.4 from /usr/local/lib/python2.7/dist-packages/pip (python 2.7)That’s it. Installing Pip for Python on your Ubuntu 20.04 system requires all the above 5 steps.
Install Pip for Python 3 in Debian/Ubuntu 18.04
Ubuntu 18.04 has Python 3 installed by default. However, it is possible to install Pip3 (Pip for Python 3) manually. So, to start the installation, open the terminal and follow the following steps.
Step 1: Update repository packages
As a routine in this guide, run the command below command to update the repository package list.
sudo apt updateStep 2: Install pip for Python 3
Then, use the following command to install pip for Python 3 and all the dependencies.
sudo apt install python3-pipType Y or press Enter when you are asked to let the installation be confirmed.
Step 3: Verify the installation
To verify the installation, run the following command and check your Pip version number. Obviously, you will see the output related to the installed Pip version.
pip3 --versionStep 4: upgrade Pip
Now, you can upgrade Pip to the latest version by running the command below.
sudo pip3 install --upgrade pipThe recent above 4 steps will install Pip for Python 3 on Ubuntu 18.04 if you follow them successfully.
Install Pip for Python 3 on Ubuntu 20.04 & 22.04
As a root or sudo user, open your terminal and run the commands below to install Pip for Python 3 on Ubuntu 20.04. then follow the required steps.
Step 1: To update your running system and install all the dependencies required for building Python modules, type the following command.
sudo apt update
sudo apt install python3-pip
Step 2: Once the installation is complete, run the command below to verify the installation by checking the pip version.
pip3 --versionYour current version might be different from what you see in below, but it will be like this generally.
Output
pip 20.0.2 from /usr/lib/python3/dist-packages/pip (python 3.8)Quick guide to install Pip for Python on Red Hat/CentOS-based systems
Since official software repositories of RHEL/CentOS-based distributions (such as Rocky Linux and Alma Linux) do not include pip, you need to enable the EPEL repository first and then install pip using the yum package manager.
Method 1: Using the EPEL repository
1. Open terminal (by pressing Ctrl+Alt+T) and Install the EPEL repository( if you haven’t already):
sudo yum install epel-release2. Update your system repository and packages:
sudo yum update3. Install pip for Python on Red Hat/CentOS-based systems:
-
Install Pip for Python 2:
sudo yum install python-pip-
Install Pip for Python 3:
yum install python3-pip4. Verify Pip installation by checking its version number by running the following commands:
pip --versionOr
pip3 --version5. Now, you can upgrade pip3 to the latest version on RHEL/CentOS-based systems to benefit from new features and ensure bug fixes (optional):
sudo pip3 install --upgrade pipMethod2: Manual Installation
1. You can also download the get-pip.py script by running the following command:
curl https://bootstrap.pypa.io/get-pip.py -o get-pip.py2. Run the script to install pip at your system level:
python3 get-pip.pyTo confirm that the pip is installed successfully, you can check the pip version.
Pip installation on Fedora
Use dnf package manager to install pip for Python 2.x and Python 3.x on Fedora by following the below steps:
1. Update all installed packages on Fedora using the following command:
sudo dnf upgrade2. Install pip on Fedora using dnf package manager:
sudo dnf install python-pip           #Python 2
sudo dnf install python3-pip         #Python 3
3. Verify pip installation on fedora by running:
pip3 --versionOr
pip --versionOr
pip -VTutorials to Install pip on Arch Linux
Install pip on Arch Linux via Pacman package manager
1. Update the all packages on Arch Linux:
sudo pacman -Syu2. Install Pip on Arch Linux via the package manager pacman:
For Python 2:
sudo pacman -S python2-pipFor Python 3:
sudo pacman -S python-pip3. Verify the installation like other Linux distributions.
Install pip on Arch Linux via Official PIP Installer
1. To download pip installer script to install pip on Arch Linux, run the following command:
wget -q https://bootstrap.pypa.io/get-pip.py2. After downloading the pip installer script, open the folder that contains the installer script and run it using the following command:
python get-pip.pyBy running this command, pip is successfully installed on Arch Linux. You can use Setuptools and wheel to distribute Python packages in your Python environment.
After installing pip on Arch Linux, to run pip from any location without specifying the full path, add it to your system PATH:
export PATH=$PATH:/home/linux/.local/binreplace /home/linux/.local/bin with your actual system path.
Why do I get an Externally Managed Environment error while installing pip?
This error is a common error when installing pip on Arch linux due to the Pacman manager’s role in installing pip, which installs Python packages system-wide.
To fix this error, delete the EXTERNALLY-MANAGED file using the following command:
sudo rm -rf /usr/lib/python3.11/EXTERNALLY-MANAGEDAfter removing the externally managed file, rerun the pip installer to install pip without conflicts and errors:
python get-pip.pyHow to Install Packages with Pip
Now, you can use Pip to install and manage Python packages found in the Python Package Index.
The commands which are used in this part, are applicable to Python 3. So, the instructions for various versions of Python are different.
However, For Python 2, replace “pip3” with “pip” in all commands.
First, use the following command to install a package.
pip3 install <package name>To install a package for example called ‘’Scrapy’’, which is used for scraping and extracting data from websites, type:
pip3 install scrapyWhen you need to install a specific version of a package with pip, specify the version number in the command. The below command shows how you can install Scrapy 1.5
pip3 install scrapy==1.5Use the following command to update an installed package to the newest version that’s available on the Python Package Index.
pip3 install <package_name> --upgradeAnytime you want to update Scrapy on a machine that is running Python 3, you should put:
pip3 install scrapy --upgradeNote: Since a Python module is tested to work properly on the Ubuntu system, you are recommended to install the module’s deb package with the apt tool. But if there is no deb package for that module, you can use pip to install a module globally.
How to Uninstall Pip packages
If you prefer to remove installed pip packages on Python 3, type:
pip3 uninstall <package_name>How to Use Pip on Linux
What can you do with Pip? Installing packages from PyPI, version control, local projects, and distribution files. Let’s see some useful basic Pip commands.
Anytime you need to view the list of all pip commands and options, run the command below to do this.
pip3 --help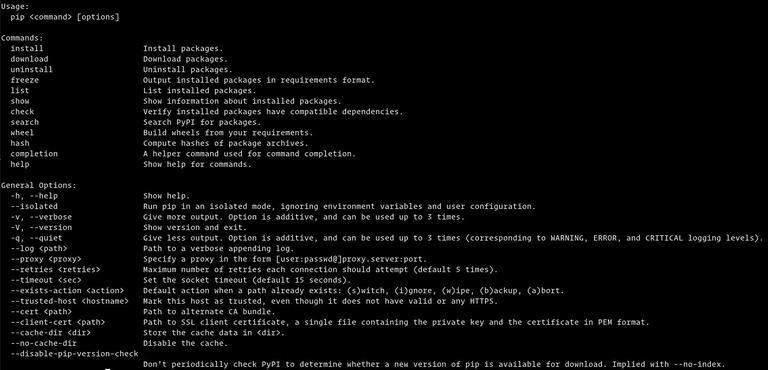
Also, using the pip <command> --help command lets you get more information about a specific command. For example, using the following command helps you to get more information about the install command.
pip3 install --helpTo find more useful information and the way you can use Pip, refer to the User Guide page of Pip.\
Conclusion
In conclusion, learning to install Pip in Linux opens doors to efficient Python package management. Whether on Ubuntu, Fedora, or Arch, following these steps ensures a solid setup. As an intermediate Linux administrator, I encourage practicing in a safe environment. Share your experiences with Pip on Linux to help others. This guide, optimized for how to install Pip in Linux, provides beginners with clear, up to date instructions to get started confidently.
FAQ
2. What are the prerequisites before you install Pip in Linux?
Before you install Pip in Linux, ensure you have a Linux system running distributions like Debian, Ubuntu, CentOS, Fedora, or Arch Linux. You need root or sudo privileges, a basic firewall, and access to a terminal.
3. How can beginners install Pip in Linux on Ubuntu for Python 3?
To install Pip in Linux on Ubuntu for Python 3, open the terminal, update the package list with "sudo apt update", then run "sudo apt install python3-pip". Verify with "pip3 --version".
4. How do you install Pip in Linux on CentOS or Red Hat-based systems?
To install Pip in Linux on CentOS or Red Hat-based systems, enable the EPEL repository with "sudo yum install epel-release", update with "sudo yum update", then install with "sudo yum install python3-pip". Verify with "pip3 --version".
5. What steps are needed to install Pip in Linux on Fedora?
To install Pip in Linux on Fedora, update packages with "sudo dnf upgrade", then install with "sudo dnf install python3-pip". Check the installation with "pip3 --version".
6. How to install Pip in Linux on Arch Linux using the package manager?
To install Pip in Linux on Arch Linux, update packages with "sudo pacman -Syu", then install with "sudo pacman -S python-pip" for Python 3. Verify with pip --version.
7. What should I do if I encounter an Externally Managed Environment error during Pip installation on Arch Linux?
If you see an Externally Managed Environment error, remove the file with "sudo rm -rf /usr/lib/python3.11/EXTERNALLY-MANAGED", then rerun the Pip installer script.
8. How can I verify a successful Pip installation in Linux?
To verify Pip installation in Linux, run "pip --version" or "pip3 --version" in the terminal. The command will display the installed version if successful.
9. How do I install a Python package after installing Pip in Linux?
After installing Pip in Linux, use "pip3 install package_name" to install a package. For example, "pip3 install scrapy" installs the Scrapy package.
10. How to uninstall a package using Pip in Linux?
To uninstall a package using Pip in Linux, run "pip3 uninstall package_name" in the terminal. Confirm the removal when prompted.
Pip is an essential package manager for Python that allows users to install, manage, and update Python packages and dependencies easily.
Dear Bisnis, thank you for highlighting pip’s role. Its simplicity and efficiency in managing Python packages make it an indispensable tool in modern Python development environments on Linux systems.