How to Install and Configure Pleroma on Ubuntu
Pleroma is an open-source social networking platform. This free and lightweight federated server is compatible with Mastodon and other ActivityPub implementations. In this article, you will learn How to Install and Configure Pleroma on Ubuntu. Pleroma consists of two components a backend (Pleroma) and Pleroma-FE which is a user-facing fronted. While Pleroma instances are deployed, you can deploy your own one. Let’s see the essential options you must provide before going through the required steps of installing and configuring Pleroma on Ubuntu.
Prerequisites to Install and Configure Pleroma on Ubuntu
To let this guide work correctly, provide the below considerations and go on.
- A system running Ubuntu.
- A non-root user with
sudoprivileges.
Install Pleroma on Ubuntu Step by step
Pleroma is a part of the Fediverse, a federated network of instances that can communicate using a common protocol. As we mentioned, you can have your account on Pleroma. It is easy to install Pleroma on your Ubuntu server. However, one single account on one instance can talk to the entire Fediverse network.
Stay with us with this article to review all the required steps to install and configure Pleroma on Ubuntu.
Step 1. Update Your System
As always, we start with updating. It is reasonable to make sure that everything is updated. So, run:
$ sudo apt update
$ sudo apt upgrade
Now, you are ready to have the packages and dependencies in one step before the Pleroma installation.
$ sudo apt install wget curl gnupg2 ca-certificates lsb-release gnupg zip libncurses5 libmagic-dev -yStep 2. Configure Firewall
As you know, Ubuntu comes with an Uncomplicated Firewall (ufw) by default. Use the command below to check if the firewall is running to start configuring it.
$ sudo ufw statusIf you see the status is inactive, continue with allowing the SSH port to enable the firewall.
$ sudo ufw allow OpenSSHAlso, you can allow HTTP and HTTPS ports as well. So, type:
$ sudo ufw allow 80
$ sudo ufw allow 443
To enable the firewall, run:
$ sudo ufw enableThen, you will see that the Firewall is active and enabled on system startup. Again, you can check the status of the firewall again:
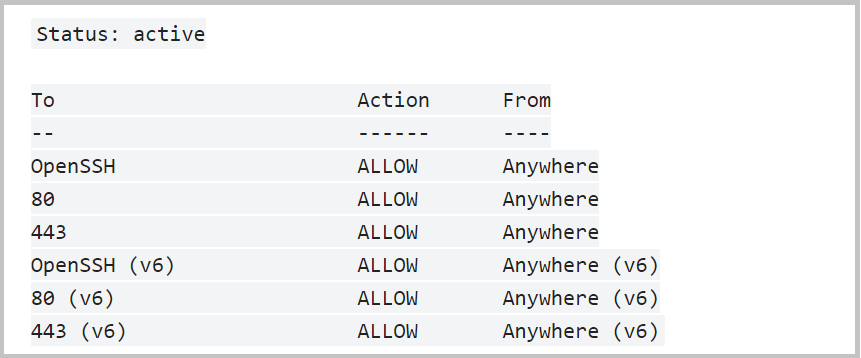
$ sudo ufw statusYou will see an output like the below which means the firewall is configured properly.
Step 3. Install PostgreSQL
In this step, you will install PostgreSQL. So, you need to add the official PostgreSQL repository to the Ubuntu sources list by running the following command:
$ sudo sh -c 'echo "deb http://apt.postgresql.org/pub/repos/apt $(lsb_release -cs)-pgdg main" > /etc/apt/sources.list.d/pgdg.list'And to add the repository’s GPG key, use:
$ wget --quiet -O - https://www.postgresql.org/media/keys/ACCC4CF8.asc | sudo apt-key add -Finally, you can update the system packages list.
$ sudo apt updateStep 4. Install Nginx
In this step, Nginx will be installed. According to that the Nginx is pre-installed on Ubuntu, run:
$ sudo apt install nginxStep 5. Install Pleroma
In this part, you can install Pleroma on Ubuntu. Firstly, a Pleroma user will be created without login capabilities. Running the following command will also create the home directory for it at /opt/pleroma.
$ sudo adduser --system --shell /bin/false --home /opt/pleroma pleromaTo switch to the Pleroma user, switch to the root user first.
$ sudo su
$ su pleroma -s $SHELL -l
To download Pleroma use the command below. You can do this in a temporary location.
$ curl "https://git.pleroma.social/api/v4/projects/2/jobs/artifacts/stable/download?job=amd64" -o /tmp/pleroma_amd64.zipAnd unzip the archive:
$ unzip /tmp/pleroma_amd64.zip -d /tmp/To install Pleroma:
$ mv /tmp/release/* /opt/pleromaNow, you can delete the temporary files:
$ rm -rf /tmp/pleroma_amd64.zip /tmp/releaseNext, switch to the root user:
$ exitTo Create directories for the uploads and public files, type:
$ mkdir -p /var/lib/pleroma/{uploads,static}Here, you can create the directory for the Pleroma configuration:
$ mkdir -p /etc/pleromaAnd then, change the ownership of Pleroma directories to the Pleroma user.
$ chown -R pleroma /var/lib/pleroma /etc/pleromaHow to Configure Pleroma on Ubuntu
You are in the middle of learning How to install and configure Pleroma on Ubuntu. Once the Pleroma is installed on your Ubuntu server, you can start configuring it. To do this, create an Admin user. So, use the command below to create an administrative user and switch to the Pleroma user.
$ su pleroma -s /bin/bash -lThen, use the command below to generate the configuration file for the Pleroma instance:
$ ./bin/pleroma_ctl instance gen --output /etc/pleroma/config.exs --output-psql /tmp/setup_db.psqlNote: Ignore the warning stating that says the configuration file could not be found and go on.
When you are asked about setting up Pleroma, choose the set of options that meets your needs. As you know, you must choose a strong password for your database when you are prompted.
To configure your instance from Administration Panel, select y when you are asked to store the configuration in the database.
At this time, switch to the default PostgreSQL user which was created when PostgreSQL was installed.
$ exit
$ su postgres -s /bin/bash -l
Then, you can create the database using the SQL file provided by Pleroma.
$ psql -f /tmp/setup_db.psql
To switch back to the Pleroma user, type:
$ exit
$ su pleroma -s /bin/bash -l
Running the command below will initialize the database you just created.
$ ./bin/pleroma_ctl migrateAnd finally, you can exit the Root user.
$ exitHow to Install SSL using Let’s Encrypt
To continue configuring Pleroma on Ubuntu, an SSL certificate must be installed. To do this download the Cerbot tool. Since Certbot’s official repository has been deprecated, you can use Snaped package installer to install Cerbot. Ubuntu comes with Snaped pre-installed.
Use the following commands to make sure that Snaped is up-to-date.
$ snap install core
$ snap refresh core
To remove any old versions of Certbot:
$ apt remove certbot
And to Install Certbot, type:
$ snap install --classic certbotEnsure that the Cerbot command can be run by creating a symbolic link to the /usr/bin directory.
$ ln -s /snap/bin/certbot /usr/bin/certbotNow, stop the Nginx service.
$ systemctl stop nginxTo generate an SSL certificate:
$ certbot certonly --standalone --preferred-challenges http -d example.comIn this way, a certificate to the ‘’ /etc/letsencrypt/live/example.com ‘’ directory will be downloaded on your server.
Next, use the command below to create a challenge web root directory for Let’s Encrypt auto-renewal.
$ mkdir -p /var/lib/letsencryptTo renew SSL and run and check it every day to renew it (If needed), create a Cron Job. So, create the file /etc/cron.daily/certbot-renew and open it for editing.
$ nano /etc/cron.daily/certbot-renewPaste the code below.
#!/bin/sh
certbot renew --cert-name example.com --webroot -w /var/lib/letsencrypt/ --post-hook "systemctl reload nginx"
To save the file, press Ctrl + X and enter Y when you are prompted. Then, change the permissions on the task file to make it executable.
$ chmod +x /etc/cron.daily/certbot-renewConfigure Nginx
Since Pleroma ships with a default Nginx configuration file, you can run the following command to install it. In this way, Nginx will be moved to the /etc/nginx/sites-available directory.
$ mv /opt/pleroma/installation/pleroma.nginx /etc/nginx/sites-available/pleroma.conf$ sed -i 's/example\.tld/example.com/g' /etc/nginx/sites-available/pleroma.confKeep in mind to replace all occurrences of ‘’example.tld’’ with your domain.
To start editing, open the configuration file.
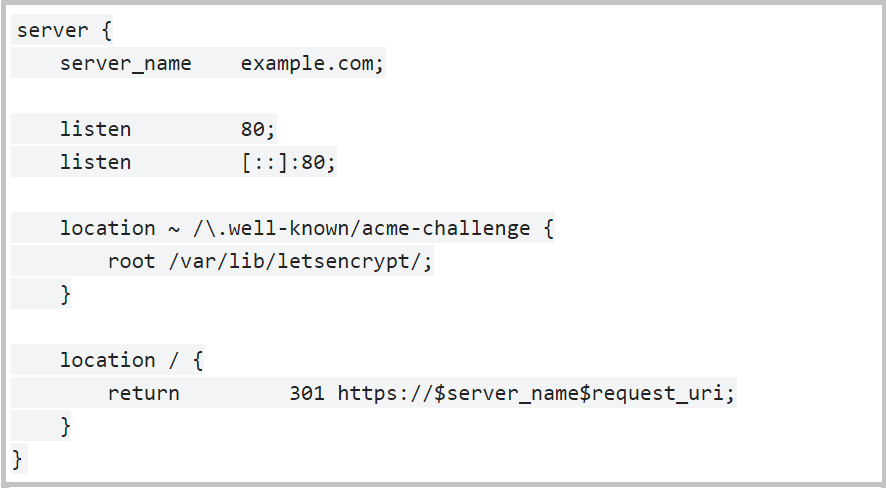
$ nano /etc/nginx/sites-available/pleroma.confThen, uncomment the location ~ /\.well-known/acme-challenge block to view a server block configuration like the below:
Again, save the file by pressing Ctrl + X, and enter Y when you are prompted. To enable the Pleroma Nginx configuration, create a symlink:
$ ln -s /etc/nginx/sites-available/pleroma.conf /etc/nginx/sites-enabled/pleroma.confNow, enable the Nginx server to start at boot time.
$ systemctl enable nginxNow, you can start the Nginx server.
$ systemctl start nginxThen, run the command below to install the Pleroma systemd service unit file provided in the distribution.
$ mv /opt/pleroma/installation/pleroma.service /etc/systemd/system/pleroma.serviceFinally, use the following commands to enable and start the Pleroma service.
$ systemctl enable pleroma
$ systemctl start pleroma
To visit Pleroma, open https://example.com in your favorite web browser.
How to Configure Pleroma by creating an Admin user
So far, you reviewed how to install and configure Pleroma on Ubuntu. You can also use the following command to create an administrative user. But first, switch to the Pleroma user:
$ su pleroma -s /bin/bash -lThe command below will create an admin user. Do not forget to replace ‘’example’’ with your username, ‘’[email protected]’’ with your email address, and ‘’password123’’ with your desired password which is highly recommended to be strong.
$ ./bin/pleroma_ctl user new example [email protected] --password password123 --adminWhen you are done, switch back to the root user.
$ exitYou will not be able to change settings from the Administration panel of Pleroma if you selected no when you were asked for storing configuration in the database. But you can change the settings by modifying the /etc/pleroma/config.exs file.
$ nano /etc/pleroma/config.exsWhen editing the file is done, restart the Pleroma service and take your time to resume the service.
$ systemctl restart pleromaNow, it is time to Update Pleroma. So, you need to download the new release. Use the command below to download it.
$ su pleroma -s $SHELL -lc "./bin/pleroma_ctl update"To stop Pleroma instance:
$ systemctl stop pleromaThen, migrate the database by running the following command:
$ su pleroma -s $SHELL -lc "./bin/pleroma_ctl migrate"Now, you can start the Pleroma instance:
$ systemctl start pleromaYou may guess that the next step is to Back up Pleroma. First, stop the Pleroma service.
$ systemctl stop pleromaThen, switch to Pleroma’s directory.
$ cd /opt/pleromaTo back up the database, run:
$ sudo -Hu postgres pg_dump -d <pleroma_db> --format=custom -f </path/to/backup_location/pleroma.pgdump>Copy the files pleroma.pgdump, config/prod.secret.exs, config/setup_db.sql, and the uploads folder to your backup destination.
Finally, start the Pleroma service again.
$ systemctl start pleromaAnytime you need to Restore Pleroma, reinstall it and make sure the Pleroma service is not working. Copy the backed-up files back to their first location and run the command below to drop the existing database and user:
$ sudo -Hu postgres psql -c 'DROP DATABASE <pleroma_db>;';` `sudo -Hu postgres psql -c 'DROP USER <pleroma_db>;'Use the following command to restore the database schema and Pleroma Postgres role with the backed-up setup_db.sql file.
$ sudo -Hu postgres psql -f config/setup_db.psqlTo restore the Pleroma instance’s data, run:
$ sudo -Hu postgres pg_restore -d <pleroma_db> -v -1 </path/to/backup_location/pleroma.pgdump>If you are moving to a newer version, you must migrate the database too. (If there are any migrations left to be performed)
$ su pleroma -s $SHELL -lc "./bin/pleroma_ctl migrate"Next, restart the Pleroma service.
$ systemctl restart pleromaAnd finally, let Postgres plan the queries properly and generate the statistics.
$ sudo -Hu postgres vacuumdb --all --analyze-in-stagesYou’re all set.
Conclusion
In this article, you reviewed all the required steps to install and configure Pleroma on Ubuntu. As we mentioned, it was really easy! In the case of following the above steps properly, you can smoothly install and configure Pleroma on your Ubuntu server without errors. If you are eager to explore fediverse, you just need to register your account on Pleroma to be able to log in to your Pleroma instance with your own username and password. If you encounter any problems, please do not hesitate to contact us. Our technical support team will try their best to solve your problems.