Install and Configuration PostgreSQL on Ubuntu

How to Install and Configuration PostgreSQL on Ubuntu

PostgreSQL is one of the most famous and popular database management systems, which has become an essential tool for accessing and managing users’ information. Database management systems, as we talked about in detail before and you are well acquainted with DBMS, are a bridge between users and the database. All users need Database management systems in a way to better organize, protect, manage and control their data. Database management systems are tools for organizing and managing information stored in a database.

PostgreSQL or Postgres is a reliable and powerful relational database system that has been in the software market for 20 years and is also implemented based on the SQL query language. The PostgreSQL database management system offers many advanced features, which include secure transactions and concurrency without reading locks. In addition, the PostgreSQL database management system has the support of the community, which is working to develop, improve and integrate this DBMS.

PostgreSQL is the most common and practical database management system used by a wide range of users to organize and manage their information. This article teaches how to install and configure PostgreSQL on Ubuntu 22.04 server in a simple language. Therefore, to use PostgreSQL on an Ubuntu server, follow the instructions that we will teach in the following.

prerequisite

To configure and use PostgreSQL, you need to buy a Linux VPS on which the Ubuntu 22.04 operating system is configured. Then configure a strong firewall on the Ubuntu server and follow the instructions below with sudo user permissions.

Steps to install PostgreSQL on Ubuntu 22.04

PostgreSQL packages are available for installation and configuration in the Ubuntu repositories. So you can use an apt packaging system to install PostgreSQL.

Step 1: Updating system packages

If you haven’t updated your system packages recently, update your system packages first.

Press the CTRL + ALT + T buttons at the same time and update the local package list of your server using the following command:

sudo apt update

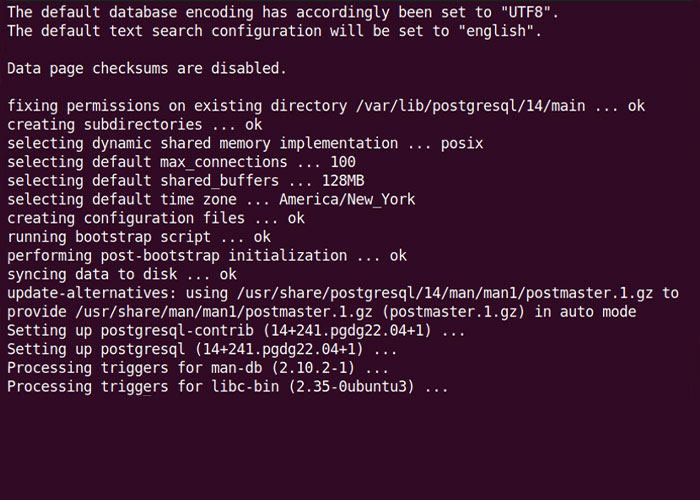
Step 2: Installing PostgreSQL

Then, to benefit from additional functions, install the PostgreSQL package along with the -contrib package on the Ubuntu 22.04 server using the command:

sudo apt install postgresql postgresql-contrib

 Install and Configuration PostgreSQL on Ubuntu

 Install PostgreSQL on Ubuntu


Step 3: Starting the PostgreSQL service

After installing the PostgreSQL package, run the systemctl start command to start the PostgreSQL service:

sudo systemctl start postgresql.service

Up to this point, we were able to install and run PostgreSQL on the Ubuntu 22.04 server. The next step is to configure PostgreSQL on the Ubuntu 22.04 server so that you can apply the desired settings to the software.

Configure PostgreSQL

To control permissions and authentication, PostgreSQL uses a concept called Roles by default, which, despite its similarities in some aspects with standard Unix-style accounts, does not differentiate between users and groups.

Peer authentication is set by default in the PostgreSQL configuration to associate and link specific Postgres roles to the corresponding Unix/Linux system accounts. So a Unix/Linux username of the same name can be entered as any role that already exists in Postgres.

A user account called Postgres is created during the installation process and is connected to the Postgres role by default. You can log in to that account to use Postgres.

Step 1: Access Postgres

There are several ways to access Postgres using a Postgres user account:

  • Access Postgres by switching to the Postgres account

Enter the following command to log into the Postgres account on your server:

sudo -i -u postgres

Then type the following command to access the PostgreSQL database:

psql

You can communicate with the database management system through the above command.

To exit PostgreSQL and return to the Linux Postgres user command line, enter the following command:

Postgres=#\q

  • Access to Postgres Prompt without the need to switch accounts

It should be noted that it is possible to directly execute any command you want with the Postgres account using sudo.

For example, if you need to switch to the Postgres user and then use thepsqlcommand to access the Postgres prompt, you should do this as the Postgres user using sudo and running the psql command as follows:

sudo -u postgres psql

Therefore, Postgres can be accessed directly without the need for a bash shell through the above command.

To exit Postgres, type the following command:

Postgres=#\q

Step 2: Create New Role

The Postgres role is set and created in the database, but to create new roles, you must use the createuser command.

flag – interactive prompts you to specify the name of the new role and asks if superuser permissions are required for this role.

After accessing the Postgres account, enter the following command to create a new role:

createuser –interactive

If you want to directly run any command using sudo without switching to your normal account, type the following command:

sudo -u postgres createuser –interactive

With the help of this script, you can make your own choices when asked, so that the Postgres commands will create a user with your specifications according to the answers you gave. So specify the name of the new role and grant superuser permissions to the new role.

Output

Enter name of role to add: opera

Shall the new role be a superuser? (y/n) y

Note: as an example, We have considered the name of the new role as Opera.

You can also use additional flags for more control. The man page for the createuser command allows you to check the options:

man createuser

At this point, you have successfully added a new user to the Postgres software.

Step 3: Creating a New Database

The function of Postgres in authentication is to create a new database with the same name as the new role for each new role that is created to log in so that the new user can connect to his new database.

So, to create the database, first, log in to the Postgres account and then enter the following command:

created   opera

But if you want to execute commands using sudo without changing the normal account, type the following command:

sudo -u postgres createdb opera

Step 4: Opening a Postgres Prompt with the New Role

As you know, a Linux user can enter the Postgres system with peer authentication by entering the role name and the Postgres database.

If you do not have access to the role name and the Postgres database that we created in the previous steps, you will have to create a new user.

To do this, use a non-root account with Sudo privileges (that is, do not log in as a Postgres account user):

sudo adduser opera

After creating a new user account to connect to the database, enter the following command:

sudo -i -u opera

psql

You can even enter commands in the following way:

sudo -u opera psql

If you have the correct configuration, you will automatically access the desired database by running the above commands.

If you intend to connect to another database, specify the desired database as follows:

psql -d postgres

Once you have connected to the desired database, you may want to check your connection information. This check can help you a lot when you connect with a non-default username or to a non-default database. For this purpose, enter the following command:

\conninfo

Output

You are connected to database "opera" as user "opera" via socket in "/var/run/postgresql" at port "5531".

Step 5: Create and delete tables

Configuration PostgreSQL on Ubuntu

So far in the article, we have taught how to install and connect to the PostgreSQL database system, and now you can easily connect to the PostgreSQL database. In the following, we intend to teach some administrative tasks in PostgreSQL to make the work of PostgreSQL administrators easier.

To create tables, the basic syntax is as follows:

CREATE TABLE table_name (

    column_name1 col_type (field_length) column_constraints,

    column_name2 col_type (field_length),

    column_name3 col_type (field_length)

);

Using the above command, you specify a name for the table you created, and it sets the columns and type of columns and the maximum length of data in each field. In addition to these features, you can also define additional restrictions for each column.

To check the new table you created, enter the following command:

\d

To check the table without viewing the sequence, enter the following command:

\dt

So you were able to create the desired table with the specifications you wanted. Read the next section to manage table data.

Step 6: Add or delete data, create queries in tables

After creating the table, it is time to manage the data in the tables. You can call the table you created and add the desired data to each column. You can do this as follows (for example):

INSERT INTO name of the desired table (color, location, install_date) VALUES ('blue', 'south', '2017-04-28');

INSERT INTO name of the desired table (color, location, install_date) VALUES ( 'yellow', 'northwest', '2018-08-16');

Note: replace the desired table name with the name of the table you created.

color, location, and install_date are the column titles we want to add and are listed as examples to help you understand better. Instead of the items we mentioned, you can add your desired values to the columns of your table.

When entering data, you must be careful to avoid multiple hangups. For example, do not type column names inside quotation marks and use quotation marks to enter column values.

To retrieve the information you added to the tables, use the following command:

SELECT * FROM name of the desired table;

In the output, it displays the data you added to the desired table, and you can make sure that the organization you created in the table is correct.

To delete a row in the desired table, you can enter the following command:

DELETE FROM name of the desired table WHERE column heading = 'Value' ;
  • name of the desired table: replace the name of the table you created earlier that now you intend to change it.
  • column heading: You replace the desired column title in this part.
  • Value: Type the amount you want to delete in this field.

Then you can restore the changes you made in the table with the help of the following command:

SELECT * FROM name of the desired table;

Therefore, you will be sure to delete the desired value and row and the change you made.

Step 7: Add and remove columns from the table

As you noticed, after creating the table, you can make changes and edit the table in this software. Now, if you want to remove a column from the table or add it to the desired table, you must enter the following commands. If you want to add a column to the table, you should enter the following command:

ALTER TABLE  name of the desired table ADD column heading;
  • name of the desired table: replace the name of your desired table in this section.
  • column heading: Replace the column heading that you want to add to the desired table.

Then retrieve the table information using the following command to make sure that the desired column has been added to your table or not.

SELECT * FROM name of the desired table;

You will notice that a new column with the title you typed has been added to your table, but the added column has no information because you have not yet added information to the table.

You can use the following command to delete the column:

ALTER TABLE name of the desired table DROP column heading;

With the help of the above command, you can delete the desired column in the table with all its information.

Note that the information in the desired column will be deleted, and other data will remain.

Step 8: Update the data in the table

you were able to create a table for better information management and make changes in the table by adding and deleting columns and rows as needed, but you still don’t know how to set queries for existing entries or how to update your information.

To update and change the values in the table, use the following pattern:

UPDATE name of the desired table SET column heading = 'value' WHERE column heading = 'value';
  • Value: The value you want to change

How to uninstall the PostgreSQL database in Ubuntu 22.04

To uninstall the PostgreSQL database in Ubuntu 22.04, just type the following command:

sudo apt remove postgresql postgresql-contrib

You could easily uninstall the PostgreSQL database in Ubuntu 22.04.

FAQ

By default, Postgres supports up to 100 connection configurations if your kernel configuration supports it. Sometimes it may be less.

The folder /etc/postgresql/<version>/main in PostgreSQL software contains PostgreSQL configuration files.

If you are looking for the best GUI for PostgreSQL, we recommend pgAdmin. Also, PostgreSQL developers usually benefit from the DBeaver tool, which is a popular multi-database GUI tool. In addition to these tools, Postico, DataGrip, Navicat, TablePlus, and SQuirreL SQL are useful tools compatible with PostgreSQL.

Summary

If you are reading this part of the article and have followed all the steps correctly, you should now be able to enjoy the unique features of PostgreSQL software in Ubuntu 22.04.

Installing PostgreSQL software on Ubuntu was not complicated, first, we started the process by updating the system packages. Then, to install PostgreSQL, we used the command “$ Sudo apt install PostgreSQL PostgreSQL-contrib” and started the PostgreSQL service.

Then to access the PostgreSQL database by referring to the Postgres account, we created a new user and a new role, and a new database and connected to the Postgres database. In addition to connecting and accessing the Postgres database, you also learned about Postgres management so that you can organize your information in tables for better control.

We hope that with the help of the information we have provided, you have reached your desire. If you have any questions in any section, please let us know in the comments section so that we can answer your questions as soon as possible.

Thank you for your choice.

Leave a Reply

Your email address will not be published. Required fields are marked.