Installing Windows 7 Using USB for Business Owners
Installing Windows 7 Using USB means creating a bootable USB drive to install Windows 7 on a computer. This process requires USB creation software and a valid Windows 7 image file.
🤖AI Overview:
Installing Windows 7 Using USB is a method that allows users to set up the Windows 7 operating system on a computer by using a USB flash drive instead of a traditional DVD. This approach is often faster and can be necessary if a device does not have an optical drive. The process involves preparing the USB drive with the Windows 7 installation files and then booting the computer from the USB to start the installation. This method is reliable and widely used for both personal and professional computer setups.
Note that since Windows 7 no longer receives essential security fixes, users are recommended to upgrade to newer versions. But if you are sure of your decision, here is all you need. Let’s get started!
Prerequisites to Install Windows 7
To let this tutorial works correctly, provide the options below.
- A server running Windows VPS.
- 1 GHz or faster 32-bit (x86) or 64-bit (x64) processor.
- 1 GB RAM (32-bit) or 2 GB RAM (64-bit).
- 16 GB available hard disk space (32-bit) or 20 GB (64-bit).
- DirectX 9 graphics device with WDDM 1.0 or higher driver.
Installing Windows 7 Using USB [Visual Steps]
As we mentioned, this guide covers the USB method of installing Windows 7. To remind you again, Windows 7 has entered its End of Life. So, technical support and updates for Windows 7 ended on January 14, 2020, and you are recommended to move to a Windows with a higher edition to receive support. Anyway, if you insist on working with Windows 7, here we go again!
Let’s go through the steps of this guide to review all the required actions for installing Windows 7 using USB.
Step 1. Connect a USB to your PC
Connect your USB flash driver to your computer. Make sure the USB is wiped. Then, copy the Windows ISO file on it.
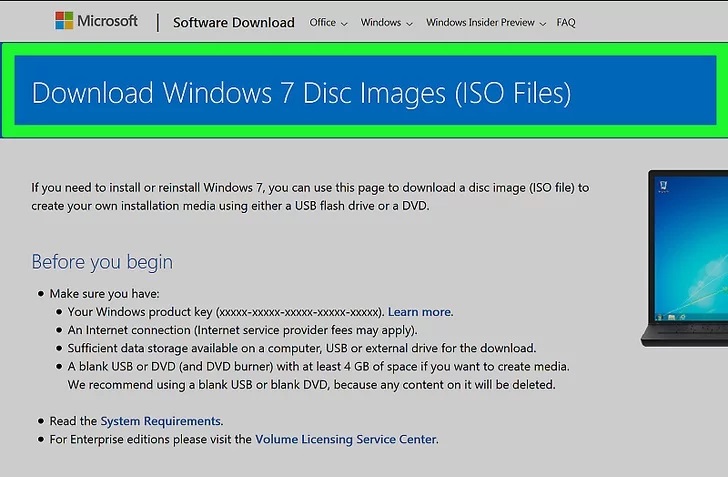
Step 2. Download the Windows 7 Setup ISO
Depending on your internet speed, this download can take some time. Download Windows 7 ISO File to obtain a list of the links if the website link is broken.
Step 3. Download Windows 7 USB/DVD Download Tool
Download and install the Windows 7 USB/DVD Download Tool. The Windows 7 ISO file will be copied to the USB flash drive with this utility.

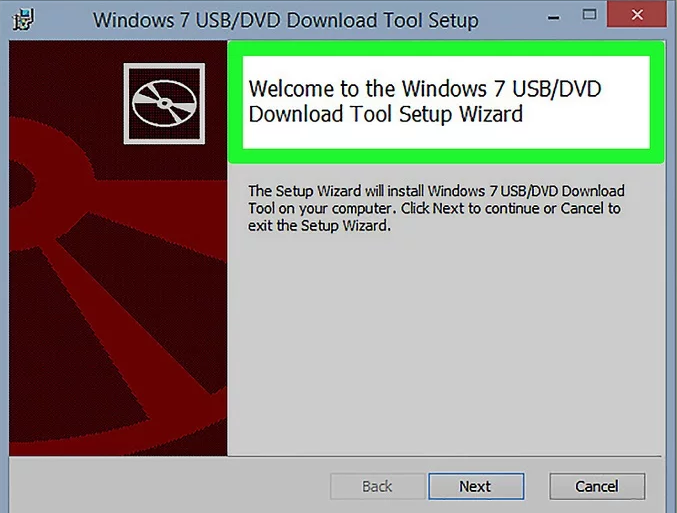
Step 4. Install Windows 7 USB/DVD Download Tool
When the “en-US.exe” file has finished downloading, double-click it. Click Install to begin the application installation. The Installation Wizard’s on-screen instructions should be followed.
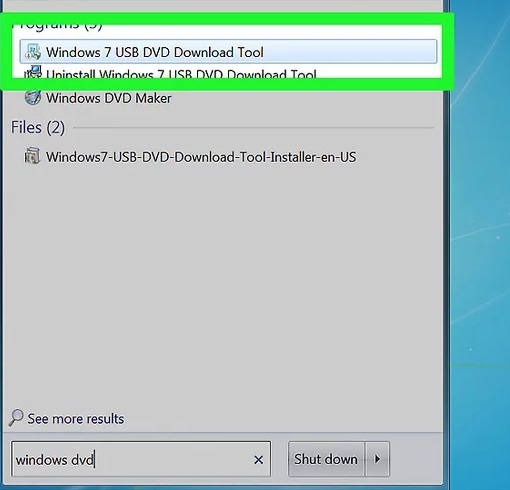
Step 5. Open the Windows 7 USB/DVD Download Tool
Open the Windows 7 USB/DVD Download Tool from the Windows Start menu after the download and installation are complete.
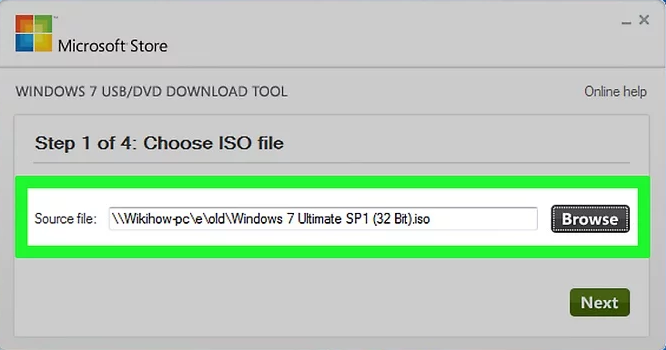
Step 6. Select the Windows 7 ISO File
Click Browse to open the Windows 7 ISO file save location, then click it to choose it on the Windows 7 USB/DVD Download Tools Choose ISO file screen. Next, click to proceed.
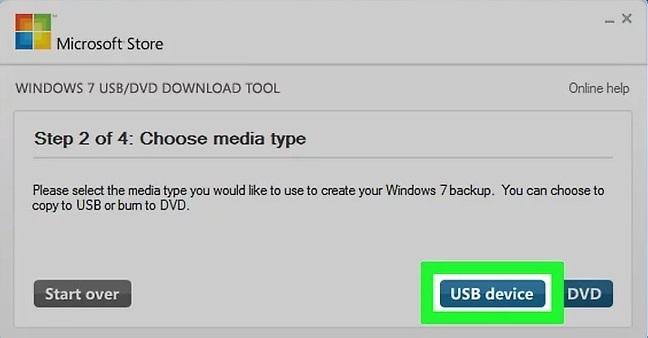
Step 7. Click USB Device
On the Choose media type, click on USB Device.
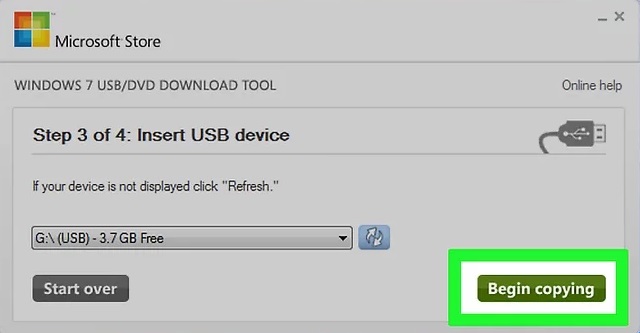
Step 8. Click Begin Copying.
Once you see the Insert USB device screen, select the USB drive you wish to copy the ISO file to using the drop-down option on the “Step 3 of 4” screen, and then click the green “Begin Copying” button. If you encounter a Not Enough Free Space error, click the Erase USB Device option to completely wipe the drive’s contents. The whole contents of the flash drive will be deleted if you do this.
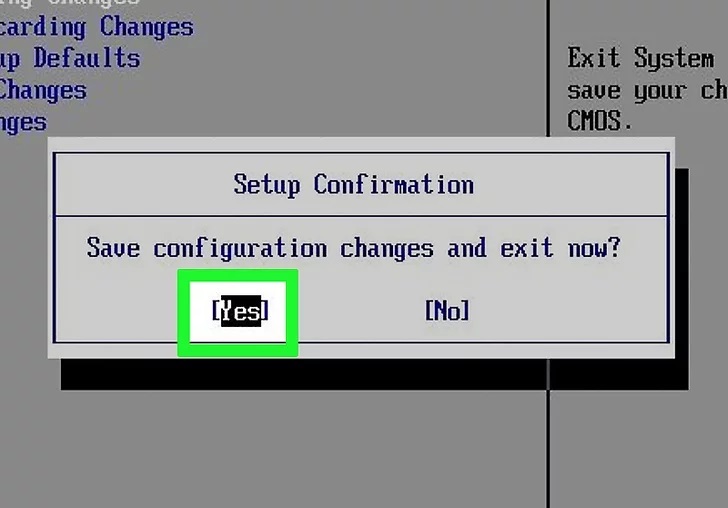
Step 9. Restart your Computer
Click Restart in the power options menu by pressing the computer’s power button.

When it restarts, immediately press Del, Esc, F2, F10, or F9. Pressing one of these buttons as soon as your computer turns on will launch the system BIOS, depending on the brand and model of your computer. When the computer starts up, some systems will instruct you which button to push to access the BIOS.
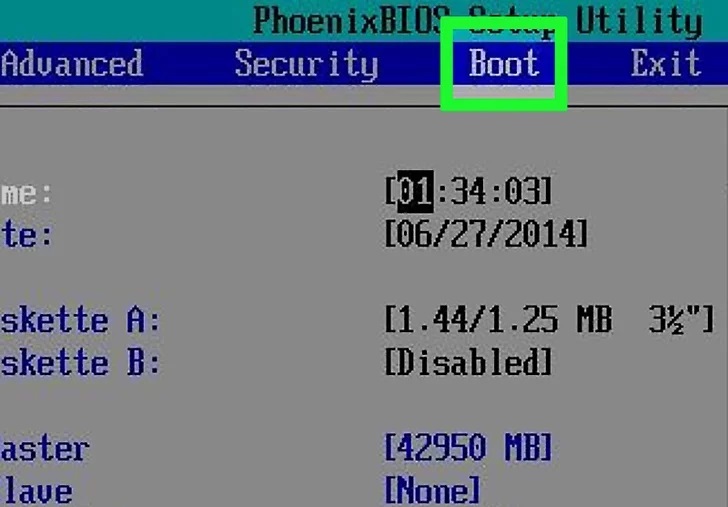
Step 10. Find your BIOS’s boot Options Menu
Your BIOS’s boot options menu might not be in the same place or have the same name as the example, but if you look around you might finally discover it.
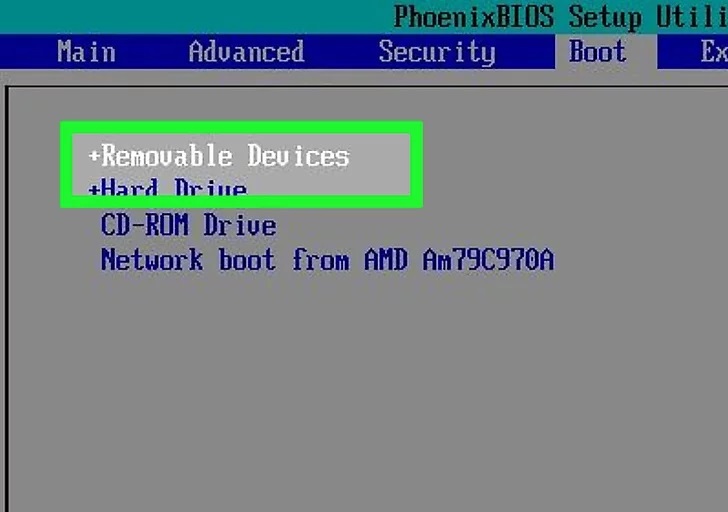
Step 11. Select the first boot device of your Computer
Choose “USB Drive” or “Removable drives” as your computer’s first boot device. The boot options menu is normally a menu of moveable device names where you should configure your USB drive as the initial boot device, though this process may vary depending on the computer.
It could also be a list of devices for which you can customize the order in which they boot. If you’re having trouble, look for assistance online or in a handbook.
Step 12. Start your Computer from the USB drive
Start your computer while the USB drive is plugged into a free USB port. If you are prompted to choose whether you want to boot from the USB device when the machine starts, press any key. after selecting the USB drive as your starting point. Windows Setup will launch.
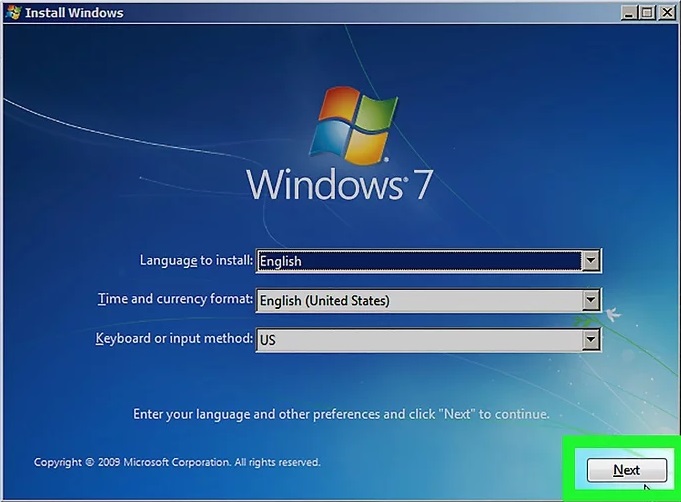
Step 13. Choose your Windows Setup options
You’ll see a window as soon as Windows Setup has finished loading. Choose your preferred language, keyboard style, and time/currency format using the drop-down menus, then click Next in the lower right corner.
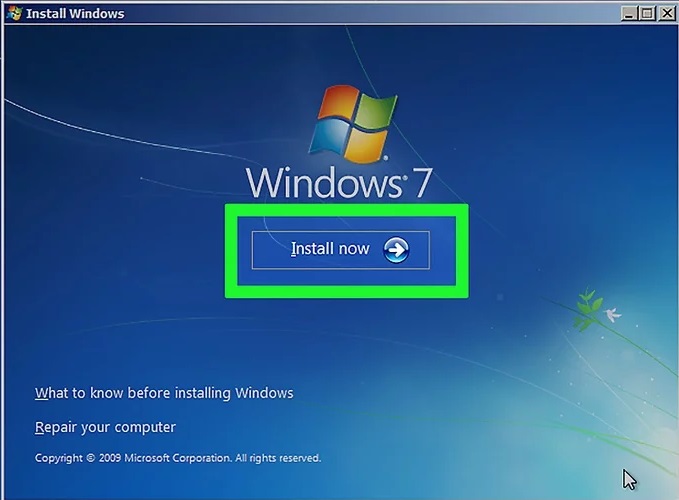
Step 14. Install Windows 7
Once you see the below screen, click the Install Now button.
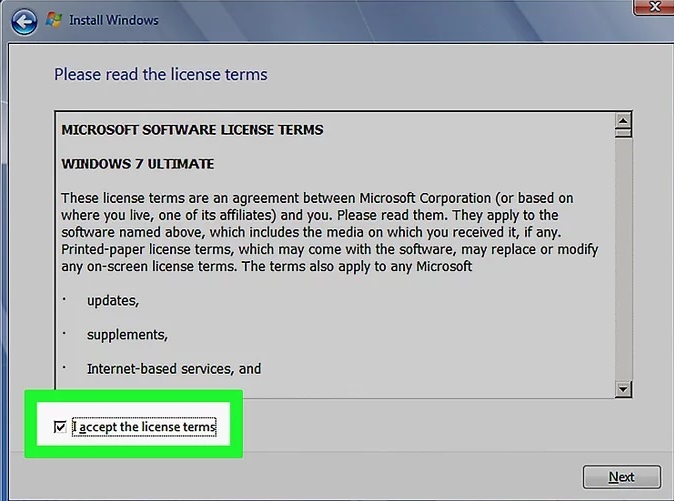
Step 15. Accept Windows 7 License Terms
Check the box next to “I accept the license terms” after carefully reading the Microsoft Software License Terms. Then, in the bottom-right corner, select Next.
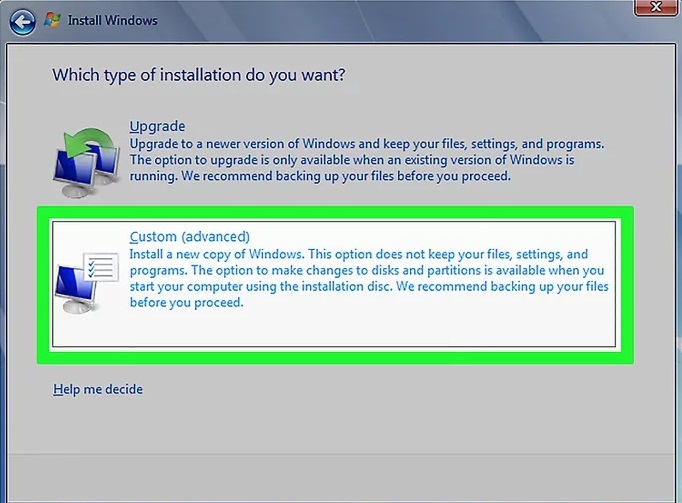
Step 16. Select Installation Type
Custom installation should be chosen. You can install Windows 7 completely with this approach. All of your files on the installation drive will be deleted after this. Choose Upgrade if you don’t want to delete all of your files. Existing Windows installations are necessary for this option.
Step 17. Choose your target hard drive & partition
Data is physically stored on a hard disk, which is how partitions “divide” hard drives into discrete sections.
If the hard drive has any data on it, remove it or format it. You should be warned that doing this would completely delete all the disk’s data.
From the list of available hard drives, pick the desired drive.
- Click Drive options (advanced).
- Select Format from the drive’s menu.
- Create a partition on your computer if it doesn’t already have one so that you can install Windows there.
From the list of available hard drives, pick the desired drive.
- Click Drive options (advanced).
- Choose New from the Drive menu.
- Click OK after selecting the size.
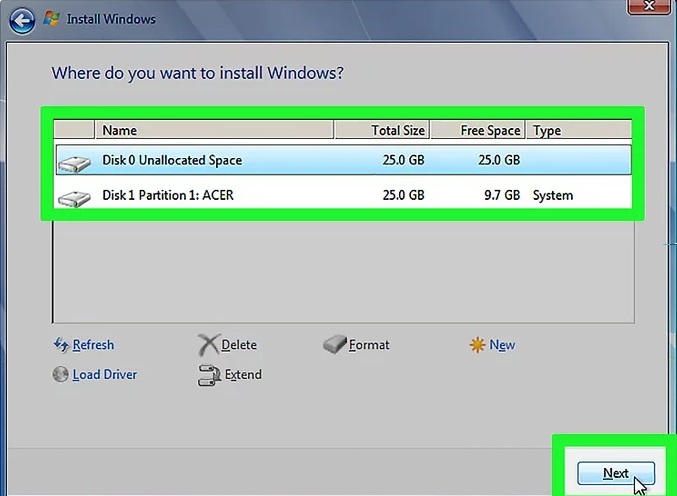
Step 18. Install Windows 7 on your desired hard drive & partition
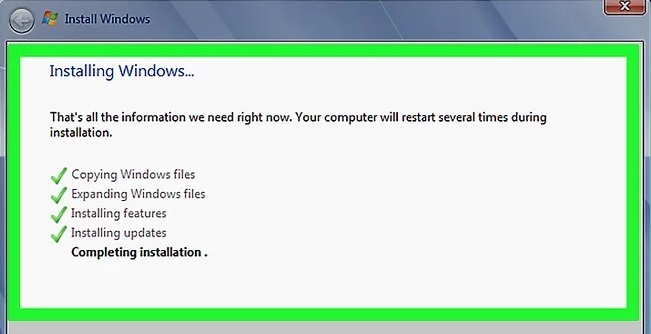
Select the location where you want to install Windows and then click Next. Windows installation will start. Several starts and restarts of your computer are possible while the installation is taking place.
When Windows is finished installing, remove the USB drive.
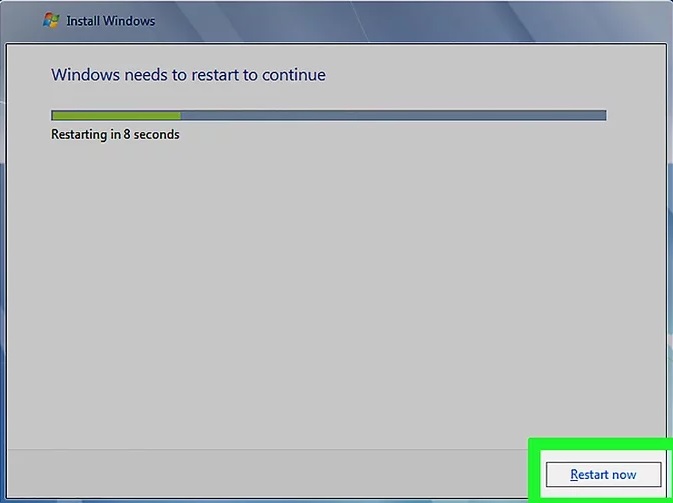
Step 19. Reboot your computer
Restart your computer and let it start normally after you’ve completed installing Windows 7 and removed the USB disk.
Congratulations! You’re all set. Windows 7 must be installed successfully by now.
Conclusion
Installing Windows 7 using USB is a practical choice for business owners seeking efficiency, reliability, and control. Following these structured steps ensures a smooth and professional installation experience. For further guidance or support, OperaVPS is available to assist with customized solutions for your business needs.
FAQ
2. What hardware requirements must be met to install Windows 7 using USB?
To install Windows 7 using USB, you need a USB flash drive with at least 4GB of capacity, a computer that supports booting from a USB device, and a genuine Windows 7 ISO file.
3. What steps are involved in creating a bootable USB drive for Windows 7 installation?
The process involves downloading the official Windows 7 ISO file, using a tool such as Windows USB DVD Download Tool or Rufus, formatting the USB drive, and copying the installation files to the USB.
4. How do I configure BIOS settings to boot from a USB when installing Windows 7?
Access the computer’s BIOS or UEFI settings during startup, usually by pressing a key like F2 or Delete. Set the USB device as the first boot option in the boot order menu, save the changes, and restart the system.
5. Can I use the same bootable USB drive to install Windows 7 on multiple devices?
Yes, as long as you have the correct licensing for each installation, the same bootable USB drive can be used on multiple compatible devices.
6. What should I do if the Windows 7 installation process does not detect my hard drive?
This issue typically occurs when drivers are missing. Ensure you have the required SATA or RAID drivers on a separate USB drive, and load them during the installation process when prompted.
7. Is installing Windows 7 using USB suitable for business environments?
Installing Windows 7 using USB is highly suitable for business owners who manage multiple devices, as it speeds up the installation process, reduces downtime, and standardizes deployment.
8. What common errors might occur when installing Windows 7 from USB and how can they be resolved?
Common errors include “A required CD/DVD drive device driver is missing” or “Windows cannot be installed to this disk.” These can often be resolved by using different USB ports, loading the correct drivers, or recreating the bootable USB drive.
9. How can I verify that the Windows 7 installation via USB is successful?
After installation, verify system stability by checking device drivers, running core business applications, and ensuring the operating system is activated through the correct licensing method.
10. Are there data security considerations when installing Windows 7 using a USB drive?
Yes, always use genuine installation files, secure your USB device before and after use, and back up important data before starting the installation to prevent accidental data loss.