Installing Windows Server 2012 R2 – Step by Step
Installing Windows Server 2012 R2 involves preparing hardware, booting from installation media, selecting installation options, and completing system setup for network management and enterprise use.
🤖AI Overview:
Installing Windows Server 2012 R2 requires meeting minimum hardware requirements, booting from installation media, and following installation prompts to select editions and configure partitions. This server OS supports virtualization, centralized management, and enhanced security features, concluding with system restart and administrator setup.
Windows Server 2012 R2 Installation Prerequisites
- Buying a dedicated server if installed on the server
- Windows Server 2012 license for legal activation
- Memory (RAM): at least 512 MB
- Processor (CPU): at least 1.4 GHz 64 bit
- Hard disk space (HDD): at least 32 GB
- Graphics (VGA): at least DirectX9.0
How to install Windows Server 2012 R2
Before installing Windows Server 2012 R2 on a server or PC, we recommend that you make a backup copy of your system information and data. Then follow the steps to install Windows Server 2012 R2:
Step 1. Download Windows Server 2012 R2 from the Microsoft site.
Step 2. Set the system or server in the desired boot mode; this feature is included in the system BIOS settings. To enter the BIOS settings section, when you turn on the system, press the Delete button, or in some systems, press Ctl+F1 or F12, and follow the BIOS configuration instructions.
Step 3. After booting the Windows Server 2012 operating system in the way you want and turning on the server, a page showing the loading of the necessary files to install the operating system will be displayed. You should be patient until the Windows installation section is loaded.

Step 4. Then you need to select the default language and click the Next button.
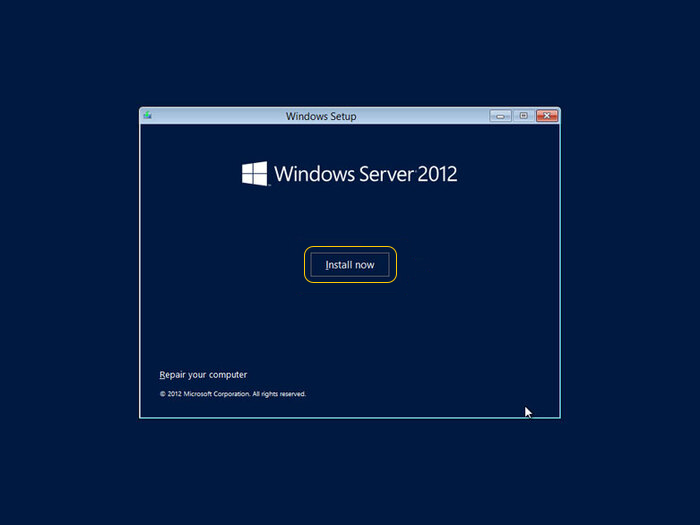
Step 5. Click the “Install Now” option.
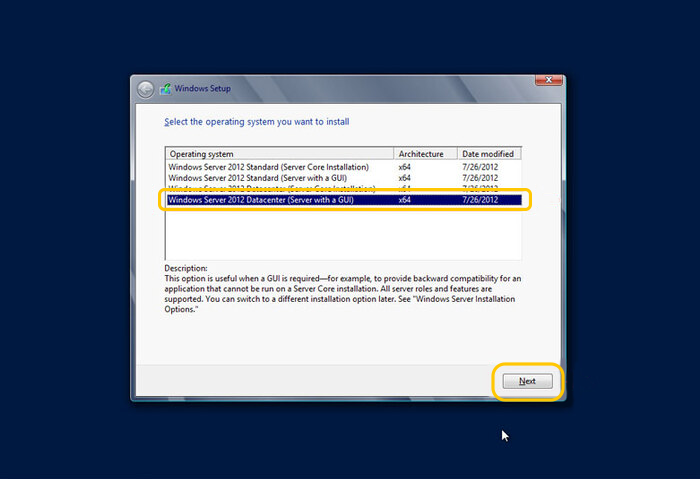
Step 6. According to the image you see, you must select one of the GUI options from the list. Usually, for servers, we select Windows Standard GUI or Data Center GUI. In this tutorial, we chose the Windows Server 2012 Data Center GUI.
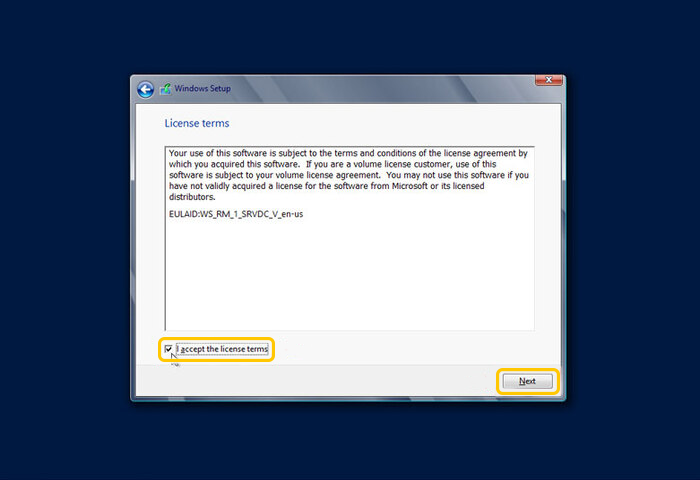
Step 7. To allow the installation of Windows Server 2012 R2, you must confirm the server License Agreement and copyright rules by checking the “I accept the license terms” box and selecting the Next button.
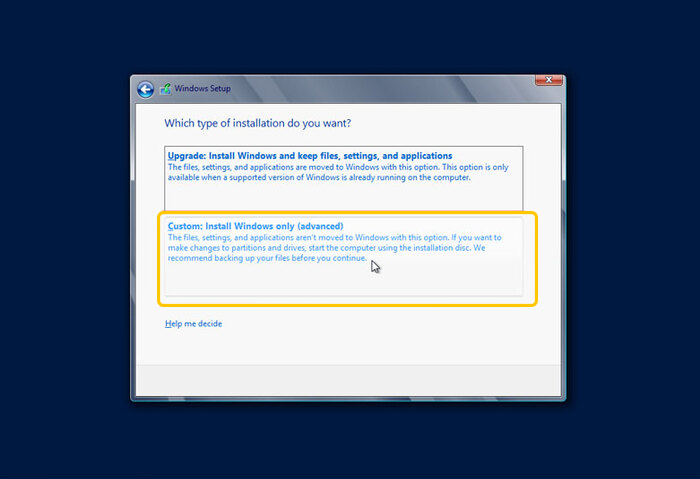
Step 8. For custom installation of Windows Server 2012, select Custom: Install Windows Only (advanced).
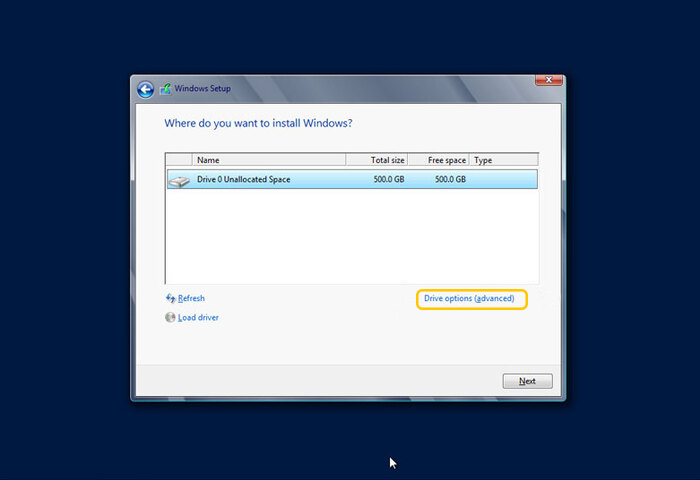
Step 9. This step is for partitioning and installing Windows on the desired partition. In this step, you will see the disk you are using, if you want to create a custom partition and change the drive options, you should click on Drive Options (advanced). If you do not decide to change the drive and create a custom partition, you should skip this step by selecting the Next option. In this tutorial, we want to create a custom partition, so we click on Drive Options (advanced).
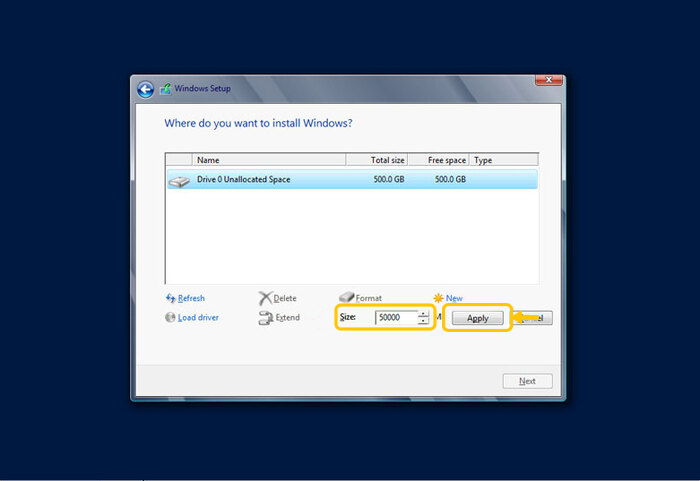
Step 10. select the hard drive to create a custom partition, and click on NEW and Next. On large hard drives, we recommend choosing 50 GB for Windows and the software required by Windows and partitioning the rest of the hard drive as desired.

Step 11. Then you will be able to determine the size of your desired partition.
Optional: You can add a drive for dual boot by using Native Boot To Vhd( SHIFT-F10) and accessing the command prompt window. Find the drive where the installation will take place (eg dir c:, dir d:, dir e:, etc) and to run Disk Partition Utility, type Diskpart and create a partition with the desired size by the Create vdisk file=e:\BootDemo.vhd type=expandable maximum=40000 command. Then Attach disk and Exit. Finally, Refresh.
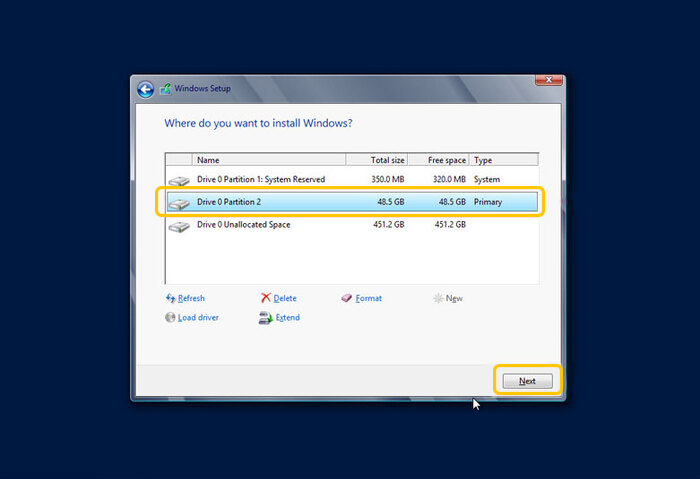
Step 12. Select the desired partition you created to install Windows.
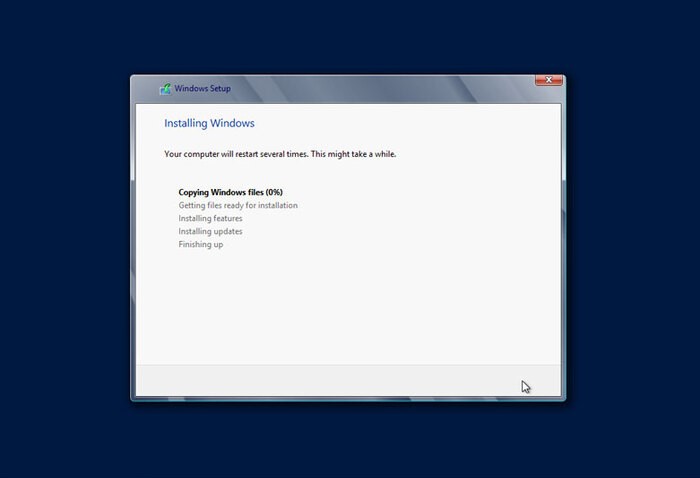
Step 13. Wait approximately 20 minutes for the files to be copied and for Windows Server 2012 to be completely installed on the selected hard drive.
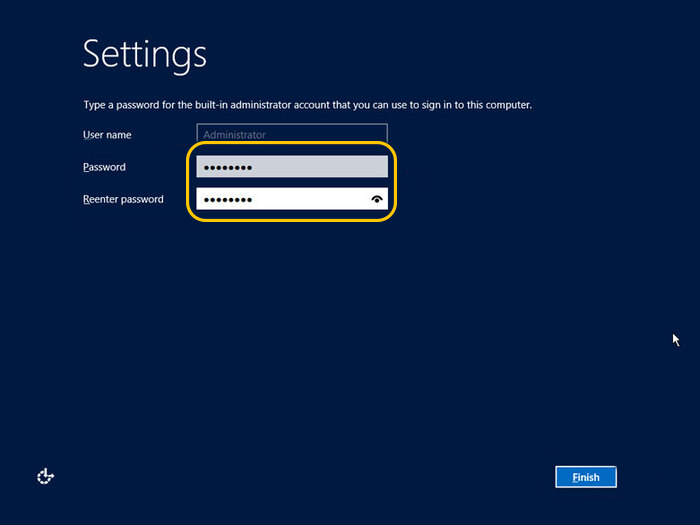
Step 14. After restarting the system several times automatically, the system will start and you will see the settings page where you must specify a security password for the administrator user and enter the password twice and click on the Finish button.
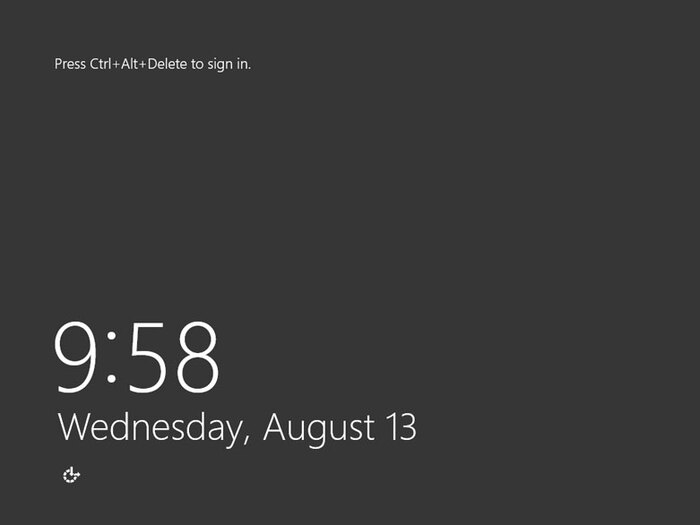
Step 15. On the page you see, you must press the Ctrl + Alt + Delete buttons Simultaneously to sign in.
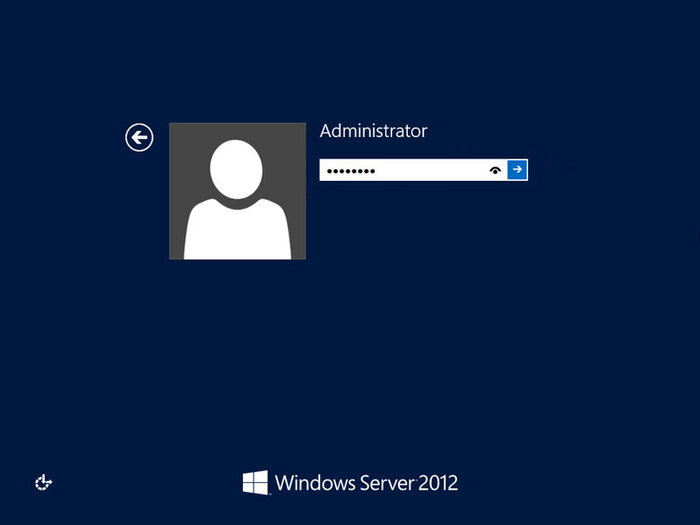
Step 16. Enter the password you specified in the previous step and press the Enter button.
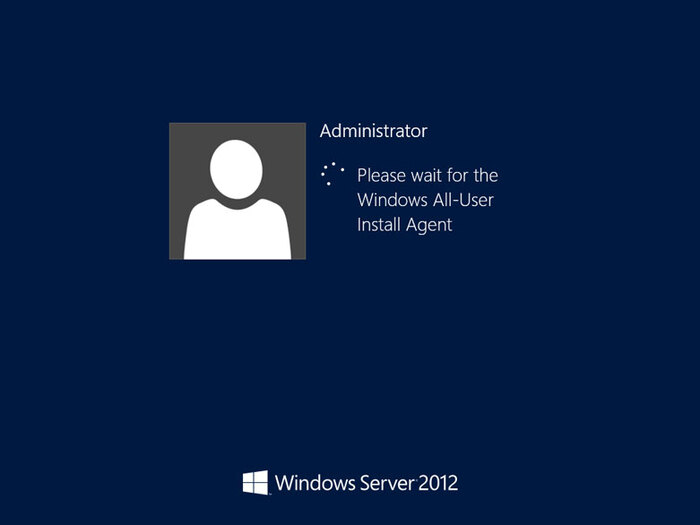
Congratulations, you have successfully installed Windows Server 2012 R2 and now you can enter the Windows Server 2012 desktop environment and enjoy the features of Windows Server 2012.
It should be noted that if you intend to install Windows Server 2012/2012 R2 on your server, you must first configure ESXi or KVM virtualization on the dedicated server and then follow the steps we have taught. If you want to benefit from the features of Windows Server 2012 on your PC, after booting Windows Server 2012/ 2012 R2 using different methods such as CD, USB, or ISO file, you must create a virtual machine and then follow the steps to install Windows Server 2012. These steps are the same on the server and PC.
Conclusion
Installing Windows Server 2012 R2 is foundational to constructing a secure, efficient, and manageable IT infrastructure for businesses of varied sizes.
By carefully preparing hardware, selecting the appropriate edition, following the structured installation steps, and applying thorough post-installation configurations, business owners can ensure their servers deliver reliable performance and security.
Adherence to best practices in security, network management, and backup further solidifies the investment in Windows Server technology, supporting business growth and operational stability over time.
FAQ
What are the key steps involved in installing Windows Server 2012 R2?
Key steps include preparing hardware, selecting the correct installation media, choosing the installation type, configuring disk partitions, setting up administrator credentials, and completing initial configuration settings.
How does licensing work for Windows Server 2012 R2?
Licensing is usually based on Server and Client Access Licenses (CALs). Businesses must purchase the appropriate number of server licenses and CALs depending on the number of users or devices accessing the server.
What are the benefits of installing Windows Server 2012 R2 for business operations?
Benefits include improved virtualization support, enhanced security features, better storage management, advanced networking capabilities, and streamlined IT infrastructure management.
How can I ensure compatibility of hardware and software before installing Windows Server 2012 R2?
Check hardware compatibility lists from manufacturers and verify application compatibility through vendor documentation and the Microsoft Compatibility Center.
What security considerations should be addressed during the installation of Windows Server 2012 R2?
Important considerations include choosing a secure administrator password, enabling firewall settings, applying the latest updates, and configuring role-based access controls.
What common issues might arise during installation and how can they be resolved?
Common issues include hardware incompatibility, insufficient disk space, and improper BIOS settings. Resolution involves verifying hardware, cleaning up or resizing partitions, and updating BIOS firmware.
8. Can Windows Server 2012 be upgraded to Windows Server 2012 R2?
Yes, businesses can upgrade from Windows Server 2012 to 2012 R2 through an in-place upgrade process that preserves settings and applications, provided the system meets the upgrade requirements.
What post-installation tasks are recommended after installing Windows Server 2012 R2?
Recommended tasks include installing updates, configuring roles and features, setting up backup solutions, and creating recovery points.
How does Windows Server 2012 R2 improve the management of business network infrastructure?
It offers enhanced tools like Server Manager, improved PowerShell support, centralized management consoles, and better integration with cloud services to simplify network and server management.