How to Install Wine on Ubuntu
Wine is a powerful compatibility layer that enables you to run Windows applications and games on Ubuntu without the need to install Windows or use a virtual machine.
It translates Windows API calls into Linux system instructions, offering near-native performance for many .exe programs.
To install Wine on Ubuntu, just enable 32-bit architecture, add the official repository, and run:
sudo apt install --install-recommends winehq-stable -yIf you prefer a remote setup with desktop access or GPU support, consider purchasing Linux VPS to run Wine on a high-performance cloud instance, handle heavy applications, and ensure uptime for continuous workloads.
The following guide shows you how to install Wine on Ubuntu 20.04 / 22.04 / 24.04 from the official WineHQ repositories.
Prerequisites to Install Wine on Ubuntu
To let this tutorial meet all its goals, please consider the following points:
- A non-root user with
sudoprivileges. -
If using 64-bit Ubuntu and you need to run 32-bit Windows apps, enable i386 architecture.
-
A desktop environment (for GUI apps) or a graphical session available on the VPS.
- Access to a terminal window/command line (Ctrl-Alt-T)
-
Optional:
winetricksfor managing common Windows libraries and runtimes
Install Wine on Ubuntu 20.04/22.04/24.04 [Step-by-Step]
In this section, we will walk through the exact steps to install Wine on Ubuntu.
The setup process is straightforward, and once configured, Wine seamlessly bridges the gap between Linux and Windows environments.
Whether you are testing desktop software, running legacy tools, or managing workloads on a Linux VPS, the following instructions guide you through a clean and reliable installation.
Step 1: Confirm Ubuntu codename
WineHQ repo files are named by Ubuntu codename (focal, jammy, noble, etc.).
Use the exact codename to avoid “package not found” errors.
lsb_release -csReplace focal, jammy, or the output you get (e.g., noble) in the examples below. If you see a different name, use that one in the .sources filename.
Step 2: Update & install small prerequisites
To make sure apt cache is fresh and small helper tools are available for adding sources and fetching the key, run:
sudo apt update
sudo apt upgrade -y
sudo apt install -y wget gnupg2 ca-certificates software-properties-common apt-transport-https
apt-transport-https is usually installed on modern Ubuntu, but installing it explicitly avoids TLS errors when adding remote sources.
Step 3: Enable 32-bit architecture
Most Windows programs require 32-bit support. Wine’s packages will pull i386 dependencies when this is enabled.
sudo dpkg --add-architecture i386No output is problematic, if you get no errors, i386 is registered. Run dpkg --print-foreign-architectures to confirm it shows i386.
Step 4: Add WineHQ keyring
Use the commands below to add the WineHQ signing key into /etc/apt/keyrings so apt trusts the WineHQ packages.
sudo mkdir -pm755 /etc/apt/keyrings
sudo wget -nv -O /etc/apt/keyrings/winehq-archive.key https://dl.winehq.org/wine-builds/winehq.key
Using /etc/apt/keyrings avoids legacy apt-key deprecation warnings.
Step 5: Add the WineHQ .sources file for your Ubuntu release
This registers WineHQ’s apt repository for your codename.
Replace focal / jammy / noble with the output of lsb_release -cs.
# Ubuntu 20.04 (focal)
sudo wget -nv -P /etc/apt/sources.list.d/ https://dl.winehq.org/wine-builds/ubuntu/dists/focal/winehq-focal.sources

# Ubuntu 22.04 (jammy)
sudo wget -nv -P /etc/apt/sources.list.d/ https://dl.winehq.org/wine-builds/ubuntu/dists/jammy/winehq-jammy.sources

# Ubuntu 24.04 (example codename: noble) — replace 'noble' with lsb_release -cs output if different
sudo wget -nv -P /etc/apt/sources.list.d/ https://dl.winehq.org/wine-builds/ubuntu/dists/noble/winehq-noble.sources
Step 6: Update apt and install Wine (choose channel)
Refresh apt metadata and install the channel you want.
stable is recommended for production systems; devel and staging are for testing/compatibility.
sudo apt update

# Stable (recommended)
sudo apt install --install-recommends winehq-stable -y

# Or, Devel (cutting edge)
# sudo apt install --install-recommends winehq-devel -y

# Or, Staging (experimental patches)
# sudo apt install --install-recommends winehq-staging -y
apt will pull in many 32-bit and 64-bit dependencies.
Step 7: Verify and initialize Wine
Confirm the installed version and initialize a default Wine prefix.
wine --version
winecfg        # GUI: set Windows version and drivers
wineboot       # create/initialize ~/.wine (same effect as a reboot)
The first run of winecfg may prompt to install wine-mono (for .NET) and gecko (for embedded HTML).
Accept if you need those features; for complex .NET apps prefer winetricks to install specific Microsoft runtimes.
How to Configure Wine on Ubuntu
It is time to use Wine and run Windows apps and games.
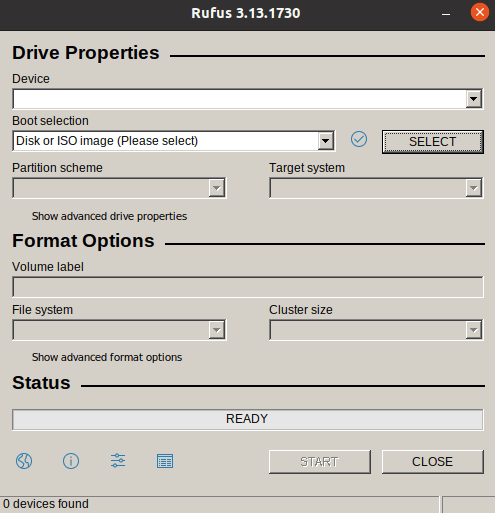
Download Rufus .exe file from the official Rufus download page to demonstrate how we can run Windows programs using Wine. To run the Windows Rufus executable file, run the command:
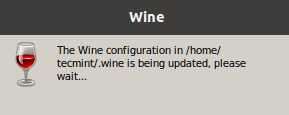
$ wine rufus-3.19.exeAfter running the program, Wine starts to create a configuration file in the user’s home directory, in this case,~/.wine as shown.
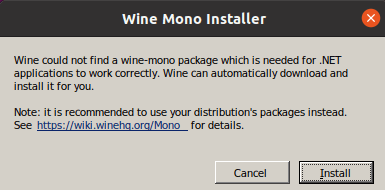
You will be prompted to install the wine-mono-package, which is necessary for .NET apps, during the Wine configuration process. Click the “Install” option.
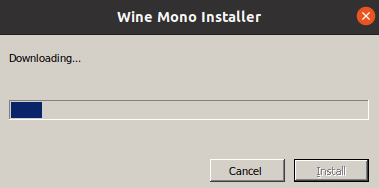
Soon, the download will begin.
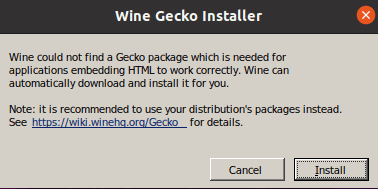
It will also prompt you to install the Gecko package, which is necessary for programs that embed HTML.
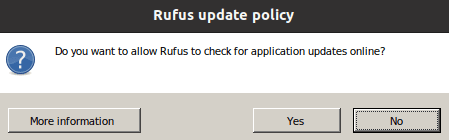
Decide if you wish to periodically check for application updates.
 The Rufus will then be shown as shown.
Set up the Wine configuration directory
Run the following command to get started using Wine.
WinebootIn this way, the command creates the ~/.wine directory and initializes all the components.
Wine Usage on Ubuntu [All Versions]
All should be ready to run a Windows application on your Ubuntu system, so far.
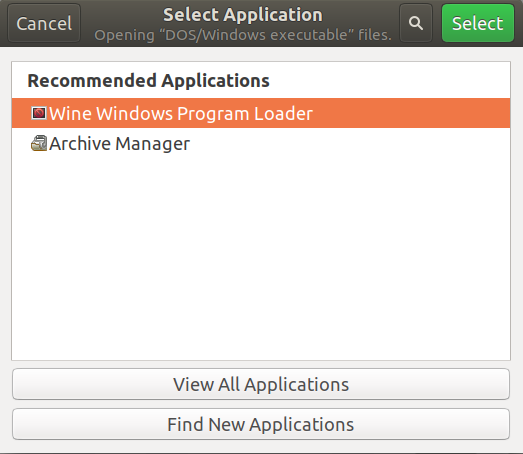
You can use Windows Media Player to run media files on Windows operating systems.
So, download its .exe file and go to downloads.
Right-click on the “exe” file and click “Open with” and “Wine Windows Program Loader.”

And the installation process will be advised to us without any problems.
How to Uninstall Wine on Ubuntu [All Versions]
Anytime, you can decide to remove it completely using the command below:
$ sudo apt purge winehq-stableTo download the Wine source package for other Linux distributions, refer to the wine download page.
How to Launch Applications
If you are running a GUI on Ubuntu, double-click a Windows.exe file.
Wine automatically associates itself with the .exe file extension. You can also right-click the application and select Open With > Wine.
Type the following command to launch an application from the command line.
cd '/.wine/drive_c/program_folder'wine launcher.exeYou must change the working directory to the location of the application files. Replace program_folder with the actual directory that holds the application. Replace launcher.exe with the executable file for the application.
Conclusion
In this guide, you learned how to install Wine on Ubuntu 20.04, 22.04, and 24.04 to run Windows applications seamlessly on Linux.
Wine eliminates the long-standing compatibility barrier between Linux and Windows, allowing users to execute hundreds of Windows programs without relying on heavy emulators or virtual machines.
Unlike traditional virtualization, Wine integrates directly with your Linux environment, ensuring faster performance and minimal resource consumption, ideal for developers, testers, and anyone managing workloads on an Ubuntu Server or Linux VPS.