Use netstat Command in Windows
It is essential to observe active network connections and the status of running TCP and UDP on different ports and addresses to discover network problems. Netstat is a command-line tool that enables users to check network connections. In this article, you will learn How to Use netstat Command in Windows. While facing internet access issues, netstat command helps you to identify the main problem.
Netstat has been present in Windows since 1993 when version 3.11 was released. After buying Windows VPS, you must be able to troubleshoot problems on your server which needs to use netstat command to check network activities and find out why a connection is not working. Join us with this article to learn all about netstat command and its usage.
What is netstat and how does it Work in Windows?
Netstat is formed from the phrases statistics and network and is a command-line tool that helps users to view the statistics of active connections on their computer or server. It is useful to check active network connections and troubleshoot problems. The netstat command assists you pinpoint the source of any issues you’re having when trying to access the internet. The status of each current network connection on your computer will be shown by netstat. The netstat can frequently offer further details about why a connection isn’t operating. Windows, Linux, and macOS support this network tool. Since netstat is a command line program, it does not feature a graphical user interface.
Previously on operavps, you taught that netstat is used to check open ports in Linux. To be aware of users who are trying to gain access to your Windows system, netstat will also be your powerful assist by monitoring your computer for security risks. This command tool does not show listening ports by default, but you can make it possible by adding the -l option to see the unusual listening ports.
It is not complicated to use netstat command in Windows. You just need to open a Command prompt/Terminal window and run ‘’netstat’’ followed by your considered option which will be explained in the following of this tutorial. So, stay with us to learn how to monitor and troubleshoot network problems and discover connected ports using netstat command in Windows.
The Basic Syntax of netstat Command
You can access the netstat services in Windows operating systems using the command line (cmd.exe). Because of this, Windows requires the command prompt, which can be launched whenever you want via ”Run” by pressing [Windows key] + [R] and typing “cmd.” To use the network tool on macOS and Linux, open the Terminal.
The syntax of the commands in netstat differs from system to system. However, the basic syntax is as follows that enables you to Use netstat Command in Windows.
netstat [-a] [-b] [-e] [-f] [-n] [-o] [-p Protocol] [-r] [-s] [-t] [-x] [-y] [Interval]When combining multiple options, a preceding hyphen (-), which is customary for the listing of the parameters, only needs to be placed in front of the first link:
netstat [-OPTION1] [-OPTION2] [-OPTION3] …How to Use netstat Command in Windows?
With some simple steps, you can start using netstat in Windows:
- Open Start and search for Command Prompt.
- Select the Run as administrator option by right-clicking the top result.
- Run the command below to view all active TCP connections.
- Type:
netstat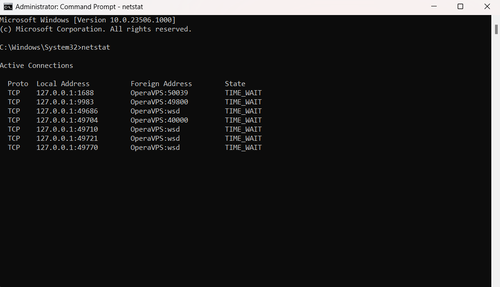
- For example, to observe all active connections showing numeric IP address and port number instead of trying to determine the names, type:
netstat -n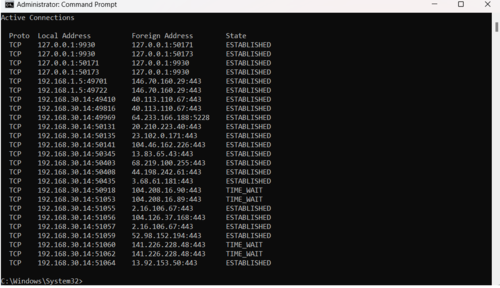
Parameters of netstat Command in Windows
| Option | Command | Description |
| netstat | Standard listing of all active connections | |
| -a | netstat -a | Displays all active TCP connections and the TCP and UDP ports on which the computer is listening. |
| -e | netstat -e | Displays Ethernet statistics, such as the number of bytes and packets sent and received. This parameter can be combined with -s. |
| -n | netstat -n | Displays active TCP connections, however, addresses and port numbers are expressed numerically and no attempt is made to determine names. |
| -o | netstat -o | Displays active TCP connections and includes the process ID (PID) for each connection. You can find the application based on the PID on the Processes tab in Windows Task Manager. This parameter can be combined with -a, -n, and -p. |
| -p Protocol | netstat -p TCP | Shows connections for the protocol specified by Protocol. In this case, the Protocol can be tcp, udp, tcpv6, or udpv6. If this parameter is used with -s to display statistics by protocol, Protocol can be tcp, udp, icmp, ip, tcpv6, udpv6, icmpv6, or ipv6. |
| -s | netstat -s | Displays statistics by protocol. By default, statistics are shown for the TCP, UDP, ICMP, and IP protocols. If the IPv6 protocol is installed, statistics are shown for the TCP over IPv6, UDP over IPv6, ICMPv6, and IPv6 protocols. The -p parameter can be used to specify a set of protocols. |
| -r | netstat -r | Displays the contents of the IP routing table. This is equivalent to the route print command. |
| interval | netstat -n 5 | Redisplays the selected information every interval seconds. Press CTRL+C to stop the redisplay. If this parameter is omitted, this command prints the selected information only once. |
| -q | netstat -q | Displays listening and non-listening ports |
| /? | netstat /? | Displays all the available parameters and additional help. |
| -y | netstat -y | Show connection template. |
| -x | netstat -x | Displays NetworkDirect connections. NetworkDirect is a specification for Remote Direct Memory Access (RDMA), which is a process that allows fast data transfers using the network adapter, freeing up the processor to perform other tasks. |
| -t | netstat -t | Displays offload state connections. A list of the current connection offload state will be generated when using this command. The offload state refers to the TCP Chimney Offload, which is a feature that transfers the network workload from the processor to the network adapter during data transmissions. |
In the following of this tutorial, you will review some examples to understand better the above commands.
Why do Smart Users Use netstat Command in Windows?
Active network connections including incoming and outgoing, routing tables, listening ports, protocols such as IPv4 and IPv6, open and connected network ports, and so on would be discoverable if a user use netstat command in Windows.
You have a significant edge in the struggle against excessive traffic and harmful software if you are aware of the incoming and outgoing connections of your computer or server. These connections are made using the corresponding network address, which among other things identifies the port that was opened in advance for data exchange. These open ports provide a serious security risk because they give other parties a way to infiltrate your machine with malware. Additionally, there’s a chance that a Trojan that is already present in your system could set up a so-called backdoor and open a corresponding port as a result. Because of this, you should frequently verify the ports that your system has opened. The netstat is a great tool for this.
To use netstat command in Windows, the Internet Protocol (TCP/IP) protocol must be installed as a component in the properties of a network adapter for Network Connections. You can also learn about the packets transported since the last system started and any faults that happened thanks to the full statistics. The netstat can also be used to display the routing table, which provides details on how data packets go via the network.
Keep in mind that, before running netstat, all other programs, such as your web browser, should be closed because they frequently link to computers with unknown IP addresses, which can have an impact on the results.
Most Used Examples of netstat Command in Windows
Let’s continue this article to review the list of netstat command examples to help you understand the different usage of netstat commands in Windows.
1. IPv4 protocol Connections
As you know, you can use netstat command in Windows to display all active connections. But if you need to only view all active IPv4 connections, run:
netstat -p IP2. Display Connections by Protocol
As we mentioned, netstat -p shows connections for the protocol specified by Protocol. To display your considered protocol, you just need to specify it to view a list of its connections.
netstat -p tcp 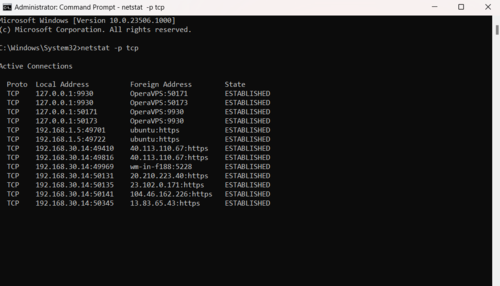
netstat -p udp
netstat -p tcpv6netstat -p udpv63. TCP and UDP protocols Statistics
The netstat command is capable to show the statistics for only the TCP and UDP protocols Statistics. Simply type:
netstat -s -p tcp udp4. Using ICMPv6 Protocol to Access Statistics
Use the command below if you only want statistics on the ICMPv6 protocol:
netstat -s -p icmpv6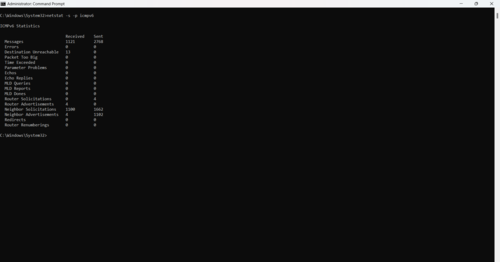
5. Show All Open Ports & Active Connections
You can use netstat command in Windows as below to view all open ports and active connections including numeric and process ID.
netstat -ano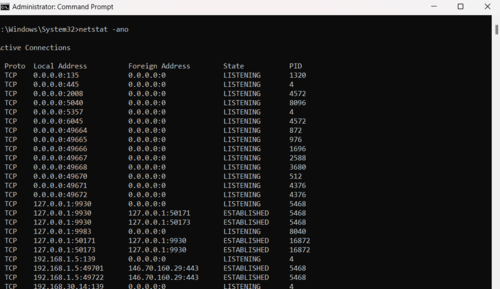
6. Display Ethernet & Protocols Statistics
Run the following command to view both the Ethernet statistics and the statistics for all protocols:
netstat -e -s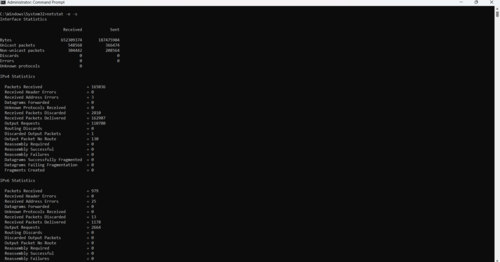
7. Display Active TCP Connections Every 10 Seconds
To use netstat command in Windows for printing the process IDs and active TCP connections in your considered timing, run:
netstat -o 10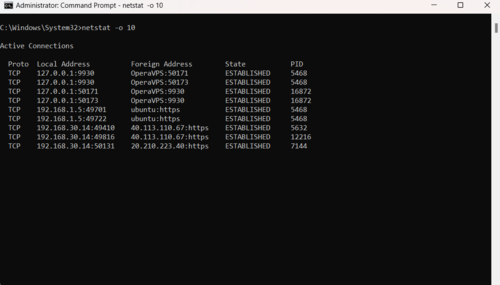
8. Display Active TCP Connections Using Numerical Form
It is possible to use netstat command in Windows for the purpose of showing active TCP connections and the process IDs using the numerical form. You just need to run:
netstat -n -o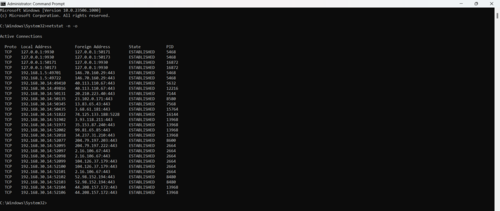
9. Display FQDNS for Foreign Addresses
To view the Fully Qualified Domain Name for foreign addresses, run the command below:
netstat -f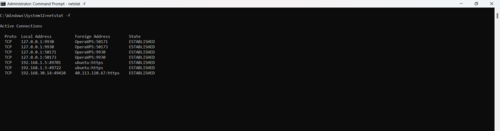
10. Display Specific Connections Only
To show only the connections that are using a specific PID, you can use netstat command in Windows. Here, 28604 is an example.
netstat -0 | findstr 28604The format of this command is also used to filter out the connections with a CLOSE_WAIT state, by replacing the PID with ESTABLISHED.
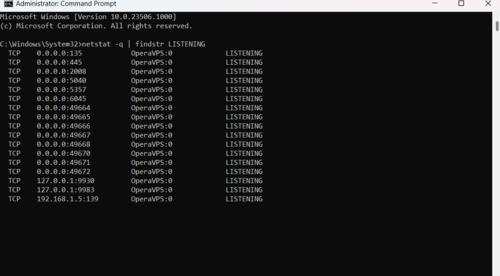
How to Highlight Only ”LISTENING” Connections?
You can produce only the specific details you require by following these procedures in addition to displaying all the available statistical information:
- Open Start and Search for Command Prompt.
- Select the Run as administrator option by right-clicking the top result.
- To list all the connections that have the state set to LISTENING, run the command netstat -q | findstr STRINGIn. DO NOT FORGET TO replace STRING for the information you want to list.
The netstat utility does not provide the findstr command. Although it’s a straightforward command to look for a text string in a file, you may use it in conjunction with many other netstat commands to better understand the data you’re seeing. In addition to Windows Server, Windows 8.x, Windows 7, and earlier versions, you may find the netstat command in Windows 10. Additionally, the utility is not just limited to Windows; it is also accessible on Linux and macOS. Although the syntax and parameters may vary, they are all extremely similar.
After discussing how to highlight only “LISTENING” connections using the Netstat command, you can use the following link to learn more about how to use the Netstat command in Linux.
FAQ
What is the meaning of ‘’ Proto’’ in netstat output?
It shows the connection protocol (TCP or UDP).
Why is the port number shown as (*). In front of Foreign Address in my output?
The Foreign Address displays the IP address and port number of the remote computer to which the socket is connected. If the port is not yet established, the port number is shown as an asterisk (*).
When is the netstat -x command used?
As you read in the article, it is used for showing NetworkDirect connections. Unless you're using the server edition of Windows or a high-performance program with a network adapter that supports this capability, you typically won't use this command.
How to see the ip address of computer using netstat command?
Track ''Local Address'' in the output. It shows the computer's IP address followed by a semicolon with the port number of the connection. The double-semicolon inside brackets indicates the local IPv6 address, and "0.0.0.0" refers to the local address too.
Which versions of Windows provide netstat command?
The netstat command is available in the command prompt of Windows 11, Windows 10, Windows 8, windows 7, Windows Vista, and Windows XP.
Conclusion
In this article, you learned How to Use netstat Command in Windows to Check Network Connections. The netstat command is frequently used in conjunction with other Command Prompt tools for networking, including nslookup, ping, tracert, ipconfig, and others. From now on, you know how to list active networks’ (incoming and outgoing) connections as well as listening ports while using this tool. You may check statistics for both network adapters and specific protocols (like IPv4 and IPv6). Along with other things, you may even view the current routing table.
If you know some commands to get a better view of the network connections then the comment section is all yours.
How to add the PID column to task manager on Windows 7? I do not find it.
Hey there. When you face this issue, you must add the PID (Process Identifier) column to task manager manually. On windows 7, select the PID checkbox from View > Select Columns in Task Manager. . If the PID you're looking for isn't listed, you may need to select Show processes from all users at the bottom of the Processes page.