How to Take Screenshot in Ubuntu with 7 Useful Methods
One of the actions Ubuntu beginners soon wish to do is to take screenshots. Although a built-in tool allows users to Take Screenshot in Ubuntu using keyboard shortcuts, there are several ways to capture a screen in Ubuntu. In this article, you will learn 7 different methods to capture high-quality screenshots in Linux. In the end, you find that taking and editing screenshots (full-screen, window, and partial) is a quick and easy action.
Join us with this guide to review how to hire a 24/7 assistant for free to save your considered screens after buying Ubuntu VPS. Also, users of other major Linux distributions can use this content since the following screenshot tools and methods work on their systems. Let’s get started and get familiar with screenshot tools and capturing methods in Ubuntu.
Method 1. Using Keyboard Shortcuts to Take Screenshot in Ubuntu
Take screenshot in Ubuntu using keyboard shortcuts is the default method. Users who do not need to edit videos or manipulate photos, prefer to use screenshot in Ubuntu keyboard shortcut way of capturing screens in Ubuntu.
Here is the table of keyboard shortcuts in Ubuntu:
| Keyboard Shortcut | Screenshot Area/ Saved Location |
|---|---|
| PrtSc | Entire screen/Pictures directory |
| Shift + PrtSc | Specific area/Pictures directory |
| Alt + PrtSc | Current Window/ Pictures directory |
| Ctrl + PrtSc | Entire screen/ Clipboard |
| Shift + Ctrl + PrtSc | Specific area/ Clipboard |
| Ctrl + Alt + PrtSc | Current Window/ Clipboard |
Now, you know where is screenshot saved Ubuntu. Let’s go to the below detailed instructions and see how to use this method to capture manually.
Step 1. Launch the Default Screenshot Tool
To take screenshot in Ubuntu, you must open the screenshot tool. The Screenshot tool can be accessed by pressing the Print Screen or PrntSc key on the keyboard.
The “Fn” and “Print Screen” keys can also be pressed simultaneously on some keyboards to achieve the same purpose.
Step 2. Taking a Full Screenshot
To capture a whole screenshot, just use the Shift + Print Screen or Fn + Shift + Print Screen key on your keyboard. The captured image will automatically be stored in the Pictures directory.
Step 3. Taking a Window Screenshot
Using keyboard shortcuts, you can also take a window screenshot in Ubuntu. To do this, follow the instructions below:
- Launch the screenshot tool (Print Screen key or Fn + Print Screen)
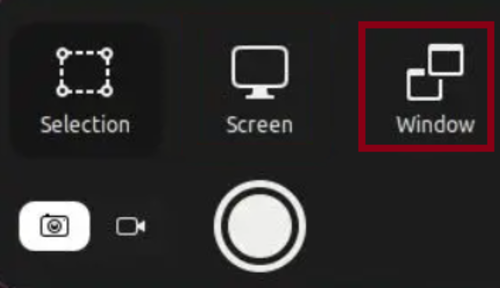
- Select the ”Window” option.
- Choose your considered Window to capture.
- Press Enter.
Also, you can use the Alt + Print Screen or Fn + Alt + Print Screen keyboard shortcuts.
Step 4. Taking a Partial Screenshot
Take screenshot in Ubuntu is not just for the whole window. If you need to save a specific section of the entire screen, you need to use the Ubuntu take screenshot of area method and capture a particular region. Follow the below path to capture a specific area in Ubuntu:
- Launch the screenshot tool (Print Screen key or Fn + Print Screen)
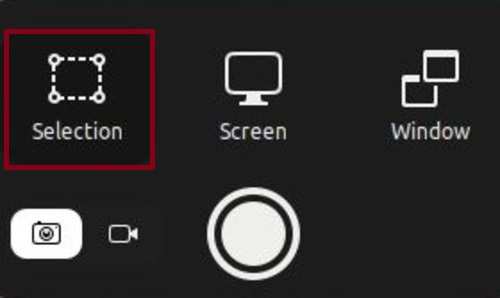
- Select Selection.
- Choose your preferred area.
- Press Enter.
As you reviewed in the above table, the screenshot will be saved under the Home/Pictures/Screenshots folder. Since the taken screenshot is also copied to the clipboard, press Ctrl + V in any media field or image editor to paste it immediately.
Method 2. Using Ubuntu Screenshot Apps to Take Screenshot
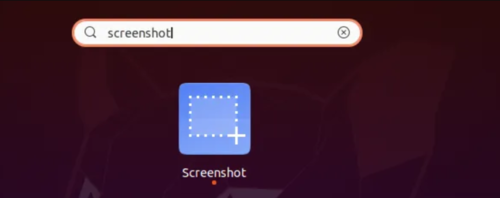
People just don’t like working with keyboard shortcuts for a variety of reasons. If you fall into this category, you can still complete your task using the Screenshot program that comes included with Ubuntu. Start by entering a screenshot into the search field in the Applications Menu. After that, choose the ideal match to launch the Screenshot app. To finish, choose the types of screenshots you want and follow the on-screen directions.
The advantage of this method is that you have more flexibility over how you want to snap a screenshot. There are many additional capabilities and effects available to you that are not typically available through keyboard shortcuts. There are options to include pointers, to include a delay after clicking to take a screenshot, and to apply various effects like borders, drop shadows, and vintage.
Method 3. Install/Use Gnome to Take Screenshot in Ubuntu
One of the simplest and most user-friendly applications to take screenshot in Ubuntu is the Gnome Screenshot tool. You can also use it to capture a screenshot of the login screen. Take screenshot in Ubuntu using the Gnome screenshot tool will be explained in this part:
Step 1. Install Gnome
Ubuntu typically ships with the Gnome Screenshot tool pre-installed. But if it isn’t already set up, launch the Terminal and enter the following command to install the Gnome Screenshot tool.
sudo apt install gnome-screenshotStep 2. Launch Screenshot app
To search for the Screenshot app, open the app launcher.
Step 3. Take your Preferred Capture Area
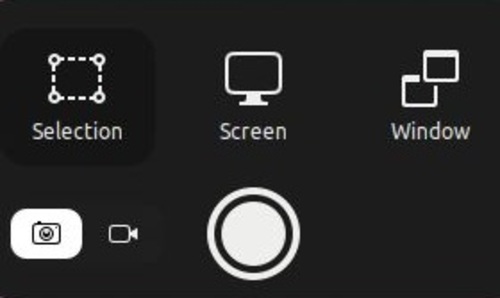
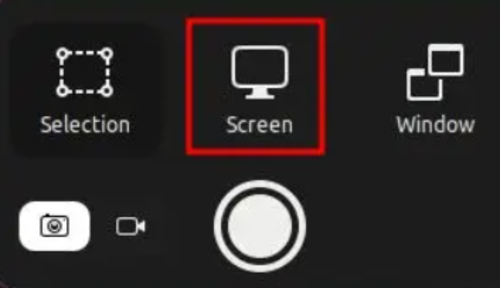
Same as method 1, choose your needed option to take the screenshots. To take a full-screen screenshot, choose ”Screen”, select ”Window” to take a screenshot of a particular window, and to take a partial screenshot choose ”Selection”. Once you choose your considered option, you must click on ”Take Screenshot” to capture and then save it under the ”Pictures” folder.
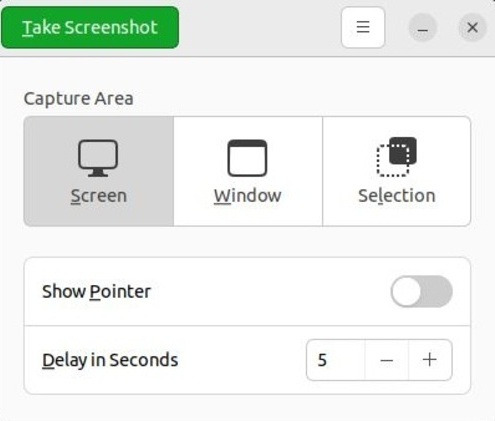
Step 4. Take Delayed Screenshot
The Gnome Screenshot tool’s ability to take delayed screenshots is one of its strongest features. This implies that you can also snap a screenshot of the lock screen. Once you set the value, click “Take Screenshot” in the top left corner.
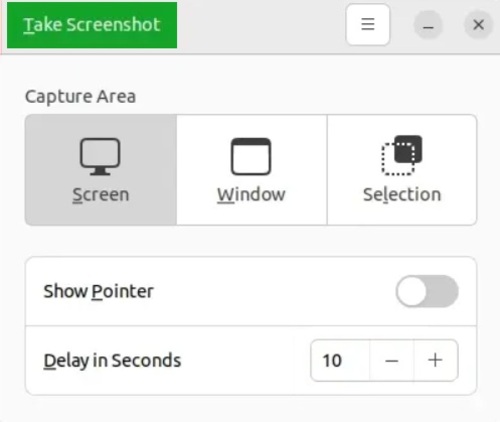
For example, the screenshot will be taken after 10 seconds as you see below:
Step 5. Lock the Screen
To take the screenshot, lock the screen. When you log in, a prompt asks you to save the screenshot.
Method 4. Take Screenshot Using Ubuntu Terminal
Big fans of the terminal, here is your special method. If you use the terminal, it might be opened most of the time. So, this method teaches you how to take screenshot in Ubuntu without leaving your terminal. As you learned in the keyboard shortcuts method, you can capture the entire screen, a partial area, or even take a window screenshot as in this method using commands. In this method, all the screenshots will be saved in the Pictures folder.
Note: To use this method you must have installed the Gnome screenshot tool. If you have not done it in the previous method, run the command below to do this:
sudo apt install gnome-screenshotNow, you are ready to run the relevant command and get what you want.
1. Capturing the Entire screen:
Run the following command to take a screenshot of the whole screen:
gnome-screenshot2. Capturing the Current Window
To take a screenshot of the current window, run the below command:
gnome-screenshot -w3. Capturing a Specific Region
Use the command below to take a screenshot of a particular area:
gnome-screenshot -a4. Capturing a Screenshot with Delay
If you need to take delayed screenshots, run the command below and replace your preferred value with 15:
gnome-screenshot -d -155. Capturing a Screenshot with a Border
If you type the following command, your screenshot will have a border around it for a slight variation:
gnome-screenshot -w -bMethod 5. Using CLI tools to Take Screenshot in Ubuntu
Same as the privious method, this method must be used by terminal lovers. Using the GNOME screenshot tool, ImageMagick, and Deepin Scrot is recommended since they all are available on most of the major Linux distributions.
1. GNOME Screenshot
Desktop users might prefer to use Gnome screenshot to take screenshot in Ubuntu. To install it, run:
gnome-screenshotIt is also used for taking a screenshot with a delay. To use this feature, run the command below and replace 10 with your considered value:
gnome-screenshot -d -10In all releases that include the GNOME desktop, the GNOME screenshot is one of the standard tools.
2. ImageMagick
ImageMagick must be pre-installed on your Ubuntu system, If it is not, run the following command to install it:
sudo apt-get install imagemagickOnce it is installed, you are ready to use the below commands and take screenshot in Ubuntu.
For example, to take a screenshot of your entire screen, type:
import -window root Yourimage.pngOr, run the following command to take a screenshot of a specific area:
import Yourimage.png3. Deepin Scrot
Deepin Scrot is an advanced terminal-based screenshot tool. If you have not already installed it, run the command below and install Deepin Scrot on your Ubuntu:
sudo apt-get install scrotWhen you are finished, follow the below instructions to take screenshot in Ubuntu:
To take a screenshot of the entire screen, type:
scrot yourimage.pngUse the command below to take a screenshot of the selected region:
scrot -s Yourimage.pngMethod 6. Using Flameshot App to Take Screenshot
Flameshot is the finest option if you’re seeking an advanced screenshot program for Ubuntu. You can edit, annotate, and highlight the screenshots in addition to taking screenshots and uploading them to imgur. Using the Flameshot app you can blur and crop any part of the image, and open your screenshot with other apps. To take screenshot in Ubuntu using the Flameshot app, simply conduct a search for it in the Ubuntu Software Center to begin the installation process on Ubuntu.
Step 1. Install Flameshot App
However, if you prefer to use the terminal, open it up and run the command below to install the Flameshot app:
sudo apt install flameshotStep 2. Launch the Flameshot App
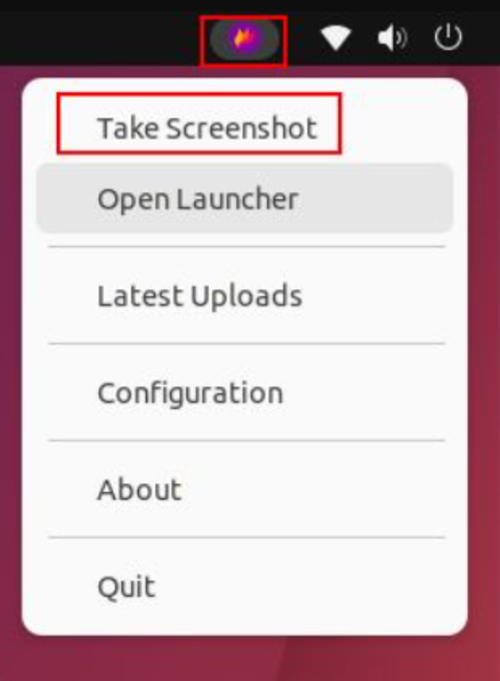
Once installed, open it from the app launcher to locate it in the top-right corner, underneath the system tray. The “Take Screenshot” option can be found by clicking on the icon in the system tray.
Step 3. Use the Flameshot App
Use your mouse to select a window, a partial region, or the full-screen option at this point.
Step 4. Save the Screenshot
While the screenshot will be saved in the Pictures folder by default, you can hit “Ctrl + S” to save the file to your selected location.
Method 7. Take Screenshot in Ubuntu With Third-Party Apps
Screen captures using third-party programs are your final resort if you’ve tried all the ways outlined above and are still unimpressed. You won’t have to pay anything, so stop worrying. You have a ton of free options to pick from because of the open-source culture of the Linux community.
There are several Ubuntu screenshot tools available, but the two greatest ones stand out. Gimp and Shutter. Let’s see how to use them to take screenshot in Ubuntu.
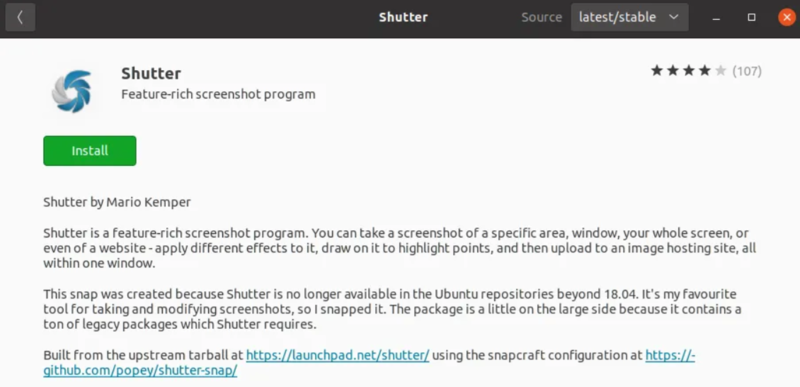
Install & Use Shutter
- First, go to the Ubuntu Software app, search for Shutter, and click on Install.
- Also, you can use the following commands to install Shutter:
sudo add-apt-repository universe
sudo apt update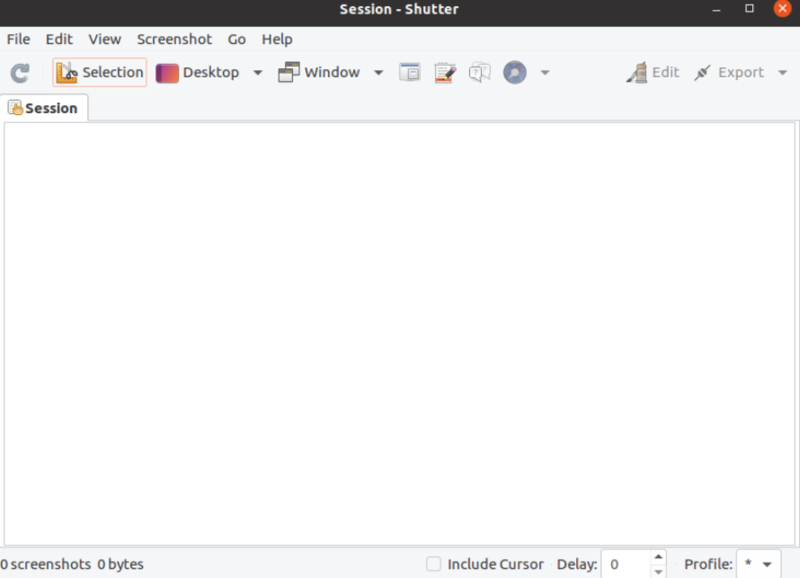
sudo apt install shutter- After the app has been set up, launch it using the app launcher. After that, you can always access it by clicking the system tray area in the top-right corner, which is where it will sit.
- After the program has been launched, as you learned in the previous methods, click “Selection” to take a screenshot of the selected area, “Desktop” to take a screenshot of the entire app, and finally “Window” to take a screenshot of a specific app window. Afterward, press “Enter“.
- It will immediately save the screenshot to the “Pictures” folder. No need to manually save it.
Install & Use Gimp
GIMP contains a lot of sophisticated features. Therefore, using GIMP is only a good choice if you need to do some extensive editing.
- To take screenshot in Ubuntu with Gimp, search for GIMP on the Ubuntu Software website, then install it there.
- Your password will be requested by the system for verification.
- Your system will install GIMP in a matter of seconds.
- Once finished, select Launch to launch the program. To capture a screenshot, choose File > Create > Screenshot.

- GIMP might be a wise choice if you anticipate needing to make some preliminary modifications to your screenshots.
- You will be presented with a few controls to manage the screenshot after selecting the option to take a screenshot.
- After you click “Snap” to snap the screenshot, GIMP will open up with the image already open for editing.
That’s it! You have just successfully finished learning 7 useful methods to Take Screenshot in Ubuntu.
Conclusion
In this article, you learned How to Take Screenshot in Ubuntu. At this point, you know 7 different methods to capture screens quickly and easily. Keyboard Shortcuts, Screenshot Apps, Gnome screenshot tool, Ubuntu Terminal, CLI tools, Flameshot App, Shutter, and Gimp apps were explained with examples to help you take screenshot in Ubuntu.
Let us know which method is your favorite choice and why. Also, if you use any other ways or tools share it with the Ubuntu lovers here.