How To Install WAMP On Windows VPS
Wamp is a brief of Windows, Apache, MySQL, and PHP. You can install WAMP on Windows VPS or your own Windows to test and develop your website locally or even provide it to your users.
Before starting to install WAMP on Windows VPS, let’s check what WAMP means exactly and briefly.
- W: Windows: No need to explain. It is the operating system of your server.
- A: Apache: is a famous web-server. The web-servers duty is to provide required information to the browser.
- M: Mysql: is the most famous database application.
- P: PHP: is PHP is a language that helps you create dynamic web pages.
The difference between installing WAMP on Windows VPS or your own Windows is that a Windows VPS is always connected to the Internet and electricity, so your website can always be up.
Steps To Install WAMp On Windows VPS
- Install Prerequisites
- Download WAMP
- Install WAMP On Your Windows VPS
-
Installing Prerequisites
To install wamp on windows VPS and run it correctly, first, you should install the Visual C++ library on your server.
-
Download WAMP On Your Windows Server
You can download the latest version of the WAMP On The Below Link.
-
Install Wamp On Windows VPS
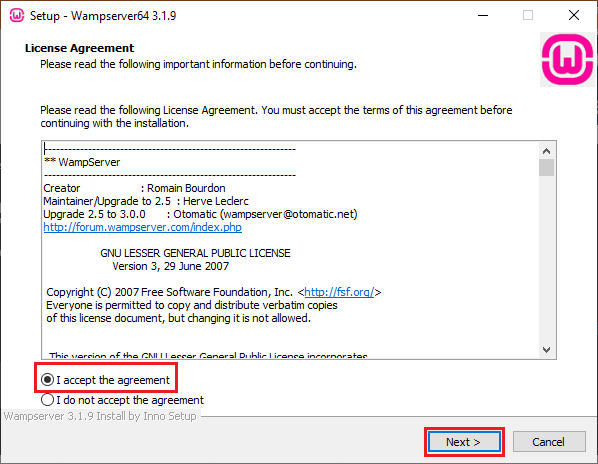
Step 1. The language should be selected. Accept the agreement and click Next.
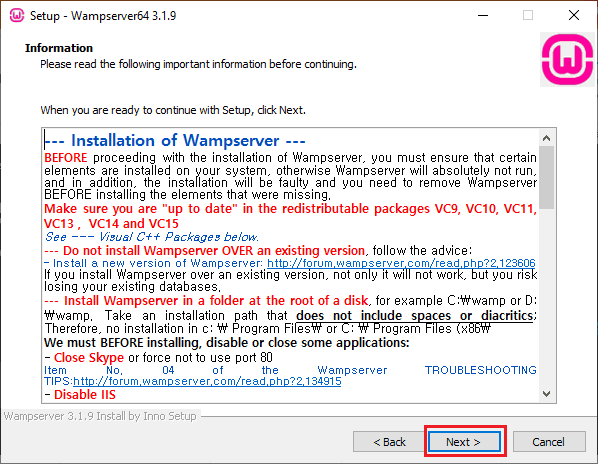
Step 2. Read the important information and click Next.
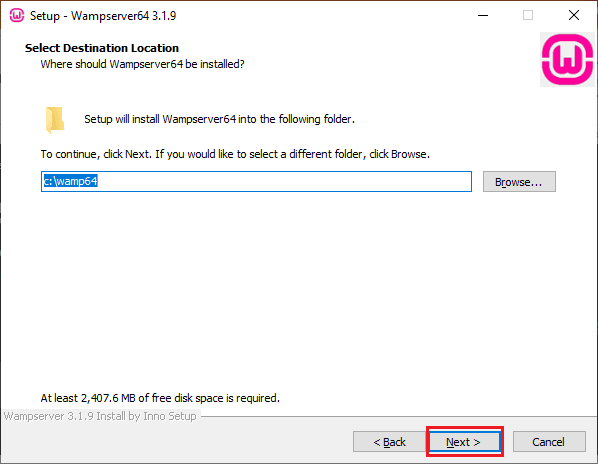
Step 3. Select the destination folder that the WAMP should be installed in.
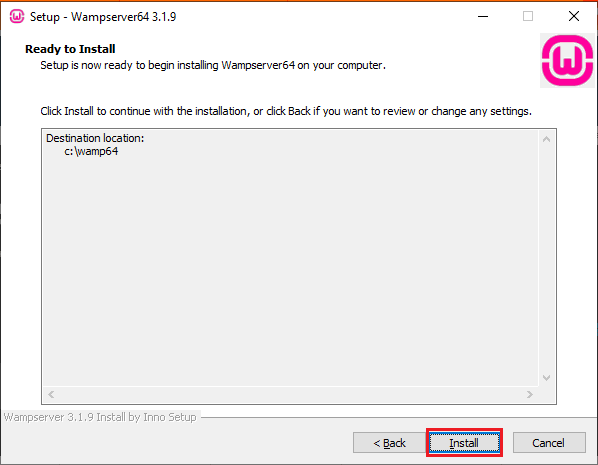
Step 4. Click on Install to start the installation process:
Step 5. Before the install finishes, you will be asked 2 questions.
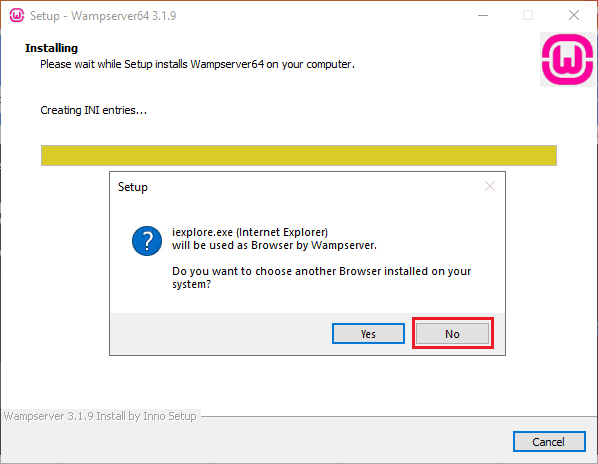
Question 1. The first one is about the default browser, so if you choose yes, you will be asked to choose a new browser. If you choose no, the default browser will be kept, which is Internet Explorer.
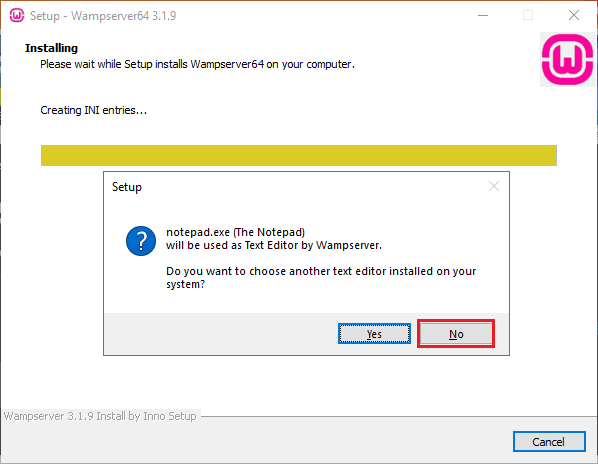
 Question 2. The second one is about the default editor. If you choose yes, you will be asked to choose a new editor. If you choose no, the default editor will be kept, which is notepad.
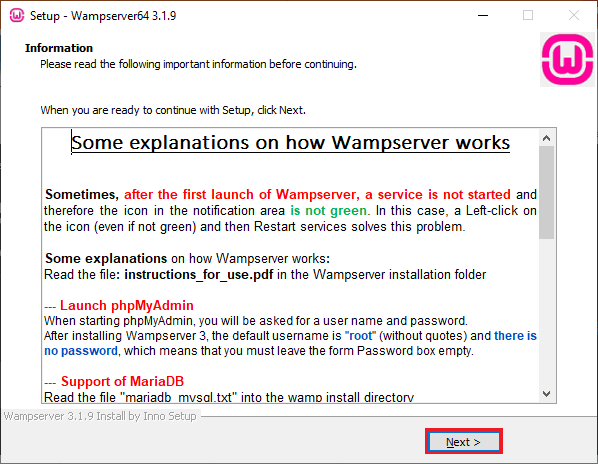
Step 6. In this step, you will be shown how Wampserver works, and you should click Next.
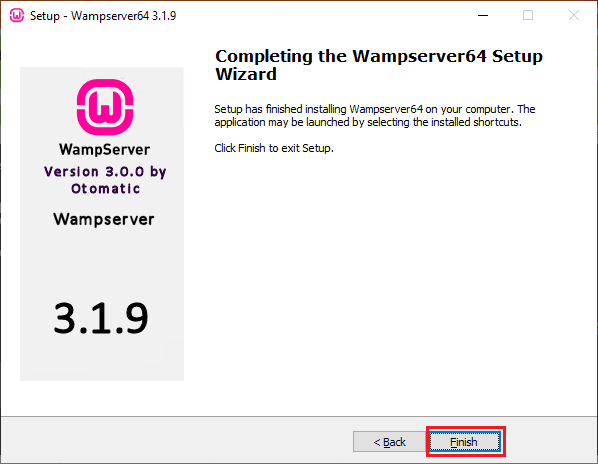
Step 7. The installation is finished. You can click on Finish.
Note: If you faced any error when installing it, you can ask it in the comments section.
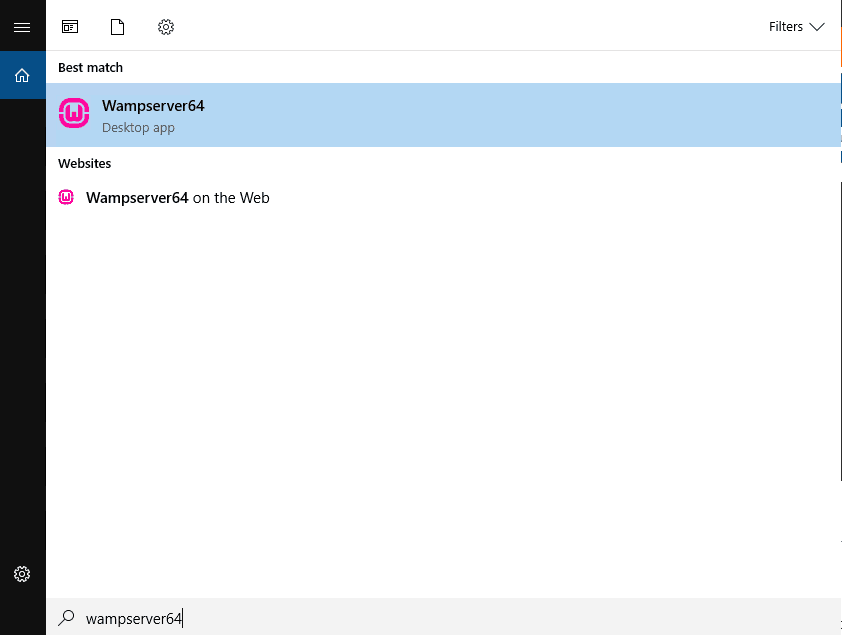
Step 8. Once the installation is finished, you can start the wamp service by writing the wampserver64 in the search bar.
Once you click on it, the icon of the Wamp should be green.
If it’s not, try to restart the Wamp by right-clicking on the Wamp icon and choosing the Restart All Services.
If still, it was not green, it means there is a problem with the wamp server.
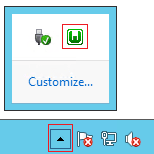
In this situation, you may try to reinstall the wamp. If still, it’s not working after reinstall, it should be checked and troubleshoot completely.
Troubleshoot WAMP Not Starting
- Click on the WAMP icon select Apache -> Service -> Test Port 80; this will check if any other program uses the port.
- Also, try this: Select Apache -> Service -> Install Service. This will make apache use port 80 if it is not already used by any other program like IIS or Skype.
Conclusion
In this topic, we tried to install WAMP on Windows VPS. We hope you do it successfully, too, and if you faced any issue, please do not hesitate to contact us in the comments section.