Connect to Linux Server from Windows with Putty
Connect to Linux Server from Windows using PuTTY, a free SSH client that enables secure remote access by entering the server IP, username, and password. This allows command-line control of the Linux server directly from Windows.
🤖AI Overview:
Connecting to a Linux Server from Windows typically uses PuTTY, a widely adopted free SSH client. Users install PuTTY on their Windows machine to establish secure SSH connections by providing the Linux server’s IP address and login credentials. This method offers efficient remote command-line management of Linux servers.
What is putty in Linux?
For Windows, Linux, and Unix-like operating systems, PuTTY is a free and open-source GUI client that supports a broad number of protocols, including SSH, Telnet, Rlogin, and serial. This graphical terminal tool called PuTTY Linux is capable of connecting to serial ports and supporting the SSH, telnet, and rlogin protocols. It can also establish a connection to raw sockets, usually for debugging purposes. The main usage of Putty on Linux is probably debugging: connecting to raw sockets and connecting to serial ports. This is because most users would just use the preinstalled OpenSSH in a terminal window on Linux for basic SSH access.
Particular advantages of using Linux PuTTY include when working away. Configuration is more dependable and simple. And after a brief interval, it connects to connect remotely. Windows administrators typically use PuTTY as SSH and telnet clients to connect from their local Windows PCs to remote Linux servers. PuTTY, however, is not just for Windows. It is also well-liked by Linux users.
Connect To Linux VPS with Putty
Step 1. Download & Install Putty
Firstly, you need to download and install Putty software. Most Linux distributions have official default repositories where PuTTY in Linux can be installed. Here, we go as follows.
Download a suitable software version of Putty, if your system support 64-bit so download it, if not download the 32-bit version. Then, complete the installation steps and Install the Putty to Linux connection!
Step 2. Use Putty to connect to a VPS using Password
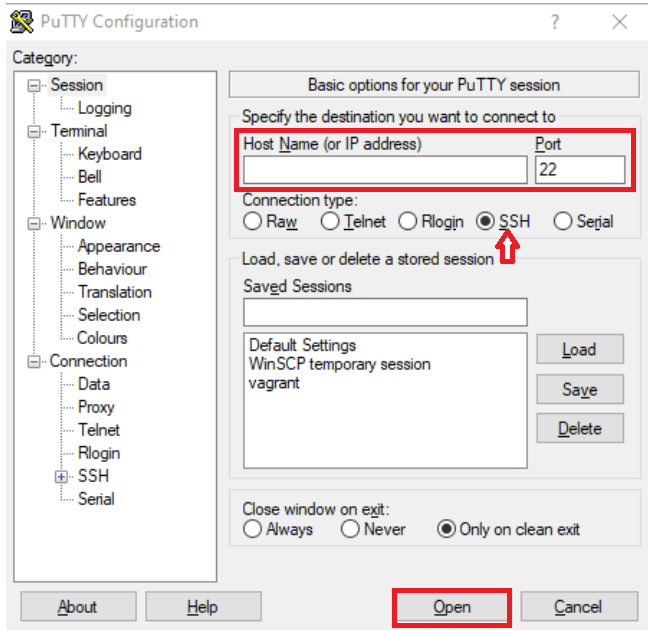
Search the “Putty” in your Windows search box and open it. In the launched window, put the IP or Hostname and click Open. Example, IP: 192.168.1.14 or Hostname: server1.domain.com
Note: The default SSH port number is 22, also make sure the SSH radio button is selected!
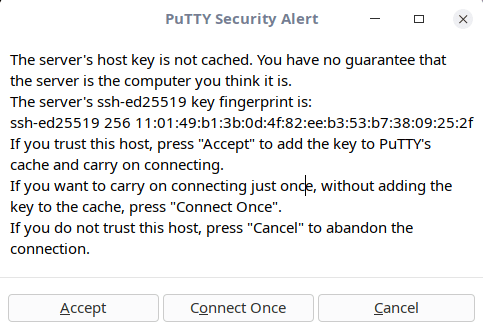
It will pop up a Warning page at the first login! If you are sure that you have entered the correct information, click Yes. Future connections do not show this warning because the host key is now cached on the local computer.
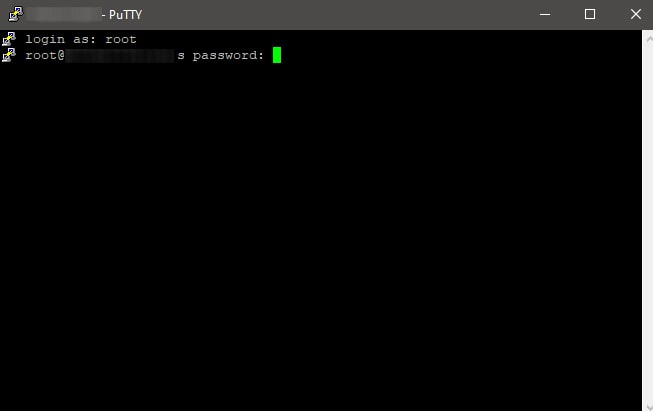
Now the connection is created, Just type the Username and press Enter, After that, type Putty Password and press Enter again.
Note: Due to security reasons, You won’t see the typed characters as a password!
 Hola! You are in!
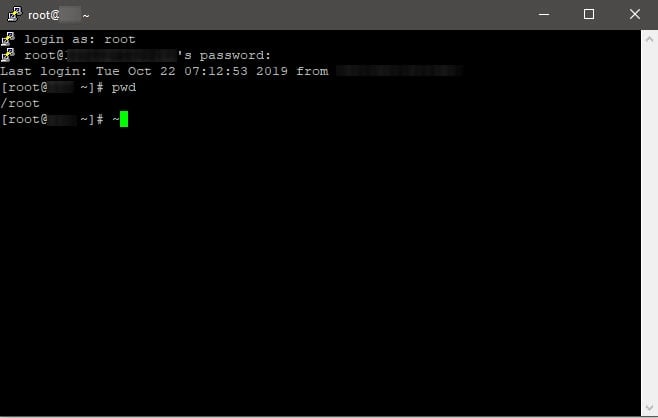
Using the Putty SSH client, you can connect to your account.
How to change the Linux VPS Root Password
We always recommend changing the default root password to a personal one! You can use passwd command to do it in 3 simple steps!
- Execute the
passwdin the shell prompt
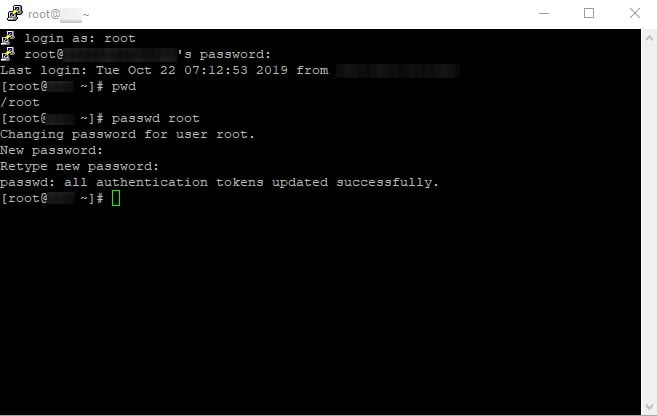
- Enter the new password. As mentioned, the password does not echo to the screen.
- Reenter the new password and press Enter.
You’ve now used PuTTY to successfully get into your SSH account and configured it to connect using a secure SSH key pair. You only need to double-click on the stored session you established and input your passphrase to connect securely in the future.
What are Putty Alternatives?
PuTTY still has a lot of users that use it to connect to Linux servers and network devices using SSH, but its single-session handling design has some drawbacks. Today, a wide variety of SSH clients and terminal emulators that aim to outperform PuTTY are readily available. Let’s look at different online PuTTY alternatives and how they differ from this venerable program.
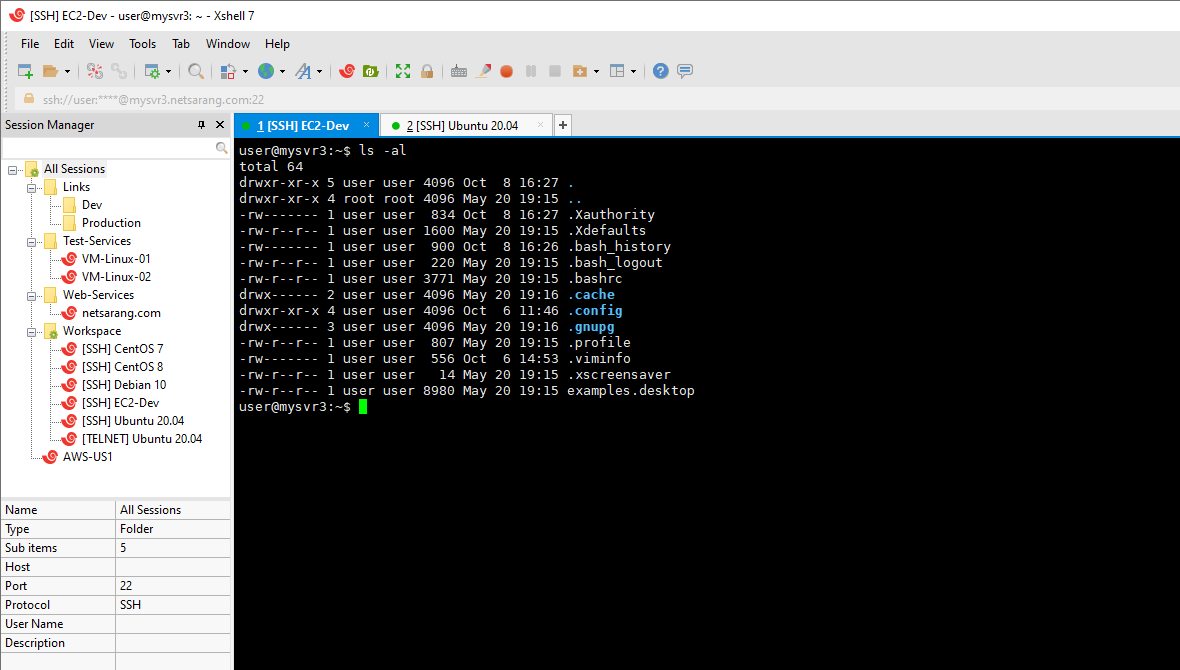
Xshell
An application called Xshell was created by Netsarang as part of their PC X software collection to simplify the interface between UNIX, Linux, and Windows systems. The SSH client component of that package, Xshell, was created with difficult administrative responsibilities in mind. You can manage numerous connections with a session manager, and switching between them is simple with Xshell’s tabbed GUI interface. Complex scripts can be written more easily with Xshell’s draft & send interface. Xshell supports cutting-edge encryption techniques like GSSAPI and PKCS#11 if security is a priority.
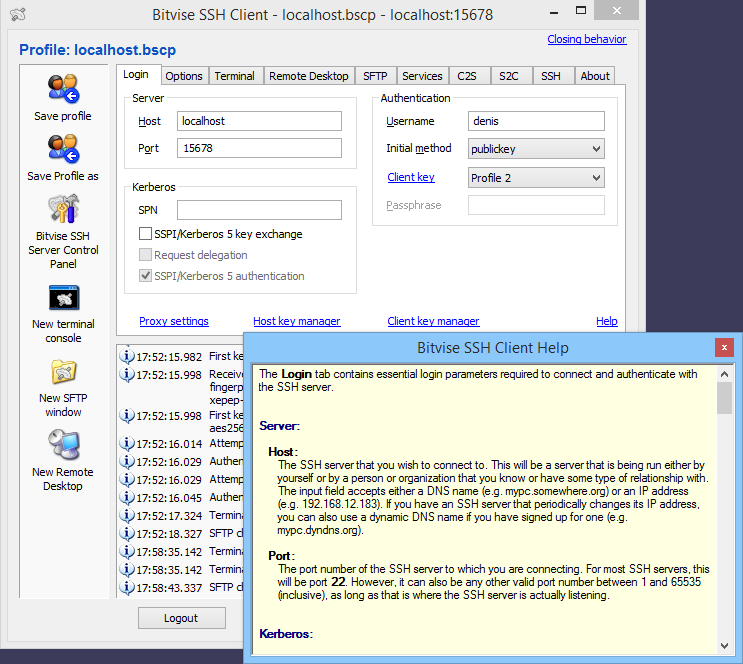
Bitvise SSH Client
The Bitvise SSH Client is a free Windows utility that works in conjunction with the Bitvise SSH Server but can also be used independently. For up to 30 days, the Bitvise SSH Server is free. The SSH client is free forever and compatible with Windows OS. It is a contemporary terminal emulator that supports SFTP, SSH, SCP, and tunneling connections and offers both a GUI and command-line interface. Moreover, complex tunneling features are used. Bitvise SSH Client offers features like dynamic port forwarding and proxy server functionality, coupled with the security of encryption technology. To speed up the connection procedure, Bitvise has integrated typical activities like Remote Desktop forwarding into the Interface.
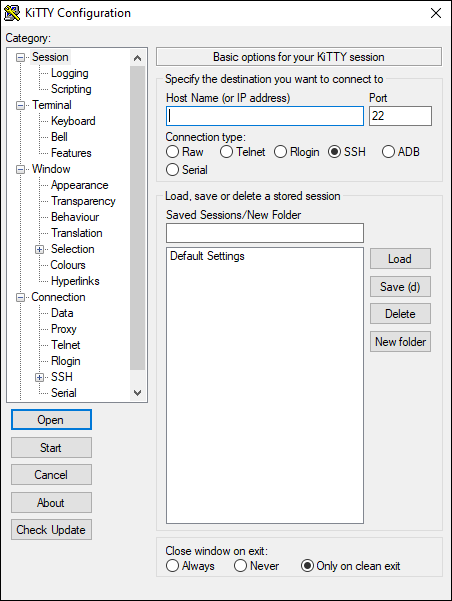
Kitty
A fork of PuTTY is KiTTY. That implies that the source code of PuTTY was previously copied and modified to create this unique program. The original program has been altered and upgraded since that copy was made. As a development of the PuTTY code, KiTTY is the genuine heir to PuTTY, therefore if you’re looking for a PuTTY alternative, this is it. The utility contains SCP for secure file transfers and offers an SSH secure connection. Kitty is also routinely updated, therefore this utility has steadily strayed from PuTTY’s basic functionality. Only Windows users can download Kitty for free. You can log into distant Windows, Linux, Unix, and macOS devices even if the interface only supports Windows.
You can write scripts to automatically log in and execute commands on the command line of the remote computer. The interface can display numerous concurrent sessions.
You are recommended to explore other alternatives of Petty to find the best option.
Conclusion
Learning to connect to a Linux server from Windows is a critical first step in remote Linux server management. Utilizing SSH ensures secure communication between your Windows machine and your Linux server.
Whether you prefer the familiar interface of PuTTY, the built-in capabilities of Windows PowerShell, or the Linux environment provided by WSL, each method offers reliable ways to establish a secure connection.
Incorporating SSH key authentication and proper firewall configuration enhances security. With practice using these tools and methods, beginners can confidently manage Linux servers remotely and securely.
FAQ
2. How do I install PuTTY on Windows?
Download PuTTY from its official site, select the appropriate version for your system, and follow the installation prompts.
3. What details are needed to connect using PuTTY?
You need the server’s IP address or hostname, your username, and the SSH port number, typically 22.
4. How do I establish a connection with PuTTY?
Enter the server IP or hostname in PuTTY, select SSH, and click Open. Then provide your username and password when prompted.
5. Are there alternatives to PuTTY?
Yes, alternatives include Xshell, Bitvise SSH Client, KiTTY, Termius, and MobaXterm, offering various advanced features.
6. How can I enhance security when connecting?
Use strong passwords, consider SSH key authentication, and disable root login over SSH if possible.
7. What if I get a security warning on first connection?
This is normal; PuTTY warns when it does not recognize the server. Accept it if you trust the server.
8. Can PuTTY connect to servers other than Linux?
Yes, PuTTY supports different protocols and can connect to Unix and various network devices.
9. What benefits does PuTTY offer over built-in Windows tools?
PuTTY provides a graphical interface, multiple protocol support, and customizable SSH connection options.
10. How do I change my Linux server root password after connecting?
Run the 'passwd' command after login and follow the prompts to update the root password.
Does putty linux support X11 forwarding?
Yes, putty supports this feature. If you don't have Putty installed on Linux, Linux SSH clients also support X11 forwarding.
Thank you for sharing this information with me. Thank you
Great content! It was simple, thank you! Keep it up!
Awesome post! Keep up the great work! :)