Install Arch Linux: A Beginner’s Guide by Ashley B
Install Arch Linux means setting up the Arch Linux operating system on your computer. To install Arch Linux, download the official ISO, create a bootable USB, and follow the installation steps.
🤖AI Overview:
Install Arch Linux is the process of setting up the Arch Linux operating system on a computer. The main goal is to provide users with a flexible and minimal Linux environment that they can customize according to their needs. Installing Arch Linux typically involves preparing your system, partitioning your disk, and following guided commands to configure the core operating system. This approach gives users full control over their software and system setup.
Introducing Arch Linux OS
Before we teach you how to install the Arch Linux operating system, we want to answer your most basic question about what Arch Linux is, and We will briefly introduce you to this practical and popular operating system. As we have already given a complete explanation about Arch Linux, this is a minimalistic and light Linux distribution operating system developed for professional GNU/Linux users and has tried to be user-friendly.
Arch Linux OS is known for its simplicity, modernity, pragmatism, user-centricity, and versatility. By promoting a DIY attitude among users, this distribution has made it possible to customize features and change various aspects of the operating system according to the user’s needs.
Why Arch Linux OS?
Usually, after buying a Linux VPS, professional Linux users seek a distribution of Linux that can take complete control of the operating system and meet every need freely. Arch Linux has attracted many users with its flexibility and customization capabilities. Being open source and free, as well as being light, modern, and having a minimalist environment, are the advantages of Arch Linux that add to its popularity.
Arch Linux supports x86-64 architectures and strives to provide a modern and optimized system. Adopting a Do It Yourself (DIY) attitude, the Arch Linux operating system allows users to adjust every intricate detail. Finally, the operating system gives you complete control over its performance from when the ISO is loaded until the installation is complete.
As a result, in Arch Linux, your system does not have a native desktop, and controlling everything from the desktop environment to the details required for ease of work is the user’s responsibility. Arch Linux allows the user to use the latest features and updates based on the release model version and also, for taking advantage of the new features that the update offers, enter the following simple command and upgrade your system:
Pacman -SyuWhat is the arch user repository?
In launching and installing the operating system Arch Linux, you will hear the term arch user repository, which we felt necessary to introduce you to, is a community-based repository for Linux packages developed by users.
The arch user repository is the only platform supported by Arch x86_64. The official package repositories and user repositories (AUR) contain 58,000 binary and source packages, which is close to Debian’s 68,000 packages. However, these two approaches perform differently in packaging.
AUR is a collection of user-generated PKGBUILD scripts for packages already available in the official Arch repositories. These PKGBUILD scripts simplify the process of installing from the source by verifying dependencies, listing them, and setting compatibility with the system architecture. Helper programs for AUR can also simplify package installation and download. However, due to existing security risks, such tools are never distributed through official channels. This is why the Arch development team avoids putting Additional software in the official distribution.
What is Pacman?
By default, packages are managed by Pacman. Pacman is a package manager that can boot your system with the latest updates, remove or restore packages, and even detect dependencies automatically. Arch Linux packages, designed specifically for the x86-64 architecture, are available from the Arch package repositories. Pacman can also be used to install and configure programs that are in tar.gz or tar.zst package formats.
Before version 4.0 0 0 Pacman, the Arch closure manager did not support signed closures. During the installation and download stages, packages and their metadata were checked for correctness, and the introduction of malicious code from compromised repositories or unauthorized mirrors was prevented.
The close signature option was included in Pacman 4.0 0.0 but was disabled by default. The developers made closing the signature necessary in November 2011. It was stopped by default on March 21, 2012, and reactivated in June 2012.
What is an arch build system(ABS )?
ABS is a program like a port that can compile source code into binary packages that can be installed with Pacman. ABS includes a set of shell scripts known as PKGBUILD that can be used to modify and compile any official Arch package. ABS also allows you to recompile the complete system with different compiler options (compiler-modified flags). Alternatively, pkg.tar.gz packages can be created from unofficial sources using the makepkg utility. In addition to these tools, Pacman allows you to manage and install new packages.
How to install Arch Linux OS
After getting familiar with the Arch Linux operating system and terms related to it, let’s get to the article’s main topic, which is the installation steps of the Arch Linux operating system. Before proceeding with the installation of the Arch Linux operating system, make sure that you have the following conditions:
prerequisites
- At least 512 MB of RAM (2 GB of RAM is recommended.)
- At least 2 GB of free disk space (we recommend 20 GB of free hard disk space for initial use with the desktop environment)
- A blank DVD and the software and hardware needed to burn it
- A USB with at least 2 GB of free space for storage
- Having a system compatible with x86 64 (i.e., 64 bits)
- Active internet connection
- Familiarity with the Linux command line
Follow the instructions below to set up Arch Linux on your computer.
Step 1:Downloading Arch Linux OS
The first step starts with downloading the Arch Linux OS through the provided link and the Arch Linux download page. You can download the Arch Linux operating system in two ways:
- Via BitTorrent
- Via direct download
If you downloaded the operating system via BitTorrent, choose one of the following options:
- Downloading the torrent file
- Giving your BitTorrent app a magnet link
Alternatively, you can scroll the page until you find a mirror that is closer to your current location.
Step 2: Create a bootable Live USB or burn the Arch Linux ISO to a DVD
This step can create a bootable USB or DVD from the Arch Linux ISO file.
Create an Arch Linux Live USB
In order to create a Live USB of Arch Linux in the easiest way, the best option is to use the Etcher GUI program, which is compatible with both Linux and Windows operating systems.
You can use the dd command in the Linux system to create Live USB. Using the following command, Linux users can create a bootable USB drive (Live USB):
dd bs=4M if=/path/to/archlinux.iso of=/dev/sdx status=progress && syncIn the command above, to create a Live USB, replace /path/to/archlinux.iso with the path of the downloaded ISO file and /dev/sdx with the path of your USB drive, and you can also enter the lsblk command to access your drive information.
Burn the Arch Linux ISO to a DVD
To install the Arch Linux operating system from DVD, you can use AnyBurn or Brasero tools to burn the downloaded operating system on a blank DVD.
Step 3: BootUp Arch Linux
- After saving the Arch Linux ISO as a Live USB or burning this operating system to a DVD, reboot your computer while equipping your system with the Arch Linux installation media.
- Pressing the F2, F10, or F12 keys as appropriate for your system allows you to select the device from which the system will boot.
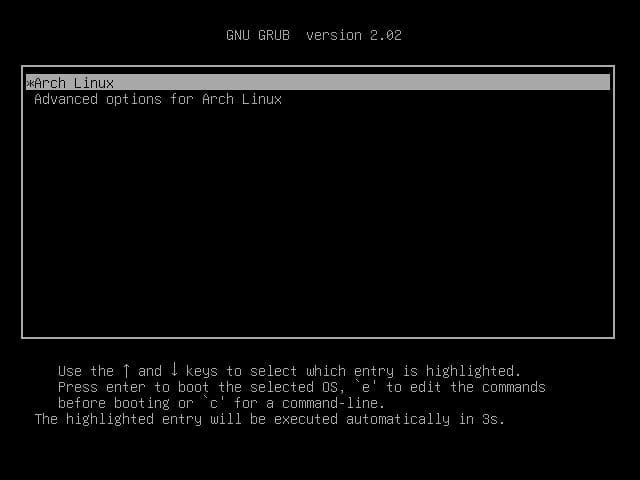
- By referring to the boot settings menu, specify the desired installation media between Live USB and DVD options. If Arch Linux is Launched, it will appear with the following image:
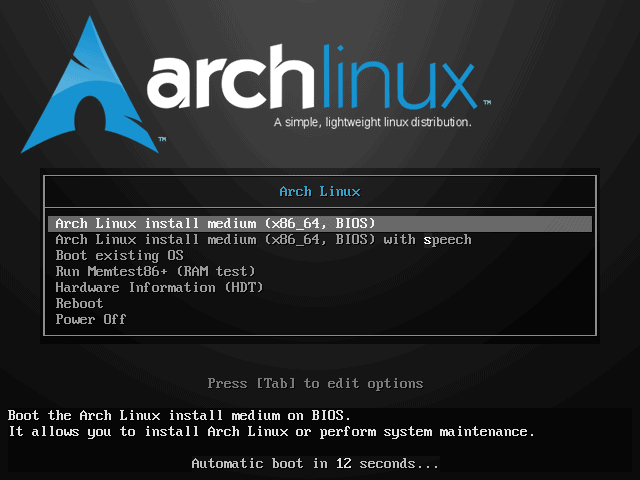
- Select Boot Arch Linux (x86 64) and press Enter to start the installation process.
Step 4: Set Arch Linux keyboard defaults
When installing Arch Linux, the keyboard layout is based on the US keymap by default. To use and display alternative formats and layouts, enter the following command:
ls /usr/share/kbd/keymaps/**/*.map.gzThe loadkeys command, along with the desired layout file name, applies the desired changes to the keyboard layout. To switch to the German keyboard layout, for example, you can type the following command:
loadkeys de-latin1Step 5: Check and confirm online internet connection
Use the ping command to check the internet connection:
ping -c 3 google.comWhen installing Arch Linux, you may find it helpful to read the Arch Linux wiki’s wireless configuration if you are using a wireless Internet connection.
Step 6: Enable Network Time Protocols (NTP)
To benefit from automatic system time updates over the Internet, you must enable the Network Time Protocol (NTP).
timedatectl set-ntp trueAlso, to check the NTP service status, use the following command:
timedatectl statusStep 7: Partition the disks
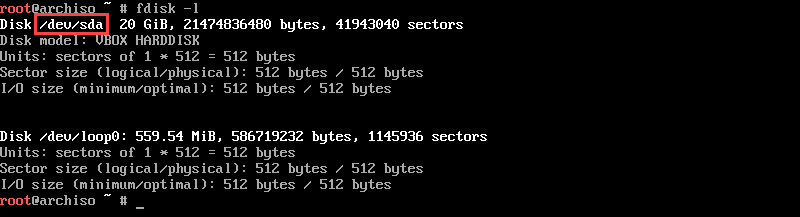
First, list the disk drives that are accessible with the fdisk command:
fdisk –lThen select the name of the disk you want to partition. Disk names are in the format /dev/sdX before, where X is the drive letter in this format.
fdisk /dev/sda
We recommend that it is better first to delete the existing partitions on the disk using the d command to free up disk space and then to create a new partition using the n command.
Note: when checking the disk drive list, disregard disk drives ending in “loop” or “airoot.”
Run thecfdisk command to partition the drive:
cfdisk /dev/sdXNote: Instead of the letter X, the drive letter of the disk you want to partition is substituted.
The next step is to use the arrow keys to specify dos for the label type, and press Enter to confirm.

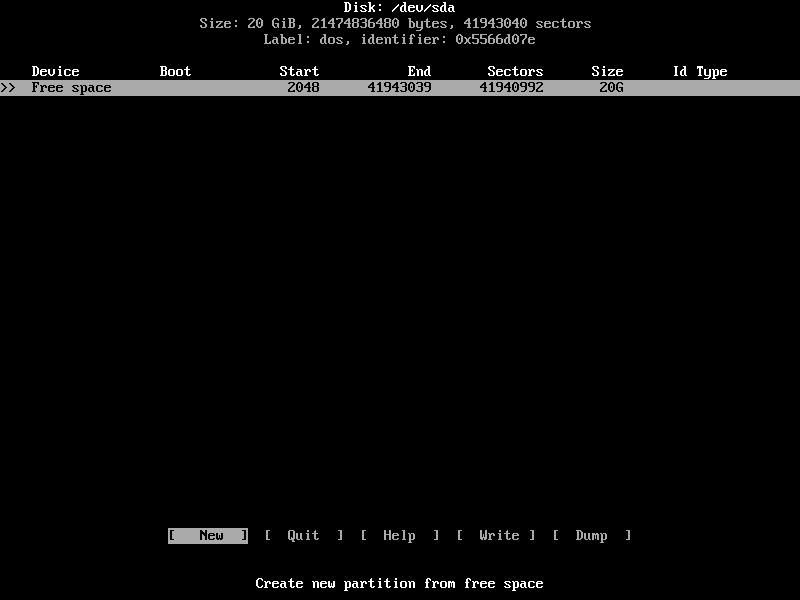
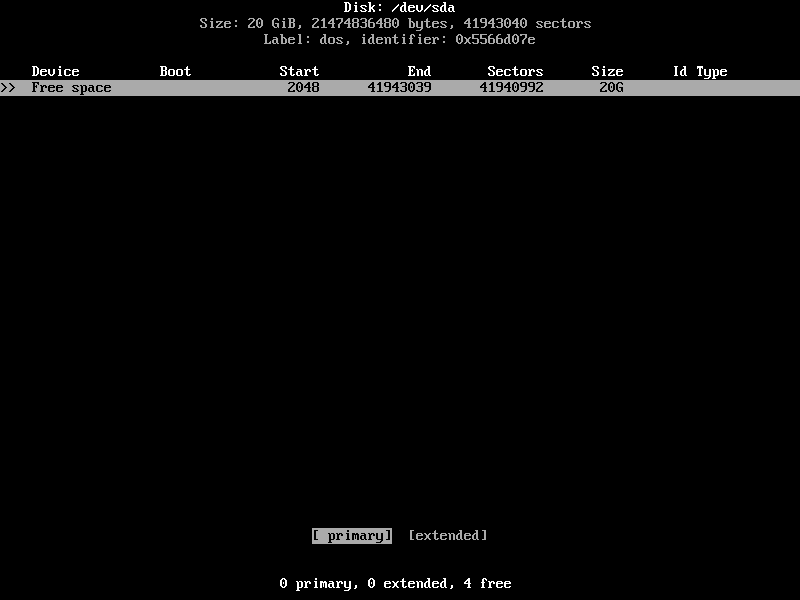
After selecting a disk, a new window will appear, showing the free space available on that disk and allowing you to allocate it. To create a new partition on the disk, select the New option at the bottom of the screen and press Enter.
Specify the desired size for the partition (in GB) and then press Enter to confirm.
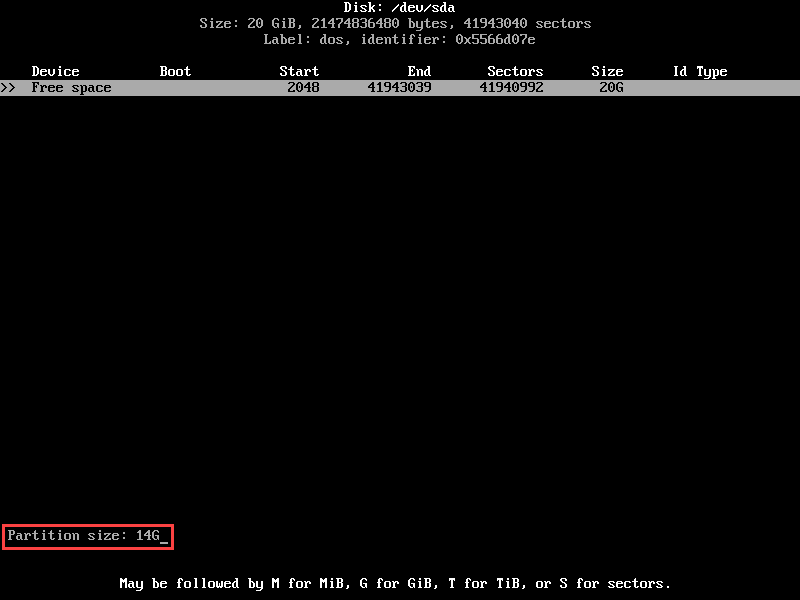
Note: Remember that the swap partition needs a certain amount of free space (disk space at least two times the amount of RAM), So consider enough free space for this partition.
Set the partition to Primary when prompted and confirm with entering.
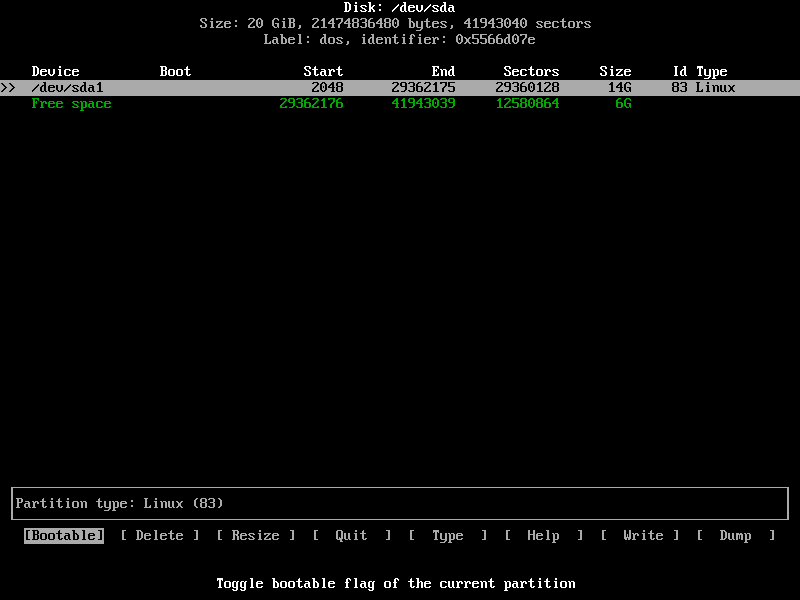
Now both the available space on the disk drive and the newly created partition are visible.
At the bottom of the page, select Bootable and confirm by pressing Enter. This ensures that Arch Linux always uses the root partition when booting.
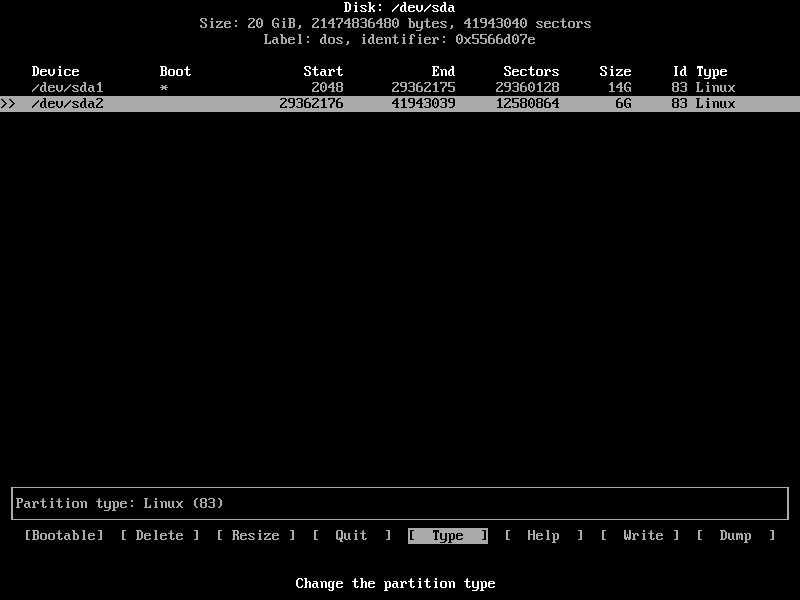
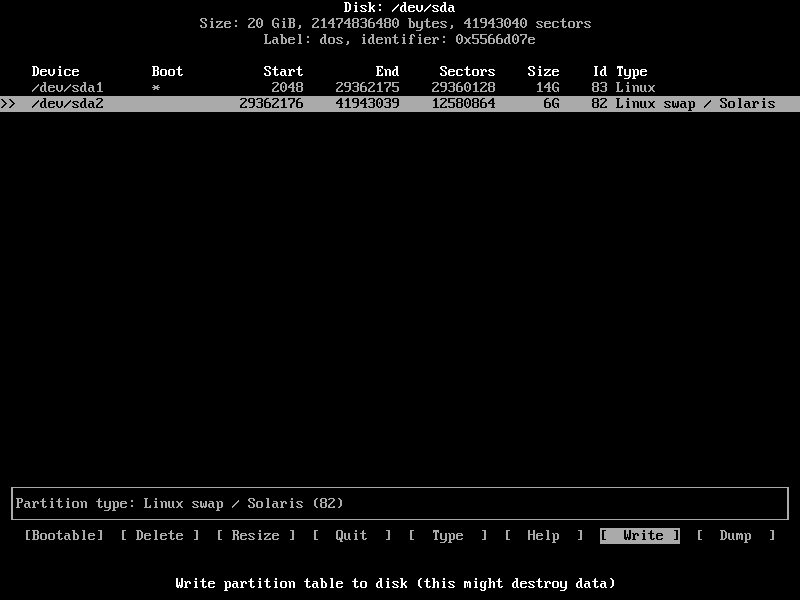
In order to create a second partition using the remaining disk space, you need to follow the steps outlined above as described in the previous step. The new partition does not need to be booted, so select the Type option at the bottom of the screen and press Enter.
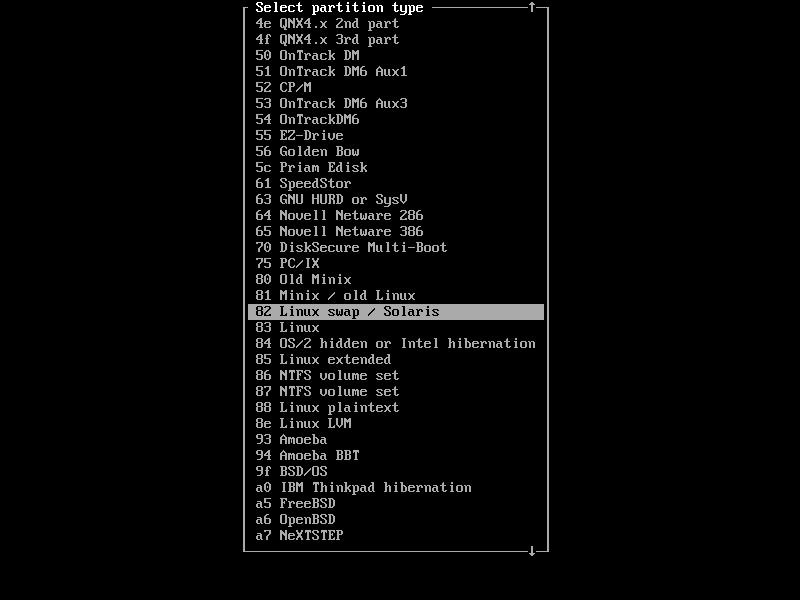
Scroll down the list until you get to 82 Linux swap / Solaris. Press Enter to confirm. As a result, a swap partition is created by doing this step.
Click Write at the bottom of the screen to confirm the drive changes. Type the answer yes and press Enter.
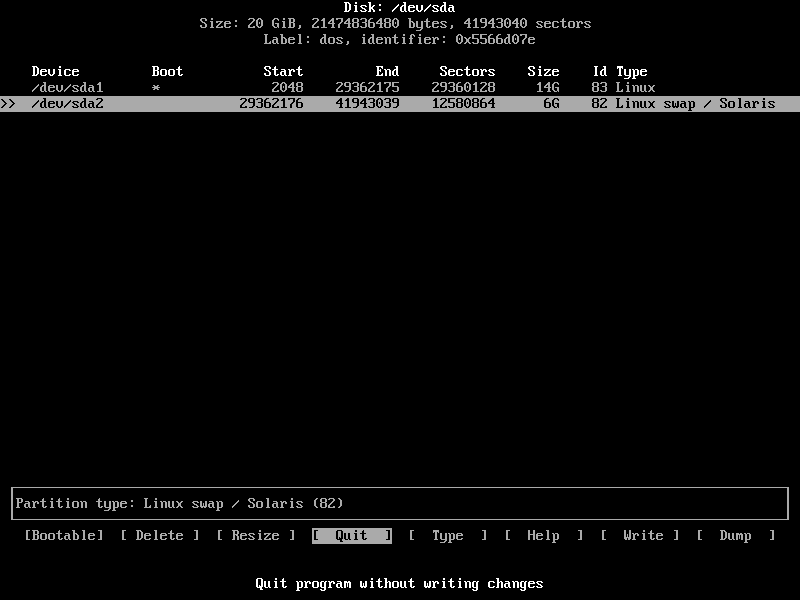
To exit the cfdisk screen, select Quit and press Enter.
Step 8: Create a Filesystem
Before you can install Arch Linux, you need to format the new partitions. To do this, create a file system on each partition.
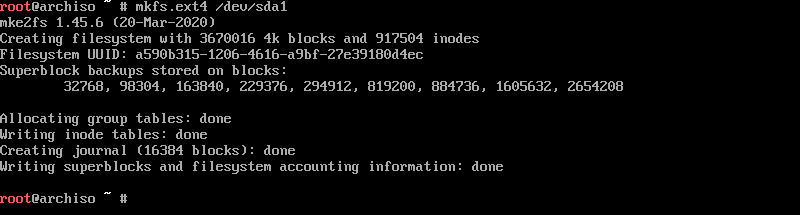
First, create the ext4 file system using themkfscommand for the bootable partition:
mkfs.ext4 /dev/sdX1
Then, use themkswapcommand to set up a file system on the swap partition:
mkswap /dev/sdX2
Step 9: Mount the file system
Run the following commands to mount the newly created file systems:
mount /dev/sdX1 /mnt
swapon /dev/sdX2
Mount: Mounts the file system on the bootable partition.
Swapon: Activates the swap space file system.
X: belongs to the drive letter of the disk containing the partition.

Step 10: Check the mirror list to find a suitable mirror
Arch Linux downloads its files through a mirror during the installation process. If you try downloading files from a mirror far from your location, you will face installation failure due to the slow installation process. This issue has always been a challenge in installing Arch Linux because there is a messy list of so many mirrors that the first mirror at the top of the list is always automatically selected, which is not guaranteed to be ideal.
If you want to improve your download speed, the fastest mirrors should be prioritized in the mirror list.
- As a solution to solve this problem, first synchronize the Pacman repository so that you can install and run the software:
pacman –Syy

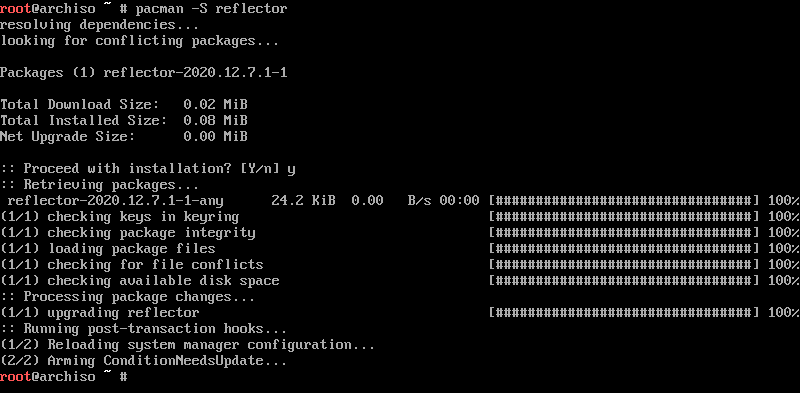
- After setting up a reflector, the mirror can be updated and organized based on download speed. To add a reflector, enter the following command:
pacman -S reflector
- If you feel the need, you can create a backup copy of the mirror list using the following command:
cp /etc/pacman.d/mirrorlist /etc/pacman.d/mirrorlist.bak- Utilize the reflector to update the list of mirrors:
reflector -c "XX" -f 12 -l 10 -n 12 --save /etc/pacman.d/mirrorlistNote: You must enter your country code instead of XX; for example, if you are in the UK, replace it with the UK.
Important: You will access the mirror list via /etc/Pacman.d/mirror list.
Step 11: Install Arch Linux
Use the pacstrap script to install Arch Linux on the bootable partition:
pacstrap /mnt base linux linux-firmwarThe duration of the installation of the operating system depends on the speed of your download.
Step 12: Configure Arch Linux
After completing the Arch Linux installation process, it is necessary to configure.
Create fstab file
The fstab file determines the prioritization and how to mount disk partitions, remote devices, blocked devices, and other data sources in the file system. To create the fstab file, run the following command:
genfstab -U /mnt >> /mnt/etc/fstabUse Arch-Chroot and select the mounted disk as the root
To switch to a freshly installed Arch Linux system, use the arch-chroot command and enter the installation disk as root:
arch-chroot /mntSpecify the time zone
- The first step is to list all available time zones:
timedatectl list-timezones- Set your time zone and write its name.
Note: You can exit the list by using the command q or Ctrl+C.
- Call the following command:
timedatectl set-timezone Time/ZoneTo adjust, replace Time/Zone with the name of the desired time zone (for example, Europe/Paris).
Zone setting
Locale settings determine how the system displays text, dates, numbering, and the currency used, and you can also change your system language.
First, to check and find the name of your location, you need to open the file locale.gen, which contains different regions of the world. For this purpose, enter the following command:
sudo nano /etc/locale.genThen uncomment their names to use and enter your desired local name or other items you wish to use.
Exit the desired environment by typing Ctrl + X and type Y to save the changes.
Create a file containing the settings for your region by entering the following command:
locale-gen
echo [locale_name] > /etc/locale.conf
Replace the desired locale name in the [locale_name] field.
Note: You can change the settings related to the location and time zone of the operating system later.
Setting the Hostname file
- The first step is to create the Hostname file and then add your hostname to that file by typing the following command:
echo [your_hostname] > /etc/hostname- Create a host file with the Touch command:
touch /etc/hostsAdd the following content to the host’s file you created:
127.0.0.1      localhost
::1        localhost
127.0.1.1 [your_hostname]
Enter the following command to enable Dynamic Host Configuration Protocol (DHCP):
systemctl enable dhcpcdSet Root Password
To set a new root password, use the passwdcommand:
PasswdAfter entering the passwdcommand, you will be prompted for a new password to confirm the changes.
Step 13: Install Grub Bootloader
To install Grub Bootloader according to whether your system supports UEFI or not, you can use two methods:
Launch GRUB Bootloader on a non-UEFI system
- Add GRUB bootloader packages with the help of the Pacman manager:
pacman -S grub os-prober- Start installing GRUB bootloader:
grub-install /dev/sdXNote: replace X with the letter of the driver on which GRUB is to be installed
To create a GRUB configuration file, you can enter the following command:
grub-mkconfig -o /boot/grub/grub.cfgInstall GRUB Bootloader on a UEFI system
1. First, use Pacman Manager to install GRUB bootloader packages:
pacman -S grub efibootmgr2. Next, you need to create a directory for the EFI partition:
mkdir /boot/efiTo create a directory in Linux using the mkdir command, our article can guide you completely.
- After that, mount your bootable partition in the new directory you created:
mount /dev/sdX1 /boot/efiNote: replace X with the letter of the disk drive on which the partition is located.
- Install GRUB by running the following command:
grub-install --target=x86_64-efi --bootloader-id=GRUB --efi-directory=/boot/efi- At this stage, create the GRUB configuration file using the following command:
grub-mkconfig -o /boot/grub/grub.cfgcreate an additional user:
It is better to create more than one root user account in the system you have booted. Because if you have only one root user account, you can access the root user account without needing to authenticate for each login. But if you have more than one root user account, authentication happens every time you log in, and also The system’s security is also provided.
Therefore, if you want to create an additional user, you must use theSudocommand. If you haven’t installed the sudo package yet, do it with the following command:
pacman -S sudoIn the next step, you need to give permission to create a new user and specify a unique name for the new user, which we have considered asam here:
useradd -m asam
passwd asam
For the new user, specify a password and confirm it. So you have added the new user to a select group with specific permissions. It is necessary to be a member of the wheel group for the extraordinary performance of a user:
usermod -aG wheel,audio,video,storage asamThe last step is to uncomment the line in the visudo file that contains the word “wheel.”
This action typically launches the VI editor. Therefore, we must force the use of nanotechnology for:
EDITOR=nano visudoFinish your work by saving the changes and then exiting the file.
Installing the desktop environment (GNOME)
To get started, you need to start the X server. Use the following command to install Network Manager and Xorg as display servers.
pacman -S xorg networkmanagerThen use the following command to install the GNOME desktop environment on Arch Linux:
pacman -S gnomeFinally, you must enable GDM Arch Display Manager along with Network Manager.
systemctl enable gdm.service
systemctl enable NetworkManager.service
Step 14: Exit the Arch-Chroot Environment and reboot
you exit the Arch-Chroot Environment by entering the following command:
ExitFinally, use this command to unmount the root partition:
umount /mntor
umount -l /mntFinally, shut down your system:
shutdown nowThen you restart the system:
sudo rebootStep 15: Log in to Arch Linux
Make sure you disconnect the live USB before rebooting the system. If the installation is successful, upon system reboot, the Grub loading page and GNOME login prompt will appear, giving you the option to load Arch Linux. To start uploading, please press Enter and then enter your custom password to access your account.
Conclusion
Every step to install Arch Linux is important, from preparing your system and downloading the correct files, to setting configurations and securing your data.
Following this guide will help you achieve a successful installation, especially if you are new to Linux. For the best experience, take each step slowly and carefully.
If you need further assistance, OperaVPS is always here to help you throughout your Arch Linux journey.
FAQ
2. How do I create a bootable USB drive for installing Arch Linux?
You can create a bootable USB drive for Arch Linux by downloading the Arch Linux ISO file and using tools like Rufus, balenaEtcher, or the "dd" command on Linux systems. Always verify the ISO before writing it to ensure a smooth installation process.
3. Is Arch Linux suitable for beginners?
While Arch Linux is known for being minimal and flexible, it requires manual configuration which can be challenging for beginners. However, the official Arch Wiki and community support make it possible for motivated beginners to install Arch Linux successfully.
4. What are the basic steps to install Arch Linux?
To install Arch Linux, start by downloading the ISO and creating a bootable USB. Then, boot from the USB, set up your internet connection, partition the disk, format partitions, install the base system, configure localization and network, set up a user account, and finally install a boot loader.
5. Do I need to know command-line skills to install Arch Linux?
Yes, installing Arch Linux is primarily done through the command line interface. Basic knowledge of command-line operations is important, but you can follow step-by-step instructions provided by the Arch Wiki and guides tailored for beginners.
6. How can I install a desktop environment during or after the Arch Linux installation?
After installing Arch Linux and rebooting into your new system, you can install a desktop environment by updating your package database with pacman and then installing your preferred desktop environment package, such as GNOME, KDE, Xfce, or others.
7. What is pacman and why is it important when using Arch Linux?
Pacman is the default package manager for Arch Linux. It allows you to easily install, update, and manage software packages and system updates directly from the command line. Learning how to use pacman is essential for maintaining your Arch Linux system.
8. Can I dual boot Arch Linux with Windows or another operating system?
Yes, you can set up a dual boot system with Arch Linux and Windows or another OS. During installation, carefully partition your hard drive and make sure to install a boot loader like "GRUB", which can detect and let you choose between multiple operating systems at startup.
9. Where can I find help if I have trouble installing Arch Linux?
If you need help, the Arch Wiki is your primary resource and offers detailed documentation for every step of the installation process. You can also get help from the Arch Linux forums, IRC channels, or friendly community groups.
10. Is it possible to install Arch Linux without an internet connection?
A working internet connection is highly recommended for installing Arch Linux, as most of the installation packages are downloaded during setup. Offline installations are possible with advanced preparation, but are not suggested for beginners.