How to Connect to WireGuard VPN Easily
Connect to WireGuard by installing the client, importing your config file, and activating the VPN on your device. This secure method works on Windows Linux macOS iOS and Android.
🤖AI Overview:
Connect to WireGuard by setting up a VPN connection with your configuration file. Download the WireGuard client, import the config, and activate VPN on Windows Linux macOS iOS and Android. Check your connection by verifying status or IP address changes.
Connect to WireGuard on Windows 10 / 11
Here, we will see how to connect to WireGuard on Windows 10 and 11 through four easy steps.
Step one: Downloading the WireGuard client
Put the WireGuard config on your desktop. Visit WireGuard’s website and download the latest WireGuard Windows client version.
Step two: Installing WireGuard on Windows
To install the WireGuard on your Windows 10 or 11, run the WireGuard installer you just downloaded and finish the process.
Step three: Importing the WireGuard config file
Run the WireGuard client and select the “Import tunnel(s) from file” button. Select and import the WireGuard config file you previously put on the desktop.

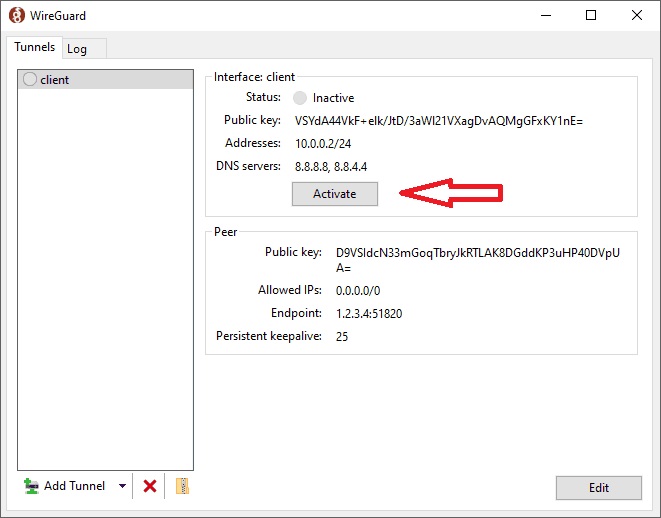
Step four: Activating WireGuard VPN on Windows
Upon this step, the WireGuard is not active yet. Click the “Activate” button to activate the WireGuard VPN.
The result will be like this:
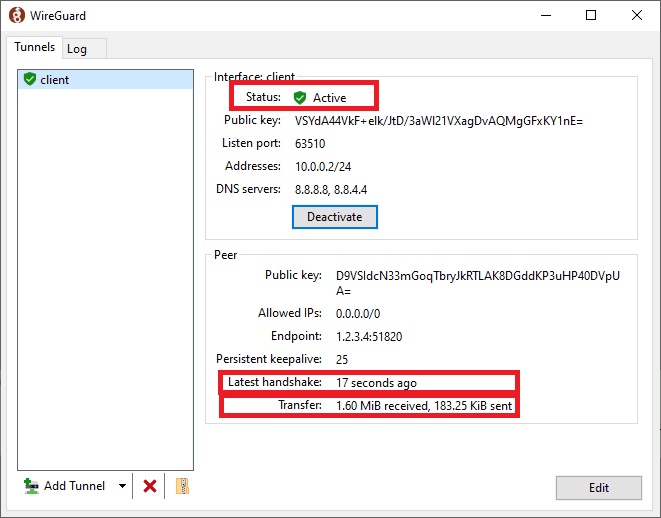
In the “Peer” section, check to see if the “Latest handshake” has any values. Also, you should see numbers in front of the “Transfer” phrase to say that the WirGuard VPN is connected.
Note that upon WireGuard’s activation, all local connections, like accessing the printer through your network, will be blocked.
You can simply undo this. Right-click on the tunnel name, click on “Edit selected tunnel” and uncheck the “Block untunneled traffic (Kill-Switch) checkbox. Finally, save the settings.
Connect to WireGuard on Linux
To connect to WireGuard on Linux, we use the terminal with the config file in hand.
Step one: Installing WireGuard on Linux
Let’s start by installing the WireGuard on your Linux. To do so, run this command:
sudo apt update && sudo apt install wireguard Now, we need the WireGuard config file. Download your WireGuard configuration file so we can continue the process.
Step two: Moving the config file to the WireGuard directory
Move the downloaded config (.conf) file to /etc/wireguard/ directory. To do so, go to the folder in which the file exists and run this command:
mv (file name) /etc/wireguard/Remember to replace your file’s name with (file name) in the command above.
Step three: Connecting to WireGuard
Run the following command in the terminal:
sudo wg-quick up (the name of the configuration file without the .conf suffix)For example, if your configuration file’s name is “WireGuard-VPN.conf”, enter:
sudo wg-quick up WireGuard-VPNAfter running the command, you will be connected to your WireGuard server.
To check the status of the connection, enter:
sudo wgIt will display the public key, private key (usually hidden), listening port, and fwmark of the WireGuard VPN.
Step four: Disconnecting WireGuard on Linux
Finally, to end the session, run:
sudo wg-quick down (the name of the config file, without the .conf suffix)For example:
sudo wg-quick down WireGuard-VPNHow to set up WireGuard VPN client on macOS
Follow the instructions below to connect to the WireGuard server on macOS.
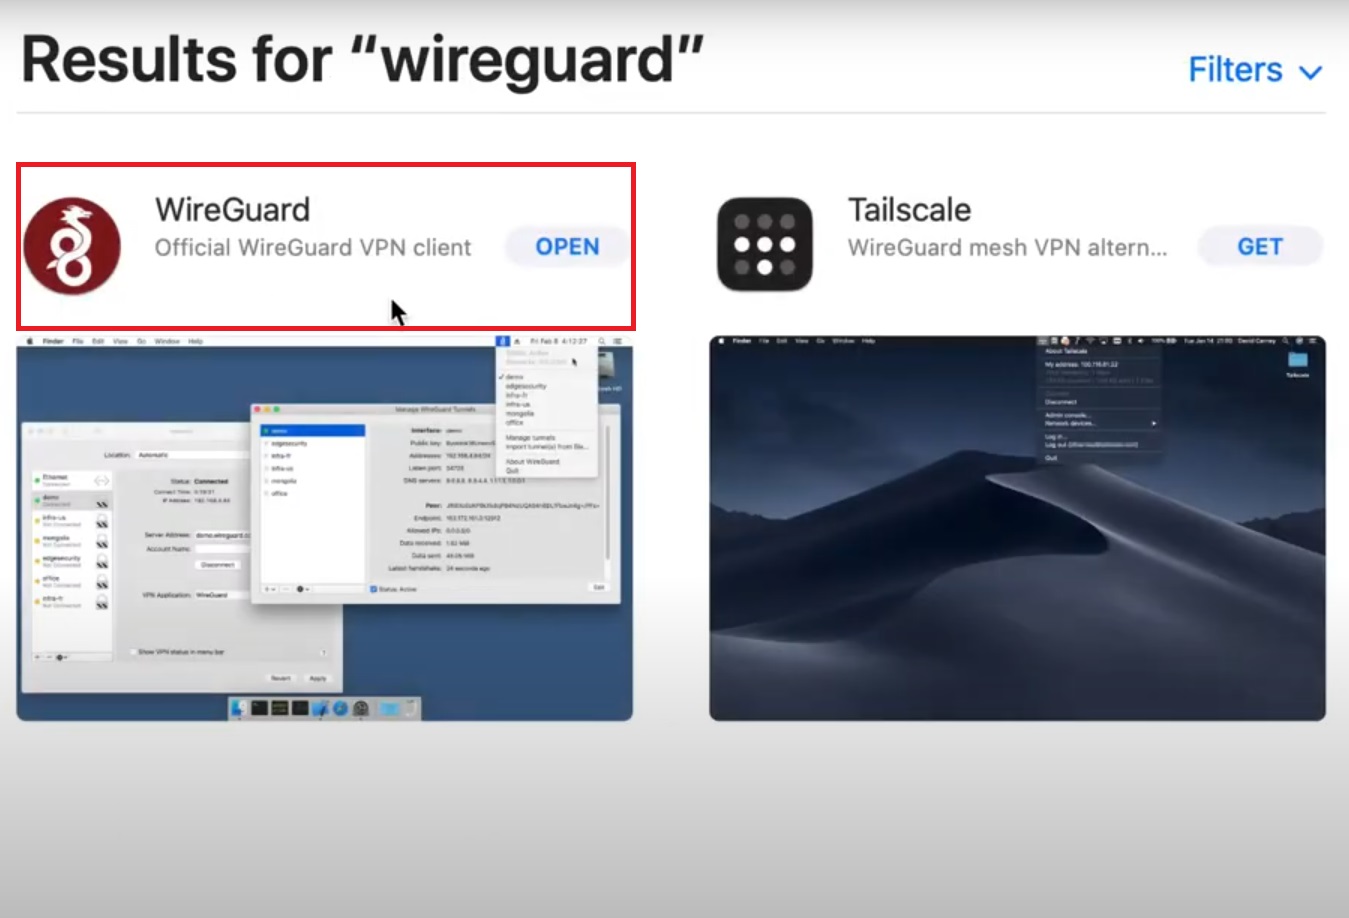
Step one: Downloading WireGuard on macOS
Download and open the WireGuard client on macOS.
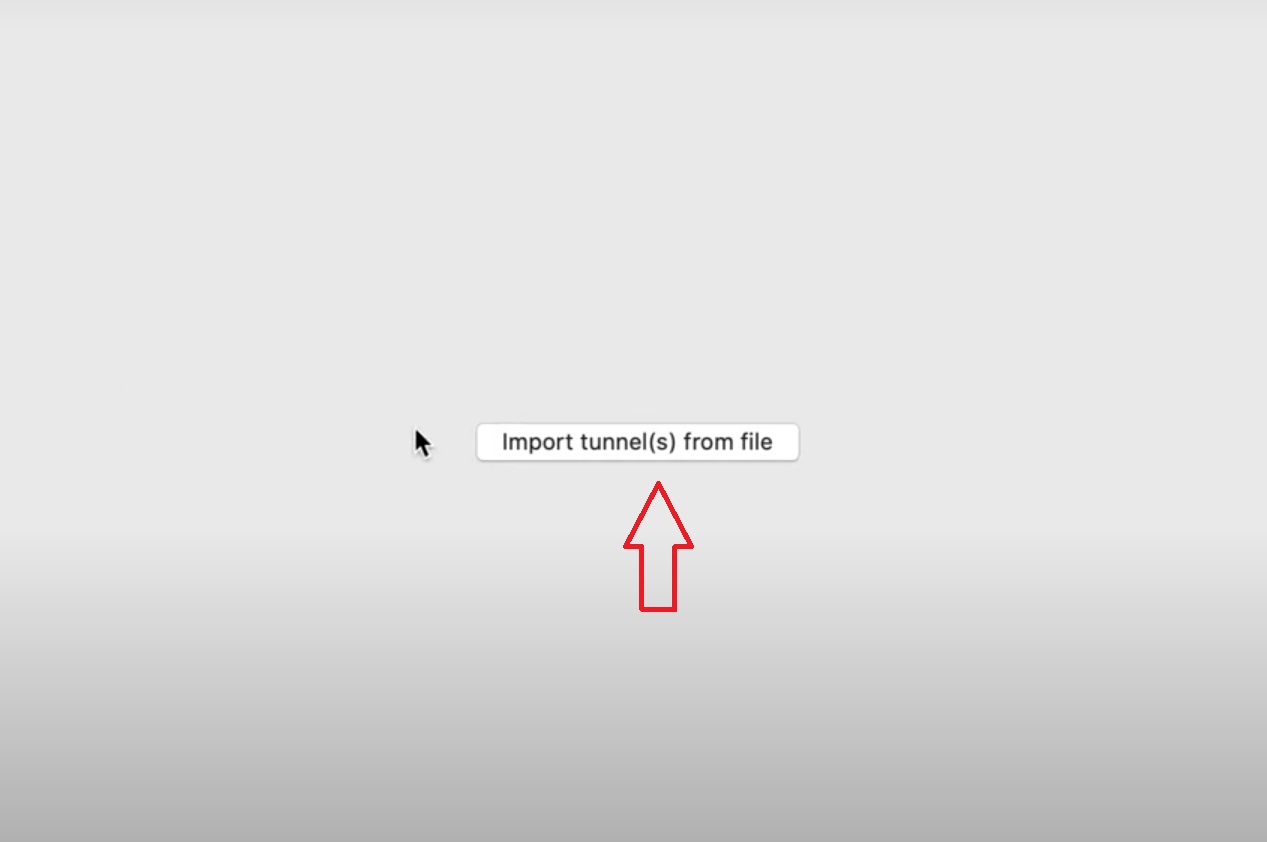
Step two: Importing the WireGuard config file
In the app, click on the “Import tunnel((s) from file” to import the WireGuard config file.
Now select the WireGuard config file and click on “Import”
The system will display a message to get permission for WireGuard to add VPN configurations. Select “Allow”
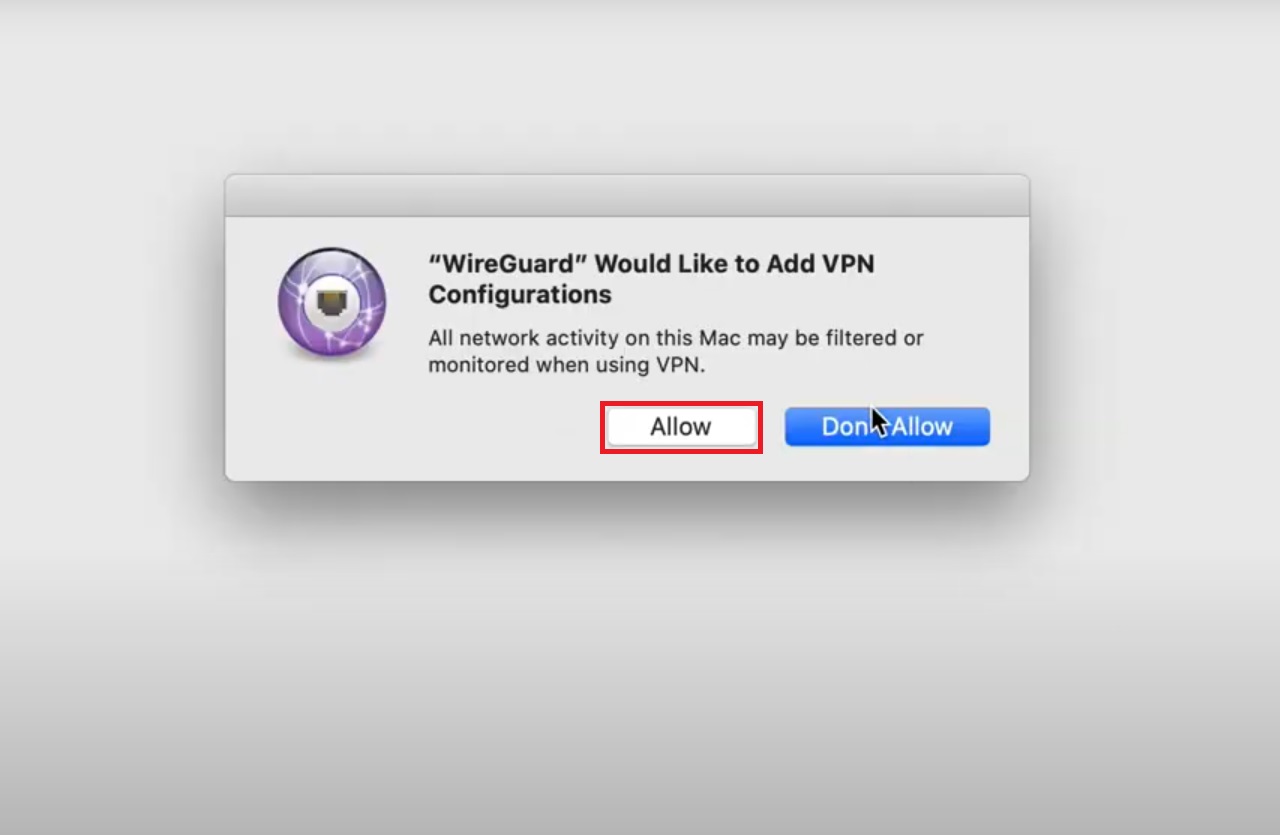
Step three: Activating the WireGuard on macOS
Activate the WireGuard VPN on macOS by clicking the “Activate” button.
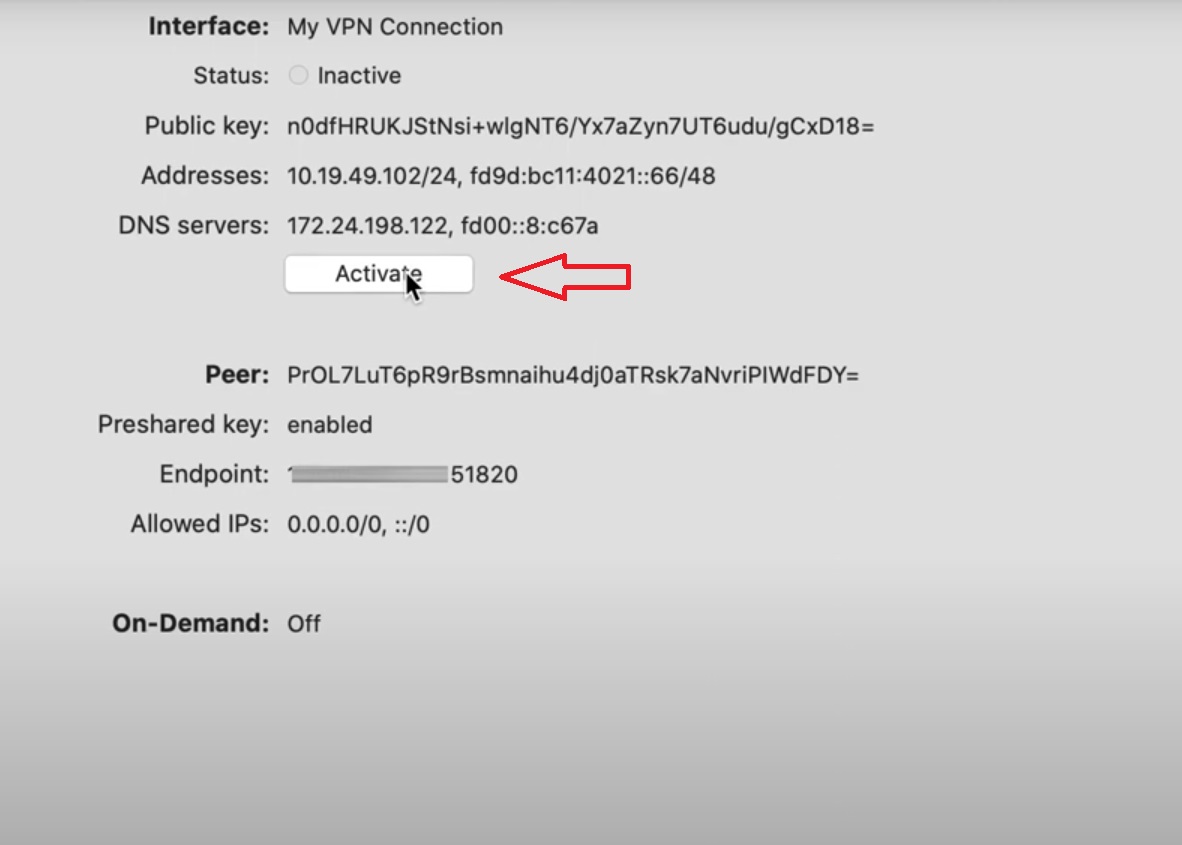
The result will be:
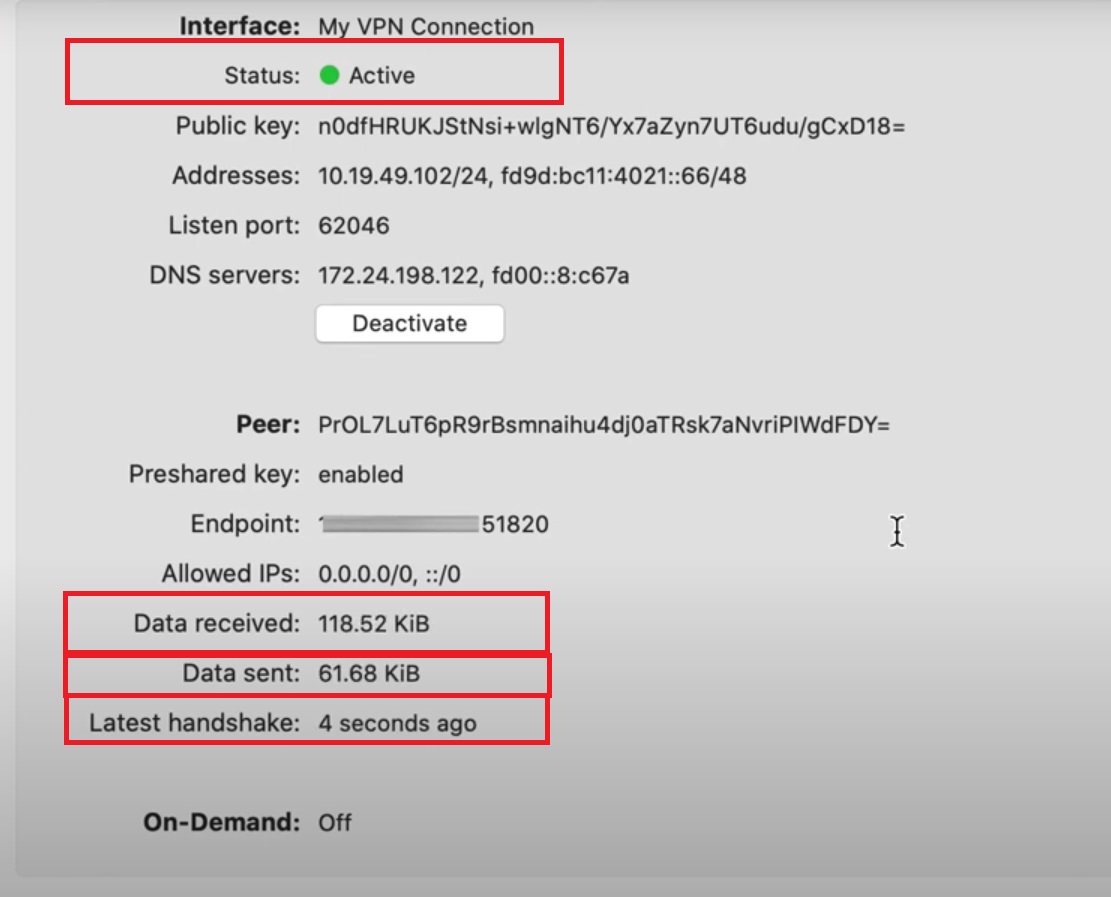
Now check the “Status”, “Data received”, “Data sent”, and “Latest handshake” fields that represent the status of the VPN, the amount of transferred data, and the time of the latest handshake, respectively.
How to Configure WireGuard VPN Client on iOS?
Connecting to the WireGuard client on iOS is much like connecting to it on macOS. To do so:
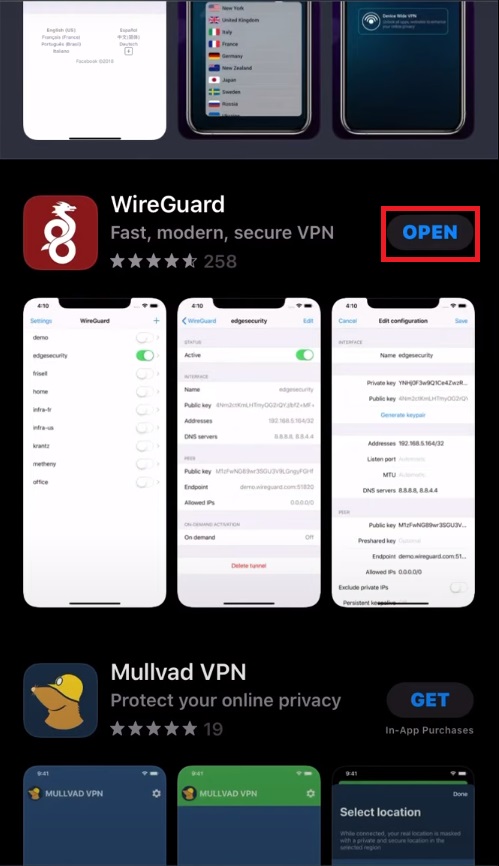
Step one: Downloading the WireGuard on iOS
Download and open the WireGuard on your iOS device.
Step two: Importing the config file
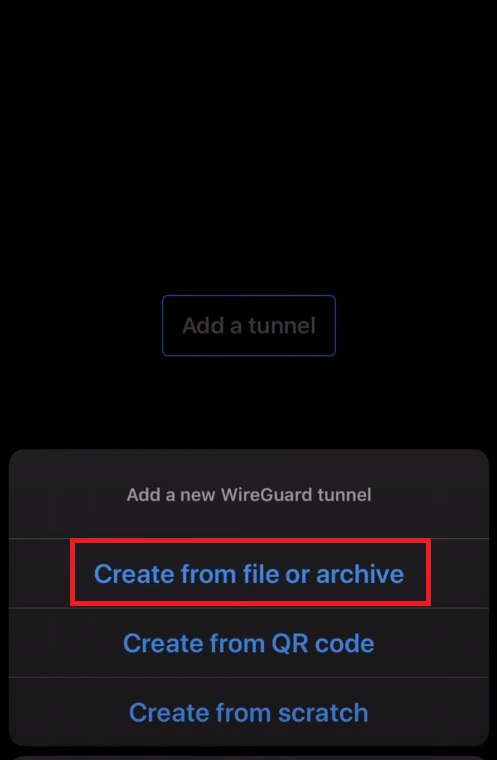
Click on “Add a tunnel”

Then, click on “Create from file or archive”
Select the config file and import it. Enter a name for your WireGuard VPN configuration. The device will ask you to grant permission. Select “Allow”
To import the WireGuard config, you can either scan the QR code if you have one.
Step three: Activating the WireGuard VPN
Now, you can see the WireGuard VPN configuration. Click on the white button so it will be switched and turned to green. This means the VPN is active.

How do I Connect to WireGuard on Android?
Let’s check the steps required to connect to the WireGuard server on Android.
Step one: Downloading the WireGuard
Download and install the WireGuard client.

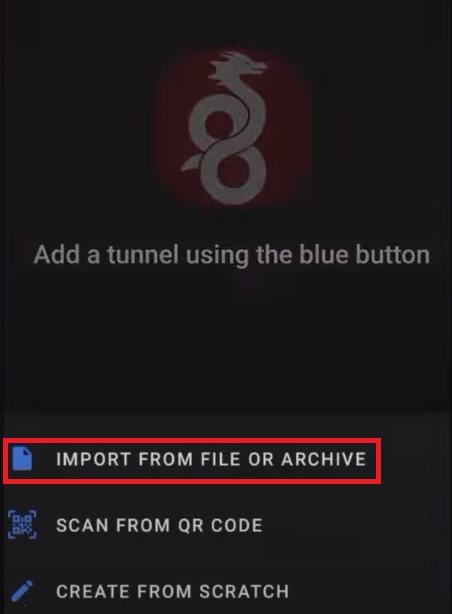
Step two: Importing the WireGuard config file
Click on the big Plus button and select “Import From File Or Archive”
Locate the config file and import it. You can also import it through the QR code.
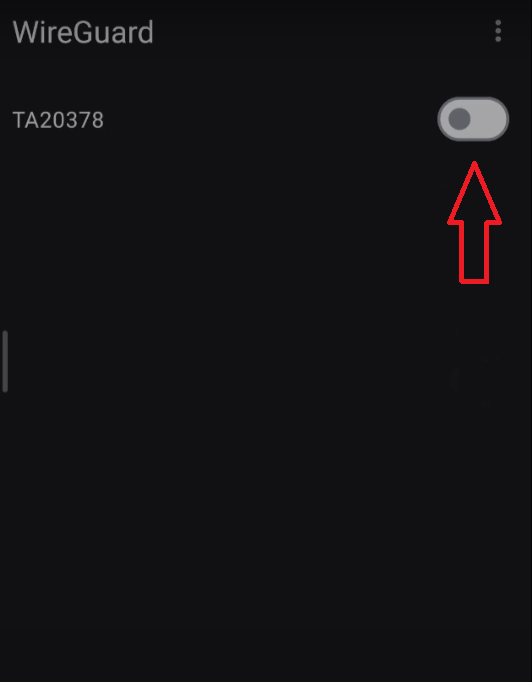
Step three: Activating the WireGuard VPN
Activate the WireGuard config by tapping the gray button in front of the selected config in the WireGuard client app.
Your WireGuard VPN connection is set.
How do I know if WireGuard is connected?
Connecting to WireGuard is a valuable skill for anyone wanting secure and efficient VPN connections.
By following this beginner-friendly guide, you can install WireGuard, generate cryptographic keys, create configurations, and establish a reliable connection with ease.
Remember that understanding each step’s purpose helps maintain your VPN setup securely and troubleshoot problems promptly. With this knowledge, you can confidently connect to WireGuard and enjoy a safer online experience.
Conclusion
We provided the steps to connect to WireGuard on five platforms, with the instructions to check the state of the WireGuard VPN connectivity for each.
If you encounter any problems during the process, feel free to leave your questions in the comments section.
FAQ
2. How do I connect to WireGuard on Windows?
Install the WireGuard client from the official website, import your config file, then activate the VPN.
3. What are the steps to connect to WireGuard on Linux?
Install WireGuard using your package manager, place config in "/etc/wireguard/", connect with 'sudo wg-quick up [config]', and disconnect with 'sudo wg-quick down [config]'.
4. How can I connect to WireGuard on macOS?
Download the WireGuard app, import your configuration file, allow VPN permissions, and activate the connection.
5. How do I connect to WireGuard on iOS and Android?
Download the WireGuard app from the App Store or Google Play, import or scan the config file, and toggle the VPN switch to connect.
6. How do I verify a WireGuard connection?
Check the app status for handshake or data transfer indicators and confirm your visible IP address has changed.
7. What is the WireGuard config file and why is it necessary?
It contains keys and settings needed to establish a secure VPN connection; without it, connection fails.
8. What common issues affect connecting to WireGuard and how to fix them?
Problems include incorrect config files, firewall blocks, and permissions. Verify config accuracy, check firewall settings, and restart the client or device if needed.
9. Where can I find official WireGuard clients?
Clients are available on the official WireGuard website and in Microsoft Store, Apple App Store, and Google Play Store.
10. Can I use WireGuard on multiple devices?
Yes, WireGuard supports multiple platforms and simultaneous connections if configured properly.