Configuring DHCP Server in Windows Server
Configuring DHCP Server in Windows automates IP address assignment, streamlining network management for business environments. It involves installing the DHCP role, creating IP scopes, and configuring essential options efficiently.
🤖AI Overview:
Configuring DHCP Server in Windows enables automatic IP address allocation to network devices, simplifying network administration. This process includes installing the DHCP role, setting up IP scopes with defined ranges and exclusions, and completing post-installation configuration using Server Manager tools. It reduces manual IP setup and supports efficient network communication.
What is DHCP and Why Should Use it?
Small networks will not face trouble assigning IP addresses manually, but in large networks, it is almost impossible because of the numerous devices. Dynamic Host Configuration Protocol (DHCP) is a networking protocol and only service that automatically assigns your IP address.
What will happen after installing and configuring DHCP in your environment? Whenever a new device joins the network, it queries the DHCP server for an IP address. On the basis of the specifications, you made to your DHCP server, the DHCP server offers and assigns a valid IP address to the requester. Without a DHCP server, providing IP addresses to networked devices would require an exorbitant amount of manual setting which is really problematic. A DHCP server can save you a ton of time.
To not concern about the process of assigning IP addresses, a DHCP server is responsible to offer IP addresses automatically to devices to access the internet, applications, and so on.
Installing and Configuring DHCP Server in Windows Server
As an administrator, you must configure an IP address for network nodes. It will be done in a static configuration. DHCP helps you to provide the information automatically and dynamically. This tutorial covers Installing and Configuring DHCP Server in Windows using Server Manager method.
Stay with us and follow the below steps to finish installing DHCP and Configure it on your Server.
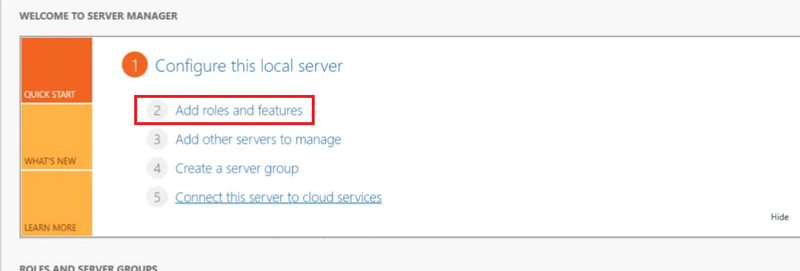
Step 1. Using Server Manager
To start the installation process, you need to open Server Manager. From the Start Menu, open the Server Manager console.
Then, click “Add Roles and Features” in the “Server Manager” window. This will cause a pop-up window to appear. On the pop-up, click “Next”
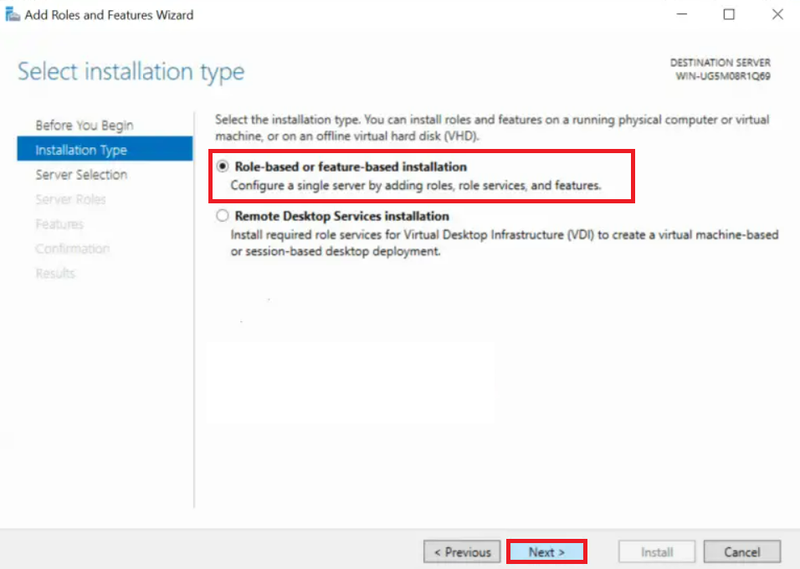
Step 2. Select Installation Type
Once the below page is displayed, choose the Role-Based or Feature-based installation radio option and click on the Next button.
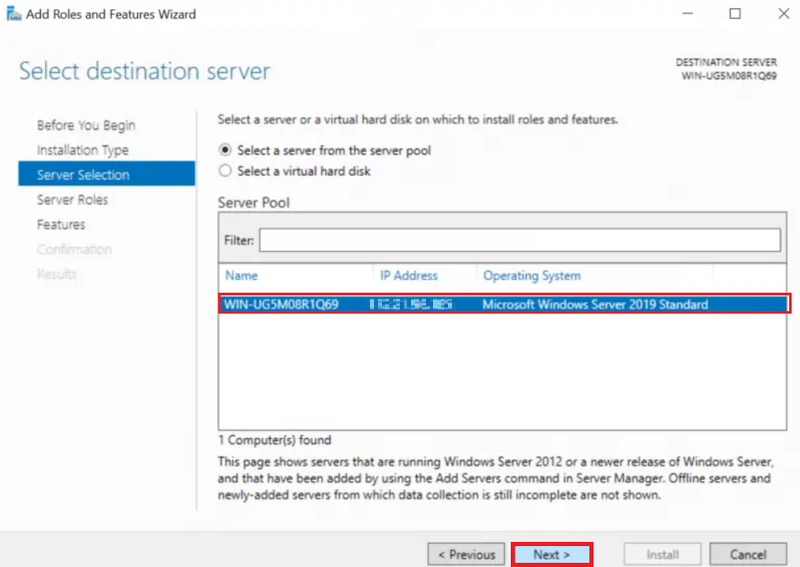
Step 3. Choose a Server to Install DHCP Role On
Select the server you want to install the DHCP Server on from the list on the page below. After choosing the Server machine that hosts your DHCP server, click Next.
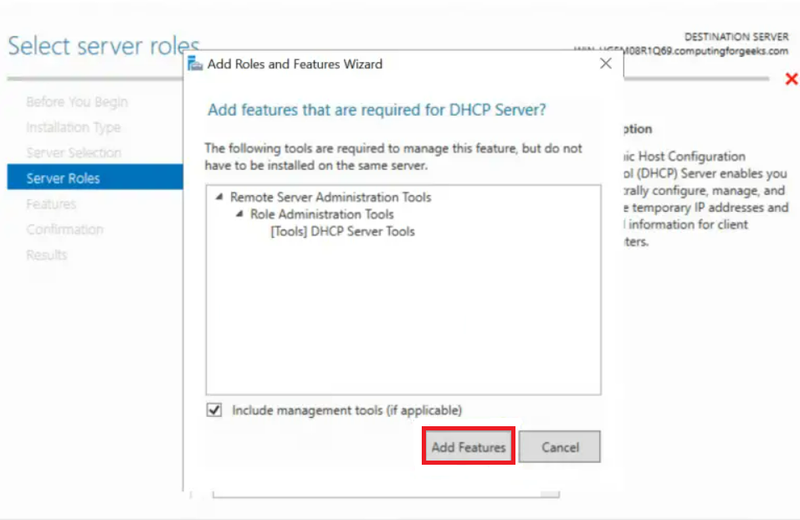
Step 4. Select Server Roles
In this step of Configuring DHCP Server in Windows, you need to Select Server Roles.

A pop-up window will appear when you choose the option, requesting that you add features needed by the DHCP server. If you want to add the DHCP management tools along with the DHCP role, keep the Include Management Tools checked selected. Then, click on Add Features and then click on the Next button to move on.
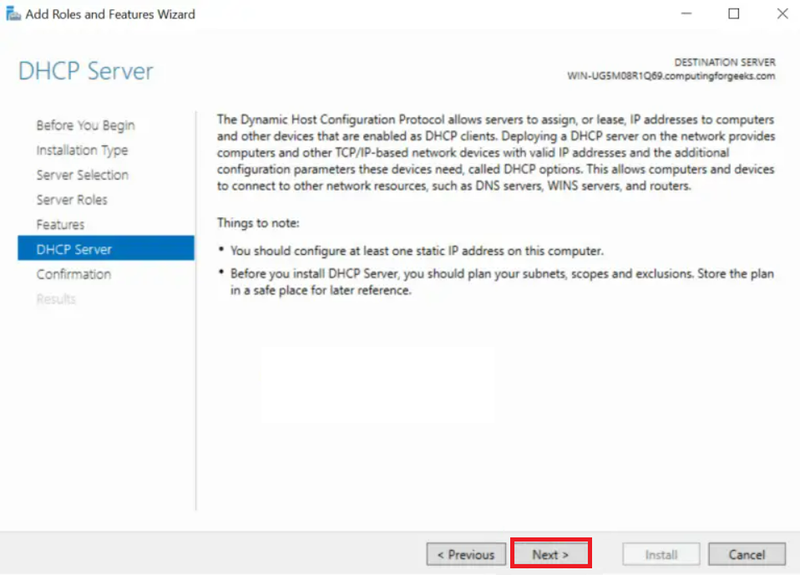
Step 5. DHCP Server
On the DHCP Server, click on Next and continue.
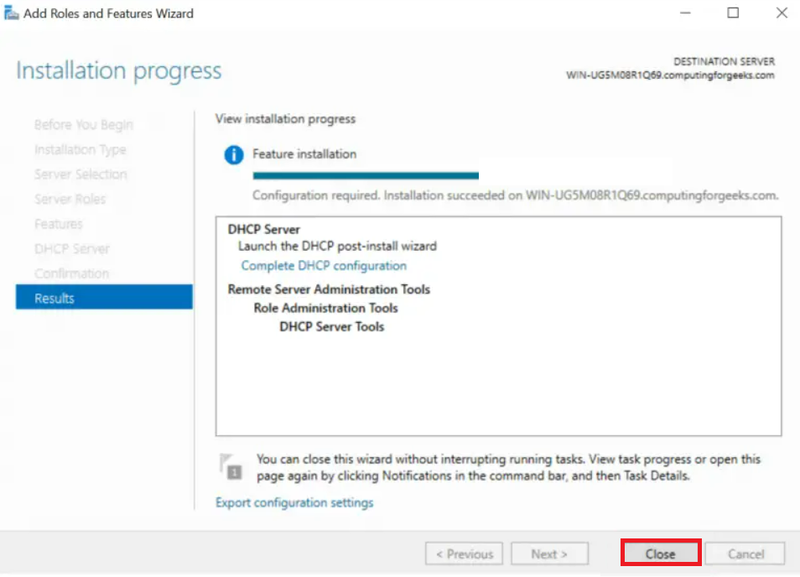
Step 6. Confirm Installation Selections
You are so close to finishing Configuring DHCP Server in Windows. In this step, verify that DHCP Server and other names are on the list by looking at it. Click “Install” after that. Click “Close” once everything has been installed successfully, and your DHCP server will be up and running.
Let’s start the DHCP post-deployment configuration process.

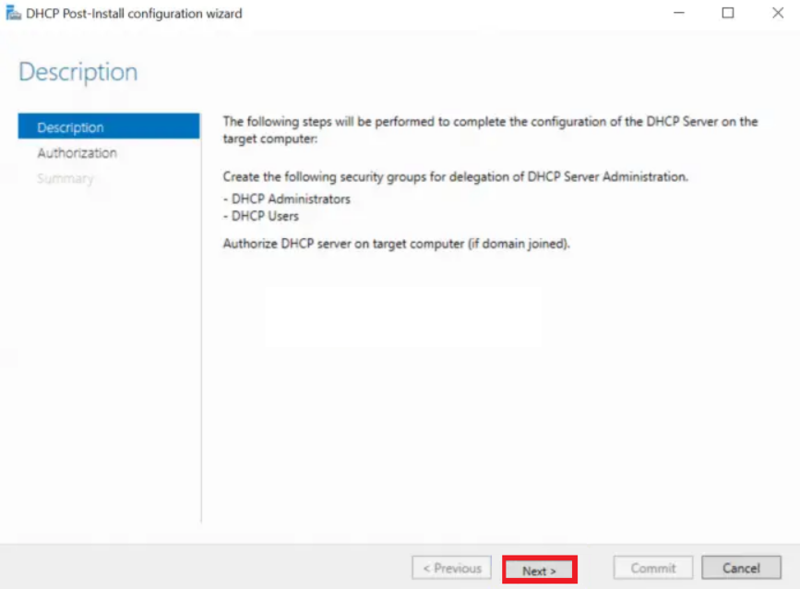
Step 7. Post-deployment Config
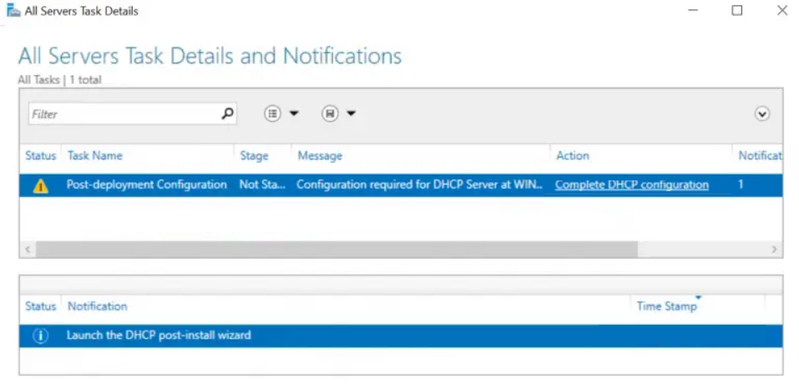
By now, you must complete the installation process. You are ready to start Configuring DHCP Server in Windows. The option “DHCP” should now be shown on the left pane of the window when you open Server Manager. A yellow-marked warning with the words “Configuration required for DHCP Server at…” and the link “More” should appear, as seen in the picture below.

The phrase “All Server Task Details and Notifications” will appear in a new window. You will see the “Post-deployment Configuration” line underneath it. As illustrated below, click on “Complete DHCP Configuration” at the end of that line. There will be an installation wizard. Choose “Next“.
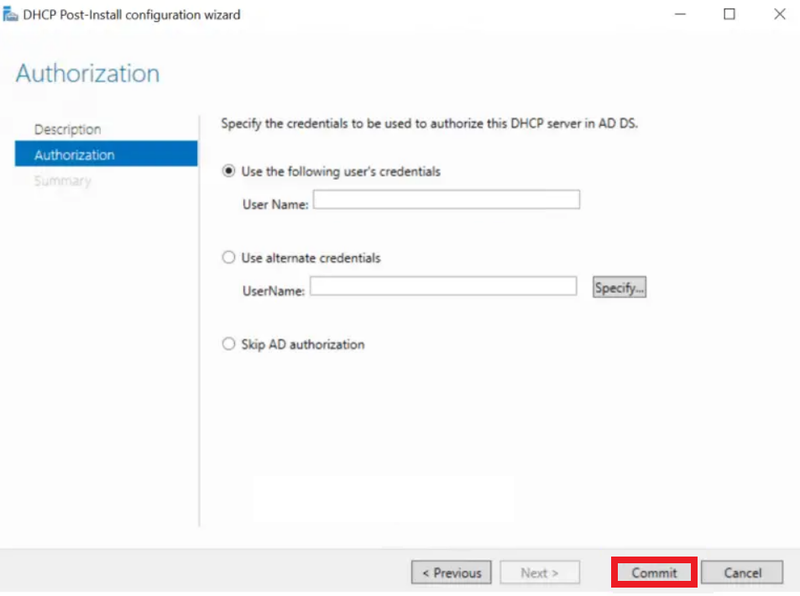
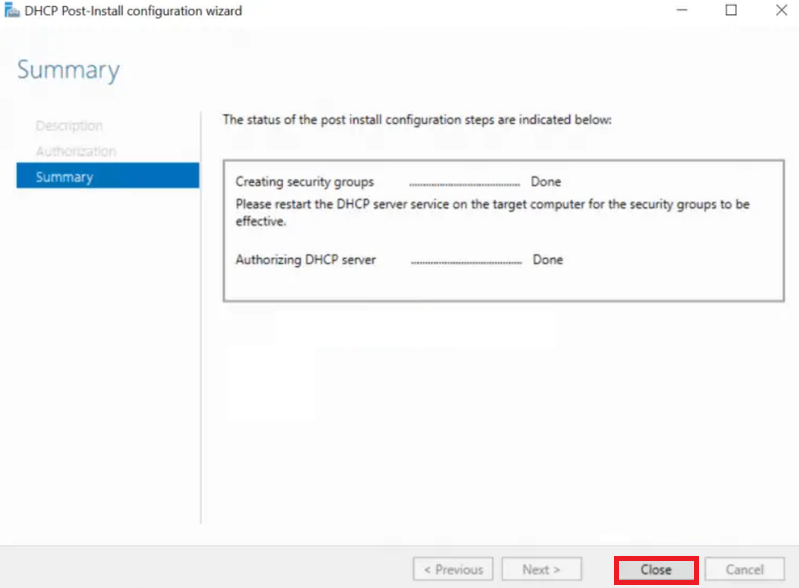
Three choices are offered to you on this Wizard page. You can move forward using the Administrator’s credentials, the credentials of a different user, and AD Authorization. Select the “Skip AD authorization” radio option if your server is standalone and is not a member of any Active Directory domain. If so, you should log in using the credentials listed in your AD. Click “Commit” once you’ve made a decision that works with your surroundings. Allow it to complete its task, and if it is successful, click “Close” with satisfaction.
Step 8. Configure DHCP Server
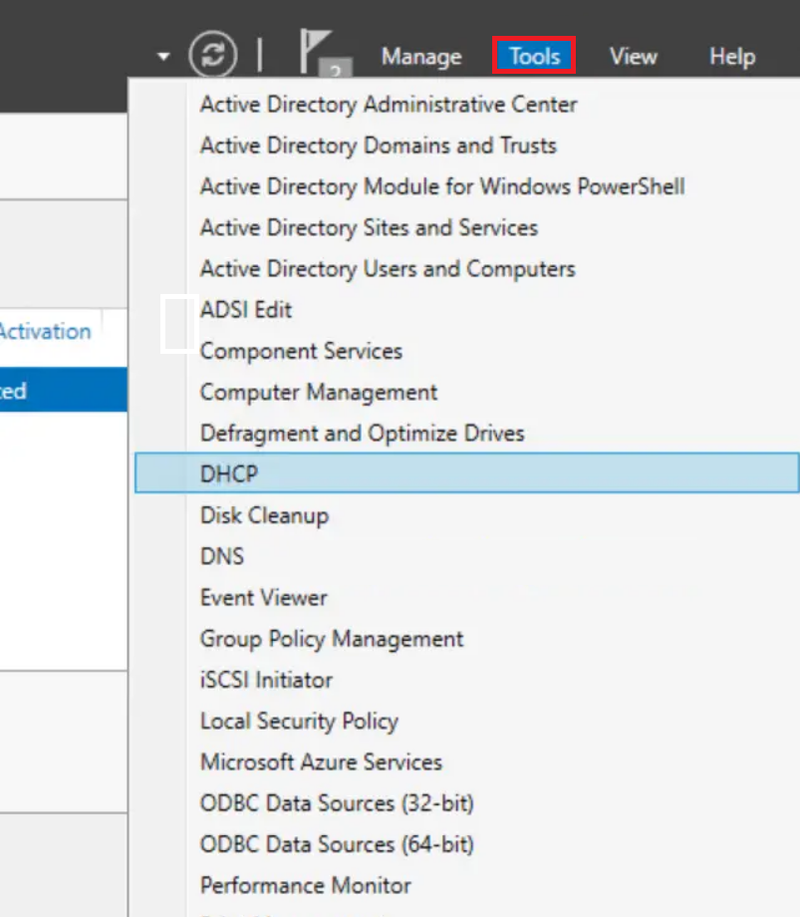
To continue Configuring DHCP Server in Windows, return to Server Manager and select “DHCP” from the “Tools” menu. The DHCP Configuration Window will then open as displayed below.
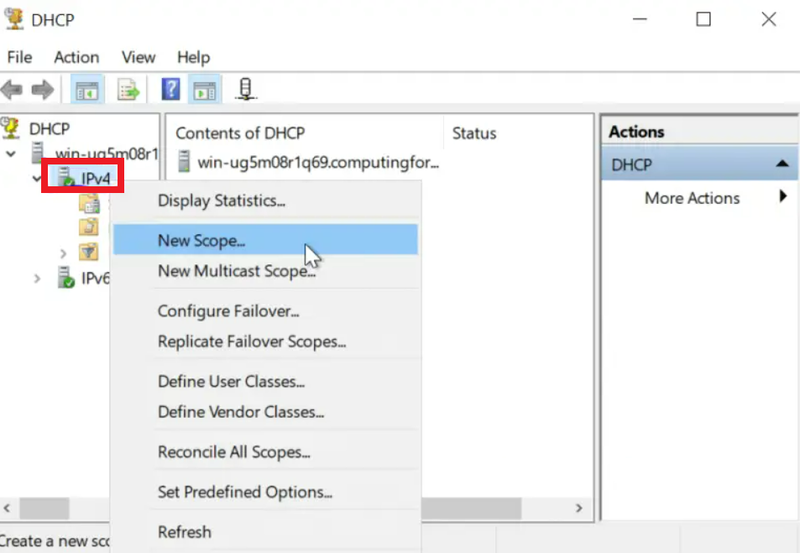
Step 9. Select New Scope
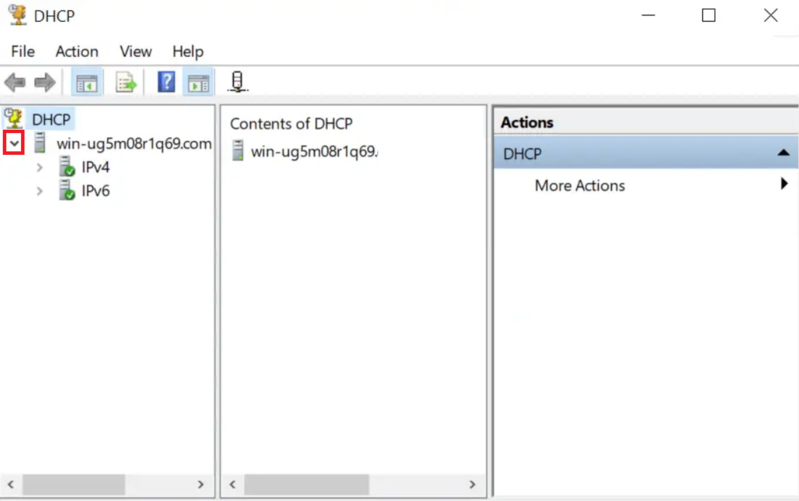
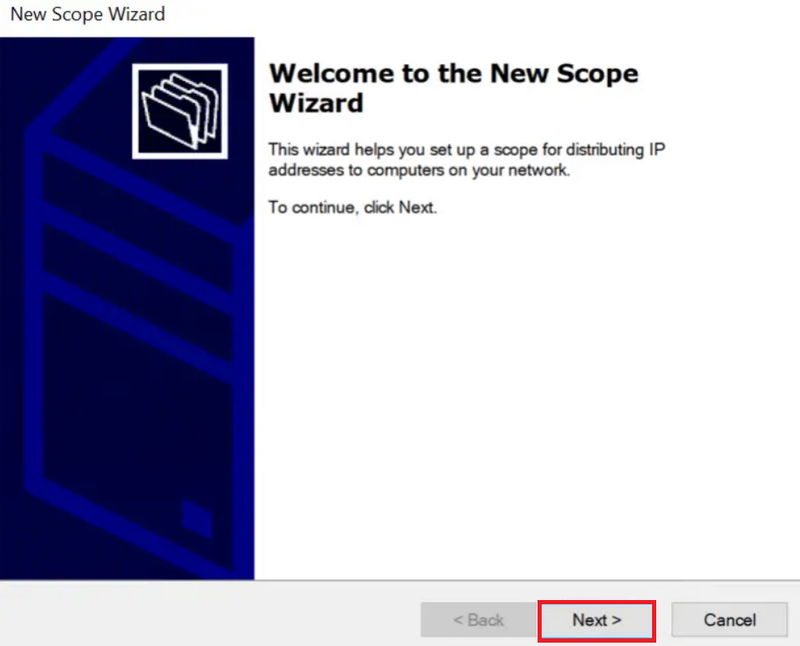
Click the drop-down arrow as indicated above, then right-click “IPv4” in the window’s left pane and select “New Scope“. As seen below, a new window for the scope wizard will open. Choose “Next”
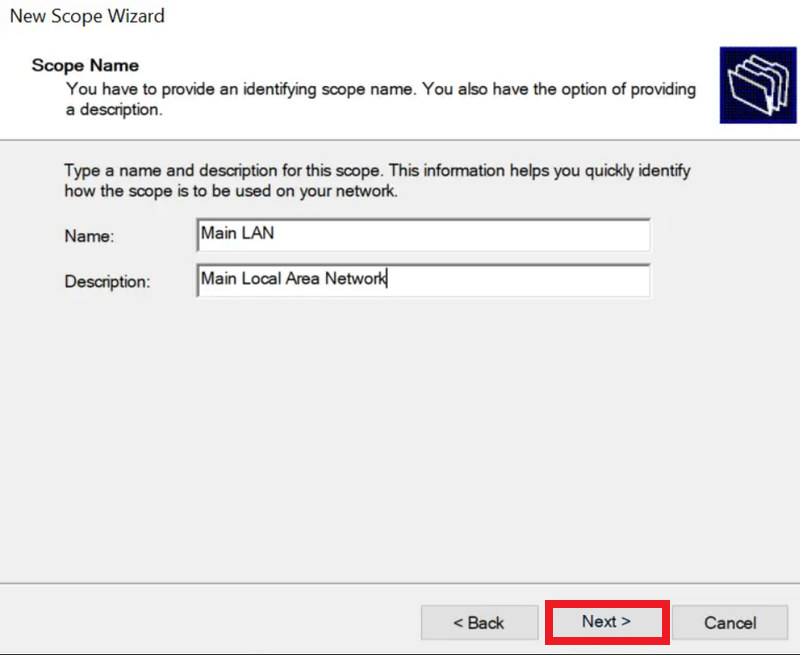
Step 10. Name your Scope
Select “Next” after entering the new scope’s name and description.
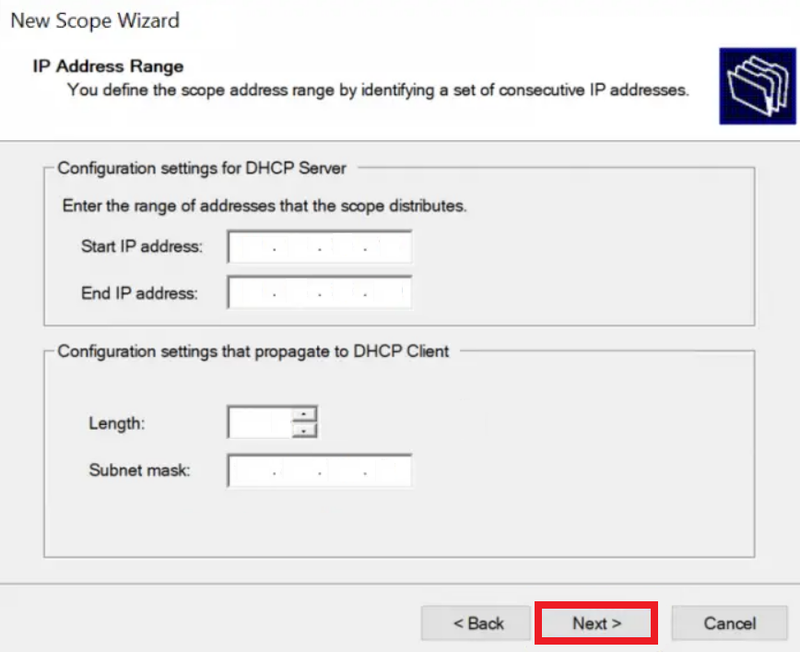
Step 11. Insert your IP Address Range
In this step, you need to input the preferred IP address range. To do this, input your start and End IPs, Length, and Subnet Mask. When you are finished, click on Next.
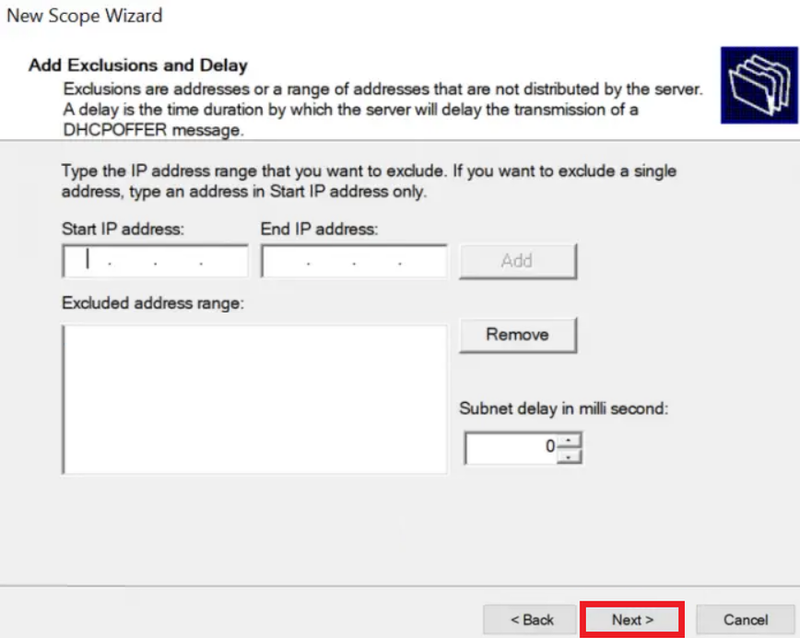
Step 12. Set any IPs you Consider excluding here
At this point, you can enter any IP addresses you want to reserve for possible future use with equipment like a printer and other devices.
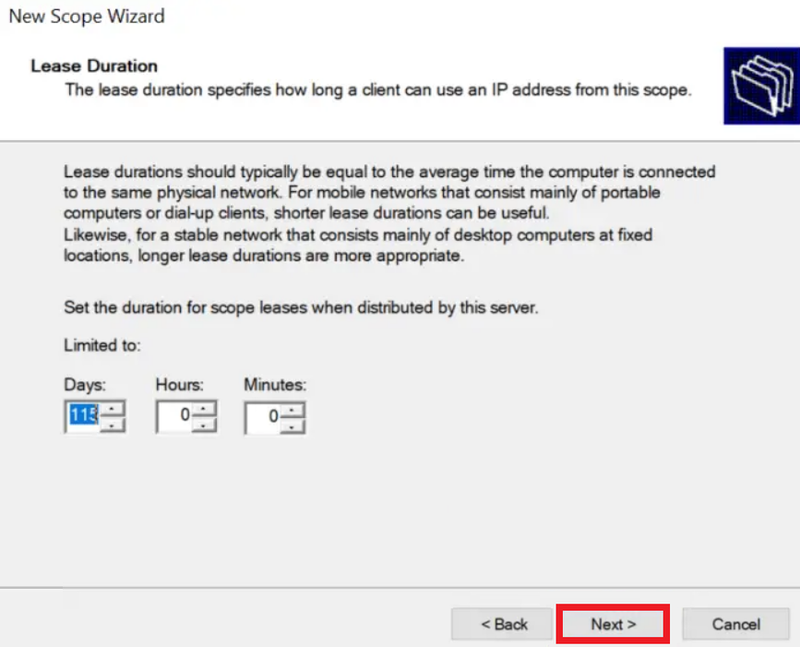
Step 13. Lease Duration
A computer or client will receive an IP address for the lease length until the DHCP server changes it or assigns a new one when the user logs in again. Hit “Next” after setting yours.
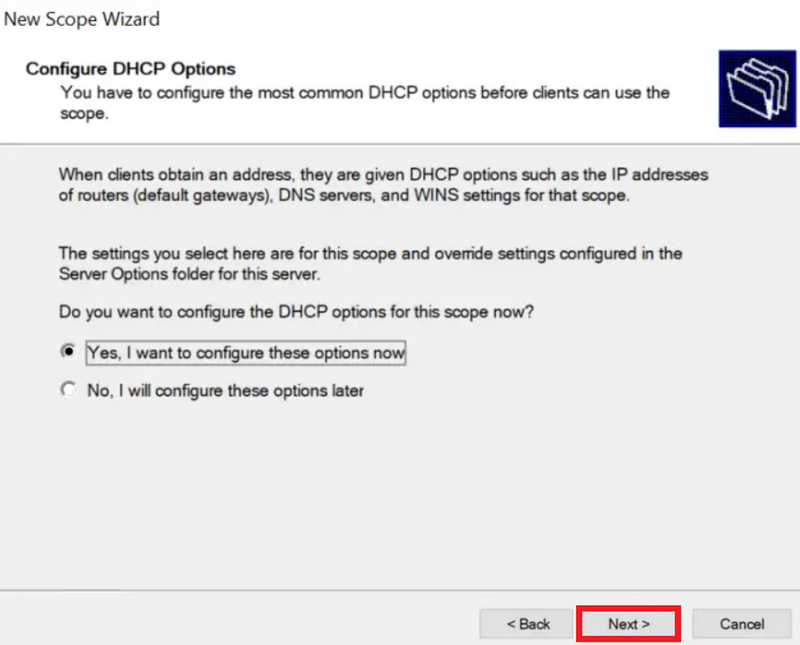
Step 14. DHCP Options
If you agree with the DHCP Options as they are shown on the page, simply click “Next” on this page.
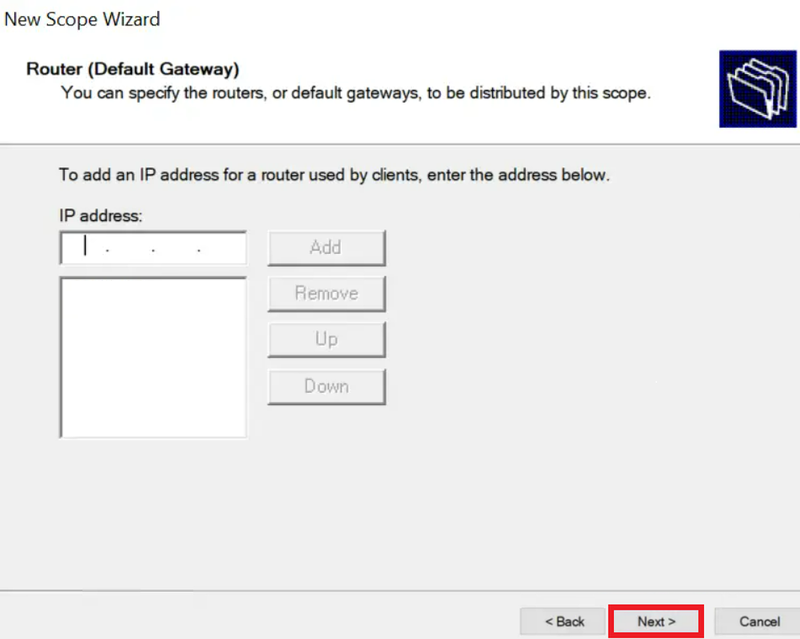
Step 15. Default Gateway
In this step of Configuring DHCP Server in Windows, you must enter the Default Gateway that will be given to the clients during the leasing period on this page. Enter it in and select “Add” next to it. Click “Next” after that.
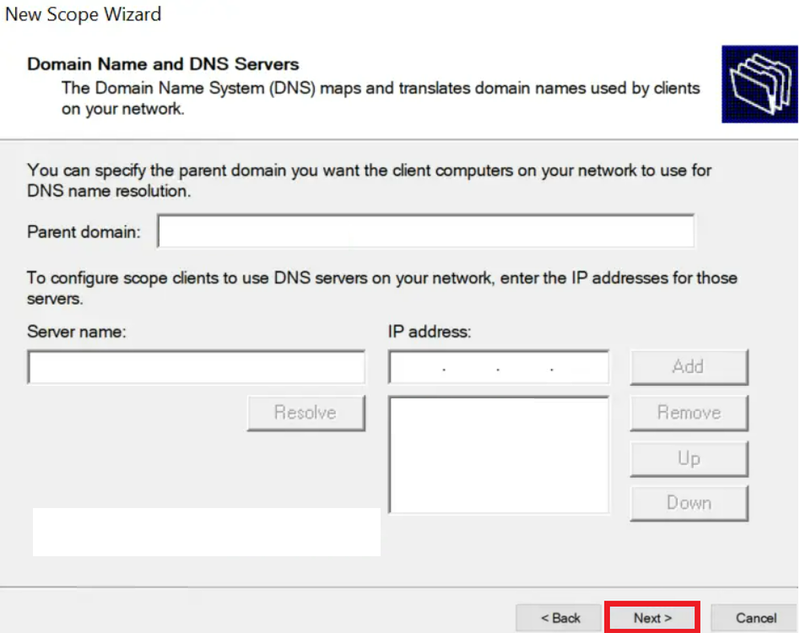
Step 16. Domain Name and DNS Servers
Previously, you got familiar with DNS Records and you know the DNS is crucial since it makes it easier to resolve FQDNs to IP Addresses. So, enter it and press “Next”
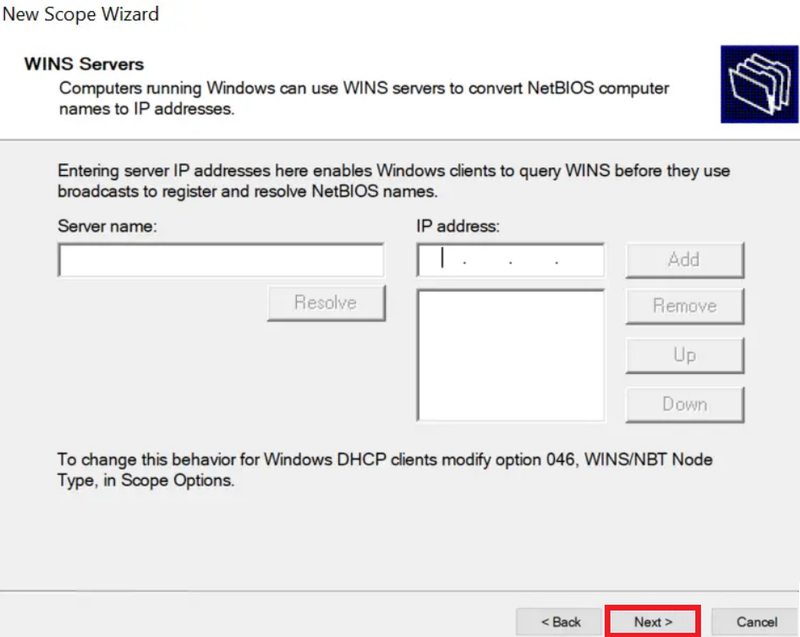
Step 17. Wins Servers
This step is optional. If you want to use WINS Server in your environment, enter the information below and click “Next” to continue.
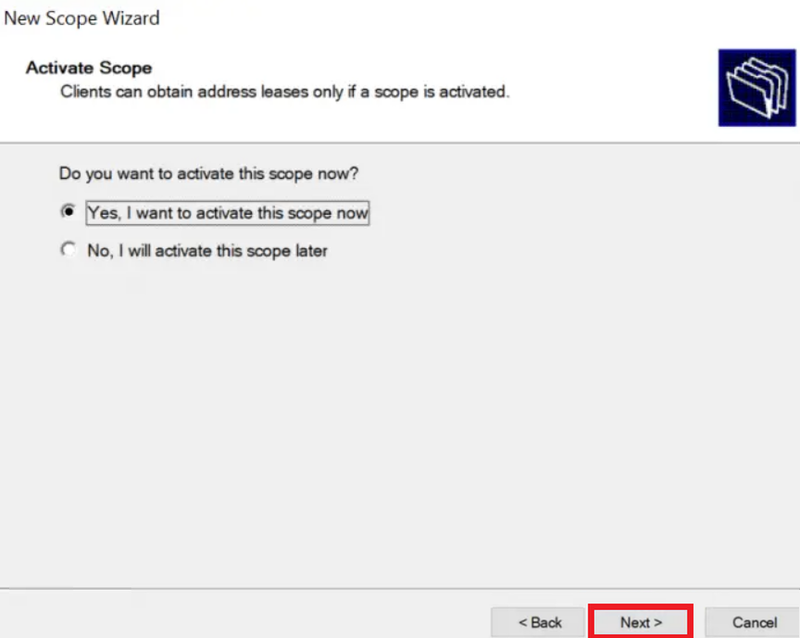
Step 18. Activate Scope
Simply click “Next” to activate the scope we have set for this Step. Pick the second radio option if you want to activate it later.
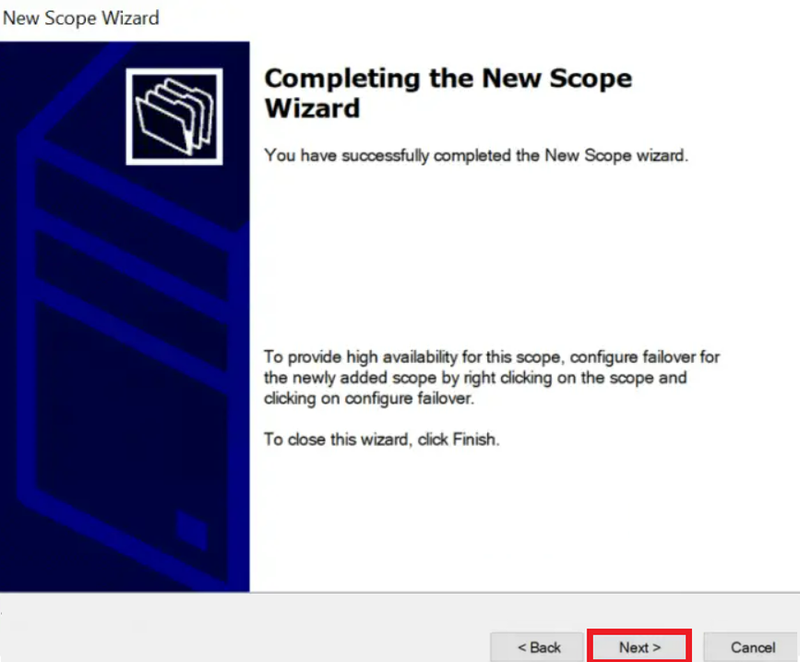
Step 19. Complete Scope Configuration
Configuring DHCP Server in Windows is now complete. Create additional scopes as shown above for the VLANS you have segmented in your LAN/Network, then set up your router so that it requests IP addresses from the DHCP server in accordance if you have done so.
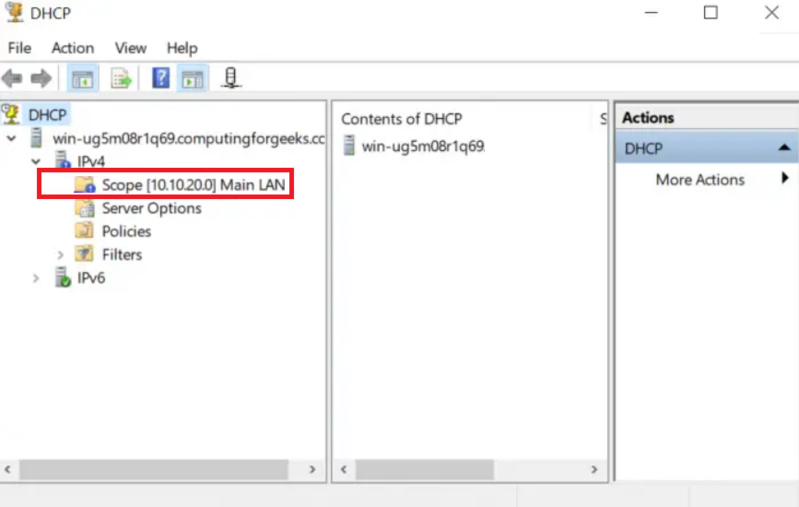
Step 20. Verify that your Scope is active and Set up
Check to see if your configs are present by opening your DHCP Configuration as in Step 9 and opening it as shown below.
Step 21. Configure DHCP Client on Windows
The next step is to set up DHCP Client so that a Windows machine can request an IP address from DHCP Server after DHCP Server has been configured on our Windows server.
How to Access DHCP Manager Console [4 Methods]
A DHCP administration console is added to your server once the DHCP has been deployed and configured. You can further configure your DHCP server from this panel. There are multiple ways you can open this console on your Windows Server. Previously, you learned How to Install Microsoft Windows Server 2022. It is a good idea to open DHCP Manager Console on Windows Server 2022 since it is a perfect place to discuss some methods for opening this console.
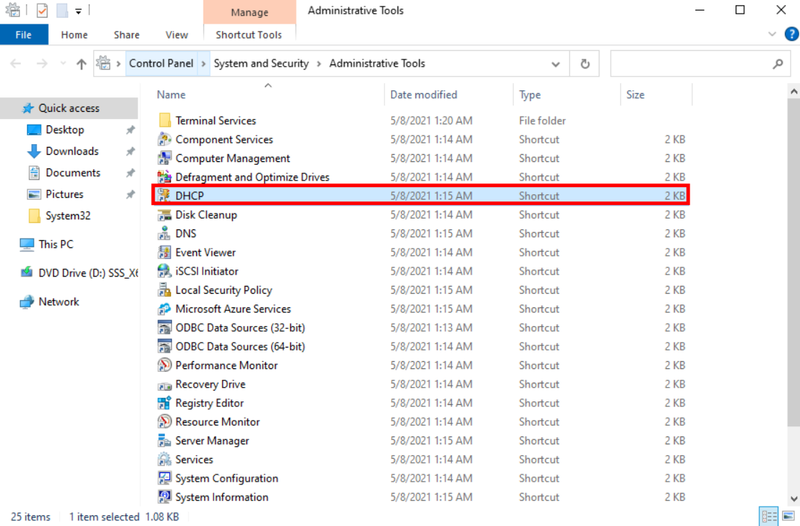
Method 1. Windows Administrative Tools
You can start by demonstrating how to use Windows Administrative Tools. When you install them, other administration consoles, including DNS, are added in addition to DHCP. Anyhow, open Windows Administrative Tools from the Start Menu to access the DHCP management console using this technique. If it isn’t pinned in the Start Menu, you can search for it there. Click DHCP to open it once the Windows Administrative Tools are open.
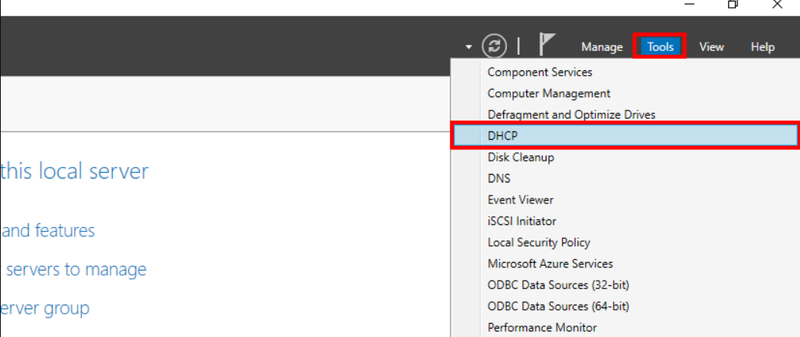
Method 2. Server Manager Console
Utilizing the Server Manager console is the second approach. The majority, if not all, of the features you add to your Windows Server, are added to the Server Manager’s Tools menu. These features include DHCP, DNS, and other things. Open the Server manager there to access the DHCP management. Next, pick DHCP from the list by clicking Tools.
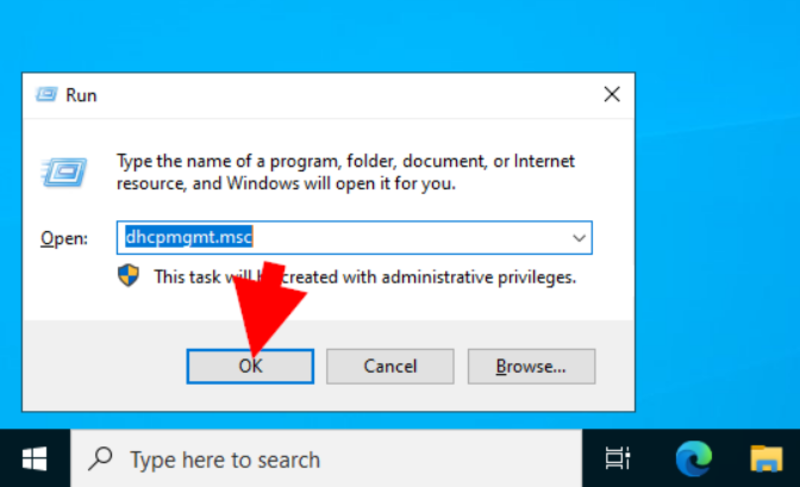
Method 3. Run Dialogue Box
Utilizing the Run dialog box is the third approach. Using this technique, launch Run by pressing the shortcut keys Windows + R. After that, type dhcpmgmt.msc and press Enter or OK.
Method 4. Start Menu
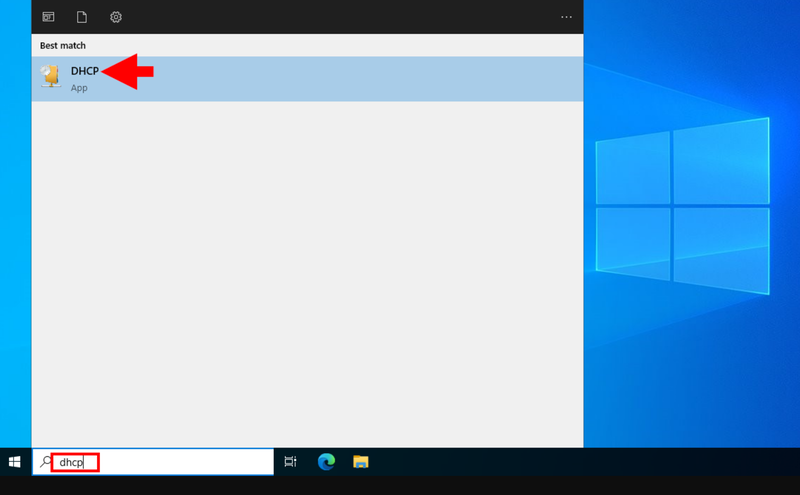
The quickest and simplest method is Start Menu. The DHCP management console can be accessed easily from the Start Menu, much like the majority of other functions and tools. To open it, go to the Start Menu or click the Windows key while searching for DHCP.
Conclusion
Configuring DHCP Server in Windows is a fundamental task that business owners and IT administrators must approach with thorough planning and a clear understanding of network architecture.
Doing so ensures efficient IP address management, seamless device connectivity, and reduced administrative overhead.
By following the detailed steps and recommendations provided in this guide, businesses can establish a reliable, secure, and scalable DHCP environment that supports their present needs and future growth.
FAQ
2. How do I install the DHCP Server role on a Windows Server?
Open Server Manager, select Add Roles and Features, choose Role-Based installation, select your server, add the DHCP Server role, confirm selections, and complete the installation.
3. What are the key steps to configure a new DHCP scope?
Name the scope, define an IP address range, set exclusions, specify lease duration, configure gateway and DNS options, and activate the scope.
4. How can I ensure secure DHCP server deployment?
Use Active Directory authorization for integrated environments or skip AD authorization for standalone servers during post-deployment configuration to ensure authorized IP allocation.
5. How do I configure DHCP clients to obtain IP automatically?
Set the network adapter on client devices to obtain IP addresses automatically via DHCP to receive configurations seamlessly.
6. How can I access the DHCP Manager Console on Windows Server?
Access it through Windows Administrative Tools, Server Manager Console menu, Run dialog (dhcpmgmt.msc), or Start Menu search.
7. What are best practices for managing DHCP Server?
Regularly review DHCP logs, maintain current scopes, configure appropriate lease durations, exclude static IPs, and align DHCP options with network infrastructure.
8. How do I troubleshoot devices not receiving IP addresses?
Check DHCP service status, scope activation, IP conflicts, DHCP logs, client settings, and network connectivity between clients and server.
9. Can DHCP Server configuration improve network scalability?
Yes, it automates IP management, facilitating quick device setup and supporting network growth efficiently.
10. How does DHCP integration with DNS and WINS enhance network function?
DHCP updates DNS records automatically for smooth name resolution, and WINS integration supports legacy systems for NetBIOS name resolution.