How to Install VS Code on Ubuntu
Read on to learn how you can install VS Code on Ubuntu. But first, see what Visual Studio is. Microsoft’s Visual Studio Code is a robust, free, open-source text editor. It has a built-in terminal, code refactoring tools, snippets, syntax highlighting, code completion, and more. Visual Studio Code is compatible with multiple operating systems, including macOS, Linux, and Windows. Debugging, syntax highlighting, version control, and code completion are just some of the many features available in Visual Studio Code, a simplified Code Editor. You can insert, expand, create, and compress various code blocks using the editor’s numerous features, such as outlining and code snippets.
Many people got Visual Studio and Visual Studio Code mixed up. While Visual Studio is only accessible on Windows, Visual Studio Code is just a simple code editor that can be used on various platforms. Remember that you can buy linux vps and connect VS Code to VPS servers for running command lines and modifying files.
Now we’ll have a look at a few different approaches to install visual studio code on ubuntu. It’s totally up to you to decide which one is the most practical.
Prerequisites to install VS Code on Ubuntu
- A system that runs Ubuntu.
- An account with administrative rights.
- An active internet connection.
Install VS Code with Snap Package
Microsoft offers the Visual Studio Code development environment as an official Snap package on Canonical’s Snapcraft Store. You can easily install Visual Studio Code on Ubuntu with the help of this package.
Step 1: Install Snap Package With the Ubuntu Software app or The Specific Command Line
Exactly what do we mean by the term “Snaps?” These completely self-contained programs have everything a computer needs to run the binary. Snap packages are simple to protect and update. The Ubuntu Software program or the command line can be installed to install Snap packages.
Alternatively, you can use the Ubuntu Software app and type “Visual Studio Code” into the search bar.
If you’d instead use the command line, you can launch a terminal emulator by pressing Ctrl+Alt+T and entering this command:
sudo snap install code --classicThat’s it; you’ve successfully installed Visual Studio Code!
How about updates in the future? You need not worry about this; your computer will download and install updates to Visual Studio Code without interrupting your work.
The Quick Approach to Deleting Visual Studio Code Snap Method
The following command can be used in a terminal to remove the Snap package for Visual Studio Code:
sudo snap remove codeInstalling Visual Studio Code with apt
Microsoft’s official APT repository host Visual Studio Code. Here are the required steps you need to take to install VS Code on Ubuntu:
Step 1: Update Packages
By executing the following command as a user with sudo rights, you can update the packages index and install the dependencies:
sudo apt update
sudo apt install software-properties-common apt-transport-https wget
Step 2: Import wget Command
Use this wget command to bring in Microsoft’s GPG key:
wget -q https://packages.microsoft.com/key/microsoft.asc -O- | sudo apt-key add -Step 3: Install Repository Dependencies
And then type to turn on the repository in Visual Studio Code:
sudo add-apt-repository "deb [arch=intel64] https://packages.microsoft.com/repos/vscode stable main"Step 4: Install by using the apt Command
Install the Visual Studio Code package after you’ve enabled the apt repository:
sudo apt install codeInstall the Latest Software Update
The update/upgrade instructions can be executed as follows to update your VS Code:
sudo apt update
sudo apt upgrade
How to Uninstall Visual Studio Code Using apt
With the proper technique, uninstalling is a simple process. The following command can be entered into the terminal window:
sudo apt auto-remove codeInstalling Visual Studio Code Using the GUI
Here’s how you can easily install VS Code on Ubuntu by GUI:
Step 1: Open the Ubuntu Software app
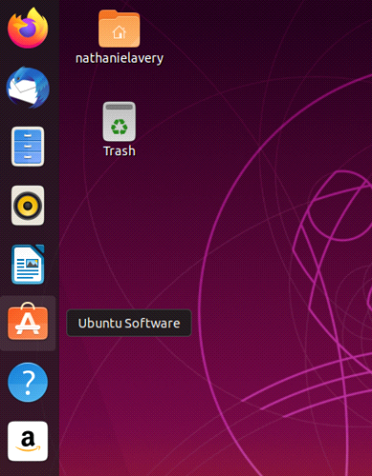
The Ubuntu graphical user interface has a direct download link for Microsoft Visual Studio Code. If you’d instead not use the terminal, you can install the package easily from your desktop.
Launch the Ubuntu Software application from the Programs menu to set up Visual Studio Code.
Step 2: Search for VS Code and Install it
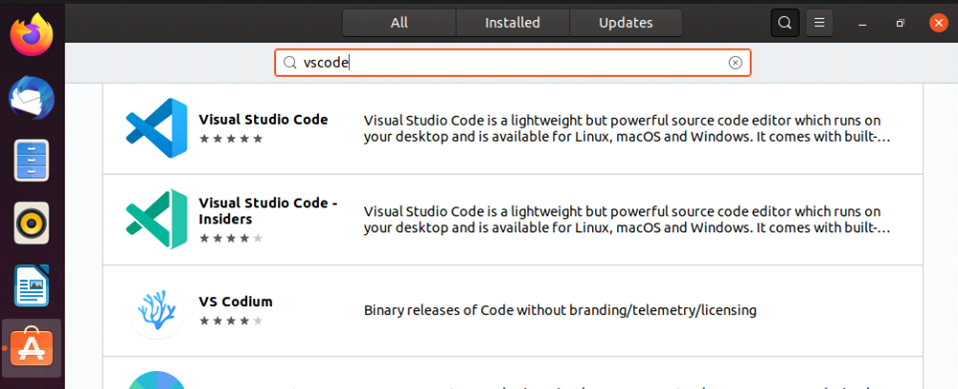
Just type in “Code” and go with the first result. Next, select the Install button.
Step 3: Launch Visual Studio Code
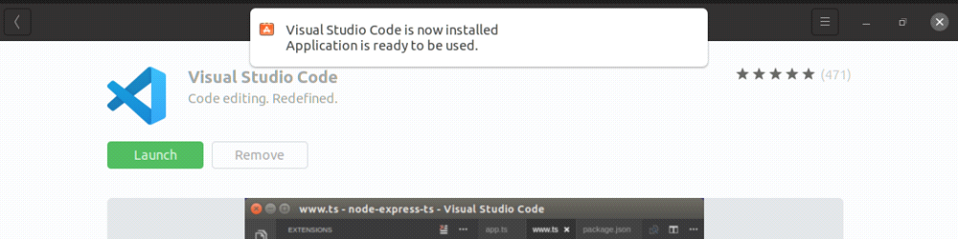
After setup is finished, you may launch Visual Studio Code from the console or the Applications folder.
Uninstall VS Code through the GUI
Follow the steps below to uninstall the application if you installed vscode using the Ubuntu Software Center:
- Launch the Ubuntu Software Center and navigate to the Installed tab to view all of the applications that have been installed.
- Find the code app on the list, and then select the Remove button next to it.
- When prompted, click the Remove button a second time to complete the uninstallation of vscode from the system. Please provide the admin password so that we can verify that you wish to remove the app.
The application was uninstalled from your system without any problems.
Install Visual Studio Code DEB package
This is the typical procedure to install VS Code on ubuntu. The VSCode DEB package is an official release for the Debian and Ubuntu Linux distributions.
Step 1: Download the DEB Package and Install
After downloading, the Visual Studio Code Download site provides a deb package that may be installed with the apt or dpkg command.
The .deb package should be downloaded if you are using Linux Mint, Elementary OS, or any other distribution that is based on Ubuntu. You can get.rpm packages from places like Fedora and SUSE’s software repositories.
Step 2: Run The Command Line
Once the file has finished downloading, run the instructions below from the Downloaded folder.
$ sudo dpkg -i visualstudiofilename.deb$ sudo apt-get install -fThis command tries to fix broken packages by installing missing dependencies.
OR
$ sudo apt install ./visualstudiofilename.debFAQ
While using Ubuntu's snap package manager, how can I install Visual Studio Code?
Launch the terminal and now enter the following command to install VS Code via the snap package manager:
sudo snap install —older-version-codeAfter installing Visual Studio Code, how do I launch it?
Once Visual Studio Code has been installed, you can launch it in one of two ways: via the Application Launcher by searching for it or from the terminal by entering the command to run it.
How can I use the Ubuntu GUI to install Visual Studio Code?
Open the Ubuntu Software Center from the application launcher, type "Visual Studio Code" into the search field, and click "Install" to begin the graphical installation process.
How can I set up Visual Studio Code using the APT package manager?
Launch a terminal and enter the following commands to install Visual Studio Code using the APT package manager and the repository:
add repository,update package index,install packageConclusion
In this article, we showed you how to install VS Code on ubuntu in a few different ways. As long as it’s compatible with your version of Linux, you can use any of the aforementioned approaches. The Visual Studio code editor is widely used by C and Python developers but is compatible with many more languages.