How to Install and Set Up SMTP Server on Windows?
All businesses use emails for internal and external communication and promotion. Many businesses rely heavily on email as their primary method of internal communication. Examples include emails to customers, business partners, staff, upper management, and other interested parties. Organizations that regularly send or receive large numbers of emails can benefit from dependable SMTP services
SMTP, or the Simple Mail Transfer Protocol, streamlines and accelerates bulk email processing for enterprises. To avoid being filtered out as spam, an SMTP should be able to process large numbers of emails with a single action. This is a helpful addition because it prevents businesses from paying for pricey email server administration software.
However, SMTP must be installed and configured because it is not included with Windows servers by default. Therefore, this article aims to instruct readers on how to install SMTP server on windows. You can also Buy windows VPS and install an SMTP server on it. If you are a Linux user, be sure to check out our thorough guide on how to install smtp server on Ubuntu.
What precisely is an SMTP server?
Email transmission is handled by a computer or program called an SMTP server. It operates in accordance with SMTP (Simple Mail Transfer Protocol). When an email is sent from a client, it is received by an SMTP server. The messages are then relayed to the incoming mail server via another SMTP server.
How does an SMTP server work?
If you want to install SMTP server on windows, first, we need to know the SMTP server’s place in the email sending process and its essential processes.
The SMTP connection is initiated by a mail user agent (MUA), your email client, or an app. It ends at the SMTP server for your domain. An SMTP handshake occurs here. The standard SMTP port number for this connection is 25. Other ports, such as 465, 587, and 2525, may be used instead in specific circumstances. Our post on SMTP ports provides more information. The SMTP session starts when the connection is made.
The client provides the server with the email addresses of the sender and receiver, the email’s body, and any attachments.
The mail transfer agent (MTA) performs a domain name similarity check between the sending and receiving domains. If so, the recipient’s POP3 or IMAP server will receive the message instead of their inbox. If the domains differ, the SMTP server will need to contact the DNS.
The DNS reveals the receiver’s network address (IP address).
The email is transmitted from the sender’s SMTP server to the recipient’s SMTP server. The email will be placed in an SMTP queue if the recipient’s server is unavailable (down, busy, etc.). Before the emails reach their destination, they are temporarily kept in this buffer. It is also possible to redirect the email to a secondary server.
The inbound email is checked for legitimacy by the recipient’s SMTP server. If the domain and username are valid, the server will deliver the message to the POP3 or IMAP server specified in the email header.
Key SMTP Server Features
Before you install SMTP server on windows, the following are some of the SMTP Server’s features:
- This server operates in “relaying mode,” which forwards incoming emails from one SMTP server to another before they are sent to the intended recipient.
- VRFY (verify) is a command used in Address Debugging – SMTP. In other words, it makes sure an email address is real without actually using that address.
- The SMTP server occasionally receives email from a non-local mailbox and forwards it to the correct recipient.
- The initial SMTP server included a command called “turning” that switched the sender and recipient roles. Some SMTP clients still have support for it, despite its low prevalence.
- SMTP servers can be set up to act as email gateways. These gadgets adapt TCP/IP messages for use with another email protocol.
- The SMTP server also has an EXPN (Expand) command for growing mailing lists. In addition, it identifies each email address in a mailing list.
Benefits of Using an SMTP Server
Here are some of the advantages of using SMTP Server:
- The Top Email Marketing Software – You can reach a wide variety of customers and clients worldwide with the help of bulk email marketing. These emails can be sent and received since they are sent over an SMTP server.
- Reliable – It might be time-consuming to double-check that all the information in an email is correct and that it will reach its intended audience. Time spent sending an email is for naught if it is in the spam folder. On the other hand, while using an SMTP server, you need to examine the message’s contents. This server deals with the rest automatically.
- Assisting Hand – The SMTP server’s skilled assistant will handle any questions you may have. They guarantee assistance up until the point of service implementation. They offer answers to issues that may arise later on.
- Quicker – Quicker transactional email delivery is possible with the help of an SMTP server. This prevents clients from waiting for important information like passwords and order confirmations.
- Your email marketing campaign’s effectiveness depends on the analytics and data regarding the email hitting the inbox of clients; therefore, be sure to provide reports and track emails. An SMTP server monitors outgoing emails until their intended recipients receive them.
- Spam newsletters and emails are blocked before they even reach the inbox of the intended receiver. They’re thrown away without ever being opened. The SMTP server guarantees that all emails are delivered successfully.
Prerequisites to install SMTP server on windows
- A server running Microsoft Windows.
- An administrative user account.
Please be aware that Windows 11, Windows 10, and Windows 8 are not able to function as SMTP Servers. The SMTP server is a part of Windows Server’s IIS (Internet Information Services). The SMTP email client is included with the client operating systems but not an SMTP server.
Step By Step Guide on How to Install SMTP Server on Windows
Here we are at the heart of this post, where we learn how to install and configure SMTP server on windows.
Step 1: Set up SMTP
First, access the Windows Server Manager interface.
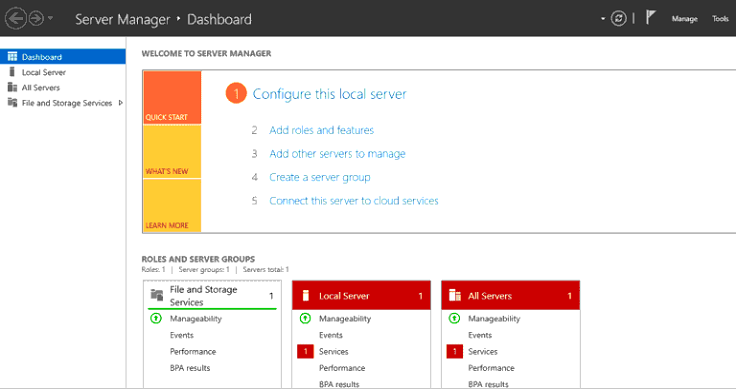
Click the “Add Roles and Features” button. Now you will observe the “before you start”.
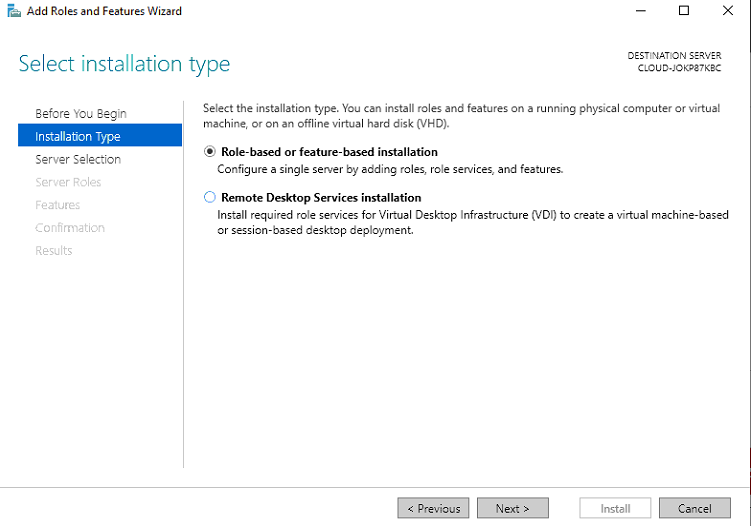
Press the Next button. The window asking you to choose an installation type will appear.
Click the Next button after choosing between role-based and feature-based installation. You should now be at the page where you can select your final server.
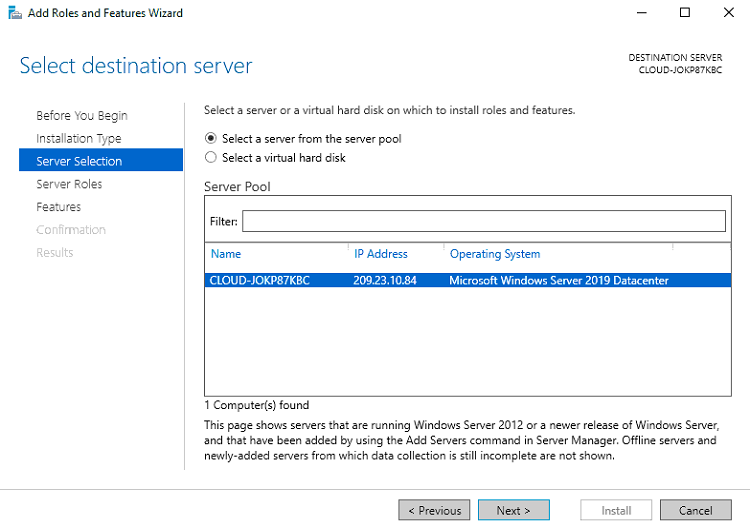
Click the Next button after selecting a server from the server pool. The Choose server roles screen needs to load.
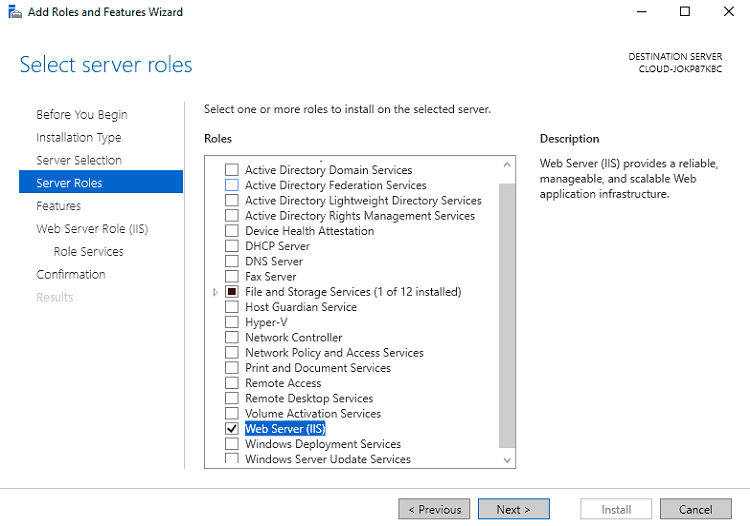
Click the Next button after selecting the Web Server (IIS) role. The choose features screen must now be visible.
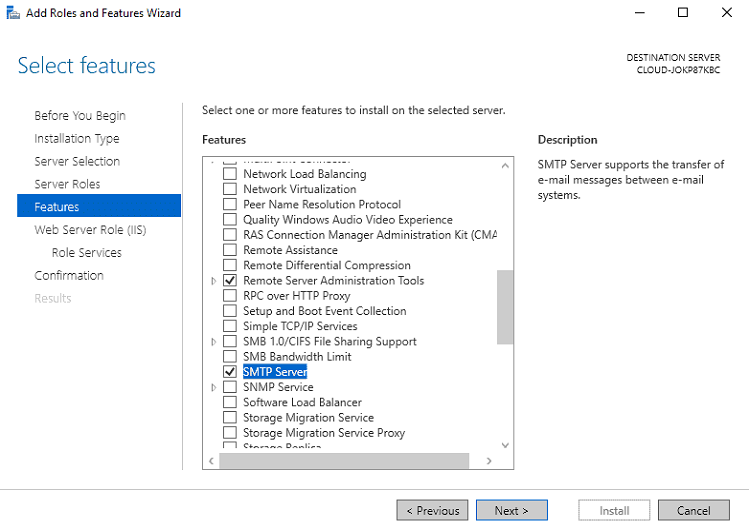
Click the Next button after choosing the SMTP server options. The screen for the web server role must now be visible.
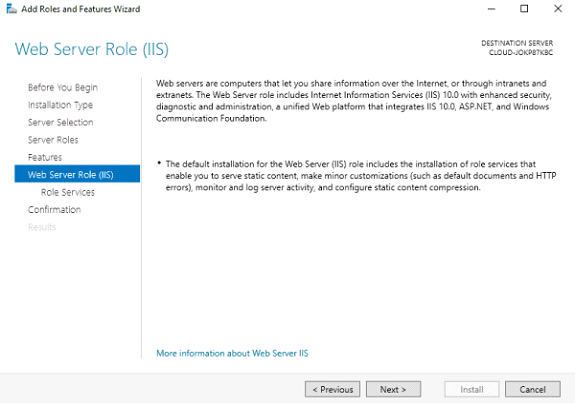
Select the Next option. Now “Select Role Services” is in front of you.
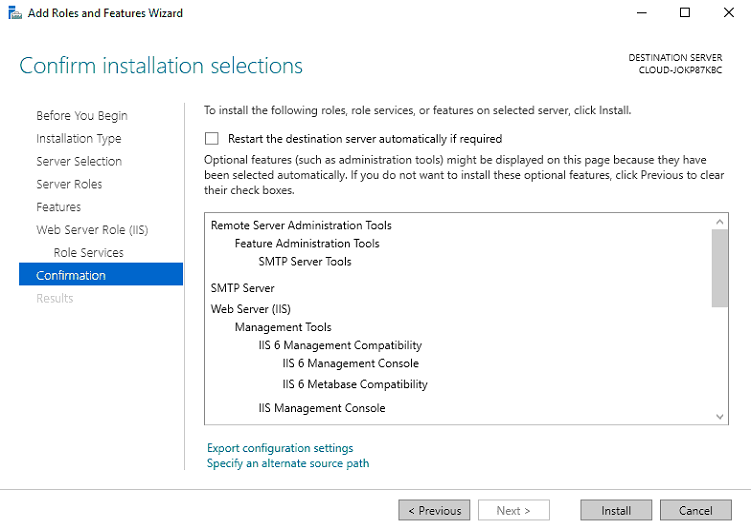
Select the Next option. The screen to verify the installation should appear.
Hit the Install button to begin the setup. You’ll need to give the installation some time to complete. Restarting the server after installation is complete is required.
Step 2: Configure the SMTP Service
The SMTP service must be configured from the IIS management after installation. To set up your SMTP server, please use the instructions below.
First, access the Internet Information Services (IIS) 6.0 Manager using the Server Manager’s Tools menu. The IIS Manager window must now be visible.
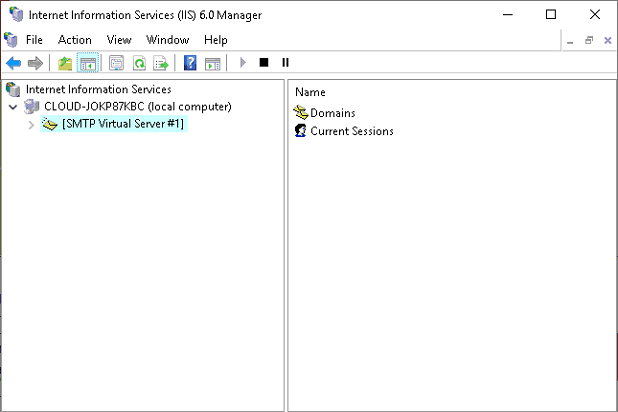
Choose “Select SMTP Virtual Server from the context menu.” The next screen should appear.
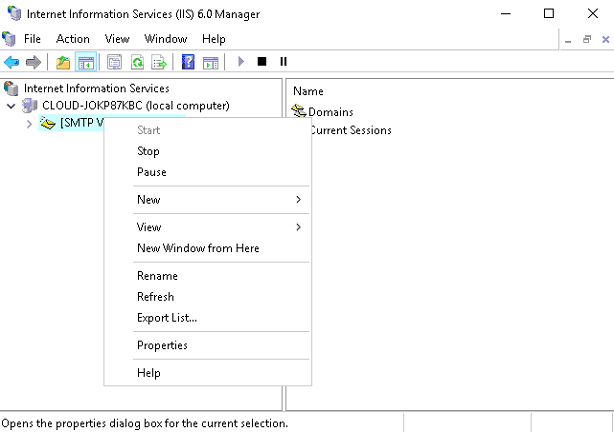
Select “Properties” from the menu. The next screen should appear.
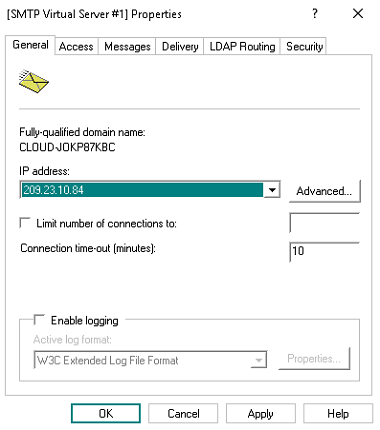
Click the Access tab after selecting your IP address. The next screen should appear.
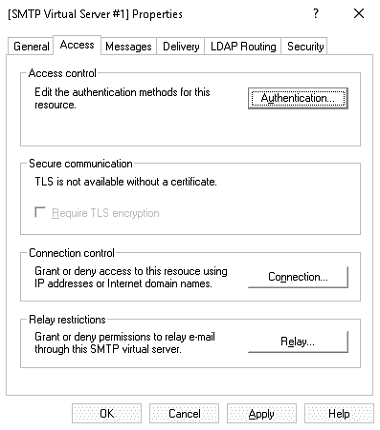
Now tap the Link. The next screen should appear.
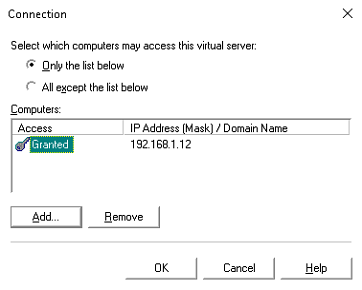
Click the OK button after entering the IP address of your permitted computer. Next, select the Relay option. The next screen should appear.
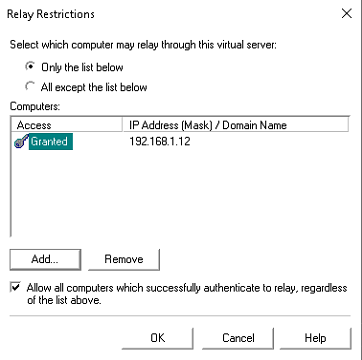
Enter the IP address of the relay and hit the OK button. Then select the Delivery menu. The next screen should appear.
Click the Advanced option after completing the mandatory configuration. The next screen should appear.
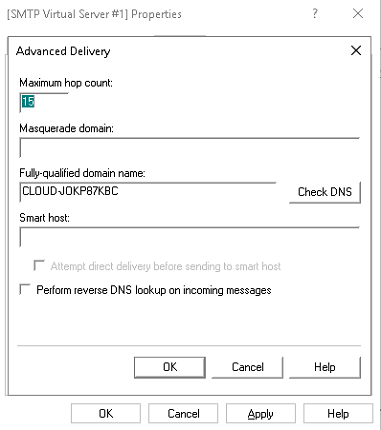
After defining your external domain, select OK to save your settings.
Step 3: Set up a Firewall in Windows
The next step is to open the SMTP port on the Windows firewall to access it from outside hosts. To set up the firewall, please refer to the instructions below.
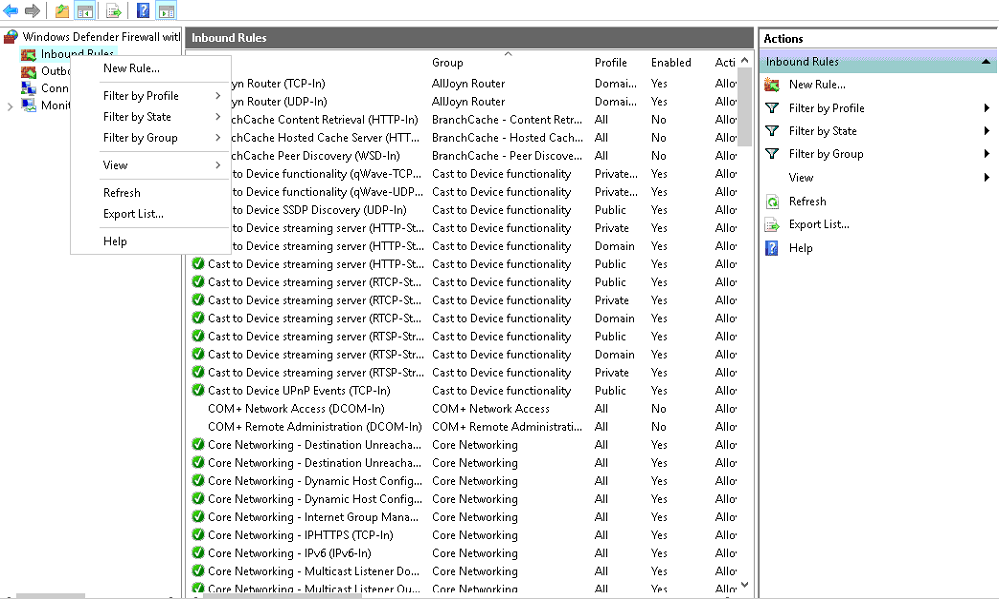
First, access the Windows Firewall in the manner outlined below.
Second, select “New Rule” from the Inbound Rule context menu. The Rule Type screen needs to load.
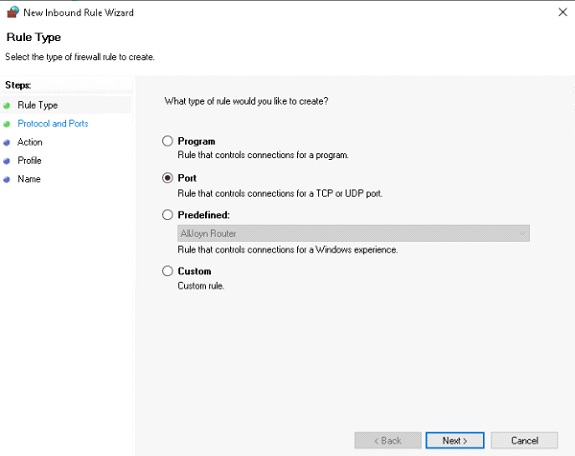
Third, choose the port you want to use, then press the Next button. Now you will see the “Protocol and Ports”.
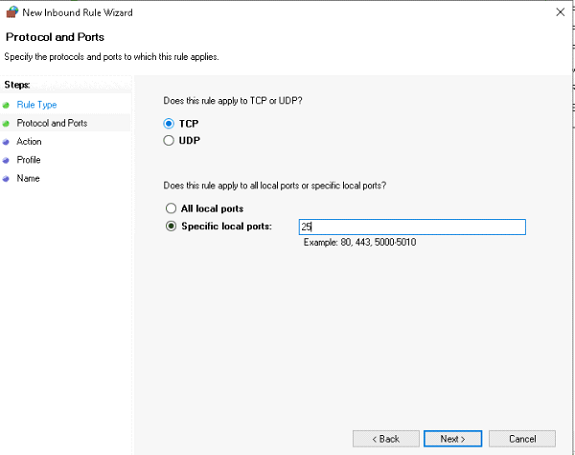
The fourth step is to specify the protocol and port number before proceeding. The Action screen should load.
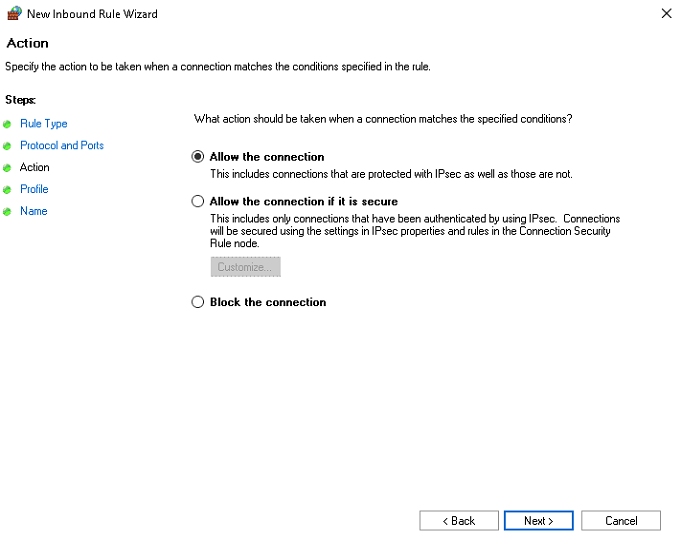
The fifth step is to click the Next button after choosing to allow the connection. The profile-selection screen will appear.
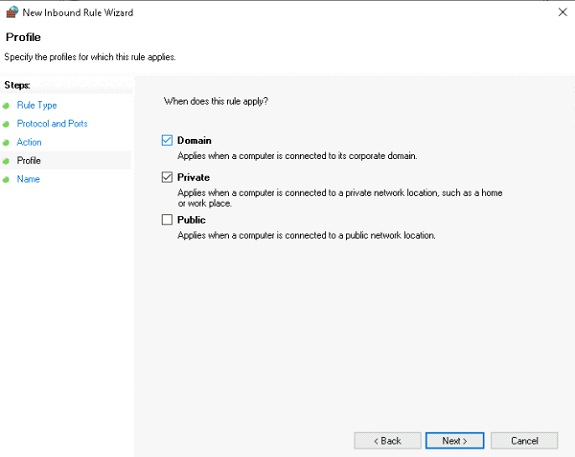
Click the Next button after choosing your profile. The panel for entering a name should now appear.
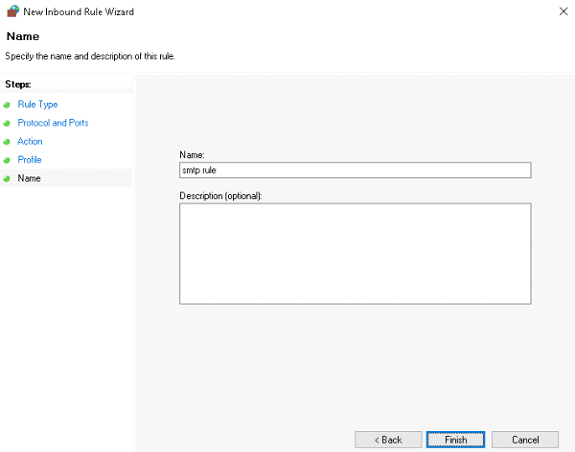
The final step in setting up your SMTP rule is to give it a descriptive name and then hit the Finish button.
You may now tailor email delivery with your Windows server to meet your needs.
We appreciate you reading our blog post on configuring a server to send and receive email with Windows SMTP.
FAQ
What are the steps for setting up an SMTP server in Windows?
Enabling the "Simple Mail Transfer Protocol (SMTP)" function is required to install SMTP server on windows. This can be easily done by going to the "Add or Remove Programs" part of your Control Panel, by clicking on "Turn Windows features on or off," and then selecting "Simple Mail Transfer Protocol (SMTP). After that, you can connect to your email provider by configuring the SMTP server settings.
In what ways is the Windows SMTP server compatible with other email service providers?
Any email source that allows for SMTP authentication can be used with the Windows SMTP server. Several well-known email clients support SMTP authentication, including Gmail, Yahoo Mail, and Microsoft Outlook.
In Windows, where can I find the SMTP server settings?
On Windows, access the "Internet Information Services (IIS) 6.0 Manager" and head to the "SMTP Virtual Server Properties" area to adjust the SMTP server settings. In this section, you can enter the information needed to connect to your email provider, such as the SMTP server name, port number, and authentication settings that can be changed after you install SMTP server on windows.
How can I verify that my Windows SMTP server is functioning correctly?
A free email testing tool, such as Mailtrap or SMTP Diag Tool, can be used to verify the SMTP server's functionality on Windows. You can use them to test your SMTP server by sending test emails to it and seeing if they arrive at your ISP's mail server. The SMTP server logs may contain information about connection problems or error messages.
Conclusion
In this guide we talked about the Windows SMTP service and its role in establishing an SMTP server. This tutorial should help you set up your own SMTP server on Windows. If you aren’t interested in setting up a full mail server, you can use the above configuration to send emails from your server. However, if you have any questions or clarifications, please comment them below. Thank you for reading, as always.