Install and Set Up Apache Tomcat on Windows
Install and Set Up Apache Tomcat on Windows by downloading the latest installer or zip, configuring the Java environment, and setting server preferences to efficiently host Java web applications.
🤖AI Overview:
Install and Set Up Apache Tomcat on Windows by downloading the latest version from the official site and installing using the Windows Service Installer or zip method. Configure Java environment and server settings like ports and admin credentials. Verify service status to ensure proper operation.
Prerequisites to Install Apache Tomcat on Windows
To let this tutorial works correctly, provide the options below and move on.
- A non-root user with
sudoprivileges. - Java Runtime Environment (JRE) or Java Development Kit (JDK) installed and configured.
Note: Since there are different versions of Apache Tomcat available for different versions of the specifications, have a look at the below image to determine your required Java Version.
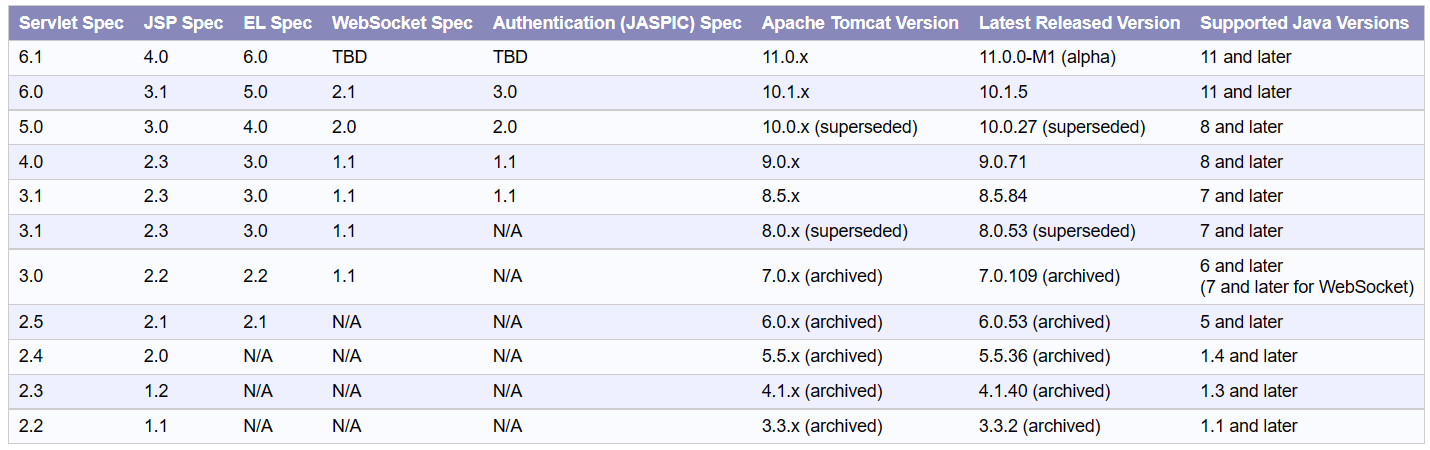
In this guide, we are going to Install Apache Tomcat 10 on Windows.
Tutorial Install and Set Up Apache Tomcat on Windows
Previously, you reviewed the required steps to install Tomcat on CentOS. Stay with us to Install Tomcat on Windows step by step. Let’s go through this guide and learn how to install and set up Apache Tomcat on Windows.
Step 1: Download Tomcat
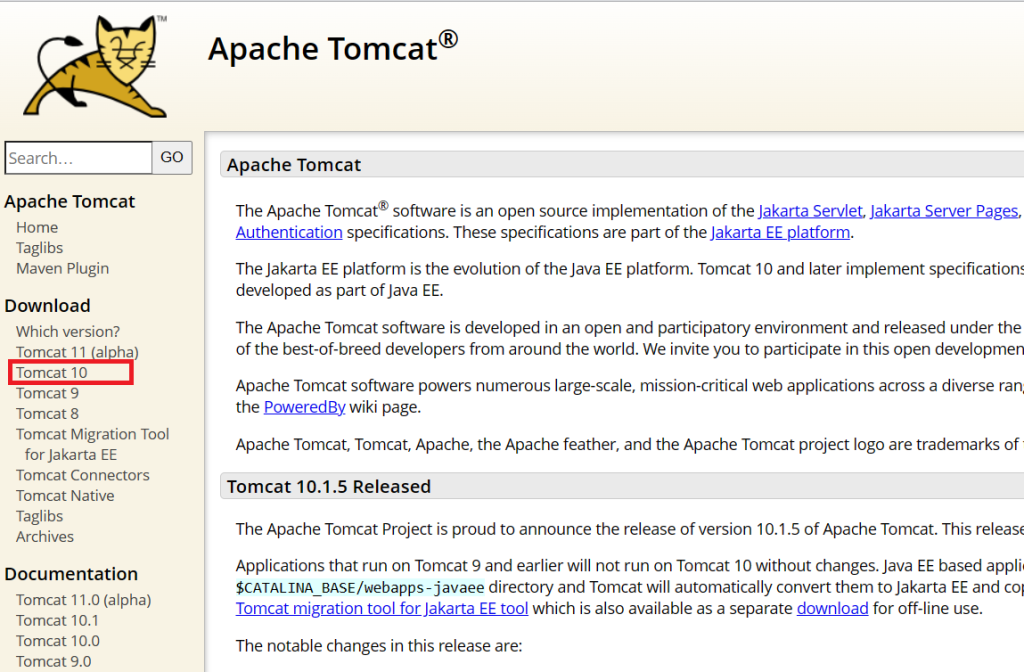
Open your favorite browser and navigate to the Official Apache Tomcat Website to download the latest Tomcat Version. As you see, you can choose it on the left menu.
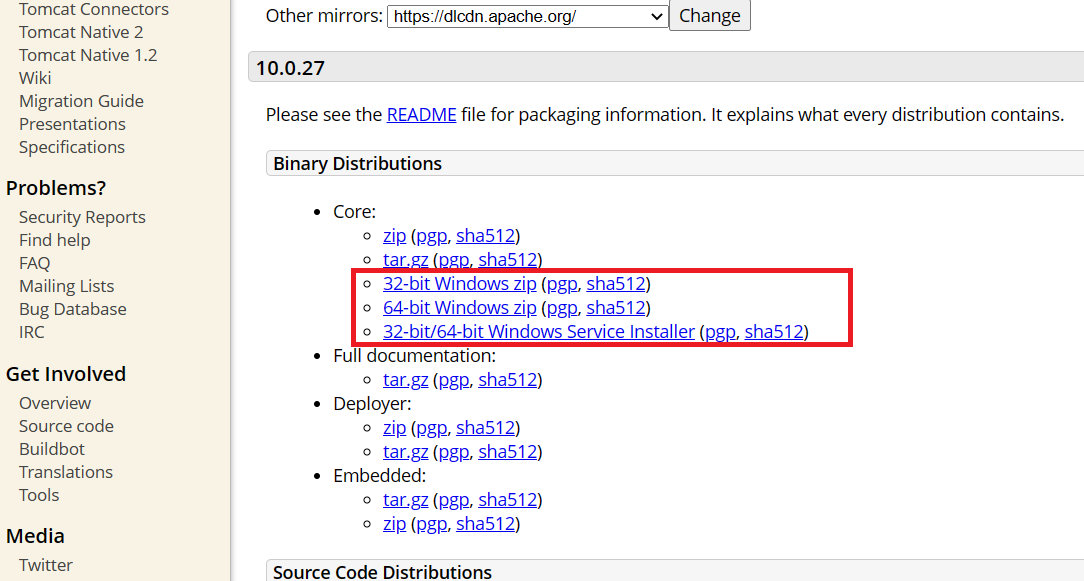
Then, by scrolling down to the Binary Distribution area, click the download link for the Windows Service Installer or the 32bit/64bit Windows zip file.
from now on, you can continue the installation process in two different methods. If you have chosen the Windows Service Installer, it will be going like this:
Step 2: Install Tomcat Using the Windows Service Installer
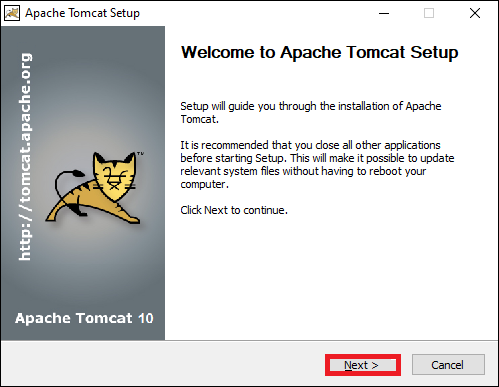
If you prefer to use the Windows Service Installer to install Apache Tomcat on Windows, follow the path below. When you open the Downloaded Windows Service Installer, click the Next button to let the installation begin as you see below.
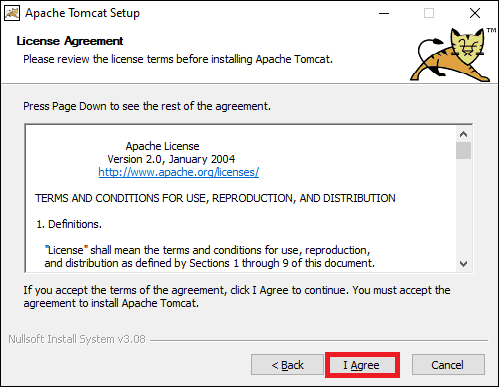
Then, Read and Agree to the License to continue.
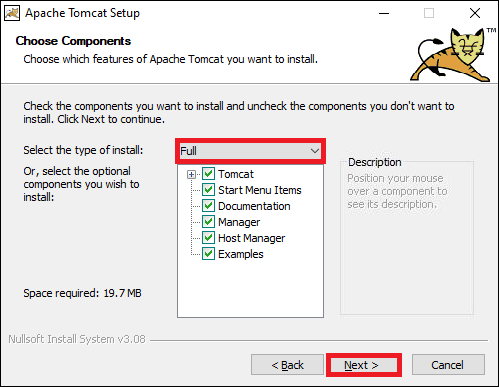
In the installation components windows, select the dropdown menu and select Full. In this way, the Tomcat server, start menu items, examples, admin interface, and documentation tools will be installed.
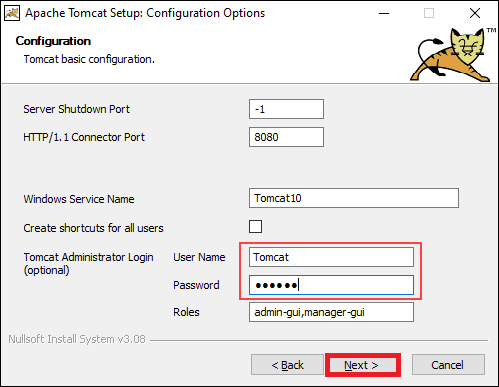
Now, it is time to set up the configure settings. The Tomcat server. For example, you can enter the Administrator login credentials such as username and password, or choose a different connection port to customize it to the port you consider. Also, you can name the Tomcat service or leave the default.
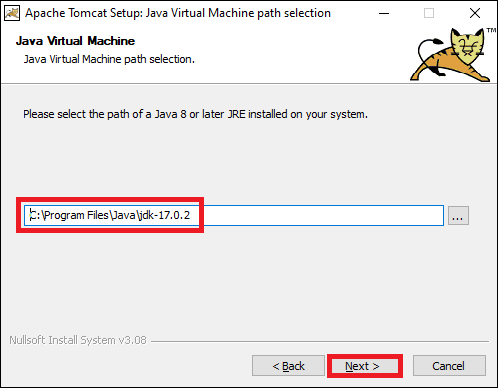
Next, you need to enter the full path to the JRE directory. However, it will be completed automatically if the Java environment variables are already set. When you are finished, click Next to move on.
In the next step, you need to choose the Tomcat server install location. Also, you can keep the default. Finally, click Install and continue.
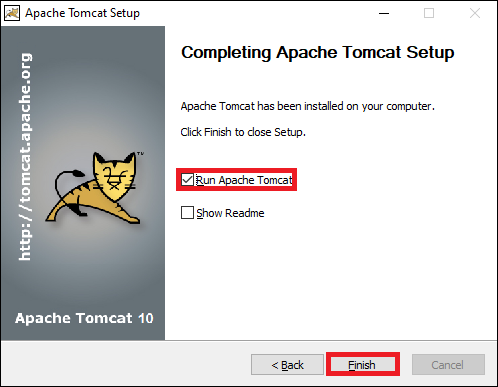
When the installation is finished, check the Run Apache Tomcat box to start the service. If you desire to see the Readme file, check the Show Readme box. Click Finish to complete the installation.
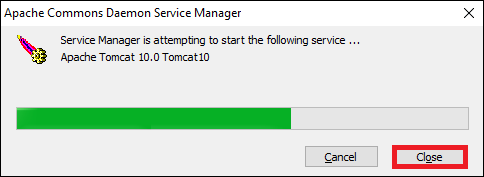
When the popup window shows up, it means that the Tomcat service is being started. After that, it will be closed automatically. Now, you’re all set and the Apache web server must have been successfully installed.
Step 3: Install Apache Tomcat Using the zip Archive
As we mentioned, there are two methods to install Apache Tomcat on Windows. the second method you can use to Install Apache Tomcat on Windows is using the zip Archive. Depending on your Windows version, you download the 32bit/64bit Windows zip file. Then, unzip the downloaded file, Right-click the file, and select Extract all…
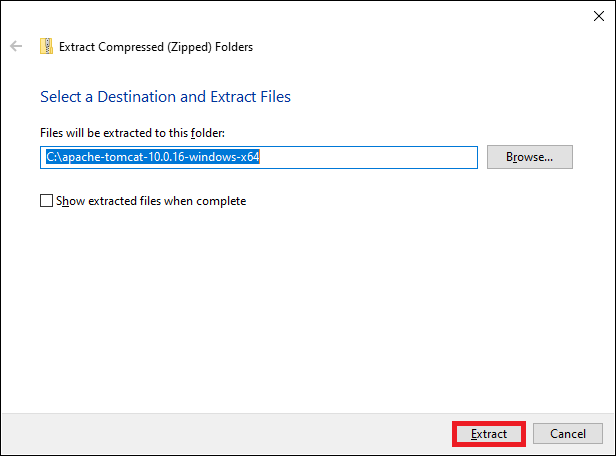
Define where the archive’s contents should be extracted. We advise extracting it to the hard drive’s root for simpler navigation. The directory can optionally have a shorter name to make server configuration easier in the future. To begin the procedure, click Extract.
Then, navigate to the conf sub-directory within the extracted directory and locate the server.xml file. The connection port’s default value is 8080. Locate the following lines in the server.xml file using a text editor like Notepad++ in order to select a different port:
<Connector port="8080" protocol="HTTP/1.1"
           connectionTimeout="20000"
           redirectPort="8443" />
Next, change the connector port number to any number between 1024 and 65535.
Locate the web.xml file in the conf directory, then update the file using a text editor to allow directory browsing. Directory searching is useful for system testing, and occasionally it can fix a 403 prohibited issue.
Locate the following lines and change the listings value from false to true:
<servlet>
  <servlet-name>default</servlet-name>
  <servlet-class>org.apache.catalina.servlets.DefaultServlet</servlet-class>
  <init-param>
    <param-name>debug</param-name>
    <param-value>0</param-value>
  </init-param>
  <init-param>
    <param-name>listings</param-name>
    <param-value>false</param-value>
  </init-param>
  <load-on-startup>1</load-on-startup>
</servlet>
Edit the context.xml file to include an auto-reload feature. Above all, auto-reload is helpful during development to avoid manually restarting the server after each update. Use your favorite text editor and open the context.xml file. Locate the following line and change the value from false to true in each instance:
<Context reloadable="false" crossContext="false" parallelAnnotationScanning="false">
   ......
   ......
</Context>
Start the server after making the changes. Cmd can be entered by pressing the Windows key. Enter will bring up a Command Prompt window. Then, navigate to your Tomcat server’s bin directory and execute:
startupNext, you need to add an exception for Tomcat in the firewall. There’s a new Tomcat console window now. The Java servlets’ system.out.println() and error messages are sent to this console.
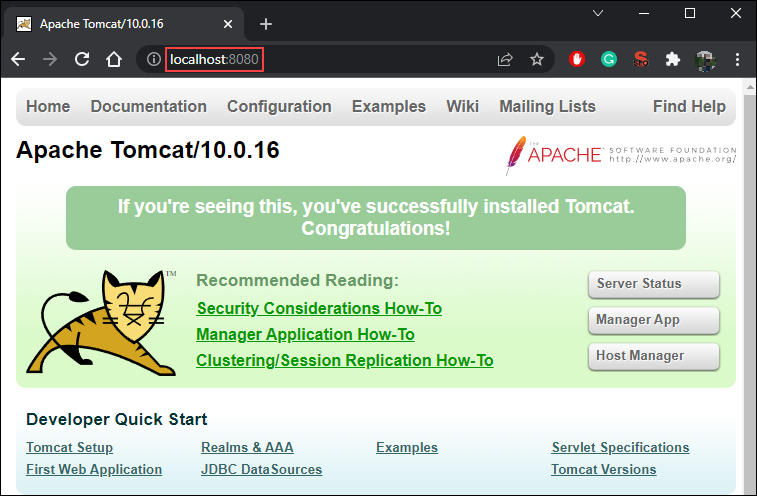
Use a web browser as an HTTP client to connect to the server. To test the server, go to http://localhost:8080 and visit the Tomcat welcome page. To learn more about the server and to get started using and configuring it, follow the Developer Quick Start pages.
When you decide to shut down the Tomcat server, you just need to press Ctrl+C on the Tomcat console.
How to verify Apache Tomcat is running
So far, you learned how to install and set up Apache Tomcat on Windows. When the installation process is finished successfully, and you viewed the recently mentioned Apache Tomcat page, you are ready to check if Apache Tomcat Service is running.
If you have done the installation by the first method, the Windows Service installer, tomcat must run on boot automatically as a Windows service. So, continue reading to make sure that tomcat is started as a Windows service:
To do this, open the Start men and search for Services and Select the Services result. Look for the Apache Tomcat service in the Services pane. The Status column shows whether the service is active or not. Using the toolbar buttons or the Stop or Restart buttons on the left side of the service list, you can start or stop the service.
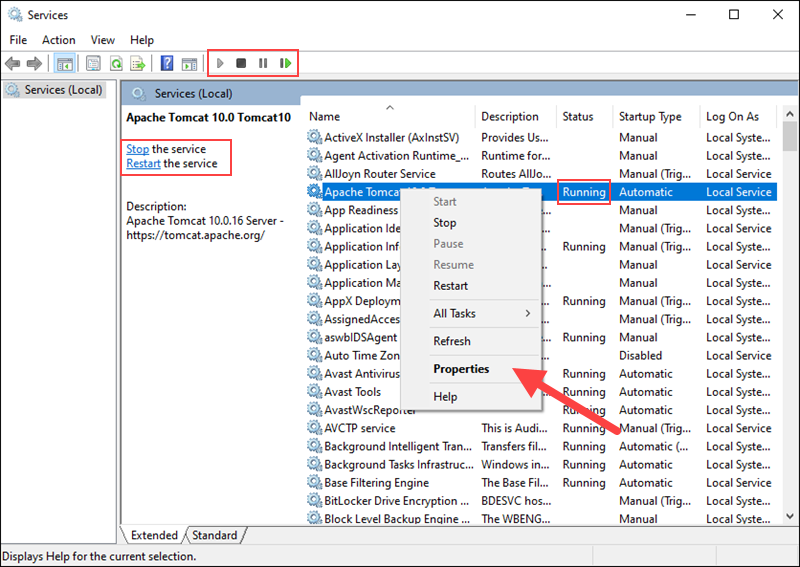
Right-clicking the Tomcat service and choosing Properties will allow you to configure the service startup.
Conclusion
By following this guide on how to install and set up Apache Tomcat on Windows, business owners can establish a reliable platform to host Java-based web applications. Proper installation, configuration, and security hardening ensure performance efficiency and protection against common threats.
After installation, consider deploying your business applications, integrating Tomcat with databases, and implementing monitoring tools for ongoing management. Investing time in these foundational steps supports scalable and secure web services crucial for modern business operations.
FAQ
2. What methods are available to install Apache Tomcat on a Windows system?
You can install Apache Tomcat on Windows using two methods: the Windows Service Installer or by extracting and configuring the ZIP archive manually.
3. How do I install Apache Tomcat using the Windows Service Installer?
Download the Windows Service Installer from the official Apache Tomcat website, run the installer, agree to the license, select full installation, configure administrator credentials and ports, specify the JRE path, choose the installation directory, and complete installation. The service can be started immediately after installation.
4. How can I install and configure Apache Tomcat using the ZIP archive file?
Download the appropriate ZIP file, extract it to a preferred location, edit configuration files such as server.xml for port changes, web.xml for directory browsing, and context.xml for auto-reload features, then start the server using Command Prompt from the bin directory.
5. How do I change the default port Apache Tomcat uses on Windows?
Modify the Connector port value in the server.xml file found in the conf directory. Set the port number to any valid port between 1024 and 65535 to avoid conflicts.
6. What steps are necessary to allow Apache Tomcat to communicate through the Windows firewall?
Add an exception for Apache Tomcat in the Windows firewall settings to allow inbound HTTP traffic on the configured connector port, typically port 8080.
7. How can I verify that Apache Tomcat is running properly on Windows?
Open the Services application in Windows and check the status of the Apache Tomcat service. Alternatively, access "http://localhost:8080" in a web browser to see the Tomcat welcome page.
8. How do I start or stop the Apache Tomcat service on Windows?
Use the Services management console to start, stop, or restart the Apache Tomcat service, or control the server through the Tomcat console if running via the ZIP archive method.
9. What advantages does the auto-reload feature in Apache Tomcat provide during development?
The auto-reload feature, configured in the context.xml file, allows changes in web applications to be applied immediately without manually restarting the server, streamlining development workflow.
10. Where can business owners seek support if they encounter issues installing or configuring Apache Tomcat on Windows?
Business owners can contact technical support teams or refer to the official Apache Tomcat documentation and community forums for assistance with installation or configuration challenges.