How to Install Ruby on Ubuntu
Ruby is one of the most popular open-source, object-oriented, dynamic, and general-purpose programming languages, which is very similar to a spoken language due to its simple syntax. The advantages of the Ruby programming language have made it popular among developers in various fields such as web/application development, data analysis, and memory management. The most important goal of this language is the development of object orientation and high productivity. Also, it is designed based on the powerful framework of Ruby Rails.
This article is provided for users interested in using Ruby on Ubuntu to learn how to install Ruby on Ubuntu 22.04 and benefit from the features of the Ruby programming language. In this tutorial, we will explain four methods of installing Ruby on Ubuntu 22.04 to use whichever method is easier for you. The methods we will provide to install Ruby will be as follows:
- Install Ruby on Ubuntu via standard Ubuntu repositories
- Install Ruby on Ubuntu via the Rbenv script
- Install Ruby on Ubuntu through the Ruby Version Manager(RVM)
- Install Ruby on Ubuntu through snap
The easiest way to install Ruby is through the Ubuntu repository, but each person chooses the most suitable method according to his conditions and knowledge. If you are ready, let’s start installing Ruby on Ubuntu.
prerequisite
- A system running Ubuntu or Ubuntu Linux VPS (Ubuntu 20.04)
- A user account with Sudo permission
- Access to the command line
Method 1: Installing Ruby on Ubuntu using the Ubuntu repository
Fortunately, the Ubuntu repository supports the Ruby programming language, so you can easily install Ruby on the Ubuntu operating system using the apt package manager. The only drawback of this method is that you cannot benefit from the latest version of Ruby, but it is the easiest and fastest way to install Ruby in Ubuntu.( In this tutorial, we are going to install Ruby on Ubuntu 22.04.)
Step1: updating Ubuntu repository
The first step is to update the Ubuntu 22.04 repository. After accessing the terminal, you can update the Ubuntu repository using the apt package manager:
sudo apt updateStep2: installing Ruby on Ubuntu
Then install Ruby on Ubuntu by running the following command:
sudo apt install ruby-full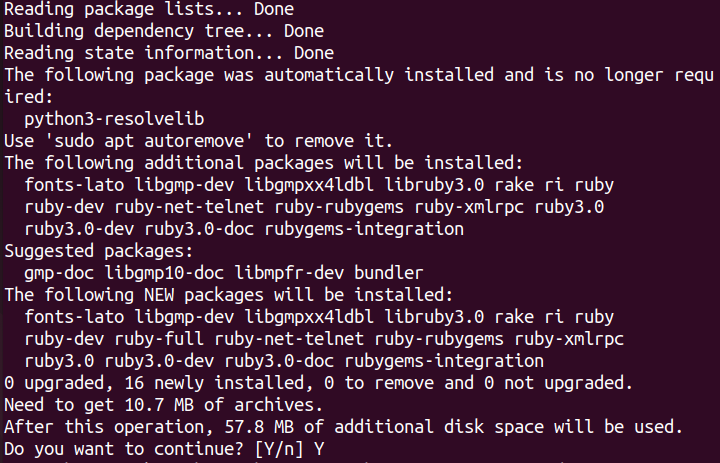
If prompted, complete the installation process by typing Y and pressing the Enter button.
Step3: checking the version of Ruby
After Ruby has been successfully installed on Ubuntu, you can check the running version of Ruby by running the following command and make sure that Ruby is installed and running on Ubuntu:
ruby --versionMethod 2: Installing Ruby on Ubuntu using Rbnev
Rbnev is a command line tool that runs on Linux distributions to manage versions of the Ruby programming language. In addition to the fact that Rbnev provides the possibility of using the latest version of Ruby, through Rbnev you can use several versions of Ruby simultaneously on the operating system and switch between different versions of Ruby.
It should be noted that the ruby-build plugin is also useful in installing the latest versions of Ruby.
The following steps will guide you in installing Ruby on Ubuntu via Rbnev:
Step1: Updating Ubuntu repository
As always, the first step is to update the Ubuntu 22.04 repository by running the apt command:
sudo apt updateStep2: Installing dependencies of Ruby
The second step will include downloading and installing libraries, compilers, and other dependencies of Ruby, which is one of the prerequisites for running Ruby correctly. Install the Ruby dependencies on Ubuntu by running the following command:
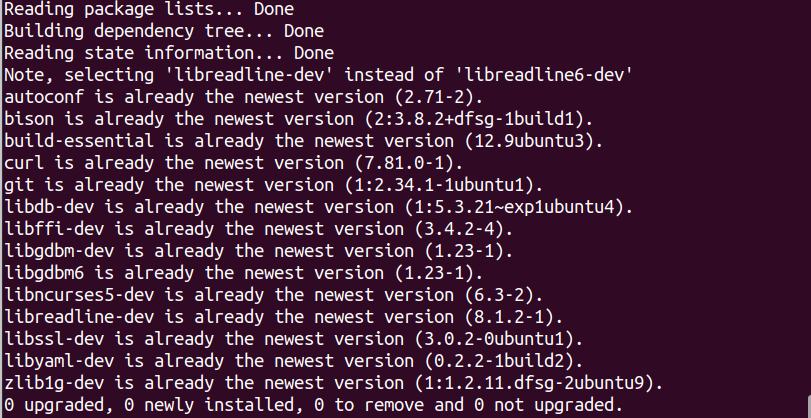
sudo apt install git curl autoconf bison build-essential libssl-dev libyaml-dev libreadline6-dev zlib1g-dev libncurses5-dev libffi-dev libgdbm6 libgdbm-dev libdb-devThen confirm the installation process by typing Y and pressing the Enter button.
Step3: Installing Rbenv
1. At this step, it is time to download the shell script file to download and run the Rbnev tool. For this purpose, run the curl command:
curl -fsSL https://github.com/rbenv/rbenv-installer/raw/HEAD/bin/rbenv-installer | bashBy running this script, the rbenv and ruby-build repositories from GitHub are simulated to the ~/.rbenv directory and Rbnev is installed by calling another script.
2. Running Rbnev requires changing and updating the PATH environment, that is, you need to add $HOME/.rbenv/bin to the PATH environment variable.
- For this purpose, if you have used the Bash shell, you must execute the following command:
echo 'export PATH="$HOME/.rbenv/bin:$PATH"' >> ~/.bashrc

echo 'eval "$(rbenv init -)"' >> ~/.bashrc

source ~/.bashrc- If you use the Zsh shell instead of the Bash shell, enter the following command to execute this step correctly:
echo 'export PATH="$HOME/.rbenv/bin:$PATH"' >> ~/.zshrc

echo 'eval "$(rbenv init -)"' >> ~/.zshrc

source ~/.zshrc3. After completing the Rbenv installation, run the following command to check its version:
rbenv -vOutput
Rbenv 1.2.0-1-g6cc7bffStep4: Installing Ruby via rbenv
1. After you have installed Rbenv, enter the following command to access a list of available Ruby versions to Install the latest or desired version of Ruby:
rbenv install –lOutput
2.6.10

2.7.6

3.0.4

3.1.2

jruby-9.3.4.0

mruby-3.0.0

rbx-5.0

truffleruby-22.0.0.2

truffleruby+graalvm-22.0.0.2

only latest stable releases for each Ruby

implementation are shown.2. Now that you have installed the Rbenv tool, you can install the latest version of Ruby on Ubuntu by typing the following command:
rbenv install [version number]For example:
rbenv install ruby 3.1.2Installing Ruby using Rbenv is not as fast as installing Ruby through the Ubuntu repository and you have to wait for some time.
Note: To list the output of each step of Ruby installation, you can use the following command:
rbenv install --verbose [version number]3. In this step, you must set the version of Ruby you installed as global. Enter the following command for this purpose:
rbenv global [version number]For example:
rbenv global 3.1.2Step5: Checking installation and execution of Ruby
Type the following command to check the running version of Ruby:
ruby --versionOutput:
ruby 3.1.2p20 (2022-04-12 revision 4491bb740a) [x86_64-linux]Method 3: Installing Ruby on Ubuntu using Ruby Version Manager (RVM)
RVM is also a command line tool that offers the possibility of managing and using several different Ruby environments (from interpreters to a set of gems). The last method is to install Ruby using RVM. Follow the steps below to install Ruby on Ubuntu via RVM:
Step1:Updating Ubuntu repository
Yes, you guessed it right, the first step is to update the packages and Ubuntu repository:
sudo apt updateStep2: Downloading and installing Ruby Dependencies
For running Ruby without encountering problems, you must download and install the essential Ruby Dependencies by entering the following command:
sudo apt install curl g++ gcc autoconf automake bison libc6-dev libffi-dev libgdbm-dev libncurses5-dev libsqlite3-dev libtool libyaml-dev make pkg-config sqlite3 zlib1g-dev libgmp-dev libreadline-dev libssl-devTo confirm the completion of the installation process, type Y when prompted and press the Enter button.
Step3: Installing RVM
At this point, install RVM :
- install RVM by entering the following command:
sudo apt install rvmOutput:
Reading package lists…Done

Building dependency tree…Done

Reading state information…Done

rvm is already the newest version(1.29.12-1).
0 upgraded,0 newly installed,0 to remove and 0 not upgraded.- In addition to the above command, there is another method for installing RVM:
first, to install RVM and confirm its installation file, you need to add the GPG key by running the following command:
gpg --keyserver hkp://pgp.mit.edu --recv-keys 409B6B1796C275462A1703113804BB82D39DC0E3 7D2BAF1CF37B13E2069D6956105BD0E739499BDBThen download and install RVM via the installation script:
curl -sSL https://get.rvm.io | bash -s stableThen run the source command to load the RVM script environment variables:
source ~/.rvm/scripts/rvmAccording to your conditions, you can install RVM by any method that suits you.
Step4:Installing Ruby via RVM
1. Then run the following command to list the available versions of Ruby in RVM:
rvm list knownOutput:
# MRI Rubies

[ruby- ]1.8.6[-p420]

[ruby- ]1.8.7[-head] # security released on head

[ruby- ] 1.9.1[-p431]

[ruby- ]1.9.2[-p330]

[ruby- ]1.9.3[-p551]

[ruby- ]2.0.0[-p648]

[ruby- ]2.1[ .10]

[ruby- ]2.2[[ .10]

[ruby- ]2.3[ .8]

[ruby- ]2.4[ .10]

[ruby- ]2.5[ .8]

[ruby- ]2.6[ .6]

[ruby- ]2.7[ .2]

[ruby- ]3[ .0.0]

ruby-head2. After choosing the desired version of Ruby, you can now install the desired version of Ruby in Ubuntu using RVM:
rvm install ruby-[version number]For example, to install the latest version of Ruby on Ubuntu, you must run the following command:
rvm install ruby 3.2.0To install the latest stable version of Ruby, you can also use the following command:
rvm install rubyIf prompted, enter the password for your account that has administrative privileges, and then press Enter.
Step5: checking the version of Ruby
To check the running version of Ruby, execute the mentioned command:
ruby --versionMethod 4: Install Ruby on Ubuntu using Snap
Snap is a command line tool from the Snapcraft toolkit that is used for package development and distribution. This method is not too difficult. We will provide the steps to install Ruby on Ubuntu using snap, by following these steps, you will easily install Ruby on Ubuntu through the snap tool.
Step 1: Checking the installation and running of Snap
In this method, you don’t need to update Ubuntu packages because Snap does it automatically 4 times a day. But running thesudo snap refreshcommand restores the latest packages.
This method is ideal for users who use the Snap tool, but it is better to first make sure that the Snap tool is running on your system and enter the following commands to make sure that the Snap tool is installed by displaying the Snap installation location and its version. Available on your system:
which snap

/usr/bin/snap

snap --version
To check the installation and execution of a tool on the system, the fastest way is to check the version of the tool. If the Snap version is displayed in the output of the above commands, it means that Snap was installed on your system; if you notice that Snap was not installed on the Ubuntu operating system, you can follow the steps to install snap from the documentation provided by Canonical and install snap on Ubuntu operating system.
Step 2: Install Ruby on Ubuntu via snap
To install Ruby via snap, enter the following command with sudo privileges:
sudo snap install ruby --classicStep 3: Checking the installation and running of Ruby on Ubuntu
Now that you have successfully installed Ruby on Ubuntu using snap, to ensure that you have completed these steps correctly and Ruby is running on your system, enter the following command:
which ruby

/snap/bin/ruby

ruby -v
How to remove Ruby in Ubuntu
Uninstalling Ruby on Ubuntu 22.04 doesn’t take as much time as installing it, it’s as simple as running just one command. If you no longer need Ruby, you can remove Ruby from the Ubuntu 22.04 repository by typing the following command:
sudo apt remove --autoremove ruby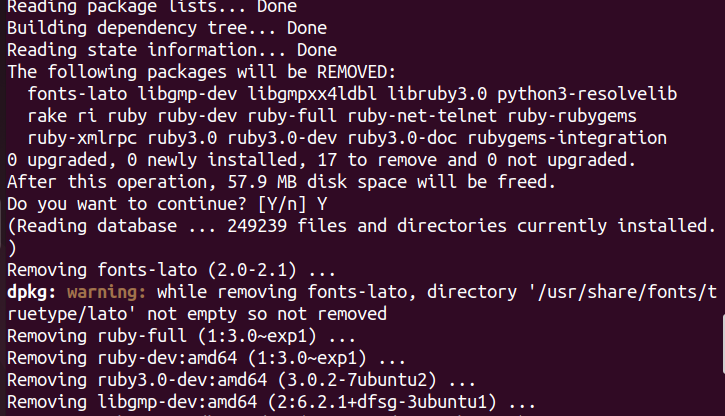
FAQ
How can we check the installation and execution of Ruby?
To make sure that Ruby is installed and running correctly, enter the following command:
ruby -vOr
ruby --versionIf the Ruby version is displayed in the output, it means that Ruby has been successfully installed on your system.
What are the uses of Ruby?
- To create and develop various web applications
- Creating static websites
- Development of automation tools
- Data processing services
- Development of DevOps
- Development and creation of web servers
- Web scraping & crawling
- API Clients
Is Ruby not suitable for beginners?
With its simple syntax, flexibility, and visual appearance, Ruby is suitable for all users, especially beginners, because, in addition to being easy to use, Ruby is the most efficient tool for learning coding and programming for beginners.
Conclusion
Ruby is one of the most popular open-source programming languages, which is most widely used in web application development. By following the steps presented in this tutorial through 4 different methods, now you should be able to successfully install Ruby on Ubuntu 22.04 to take steps towards goals and development using the powerful Ruby programming language.
Although the method of installing Ruby using the Ubuntu repository is the easiest, if you want to use the latest version of Ruby, it is better to install it using RVM or Rbnev; In addition to installing Ruby, these tools offer more possibilities for managing and using the Ruby programming language.
If you encounter a problem in any section, let us know in the comments section so that we can respond as soon as possible.
Thank you for choosing our article to read.