Beginner’s Guide to Install Cpanel/WHM on CloudLinux
You might need to manage your web hosting environment as a Linux user. If you are not that technical, cPanel/WHM is what you need to manage your considered web hosting server. So, join us with the Beginner’s Guide to Install cPanel/WHM on CloudLinux.
cPanel is a Linux-based control panel. If you have basic knowledge of hosting, and you decide to buy cheap Linux VPS, you need to use some user-friendly tools. cPanel enables you to perform actions from a dashboard instead of running complex commands.
What is cPanel/WHM and Why to Use it?
One of the most widely used control panels among site designers and hosting companies is cPanel. It is frequently used in conjunction with WHM (Web Host Manager). Both tools cooperate closely while each performs a distinct function. The server’s administrative functions are controlled by Web Host Manager. WHM manages many websites and various accounts in addition to server specifications. cPanel hosting is the process of a hosting company managing a server with WHM and setting up cPanel accounts for their clients.
Users choose cPanel for the below features:
- User-friendly interface
- Highly compatible
- Wide range of features
- Automatic software installation
- Reliable support
As an online control panel, cPanel aids customers in controlling Linux hosting services. A user may manage hosting administration chores including setting up a website, creating and managing emails, changing passwords, setting up mail forwards, managing add-on domains and subdomains, uploading and managing files, etc. with the aid of cPanel.
Stay with us to get ready to install cPanel/WHM on CloudLinux.
Prerequisites to Install cPanel/WHM on CloudLinux
Consider that, you can install cPanel & WHM on AlmaLinux version 6, 7, 8, or 9, but you cannot install cPanel & WHM version 112 and later on CloudLinux™ version 6 or 7 servers. So, make sure your CloudLinux system satisfies all the minimal criteria for new installations before you install cPanel & WHM:
- Log in to the server as the
rootuser. - 20 GB RAM.
- A Linux VPS with CloudLinux 8/9 OS.
- Perl & Curl Installed.
- At least one IPv4 address.
cPanel/WHM Installation on CloudLinux [Step by step]
Once you provided all the required prerequisites of the previous part, you are ready to follow below simple steps to install cPanel/WHM on CloudLinux.
Step 1. Update Server
Before installing cPanel, update the server with the following command. Depending on the speed of your network and the worth of your resources, the update procedure will take a few minutes.
yum update -yWhen prompted to continue with the update, type y and click Enter.
Step 2. Disable Firewall
During installation, the installer will make an effort to open the required ports. Before starting the installation of cPanel and WHM, we advise you to turn off any OS firewalls. We advise that after the installation is complete, you configure a firewall using a third-party client like APF or CSF.
Run the commands below to deactivate the firewall on CloudLinux 6:
/etc/init.d/iptables save
/etc/init.d/iptables stop
/sbin/chkconfig --del iptables
Also, to deactivate firewalls on CloudLinux 7, 8, and 9, run the following commands:
iptables-save > ~/firewall.rules
systemctl stop firewalld.service
systemctl disable firewalld.service
Step 3. Disable SELinux
Before starting cPanel and WHM installation, you must disable SELinux in order for your system to be compatible with the installation of cPanel. To do this, run:
# setenforce 0Update the following entry in /etc/sysconfig/selinux to permanently disable SELinux.
SELINUX=disabledStep 4. Setup Hostname
cPanel requests for a hostname that should be in Fully Qualified Domain Name format (FQDN). Make sure to provide your system with a suitable, fully qualified hostname. To set a proper hostname type:
# hostname myeserver.example.comNote: Do not forget to set your own hostname instead of myeserver.example.com
Edit the hostname item in /etc/sysconfig/network as shown below to permanently set the hostname.
HOSTNAME=myserver.example.comStep 5. Install cPanel/WHM
Since your cPanel/WHM installation preparation is now complete, you can run each of the aforementioned commands one at a time to install WHM/cPanel on your system.
# cd /home
# curl -o latest -L http://httpupdate.cpanel.net/latest
# sh latest
It may take some time to complete.
Step 6. Activate cPanel/WHM License on CloudLinux
To activate the free 15-day cPanel license, sign in to your cPanel Store account. Log in if you already have an account, and if not, create one now. When you install cPanel/WHM on CloudLinux, you should go to your cPanel web interface to create a free license.
In the next part of this tutorial, you will learn how to log in to your cPanel/WHM account.
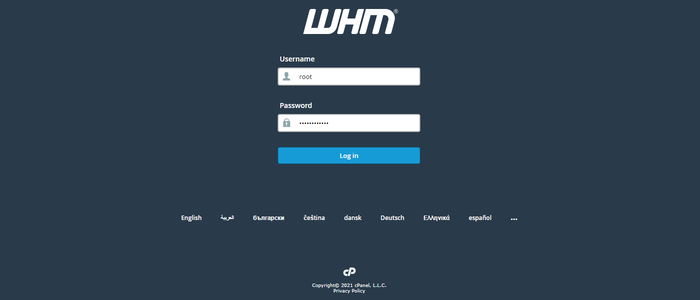
How to Log in to cPanel/WHM Via a Web Browser
In this part, you will learn how to log in to your account using the username and password for your server.
Note: To access cPanel, enter the IP address or domain and the 2083 port in your preferred browser and to access WHM, enter the IP address or domain and the 2087 port in your preferred browser.
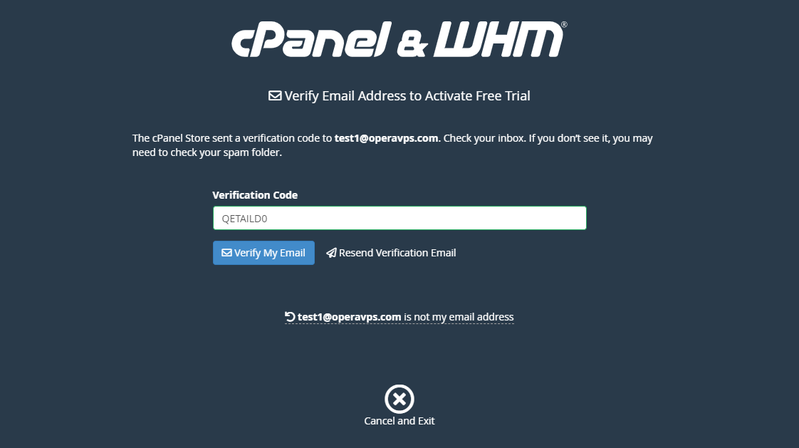
If you don’t already have an account, you will be prompted to create one. When you are done, you will get an email to set a password for your cPanel customer account. Remember that you will be prompted to grant access to the IP of your server so that it may be connected to the email address you supplied if you are signed in to your email in the same browser that you are setting the WHM and creating the account.
Note: If you purchase an IP address-based CloudLinux license, the cPanel & WHM installation process automatically installs CloudLinux.
When you’re all set, you must receive a code that you should enter.
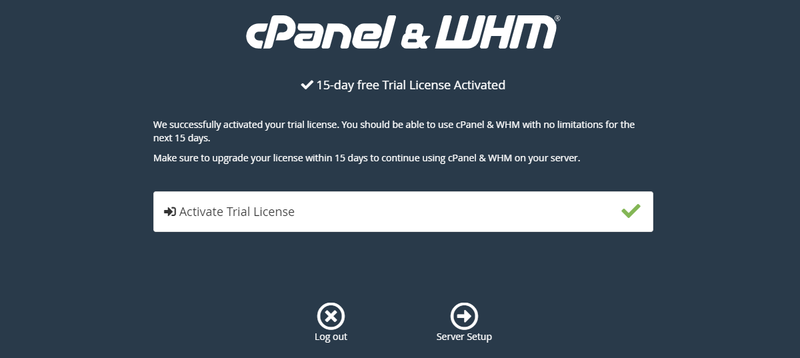
Your trial license activation was successful, as seen by this page. So you can move on to the section about server setup.
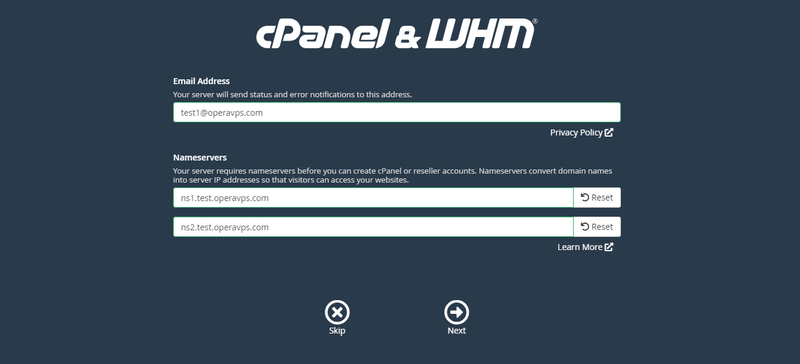
At this point, you need to enter your email address so that WHM can notify you if there are any potential errors. Next, you need to enter two name servers. Your domain or subdomain can be connected to your WHM server via name servers.
Note: In your domain control panel, you need also to add these as child name servers.
Purchase, Verify, and Update cPanel License on CloudLinux
You can visit the OperaVPS license page to order a cPanel license. Remember to confirm the activation of your license on the cPanel License Verification site.
When you run this command inside your server after ordering a license, the license will be updated.
/usr/local/cpanel/cpkeycltThat’s it! Once you see the above page, it means that you are finished installing the cPanel WHM on your CloudLinux and creating the free trial license. Just reboot your server to apply kernel and software updates.
FAQ
Are cPanel and WHM the same?
WHM/cPanel is essentially split into two sections. cPanel and WHM. Whereas cPanel is known as a single hosting account, the WHM part is utilized for managing your system, hosting accounts, and system maintenance.
How to transfer a single cPanel & WHM license across CloudLinux 8 and 9?
It is NOT possible to transfer a single cPanel & WHM license across multiple servers. This may cause cPanel, L.L.C. to lock your license.
Which browsers are compatible with cPanel?
cPanel/WHM is developed to function with the latest versions of the below browsers:
Chrome™ (MacOS®, Microsoft® Windows®, Linux)
Firefox (MacOS, Windows, Linux)
Microsoft Edge (Windows)
Safari® (MacOS)
Mobile versions of Firefox, Chrome, and Safari are also compatible with cPanel & WHM.
Conclusion
In this article, you learned how to install cPanel/WHM on CloudLinux. The Network Manager service will be immediately turned off by the cPanel & WHM installer on systems running CloudLinux 8 and 9. But, in the case of running CloudLinux 6 and 7, you need to disable Network Manager before you run cPanel/WHM installation since it automates the network’s settings and disrupts connections to the IP addresses that reside in the ipaliases module. Otherwise, following the above steps properly helps you to install cPanel/WHM on CloudLinux smoothly install without any errors.
If you encounter any problems, please do not hesitate to contact us. Our technical support team will try their best to solve your problems.