How to Install Django on Ubuntu for Web Development
Django is a free and open-source framework written in Python that is designed to help developers, governments, top technology companies, and organizations develop their websites and applications. In this article, you will learn How to Install Django on Ubuntu through four different methods. As the most popular framework, Django is used in the development of several major websites, including Discuss, The Washington Post, Mozilla, Instagram, Pinterest, etc.
Developing your applications will be easier if you have a flexible framework. So, you can quickly build a new website with Django. Using Django serves the dual purpose of automatically protecting websites and preventing typical security errors. Linux/Unix, macOS, Windows, Solaris, and other operating systems can all install Django. Join us with this guide to review different ways to install one of the best and most widely used web-based development frameworks.
In the end, you can choose the best method that suits your system, requirements, and priorities to deploy Django on Ubuntu server and speed up web development.
Prerequisites to Install Django on Ubuntu 20.04 and 22.04
To let this tutorial work correctly, provide the options below and move on.
- A Server running Ubuntu VPS.
- A non-root user with
sudoprivileges. - A valid domain name is pointed to your server IP.
4 Methods to Install Django on Ubuntu
It is not surprising that Django is that popular. Django is a Python framework that is used to develop dynamic websites, safe admin panels, and high-end apps. This tutorial covers multiple methods to Install and Use Django on Ubuntu.
Firstly, make sure that your system is up-to-date:
$ sudo apt update
$ sudo apt upgrade
Before getting started, let’s have a quick glance at the ways of installing Django.
- Using Apt Repositories.
- From Pip Packages.
- With Virtualenv.
- Using Git Repository.
Method 1. Install Django on Ubuntu with APT [Simple]
The LTS version of Django that comes with Ubuntu is the one that is supported through 2024. However, it isn’t the most recent version. To learn How to Install Django on Ubuntu, let’s start with the simplest method. Consider that this method is not the approach for installing a recent release.
To check the version of Python that Ubuntu ships with, run the command below:
$ python3 -VThen, run the following command to install Django:
$ sudo apt install python3-djangoNow, the Python 3 must be installed on your server. However, you can use the command below to check the version of Python installed:
python3 --versionAlso, to verify the successful install and check its version, type:
$ django-admin --versionMethod 2. Install Django on Ubuntu from pip Package
Stay with us with this article to review the way you can Install Django on Ubuntu through pip. The Python package (Python Package Index) is available for download from the central package repository.
To install Django from pip, run the command below to install python3-pip package first.
sudo apt-get install python-pipFor python3, type:
sudo apt-get install python3-pipThen, run the following command to install Django:
sudo pip3 install djangoUse the command below to verify the Django installation and confirm the successful installation of it:
Django-admin --versionMethod 3. Install Django in Ubuntu with Virtualenv [Typical]
In this method, you will learn How to Install Django on Ubuntu through pip in a virtual environment. Pip is a package management system for Python. Installing ubuntu Django through pip is done within a virtual environment. In this way, the Python packages will be installed with no affecting on your system.
Before installing Django on Ubuntu in a virtual environment, run the command below to refresh your local package index:
sudo apt updateTo check the installed version of Python, type:
python3 -VNow, you are ready to install pip from the official Ubuntu repository:
sudo apt install python3-pipNow that pip is installed, run the following command to install the virtual venu:
sudo apt install python3-venuIn this way, you can install the environment package.
To create a demo project directory, you can create a virtual environment. For example, you can create a new project called new-django-project. To do this, type:
sudo mkdir new-django-projectUse the following command to go inside the Django project you just created:
cd new-django-projectInside the directory, you can create a virtual environment. To do this, you need to use the Python version you are using.
python 3.8 -m venu opera-envYou can replace your preferred virtual environment name with opera-env.
The above command can install the python and pip versions install your project directory. A directory will be created with your considered name inside your project directory.
Run the following command to activate packages inside the virtual environment to be able to install them:
source opera-env/bin/activateTo make sure you are in your virtual environment, check if your command line shows something like this:
(opera-env)Yourusername@hostname :~/new-django-project$So, if you can verify that you are inside your virtual environment, use pip to install Django. Any version of Python pip is called as pip in your virtual environment. So, simply run:
(opera-env) $ pip install djangoTo verify the installation, type:
(opera-env) $ django-admin --versionAfter a successful installation, you may want to exit from your virtual environment. To do this, run:
(opera-env) $ deactivateObviously, it is possible to go inside the virtual environment and resume the work where you left. To do this, run the command below to go to the Django project directory and get started with your project again.
activateMethod 4. Install Django for Development Version Using git
To have a development version of Django, download and install it directly from its Git repository. Be aware that this method is not recommended.
First, run the command below to refresh the local package index:
sudo apt updateNow, you are ready to install git repository:
sudo apt-get install git python3-pipCheck the version of Python you have installed by running the command below:
python -VThen, use the following command to clone the Django repository:
git clone git://github.com/django/django ~/django-devUsing pip command, you can now install the cloned repository:
sudo pip3 install -e ~/django-devThe -e in the command is for edit capability.
To verify the installation, type:
django-admin --versionHow to Use Django on Ubuntu [Create New Project]
You can use any of the above 4 ways to Install Django Ubuntu according to your system and needs. In this part, let’s learn How to create a sample Django project. To do this, run:
$ mkdir ~/dj-sample
$ cd ~/dj-sample
Then, create a Python virtual environment by running the command below:
$ python3 -m venv sample_projThe environment should be activated:
$ source sample_proj/bin/activateThen, use the following command to install Django:
(sample_proj) $ pip install djangoThe startproject command is used to build the project. Another directory is created by this command and contains:
- Manage.py is a management script used for administering Django-specific duties.
- A directory containing the project code that shares the same name as the project.
In our current working directory, we will create the project directory. Use the dot(.) character at the end of the following command to accomplish that.
(sample_proj) $ django-admin startproject demoproject .To migrate the database, you can use the migrate command. Python uses SQLite database by default. Django migrations transfer model modifications into your database schema.
(sample_proj) $ python manage.py migrateNow, you must create an administrative user to access Django’s admin interface. To do this, type:
(sample_proj) $ python manage.py createsuperuserA username, email address, and password will be required. After entering the prompted information, the ”superuser created successfully” will be shown.
How to Test Development Server
Now that you learned How to Run Django on Ubuntu, it is time to test it. To reach this purpose, the ALLOWED_HOSTS directive in the Django settings has to be changed. The list of IP addresses and domain names that are permitted access to the Django application is defined by this directive.
Run the command below to open the settings file:
(sample_proj) $ nano demoproject/settings.pyFind the following entry.
ALLOWED_HOSTS = []In the square brackets, type the IP address of your server to match your server. Quotes should be used to enclose each entry, and commas should be used to separate multiple items. It is advised to prefix a domain name with the period symbol in order to match it and its subdomains.
ALLOWED_HOSTS = ['<yourserver_ip_address>']To save the file, hit Ctrl + X, then Y when prompted.
You must set up the firewall to allow Django to function before testing the development server. By default, Django uses port 8000. With the Uncomplicated Firewall (UFW), open the port.
(sample_proj) $ sudo ufw allow 8000Now, use the command below to start the development server:
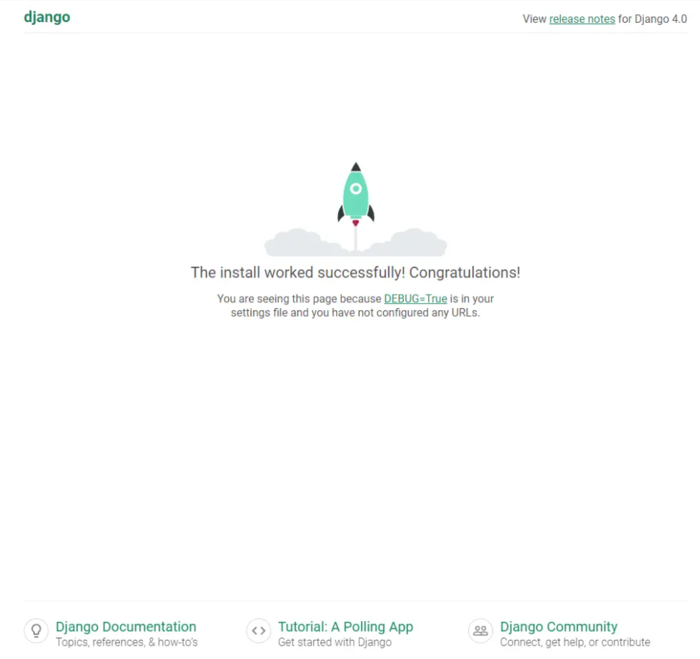
(sample_proj) $ python manage.py runserver 0.0.0.0:8000To view the below screen and access Django web application, open your preferred browser and type the http://<yourserver_ip_address>:8000.
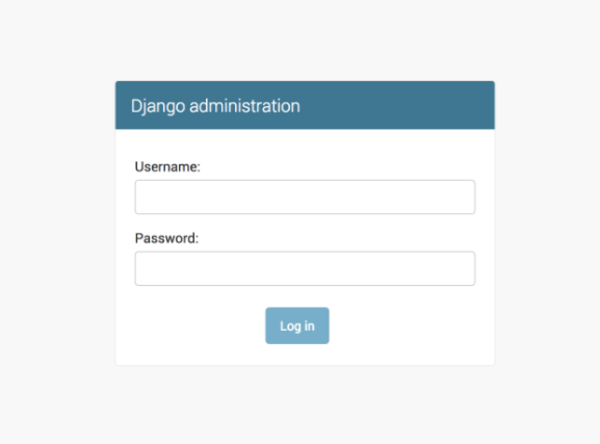
The following login page will appear when you enter the admin interface via the URL http://<yourserver_ip_address>:8000/admin/.
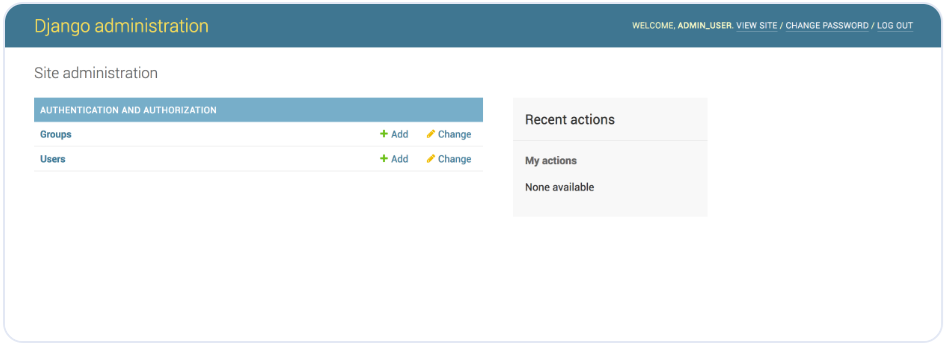
To access the admin panel as shown below, log in using the credentials you already created.
You can use Ctrl + C in your terminal to close the server after completing your demo project.
How to Make the Django Web Framework Service Persistent
Django’s service is not persistent at this time. There are two ways to enable persistence for the service. Using the nohup utility is the first method. A POSIX command that indicates “no hang up” is nohup. It is employed to carry out commands in a manner that is continuous, even upon user logout.
Using nohup to Run a Persistent Django Server
you must exit the server from the terminal. To make sure, press Ctrl + C. Then, run the command below to run Django’s development server:
(sample_proj) $ nohup python manage.py runserver 0.0.0.0:8000 &Until you manually terminate it, your Django server will continue to operate. The command will output another command and provide you with the process ID.
[1] 42595
(sample_proj) $ nohup: ignoring input and appending output to 'nohup.out'
^C
To exit, use Ctrl + C. Django’s original server will continue to function. By opening the URL in your browser, you may confirm. You must end the process after you’re done. You are given a single process ID by the nohup command. However, two processes are actually being executed. Use this command to get the IDs for both processes.
(sample_proj) $ ps aux | grep manage.py
Yourusername     42650  3.6  1.8  47792 38168 pts/0    S    02:28   0:00 python manage.py runserver 0.0.0.0.:8000
Yourusername     42651  7.9  2.0 344904 41708 pts/0    Sl   08:41   0:00 /home/ Yourusername /dj-sample/sample_proj/bin/python manage.py runserver 0.0.0.0:8000
Yourusername    42657  0.0  0.1   6612  2172 pts/0    S+   08:41   0:00 grep --color=auto manage.py
Two processes are running, as you can see: one with ID 42650 and the other with ID 42651. To shut the server using the Process IDs you just grabbed, run:
(sample_proj) $ sudo kill -9 42650 42651Install Gunicorn
Installing the Nginx and Gunicorn web servers is necessary for the second way to run a persistent Django server. A Python WSGI HTTP server is called Gunicorn. We have already explained the 3 steps that are required to Configure Nginx as Reverse Proxy on Ubuntu. After interacting with the Django application, Nginx will serve as Gunicorn’s reverse proxy.
To install Gunicorn, run:
(sample_proj) $ pip install gunicornTo run Gunicorn, type:
(sample_proj) $ gunicorn --bind 0.0.0.0:8000 demoproject.wsgiBy doing this, Gunicorn will launch on the same interface that Django was using. To confirm, access the Django homepage by opening your browser at http://<yourserver_ip_address>:8000. This indicates that Gunicorn is operating flawlessly.
Once testing is complete, leave Gunicorn by hitting Ctrl + C on the terminal. To return to your normal shell, deactivate the virtual environment.
(sample_proj) $ deactivateInstall and Configure Nginx
Nginx installation and configuration are the final steps. Nginx is included with Ubuntu, but it’s an older version. To install the most recent version, download the official Nginx repository.
First, import Nginx’s signing key.
$ curl https://nginx.org/keys/nginx_signing.key | gpg --dearmor \
| sudo tee /usr/share/keyrings/nginx-archive-keyring.gpg >/dev/null
Now, run the command below to add the repository for Nginx’s stable version:
$ echo "deb [signed-by=/usr/share/keyrings/nginx-archive-keyring.gpg arch=amd64] \
http://nginx.org/packages/ubuntu `lsb_release -cs` nginx" \
| sudo tee /etc/apt/sources.list.d/nginx.list
To update the system repositories, type:
$ sudo apt updateFinally, install Nginx:
$ sudo apt install nginxWhen you are finished, run the following command to verify the installation:
$ nginx -vNow you can configure Nginx. to do this, create and open the file /etc/nginx/conf.d/django-gunicorn.conf for editing.
$ sudo nano /etc/nginx/conf.d/django-gunicorn.confAnd paste the following code in it:
server {
    listen 80;
    server_name server_domain_or_IP;

    location = /favicon.ico { access_log off; log_not_found off; }
    location /static/ {
        root /home/Yourusername/dj-sample;
    }

    location / {
        proxy_set_header Host $http_host;
        proxy_set_header X-Real-IP $remote_addr;
        proxy_set_header X-Forwarded-For $proxy_add_x_forwarded_for;
        proxy_set_header X-Forwarded-Proto $scheme;
        proxy_pass http://unix:/run/gunicorn.sock;
    }
}
The directory on your server should be used in place of the root location in the file above.
To save the file, hit Ctrl + X, then Y when prompted.
When you are done, open the file /etc/nginx/nginx.conf for editing:
$ sudo nano /etc/nginx/nginx.confBefore the line includes/etc/nginx/conf.d/*.conf; add the following line:
server_names_hash_bucket_size 64;To save the file, hit Ctrl + X, then Y when prompted.
Then, use the command below to verify your Nginx configuration:
$ sudo nginx -tThe domain name must also be included in your ALLOWED_HOSTS directive. Launch the file settings.py.
$ nano ~/dj-sample/demoproject/settings.pyTo change the value for ALLOWED_HOSTS variable, type:
ALLOWED_HOSTS = ['<yourserver_ip_address>','django.example.com']Press Ctrl + X to save the file, then type Y when prompted.
To restart Gunicorn Socket and Service, run:
$ sudo systemctl restart gunicorn.socket
$ sudo systemctl restart gunicorn.service
Now you can start the Ngnix server:
$ sudo systemctl start nginxLet the HTTP port open. If you decide not to use the 8000 port anymore, you can easily delete it.
$ sudo ufw delete allow 8000
$ sudo ufw allow http
To confirm, access the Django homepage by opening the URL http://django.example.com.
Your Django application is currently being provided via an HTTP connection in plaintext. Using SSL certificate in Nginx to secure it is strongly advised.
Commands to Uninstall Django on Ubuntu Completely
This tutorial covered multiple methods to Install Django on Ubuntu. While using Django on your Ubuntu server, you may face some problems like setup or start issues. So, you will need to completely uninstall Django on Ubuntu. According to the method you chose to install Django, the uninstallation process is different. In this part, you will learn How to remove Django.
Essential Notes You Should Know Before Removing Django
You need to properly prepare your projects and environment before you uninstall Django to ensure that you don’t lose your effort since your Django installation can power some really essential websites and applications.
Basically, you must look at ongoing projects, make a backup of critical information, find out which version of Django is installed, and turn off virtual environments.
- It is imperative that no active projects be using Django at the time of uninstalling, otherwise, they will cease working and could have their data corrupted. To Stop the Django Server, open a terminal and type the following command.
$ python manage.py runserver --stop- Also, you must make a backup of all crucial Django data setups in order to protect your effort. To Backup Data, run the command below:
$ tar -czvf project_backup.tar.gz /path/to/your/projectThis command will make a tar.gz file including the whole project folder. By extracting the file, you may always restore it.
Note: The folder location for your Django project should be used instead of the path to your project.
- Before getting started to uninstall Django framework, Check the Version of Django on your system. To do this, simply run the command below:
$ python -m django --version- If your Django setup is installed in a virtual environment, (Method 3 in this tutorial) you must Deactivate Virtual Environment to prevent any impact on other environments. To do this, simply run:
$ deactivate- To prevent problems during the uninstallation process, you must find out which Django versions are installed on your system. To do this, you need to verify global installations, identify dependencies, and list installed Django packages. First, use the following command to list every Django package. It helps you to Determine Django Installation Methods.
To see a list of all Django packages along with their environments, run the following command.
$ pip freeze | grep DjangoCheck any global installations, meaning those installations that exist outside virtual environments.
$ pip list | grep DjangoFinally, it is time to find out all the dependencies associated with Django by running the command below:
$ pip show DjangoRemove Django App in Ubuntu
Now that you exactly know where is Django installed, identified all packages and versions, and determined which method has been used to install it, you are ready for the uninstallation.
- To delete Django on Ubuntu, if Django was installed using pip run the command below to Uninstall Django Using pip:
$ pip uninstall DjangoYou will be prompted for confirmation when you execute the above command. Input Y to confirm.
- If you have installed Django using apt, run the command below to Uninstall Django Using apt:
sudo apt-get purge python3-django- To delete any Unused Packages and dependencies, run:
sudo apt-get autoremove- When you are finished, you also must delete any remaining files connected to Django Projects, Databases, and Configuration after uninstalling Django. To accomplish this, go to the Django project directory and remove them manually:
$ cd /path/to/django/files
$ rm -r *- Additionally, you may use the following command to optionally remove any Unnecessary Dependencies that Django installed.
$ pip uninstall dependency-nameNote: Change the dependence name to suit your needs.
- Lastly, you are recommended to Verify Uninstallation. Use the following command to check that Django and its various packages have been removed from your system successfully:
$ pip list | grep DjangoIdeally, there shouldn’t be any Django packages or versions listed here. Simply repeat the previous procedure for those versions and packages if you continue to notice any. Please be aware that you will need to uninstall each Django version separately if your system has more than one. Another way to Verify Uninstallation is to run the command below and check if you view any errors or not:
django-admin --versionIf Django has been successfully uninstalled, an error stating that the command is not found will appear.
Conclusion
In this article, you learned How to Install Django on Ubuntu through four different methods. Since Django is a Python framework, installing Django requires having Python installed on your computer. This guide covered the way you can use and run Django on Ubuntu by creating a sample project. For the final steps, you learned how to install Gunicorn and Nginx on your Ubuntu server. If you need to uninstall Django, the last part of this guide presents a complete explanation of what you need to do.
If you encounter any problems using your chosen method to ubuntu install Django, please do not hesitate to contact us. Our technical support team will try their best to solve your problems.