Install TeamViewer on Ubuntu to Remote Desktop Access
If you are a member of a team collaborating online on a project, secure and easy remote access to computers to create desktop sharing sessions, online meetings, file sharing, web conferences, and other objectives is essential to you. This issue will be one of your main concerns and crucial needs in online collaboration. Using an efficient and fast solution, while being free, to establish remote connections to devices is what fulfills the needs of a business and working remotely. TeamViewer is a dedicated online collaboration software and a comprehensive cross-platform solution that allows users to access and control remote devices by sharing a remote screen from anywhere in the world.
The TeamViewer is available for various operating systems such as Windows, Linux, macOS, Android, and iOS, and it has become a secure and fast solution for remote access, file sharing between computers, online meetings, and more. So, if you are using a Linux system and need TeamViewer software based on your collaboration and business needs, this guide will answer your need by providing instructions on how to install TeamViewer on Ubuntu. With our step-by-step tutorial, you will learn how to install TeamViewer on Ubuntu and take advantage of TeamViewer’s features for remote work and personal use. So, let’s get started.
What are the advantages of installing TeamViewer on Ubuntu?
TeamViewer is a versatile solution for connecting to remote computers and gaining control over them by sharing their desktops. Awareness of the key features of TeamViewer makes you more determined to install this popular software:
Remote Management: With TeamViewer, you can take control of remote systems to perform your tasks as if you were physically seated in front of your system. This is a valuable feature for technical support, troubleshooting, and remote access to your personal computer.
Secure Connections: TeamViewer ensures secure remote connections using strong encryption protocols (TLS and AES) and protects your session privacy and data from unauthorized access.
Compatibility with Various Platforms: TeamViewer supports a wide range of operating systems and is a flexible and compatible option for remote access on different platforms.
Audio and Video Communication: TeamViewer is a comprehensive remote communication tool that supports high-quality audio and video calls. This feature is helpful for training sessions, online meetings, collaborative work, and presentations.
File Transfer and Desktop Sharing: TeamViewer provides a user-friendly interface that allows for easy and fast file and data transfer between local and remote computers during the session, making document sharing, software updates, and other files significantly simpler. Additionally, by offering desktop-sharing features, it optimizes communication and management.
Multi-Monitor Support: When controlling systems with multiple displays, TeamViewer provides an efficient and seamless experience by handling multiple monitors on the remote computer.
Unattended Access: TeamViewer enables unattended Access to a remote computer, even when the user is not present at the remote system.
Prerequisites to Install TeamViewer on Ubuntu
To ensure a smooth installation and usage of TeamViewer on Ubuntu, you should consider several prerequisites before installation to prevent potential issues and simplify the installation process:
- An Ubuntu system or Ubuntu VPS compatible with TeamViewer.
- Access to Root/sudo privileges for installing TeamViewer software.
- Updating your Ubuntu system and upgrading the list of installed packages.
- Awareness of your system’s architecture, whether it has a 64-bit or 32-bit architecture( for compatibility with the TeamViewer package).
- Sufficient disk space for downloading and installing TeamViewer.
- Access to an internet connection for downloading the TeamViewer installation package and establishing remote connections.
Tutorial for installing TeamViewer in Ubuntu step-by-step
To install TeamViewer Ubuntu, follow the instructions below:
1. Update the package list
It’s always a good practice to update your Ubuntu system’s repository and installed packages before installing new software to ensure you are working with the latest information. To do this, open the terminal in Ubuntu by pressing Ctrl+Alt+T or searching for “Terminal” in the application menu. Then, execute the following command to update the package list and upgrade the installed packages:
sudo apt update
sudo apt upgrade
2. Install the required packages
Install the required dependencies for TeamViewer at this step. While Ubuntu supports these packages by default, installing them can help streamline the installation process.The wget command line tool is handy for installing ubuntu teamviewer, so install it using our previous guide on installing and using the wget. If you haven’t done it yet, you can also install the wget command line tool and other required dependencies by running the following command:
sudo apt install wget apt-transport-https gnupg2 -y3. Import TeamViewer GPG key
To ensure the validity of the packages, import the GPG key using the wget command:
wget –O- https://download.teamviewer.com/download/linux/signature/TeamViewer2017.asc | gpg --dearmor | sudo tee /usr/share/keyrings/teamview.gpg4. Add TeamViewer repository
Since the official Ubuntu repository does not support TeamViewer, you need to download and install it from their official website or add the TeamViewer repository to your system. One standard method for installing TeamViewer is adding the TeamViewer repository to your Ubuntu system and installing it via the apt package manager. To do this, run the following command:
echo "deb [arch=amd64 signed-by=/usr/share/keyrings/teamview.gpg] \ http://linux.teamviewer.com/deb stable main" \ | sudo tee /etc/apt/sources.list.d/teamviewer.listTo make Ubuntu aware of adding the TeamViewer repository and to reflect the changes, update the package list and the Ubuntu repository once again:
sudo apt update5. Install TeamViewer on Ubuntu 20.04 & 22.04
-
Install TeamViewer on Ubuntu through the terminal
Now you can install TeamViewer software using the apt package manager from the TeamViewer repository:
sudo apt install teamviewer -y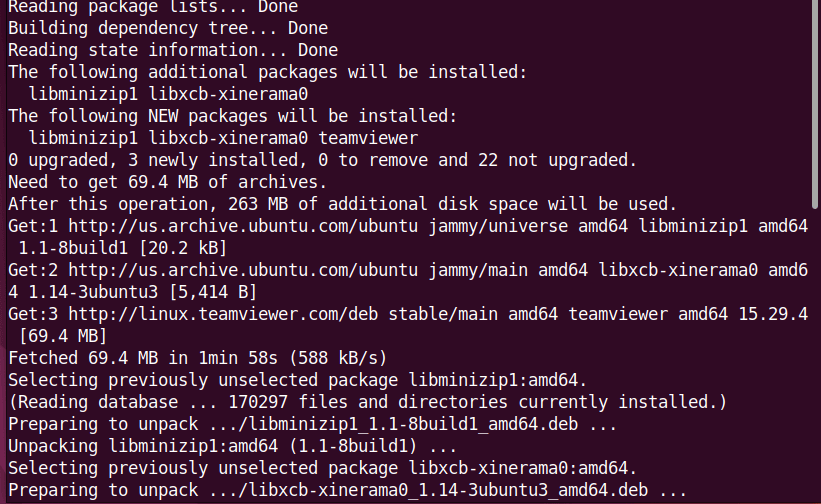
Alternative: Instead of adding the TeamViewer repository to your Ubuntu system, you can download the official Teamviewer package (DEB package) for Ubuntu directly from the TeamViewer official website using the wget command-line tool. This package is provided to simplify the installation process on Ubuntu. To download the TeamViewer DEB package, use the following command:
wget https://download.teamviewer.com/download/linux/teamviewer_amd64.debOnce the TeamViewer DEB package is downloaded, you can install it by running the following command:
sudo dpkg -i teamviewer_amd64.debReplace “teamviewer_amd64.deb” with the actual filename if it’s different.
As a result, TeamViewer will be successfully installed on your Ubuntu system and ready for use.
-
Install TeamViewer on Ubuntu through GUI
To install TeamViewer on Ubuntu via the GUI for users who prefer working with a graphical interface, follow these steps:
• First, download the TeamViewer .deb installation package for Ubuntu from the official TeamViewer website.
• If you are using the Google Chrome browser, by clicking on the file link and selecting the “Save File” button, you can save the file containing the TeamViewer installation package in the Downloads folder. If you are using Firefox, clicking on the download link, you can see the installation process, and after completion, the file will be accessible in the Downloads folder.
• After downloading, navigate to the Downloads folder, locate the TeamViewer.deb package, right-click on it, and choose “Open with other application” from the displayed list.
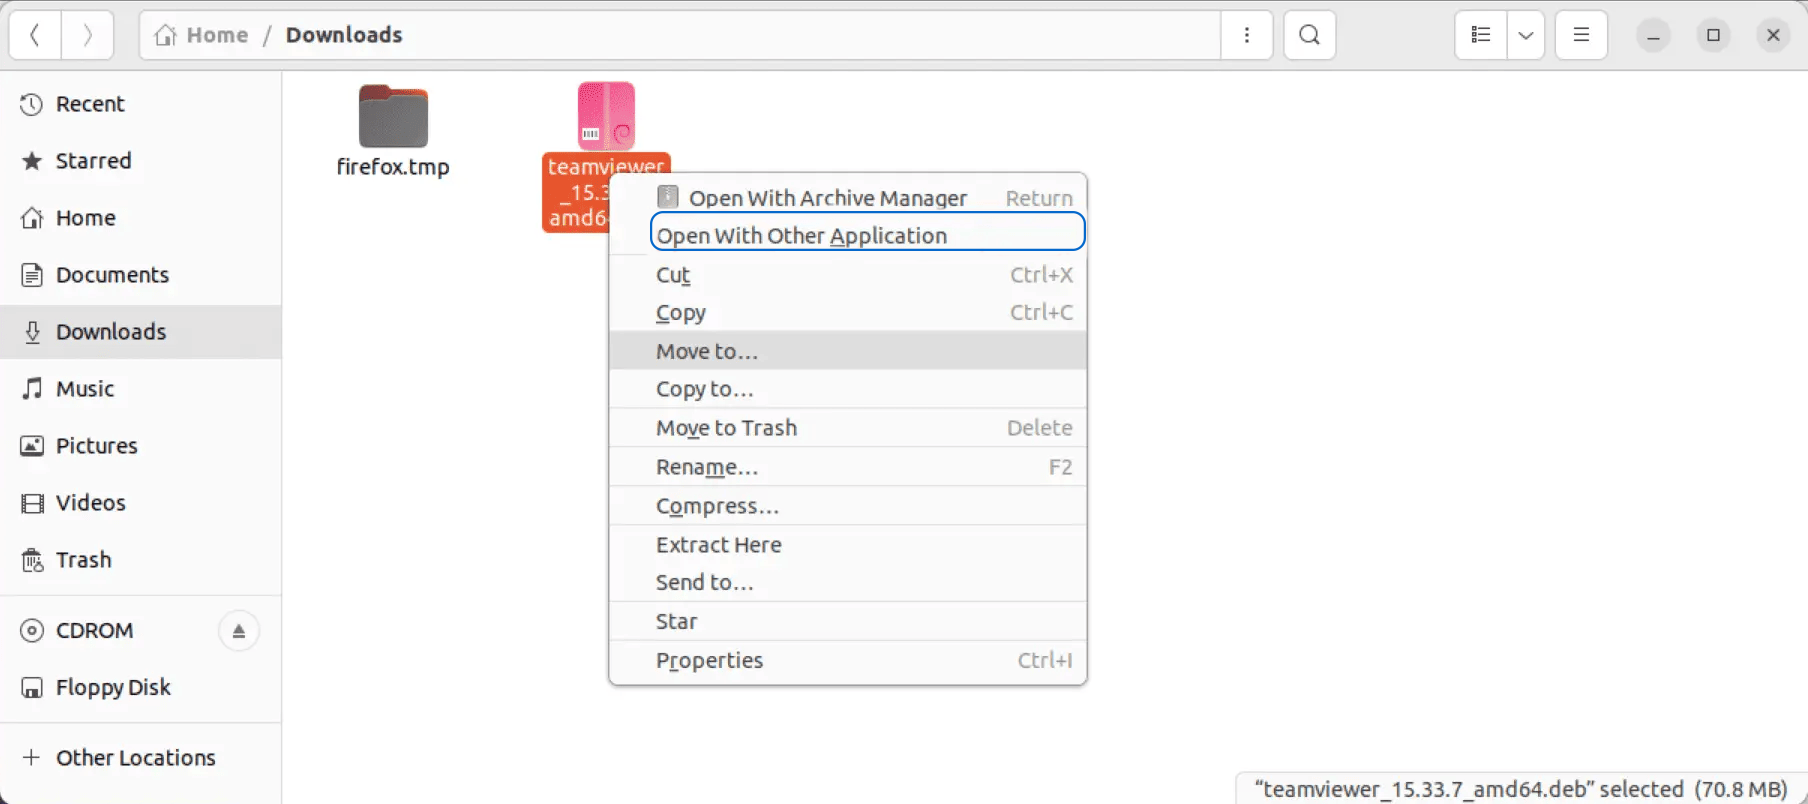
• A “Select application” window will appear, allowing you to install TeamViewer by choosing the “software install” option.

• Finally, click on the green “Select” button in the bottom right corner of the window to open the installer window.
• In the TeamViewer installer window, click the “Install” button to start the installation process.
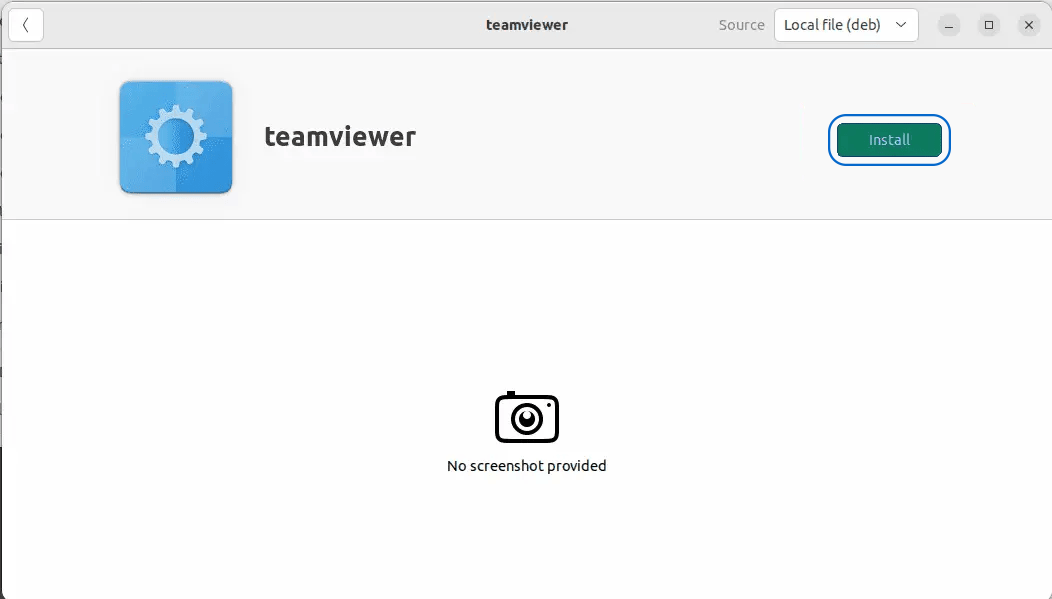
• During the installation, you may be prompted to enter your administrator password. Provide the required credentials to proceed.
• After entering the authentication details, TeamViewer will be automatically installed and launched on Ubuntu. Once the installation is complete, you can launch TeamViewer from the applications menu or use the terminal.
6. Launch TeamViewer in Ubuntu
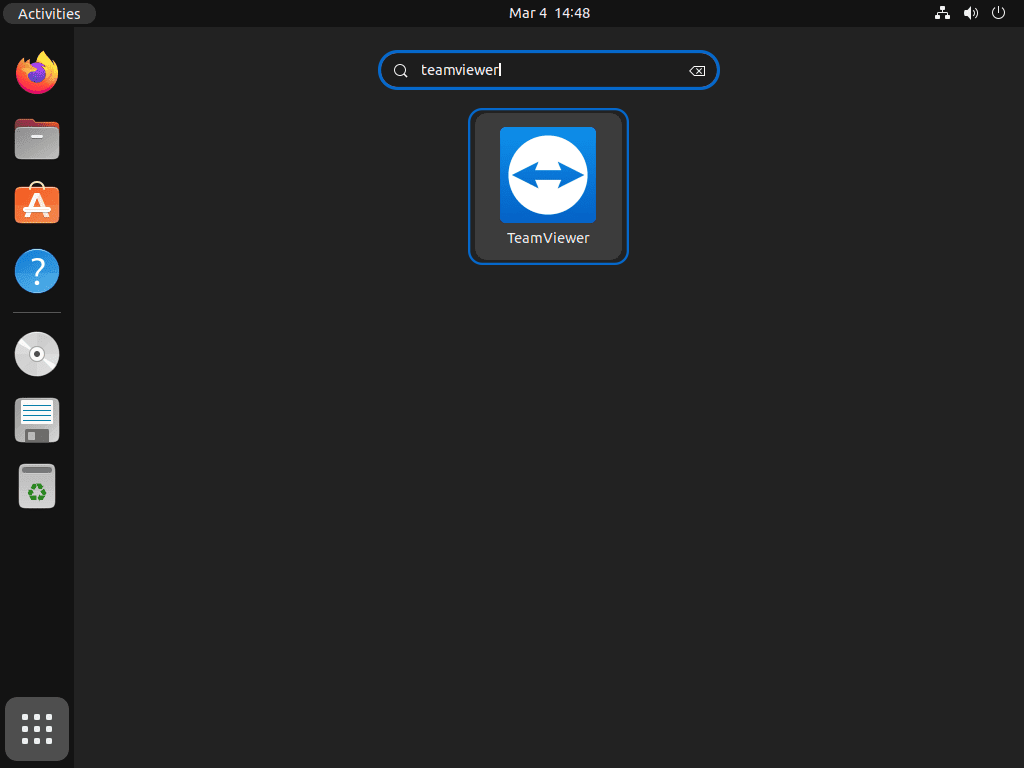
After a successful installation of TeamViewer on Ubuntu, you can now launch TeamViewer for remote access to a system or file sharing and other objectives. In Ubuntu Linux, you can launch TeamViewer both via the command line and the graphical user interface. By typing the following command in the terminal, you can start TeamViewer:
teamviewerFurthermore, users who prefer to use the GUI can launch this software by searching for “TeamViewer” in the Activities menu.
Note: If you use Wayland on your Ubuntu system, you will likely encounter error messages due to incompatibility with TeamViewer. For this reason, we recommend that to prevent potential issues when logging into your Ubuntu system, you select “Ubuntu on Xorg” through the settings menu (gear icon in the bottom right corner) on your screen.
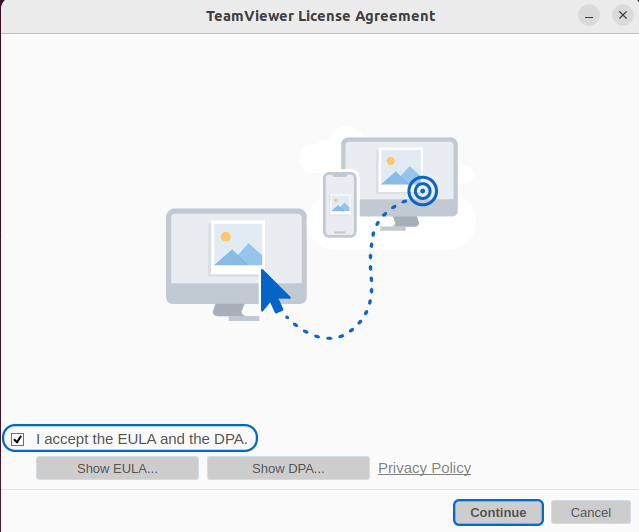
7. Accept the License Agreement
If you install and launch TeamViewer on your Ubuntu system for the first time, you will be asked to accept the license agreement. To do this, follow the on-screen instructions, check the “I accept from EULA and the DPA” box, and click the “Continue” button.
8. Use TeamViewer
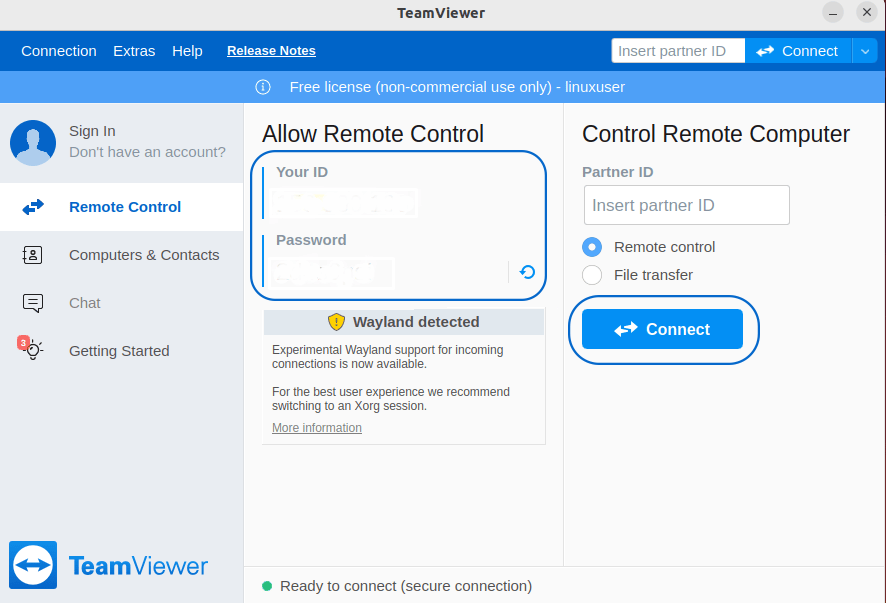
After launching TeamViewer, you will see a unique TeamViewer ID and password on the main page. This information is essential for remote connections. The TeamViewer ID is assigned uniquely to your device and remains constant with each TeamViewer run. However, the password changes every time you restart TeamViewer, and for each session you create. Unlike the TeamViewer ID, the password is temporary, and if you want someone to connect remotely to your system, you need to share this password with them to grant authorized remote access to your system.
Now, you can use TeamViewer for remote connections to other devices, and you will learn the basic principles of using it in the following.
Remote Access (Host Side)
If you want to configure your Ubuntu system or server in a way that makes it accessible to other devices remotely, you can adjust TeamViewer to start with the system boot and grant unattended access:
- In the TeamViewer interface, click on the “Extras” menu and select “Options” from the menu.
- To automatically start TeamViewer when the system boots, check the box that says “Start TeamViewer with the system” in the “General” section.
- In the “Security” section, set a strong personal password for unattended access to your computer.
- To save the settings, click on OK.
Remote Access (Client Side)
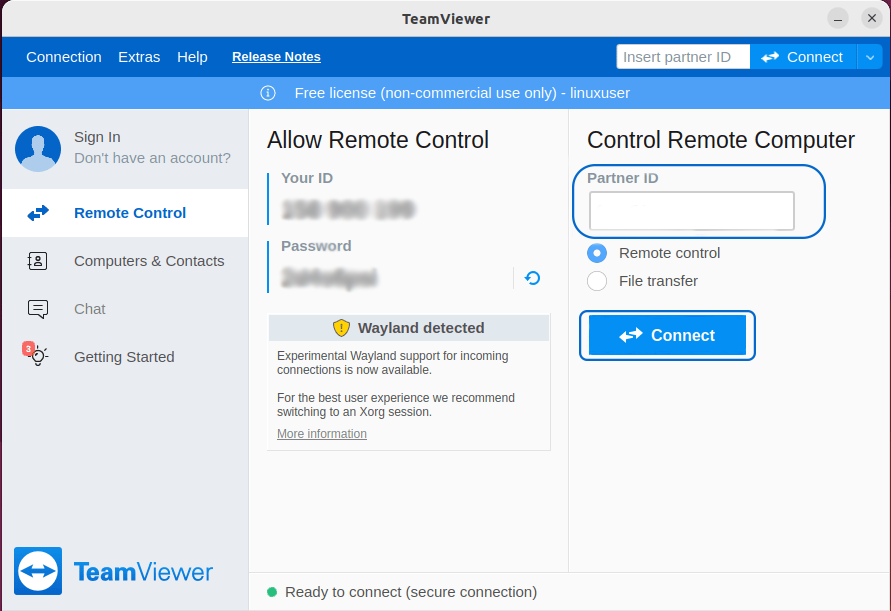
As you know, another use of TeamViewer is to connect to a remote device from your local Ubuntu system to gain control and manage the remote system. To connect to a remote computer, you will need the credentials of the remote system, including the TeamViewer ID and temporary password, and then follow the instructions below:
- In the “Partner ID” field, enter the TeamViewer ID of the remote computer.
- Click the “Connect” button.
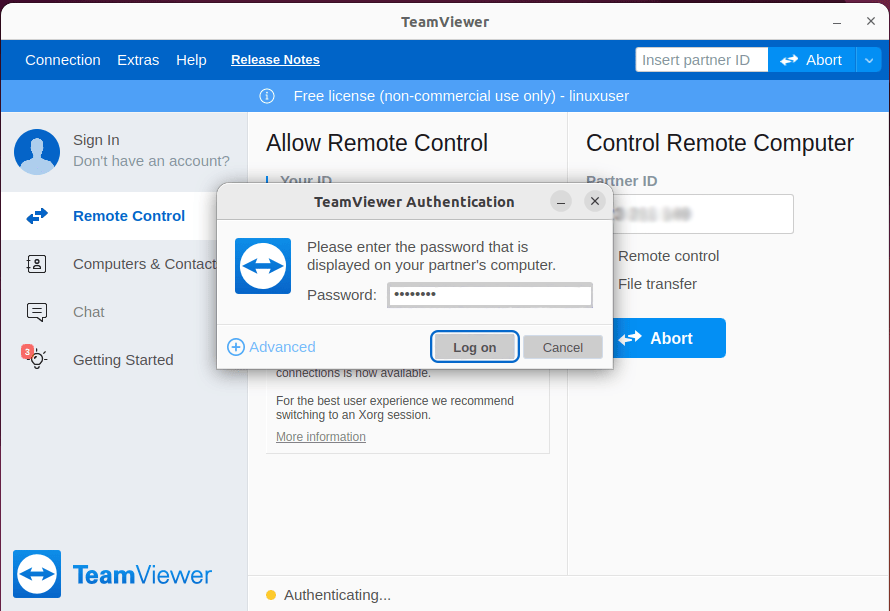
- You will then be prompted to enter the temporary password of the remote device (provided by the remote user).
- After entering the password, click on “Log On.”
Remote Control using TeamViewer Command
After connecting to the remote system, you can interact with the remote system as if you are sitting in front of it. Additionally, you can manage and control the remote system using the Ubuntu Linux terminal and the TeamViewer command. The Linux terminal is a quick and convenient method for various tasks. Here are some common commands for using TeamViewer in Ubuntu:
- Execute this command to connect to the remote device using the ID and password:
teamviewer -i [remote ID] -p [remote password]- Using the following command, you can initiate a remote session:
teamviewer -i [remote ID] -p [remote password] -l- In order to gain control of the remote device and enable remote control during a session, enter the command below:
teamviewer -i [remote ID] -p [remote password] --RemoteControl- The following command will allow you to transfer files between local and remote systems:
teamviewer -i [remote ID] -p [remote password] --FileTransfer- To enhance the quality of the remote session by setting the quality level, which ranges from 0 to 9, use the following command:
teamviewer -i [remote ID] -p [remote password] --quality [quality level]- To record the remote session and save it locally for future access, execute the following command:
teamviewer -i [remote ID] -p [remote password] --record- Run the command below to terminate the remote session and exit the TeamViewer window:
teamviewer -i [remote ID] -p [remote password] --killHow to Update TeamViewer
Regularly updating software has many advantages, and we recommend not overlooking this impactful action. Although the softwares should update automatically, you can manually update Ubuntu TeamViewer using the APT package manager:
sudo apt update && sudo apt upgradeBy running these commands, the Ubuntu system and all installed packages on the Ubuntu system, including TeamViewer, will be updated.
How to Remove TeamViewer from Ubuntu
Uninstall TeamViewer From Ubuntu via Terminal:
After some time, you may no longer need TeamViewer. You can easily uninstall TeamViewer from Ubuntu by executing the following command:
sudo apt remove teamviewerTo completely remove the TeamViewer software, you can also remove the TeamViewer repository by executing the following command:
sudo rm /etc/apt/sources.list.d/teamviewer.listAs a result, by removing the TeamViewer repository, your system will no longer be equipped for re-installation or downloading software updates for TeamViewer. Therefore, exercise caution when removing the TeamViewer repository, and if you do not intend to reinstall TeamViewer, remove the repository from your Ubuntu system.
If you’ve removed the repository list file, you won’t need the GPG key either. As a result, you can remove the GPG key by running the following command:
sudo rm /usr/share/keyrings/teamviewer.gpgUninstall TeamViewer From Ubuntu via GUI:
To remove TeamViewer in Ubuntu, follow the steps below:
• Open the Activities menu and type “ubuntu software” in the search bar.
• Click on the result and reach the following view:
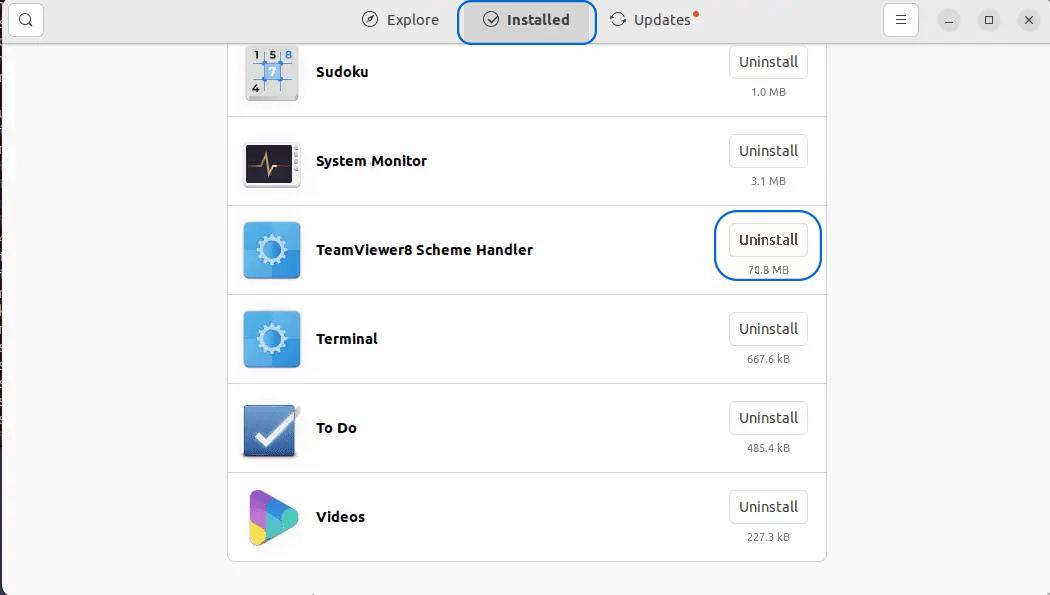
• Switch to the “Installed” tab and find the TeamViewer software in the list of installed applications.
• Once you locate TeamViewer, click on the “Uninstall” button next to it.
• A window will appear asking you to confirm the uninstallation of TeamViewer.
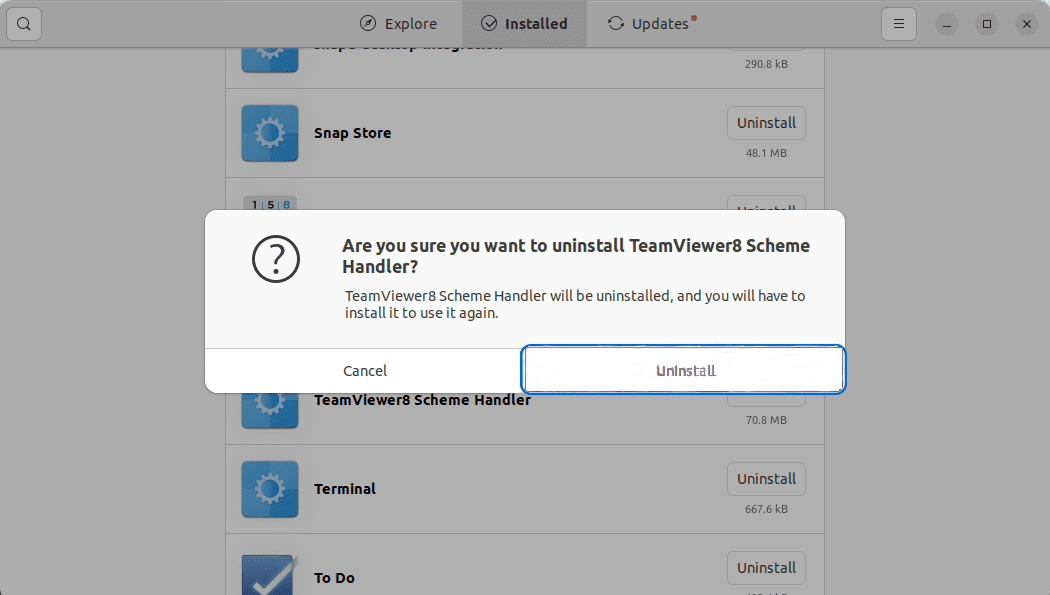
• To remove TeamViewer from the Ubuntu system, enter your login credentials as a sudo user and confirm.
After completing these steps, TeamViewer will be uninstalled from your Ubuntu system.
Tips for installing and using TeamViewer
It may seem a bit complicated if you are a beginner in using TeamViewer. Here are some tips that can help you use and install TeamViewer safely and efficiently:
- Creating a Personal TeamViewer Account is helpful for regular use of TeamViewer. Having a Personal TeamViewer Account allows you to use additional features like managing contacts, customizing your settings, tracking your connected devices, and having a consistent TeamViewer ID.
- Only share your device credentials, such as the device ID and password, with a trusted person for remote access to your device.
- When connecting to a remote device, make sure the credentials and details related to the remote device are accurate to avoid connecting to the wrong device.
- Use the file transfer feature in emergency situations and ensure the safe transfer of important files and data.
- If you have configured your system for unattended remote access, take additional security measures such as setting a strong personal password, granting permissions to specific TeamViewer accounts, or setting up two-factor authentication. This is particularly important in business environments.
- If you’re using TeamViewer behind a firewall or router, you should configure your network settings to allow TeamViewer traffic (usually, TeamViewer uses ports 5938, 443, and 80).
- Regularly updating your operating system and TeamViewer software is a good practice to keep your system secure and take advantage of advanced features. So, try to use the latest patches and security updates through software and system updates. Using antivirus and firewalls is also helpful in enhancing the security of your system.
Conclusion
TeamViewer is a popular and versatile software for various scenarios such as online collaboration, remote work, file transfer, IT support, online education, and business and personal use. Its user-friendly interface and features have made it a popular choice for remote desktop access and collaboration needs. TeamViewer offers the possibility of free usage with support for both free and paid versions; It should be noted that paid TeamViewer licenses provide advanced options and customization compared to its free version.
TeamViewer is a valuable and essential tool for remote access that you will need whether you are a beginner or a professional user. Following the instructions in this article, you should now be able to install TeamViewer on Ubuntu and use it for remote control and connections.
We appreciate that you have chosen our article to read; I hope this content has been helpful to you.