Install and Setup VNC on Linux Easily
Install and Setup VNC on Linux involves installing a VNC server like TightVNC, setting a user password, and configuring the VNC service to start with a desktop environment. This allows remote access to the Linux graphical desktop securely over a network using a VNC client.
🤖AI Overview:
Install and Setup VNC on Linux involves installing a VNC server and client to enable remote desktop access. VNC allows users to connect to and control the Linux graphical desktop environment remotely through a secure TCP IP connection. This setup requires installing a desktop GUI, configuring a VNC server such as TightVNC, creating a user with a password, and opening the appropriate firewall ports for remote access.
Steps to install and configure VNC in different Linux distributions
prerequisites
- First, you need to buy Linux VPS running Linux distributions based on RHEL or Debian, like Ubuntu so that you can configure the VNC server on it.
- you should have non-root user privileges.
- Configure a powerful and popular firewall, we recommend the UFW firewall.
- Local system running a VNC client compatible with SSH tunnel connections.
Note: There are many VNC client programs in Linux that you can choose from vinagre, krdc, RealVNC, or TightVNC according to your needs and compatibility with your system.
Step 1: Installing the desktop environment
If you have installed a minimal version of the operating system, which by default only provides a command line interface and no GUI, The first step to installing VNC should be to install the GNOME or XFCE GUI or other graphical options so that you can easily interact with the remote VNC server.
First, connect to your server through an SSH tunnel and update your Linux system packages:
sudo apt updateThen run the following command to install the GNOME desktop environment, which is more compatible with RHEL-based distributions:
$ sudo dnf groupinstall "Server with GUI" [On RHEL/CentOS/Fedora and Rocky Linux/AlmaLinux]The XFCE GUI, which provides a fast and stable connection together with the TightVNC software, is more compatible with Debian-based distributions. Therefore, to install XFCE on Debian-based distributions, enter the following command so that by installing the xfce4-goodies packages, your desktop environment will have more advanced features:
$ sudo apt install xfce4 xfce4-goodies [On Debian, Ubuntu and Mint]Note that when installing Xfce you will be prompted to set the default display manager. Display Manager is a tool that provides a graphical user interface for selecting and entering the desktop environment.
The choice of display manager in this tutorial does not affect the connection to the VNC server because you will be using XFCE or GNOME to connect to the VNC client, XFCE or any GUI has already logged you in as a non-root user, therefore, select the display manager that suits your needs and press Enter, and choosing it will not make any changes in this tutorial.
Step 2: Installing the TightVNC server
After you have installed the desktop environment, it is time to install the TightVNC software. This software allows remote desktop management and control. Install TightVNC via the yum command.
Run the following command to install TightVNC on RHEL-based distributions:
$ sudo yum -y install tigervnc-server xorg-x11-fonts-Type1 [On RHEL/CentOS/Fedora and Rocky Linux/AlmaLinux]To install TightVNC on Debian-based distributions, enter the following command:
$ sudo apt install tightvncserver [On Debian, Ubuntu and Mint]Step 3: Creating a normal VNC user
To communicate with the remote desktop, you must define a normal user with a username and password.
In this tutorial, we considered Opera as a user, so you should replace Opera with your username in the command:
$ sudo useradd OperaOR
$ sudo adduser Opera

$ sudo passwd Opera
Step 4: Setting the VNC password for the user
To set the password for the user, first log in to the user account by executing the su-Username command and then enter the vncpasswd command:
[root@[Opera ~]# su - Opera

[Opera@Opera ~]$ vncpasswd

Password:

Verify:Note: The password set in the previous step is for accessing the SSH session, while the password we define in this step is for connecting to the remote VNC server desktop. Also, please note that the password must be between 6 and 8 characters, and more than 8 characters cannot be set.
Note: After the password is confirmed, you will be able to define a view-only password. Setting this password is for situations where you want to share the VNC server desktop with other users, but do not allow them to interfere in the management of the VNC server through the mouse and keyboard.
Also, this command creates the directory “.vnc” which contains the passwd file in the user’s home directory.
To make sure the password file is created, you can use the following command:
# ls -l /home/Opera /.vnc

-rw------- 1 Opera Opera 10 Jul 22 15:23 passwd
It should be noted that to change the password and add a view-only password, you must use the following command again:
vncpasswdUp to this point, you have successfully installed and started the VNC server. In the next step, we need to configure VNC to launch the graphical user interface and provide access to the server through the graphical interface.
Step 5: Configuring the VNC server

The VNC server must be configured to connect to the GUI at startup.
In this tutorial, we will use the ~/.vnc/config file in the user configuration settings to configure TigerVNC and connect to the GNOME GUI.
$ vim ~/.vnc/configThen add the following settings to it:
session=gnome

geometry=1920x1200

localhost

alwaysshared
The session option has been added to specify the session you want to connect to, and the geometry option provides VNC desktop resolution.
After applying the changes, log out of the user login using the following command and log in again as the Root user.
$ exitFortunately, users in TigerVNC can map a user to a specific port in the /etc/tigervnc/vncserver.users file thanks to its default configuration settings:
# vim /etc/tigervnc/vncserver.usersThe <display_port>=<username> parameters play a role in the configuration file.
In the following command, as an example, we considered Opera user for display port: 1.
# This file assigns users to specific VNC display numbers.

# The syntax is =. E.g.:

#

# :2=andrew

# :3= Liosa

:1=Opera
If you want to add another user, set port: 2 along with the desired user name and continue in the same way.
Step 6: Starting the Tigervnc server
Up to this point, you have set the necessary changes, now it’s time to start the VNC server. In this step, we want to run the VNC server with one user.
When VNC is first started, by default it will run on port 5901 (belonging to the root user). This port is a display port introduced in VNC with ID:0 and VNC can be run on other ports such as :2, :3, and… Note: What is important to remember is that when working with VNC servers, :X is a display port that points to and refers to port 5900 + X.
In the example below, we created users with the usernames Opera, Loisa, Justin, and Ravi with their specific IDs and ports.
User's                   Port's                     ID's

5900                       root                       :0

5901                       Opera                      :1

5902                       ravi                       :2

5903                       Loisa                      :3

5904                       Justin                     :4
As you can see, in our example, Opera has port 5901 and ID: 1, and according to the algorithm above, to add a new user, Id: 5 and port 5905 will be set for it.
Now to start and run the VNC service for the specified user with the display port: 1 Run the following command:
# systemctl start vncserver@:1 --now

# systemctl enable vncserver@:1 –now
Use the following command to check whether the VNC service is running:
# systemctl status vncserver@:1As we provided access to the VNC server for the user with display port:1, if you want the VNC service to be applicable for other users, just replace the display port of the desired user:1 in the above command.
Step 7: Configuring the VNC port on the firewall
For Opera users, it is necessary to open port 5901 in your system’s firewall (ufw) and iptables.
# iptables -A INPUT -m state --state NEW -m tcp -p tcp --dport 5901 -j ACCEPTOR
# firewall-cmd --zone=public --add-port=5901/tcpOR
$ sudo ufw allow 5901/tcpIn our example, where we specified the port and ID for other users, if we want to open their ports in the firewall, use the following command as a guide:
# iptables -I INPUT 5 -m state --state NEW -m tcp -p tcp -m multiport --dports 5902:5904 -j ACCEPTOR
# firewall-cmd --zone=public --add-port=5902-5904/tcpOR
$ sudo ufw allow 5901:5910/tcpThen restart the Iptables service by running the following commands:
# service iptables save

# service iptables restart
Or
# firewall-cmd --reload

# systemctl restart firewalld
Step 8: Downloading VNC Client
In this step, download and install VNC viewer on your local Linux system.
Step 9: Connecting to the VNC desktop
-
Connecting to Remote DesktopVNC through the VNC viewer
After you have successfully installed VNC Viewer, when you run it, you will be asked to enter the IP of the VNC server along with the VNC ID for the desired user (in our example it was an Opera user with Id:1).
Then you need to enter the password that you specified through the “vncpasswd” command.
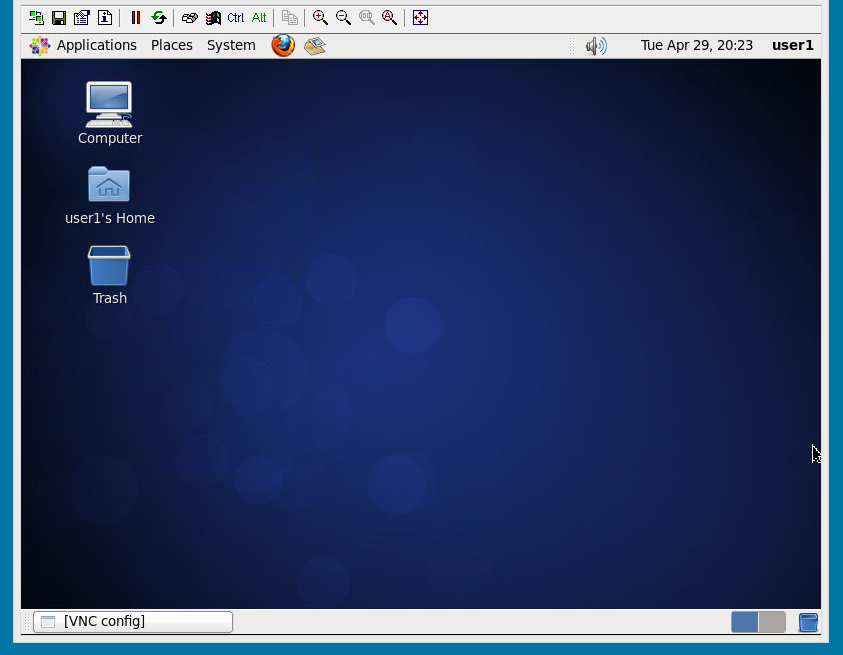
Finally, you can access the Remote desktop successfully.
-
Connecting to the VNC desktop through the SSH tunnel
Since VNC connections do not use an encrypted protocol. The recommended method is to create an SSH tunnel and securely forward traffic from your local machine on port 5901 to the server on the same port.
To set up SSH Tunneling on Linux, you can easily create an SSH tunnel with the following command:
ssh -L 59000:localhost:5901 -C -N -l username your_server_ipYou will then be prompted to enter the user’s password.
Make sure to replace username and server_ip_address with your server’s username and IP address.
Conclusion
To install and setup VNC on Linux provides an effective way to remotely access and control your graphical desktop over the network.
This guide explained how to install TigerVNC, set a desktop environment, configure the VNC server, secure it, and connect from a client.
By following these steps, even beginners will be able to create a stable and secure remote desktop setup on Linux, empowering flexible system management and remote work.
If you encounter any issues or have questions, feel free to seek help through community forums or official documentation, ensuring you continue to deepen your Linux knowledge.
FAQ
3. How do I install a desktop environment on my Linux server for VNC?
If your Linux server only has a command line, install a GUI like GNOME (recommended for RHEL) or XFCE (recommended for Debian-based systems) using package manager commands such as 'sudo dnf groupinstall "Server with GUI"' or 'sudo apt install xfce4 xfce4-goodies'.
Does VNC support a multi-user environment? Is it possible to connect to VNC for multiple users?
Yes, VNC allows multiple users to connect, but the only problem with multiple users connecting to VNC is the slowdown.
If you want to enable multiple users to connect to HMI VNC, you can easily do this by selecting this [Start VNC multi-connection] option.
4. Which VNC server software should I install on Linux?
TightVNC or TigerVNC are commonly used VNC server packages. Install TightVNC on Debian/Ubuntu with 'sudo apt install tightvncserver' and on RHEL/CentOS with 'sudo yum install tigervnc-server'.
5. How do I create a VNC user and set a VNC password on Linux?
Create a normal user account with 'sudo useradd username' or 'sudo adduser username', then switch to that user and run 'vncpasswd' to set a password for VNC remote access. Passwords must be between 6 and 8 characters.
6. How can I configure the VNC server to start the graphical desktop environment?
Edit the '~/.vnc/config' file for the VNC user and set parameters like 'session=gnome' or 'geometry=1920x1200' to specify the desktop environment and resolution. Configure user to port mapping in '/etc/tigervnc/vncserver.users'. Start the server with 'systemctl start vncserver@:1'.
7. How do I open the necessary firewall ports for VNC on Linux?
Open the VNC port (like 5901) in your firewall using commands such as 'sudo ufw allow 5901/tcp' or equivalent iptables or firewall-cmd commands. This allows incoming VNC connections to the server.
8. How do I connect to my Linux VNC server using a VNC client?
Install a VNC viewer application on your local machine. Enter the server IP and display port (e.g., 192.168.1.10:1), then provide the VNC password when prompted to access the remote desktop.
9. Why should I use an SSH tunnel for VNC connections on Linux?
VNC connections are not encrypted by default, so using SSH tunneling encrypts the traffic for secure remote access. Create an SSH tunnel with the command 'ssh -L 59000:localhost:5901 -C -N -l username server_ip' to forward ports safely.
10. How can I verify that the VNC server is running properly on my Linux system?
Use 'systemctl status vncserver@:1' to check the status of the VNC server service. If active and running, the server is ready to accept remote connections.